Qtで画像を表示するのをPyQt5,Qt Creator, ROSなどで試しました
PyQt5
PyQt5で画像を表示
pixmap.py
import sys
from PyQt5.QtCore import *
from PyQt5.QtGui import *
from PyQt5.QtWidgets import *

def window():
   app = QApplication(sys.argv)
   win = QWidget()
   l1 = QLabel()
   l1.setPixmap(QPixmap("test.png"))

   vbox = QVBoxLayout()
   vbox.addWidget(l1)
   win.setLayout(vbox)
   win.setWindowTitle("QPixmap Demo")
   win.show()
   sys.exit(app.exec_())

if __name__ == '__main__':
   window()
Qt Creator
ui上で画像を入れる
QLabelを設置し,その中のpixmapの設定から画像を選択できる
すると以下のように,画像を表示できる
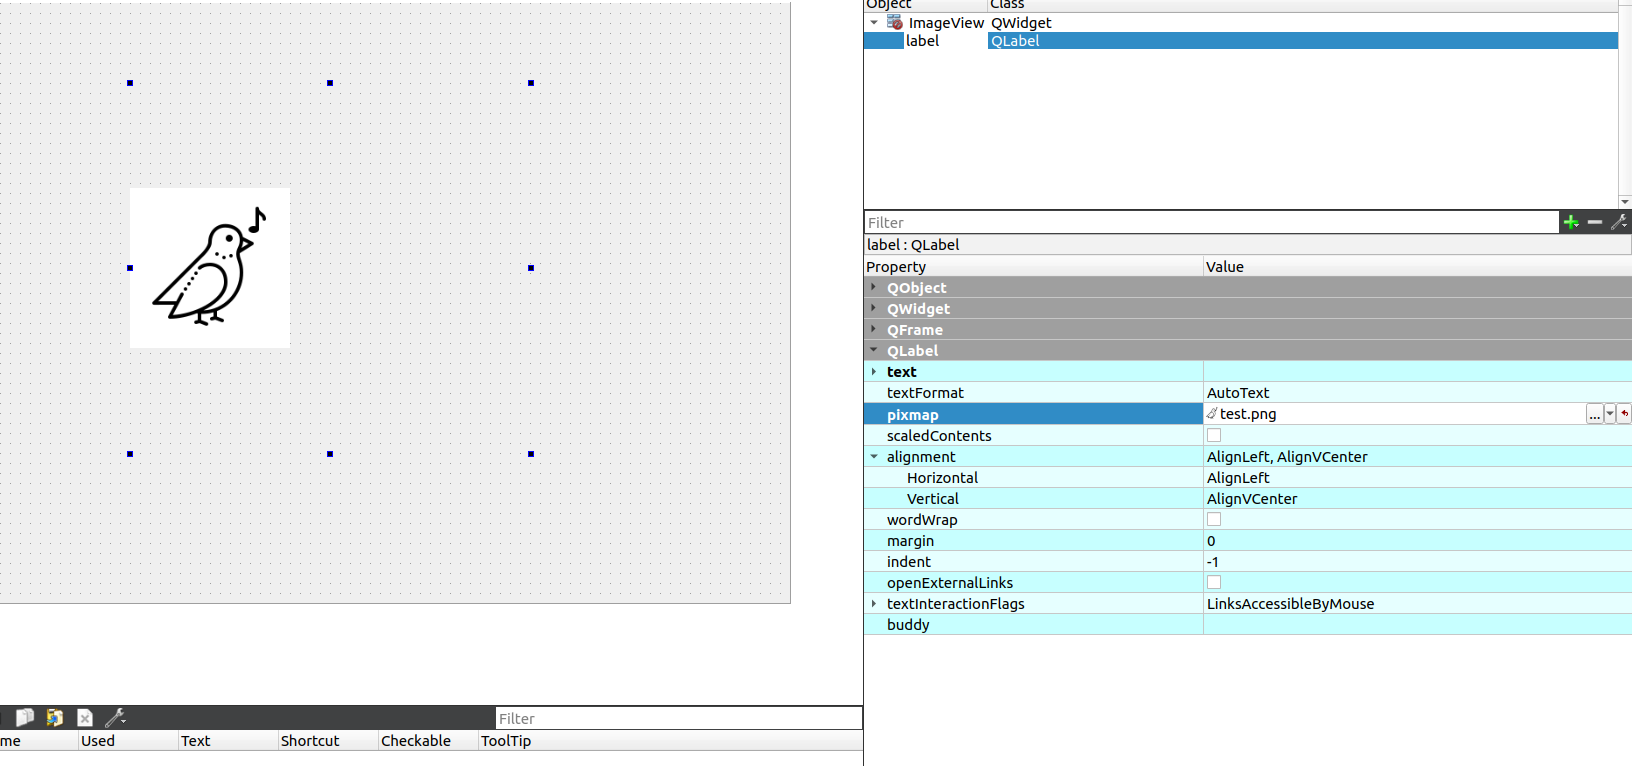
uiファイルに画像のパスが挿入されていることが分かる
imageview.ui
  <widget class="QLabel" name="label">
   <property name="geometry">
    <rect>
     <x>140</x>
     <y>80</y>
     <width>401</width>
     <height>371</height>
    </rect>
   </property>
   <property name="text">
    <string/>
   </property>
   <property name="pixmap">
    <pixmap>../PyQt5/test.png</pixmap>
   </property>
  </widget>
プログラムから画像を入れる
以下のように記載するとプログラムから画像をセットできる
# include <QPixmap>

QPixmap pix("../test.png");
ui->label->setPixmap(pix);
追加後のメインプログラム
widget.cpp
# include "widget.h"
# include "./ui_widget.h"

Widget::Widget(QWidget *parent)
    : QWidget(parent)
    , ui(new Ui::Widget)
{
    ui->setupUi(this);

    QPixmap pix("../test.png");
    ui->label->setPixmap(pix);
}

Widget::~Widget()
{
    delete ui;
}
プログラムから画像を入れる2(QImageを挟む,この後rosイメージ扱う時のため)
以下のような処理を入れる
QImage img("../test.png");
ui->label->setPixmap(QPixmap::fromImage(img));
コード全体
widget.cpp
# include "widget.h"
# include "./ui_widget.h"

Widget::Widget(QWidget *parent)
    : QWidget(parent)
    , ui(new Ui::Widget)
{
    ui->setupUi(this);

    //ROS画像の扱い
    //https://symfoware.blog.fc2.com/blog-entry-2298.html

    QImage img("../test.png");
    ui->label->setPixmap(QPixmap::fromImage(img));
}

Widget::~Widget()
{
    delete ui;
}
Qt creator で ROS Image のサブスクライブ
※Qt CreatorでROSを使う際の基本は以下を参照ください
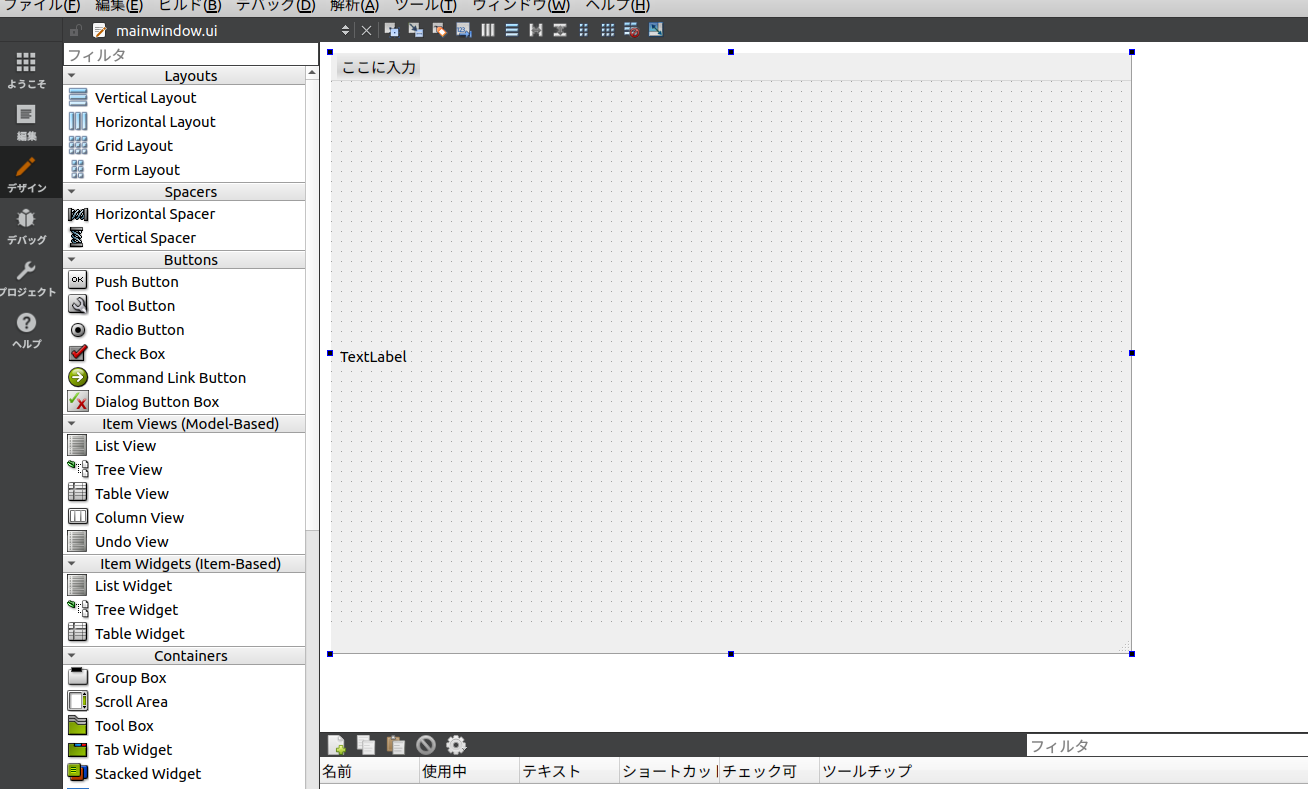
- Qt Creatorでuiにラベルを配置し,サイズをwindowに合わせる(※Windowを選択して整列をする)
各プログラムを以下のように変更
main.cpp
# include "mainwindow.h"

# include <QApplication>
# include <ros/ros.h>


int main(int argc, char *argv[])
{

    ros::init(argc, argv, "aaa");

    QApplication a(argc, argv);
    MainWindow w;
    w.show();

    ros::Rate loop_rate(20);
    while (ros::ok()){
      ros::spinOnce();
      a.processEvents();
      loop_rate.sleep();
    }
}
mainwindow.h
# ifndef MAINWINDOW_H
# define MAINWINDOW_H

# include <QMainWindow>

# include <ros/ros.h>
# include <sensor_msgs/Image.h>

QT_BEGIN_NAMESPACE
namespace Ui { class MainWindow; }
QT_END_NAMESPACE

class MainWindow : public QMainWindow
{
    Q_OBJECT

public:
    MainWindow(QWidget *parent = nullptr);
    ~MainWindow();

private:
    Ui::MainWindow *ui;
    ros::NodeHandle nh_;
    ros::Subscriber string_sub_;
    void callbackImage(const sensor_msgs::Image::ConstPtr& msg);
};
# endif // MAINWINDOW_H
mainwindow.cpp
# include "mainwindow.h"
# include "./ui_mainwindow.h"

# include <ros/ros.h>
# include <sensor_msgs/Image.h>
# include <cv_bridge/cv_bridge.h>
# include <opencv2/opencv.hpp>

MainWindow::MainWindow(QWidget *parent)
    : QMainWindow(parent)
    , ui(new Ui::MainWindow)
{

    ui->setupUi(this);
    ui->label->setText("Hello World!");
    string_sub_ = nh_.subscribe("image", 10, &MainWindow::callbackImage, this);
}

MainWindow::~MainWindow()
{
    delete ui;
}

void MainWindow::callbackImage(const sensor_msgs::Image::ConstPtr& msg) {
    ui->label->setText("Sub!");
    cv_bridge::CvImageConstPtr cv_ptr = cv_bridge::toCvShare(msg, sensor_msgs::image_encodings::RGB8);
    cv::Mat mat = cv_ptr->image;
    QImage image(mat.data, mat.cols, mat.rows, mat.step[0], QImage::Format_RGB888);
    ui->label->setPixmap(QPixmap::fromImage(image));
}
CMakeLists.txt
cmake_minimum_required(VERSION 3.5)

project(test9 LANGUAGES CXX)

set(CMAKE_INCLUDE_CURRENT_DIR ON)

set(CMAKE_AUTOUIC ON)
set(CMAKE_AUTOMOC ON)
set(CMAKE_AUTORCC ON)

set(CMAKE_CXX_STANDARD 11)
set(CMAKE_CXX_STANDARD_REQUIRED ON)

# QtCreator supports the following variables for Android, which are identical to qmake Android variables.
# Check http://doc.qt.io/qt-5/deployment-android.html for more information.
# They need to be set before the find_package(Qt5 ...) call.

# if(ANDROID)
#    set(ANDROID_PACKAGE_SOURCE_DIR "${CMAKE_CURRENT_SOURCE_DIR}/android")
#    if (ANDROID_ABI STREQUAL "armeabi-v7a")
#        set(ANDROID_EXTRA_LIBS
#            ${CMAKE_CURRENT_SOURCE_DIR}/path/to/libcrypto.so
#            ${CMAKE_CURRENT_SOURCE_DIR}/path/to/libssl.so)
#    endif()
# endif()

find_package(Qt5 COMPONENTS Widgets REQUIRED)
find_package(roscpp)
find_package(cv_bridge)
find_package(sensor_msgs)
find_package(OpenCV)

include_directories(
 ${roscpp_INCLUDE_DIRS}
 ${cv_bridge_INCLUDE_DIRS}
 ${OpenCV_INCLUDE_DIRS}
 ${sensor_msgs_INCLUDE_DIRS}
)

if(ANDROID)
  add_library(test9 SHARED
    main.cpp
    mainwindow.cpp
    mainwindow.h
    mainwindow.ui
  )
else()
  add_executable(test9
    main.cpp
    mainwindow.cpp
    mainwindow.h
    mainwindow.ui
  )
endif()

target_link_libraries(test9 PRIVATE Qt5::Widgets ${roscpp_LIBRARIES} ${cv_bridge_LIBRARIES} ${OpenCV_LIBRARIES} ${sensor_msgs_LIBRARIES})
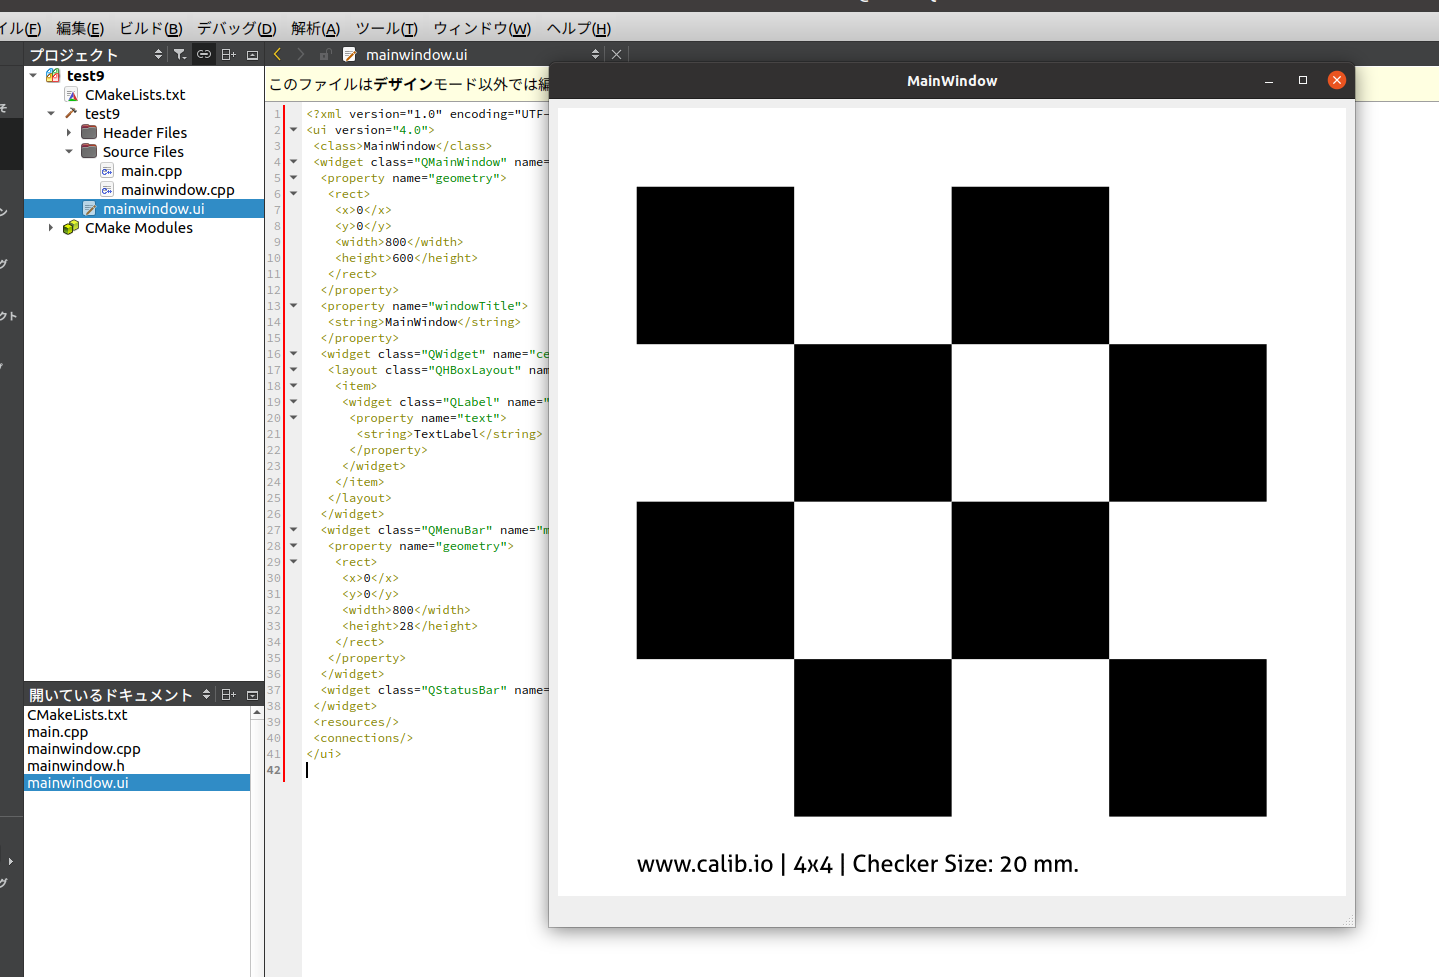
結果
- 上記プロジェクトを実行
- 以下のようなスクリプトで
/imageトピックを配信してあげる
img_publisher.py
import os
import rospy
from sensor_msgs.msg import Image
import cv2
from cv_bridge import CvBridge
import sys

def operator():

    filepath = sys.argv[1]

    rospy.init_node('image_publisher', anonymous=True)
    pub = rospy.Publisher('image', Image, queue_size=10)
    # read image
    #filepath = os.path.join(os.path.dirname(os.path.abspath(__file__)), 'lena.png')
    im = cv2.imread(filepath, cv2.IMREAD_COLOR)
    # make bridge
    bridge = CvBridge()
    msg = bridge.cv2_to_imgmsg(im, encoding="bgr8")
    rate = rospy.Rate(1) # 1hz
    while not rospy.is_shutdown():
        pub.publish(msg)
        rate.sleep()
if __name__ == '__main__':
    try:
        operator()
    except rospy.ROSInterruptException:
        pass
python3 img_publisher test.png
画像をサブスライブできました!
さいごに
ros-visualizationのrqt_image_viewはオリジナルのwidgetを作成し,uiファイルに設置し使用してそこに画像をセットして使用していました.
名前はRatioLayoutedFrameというウィジェットで画像のサイズを拡大縮小したり,1倍のサイズにしてスクロールバー出したりとかしている?みたいです
参考
-
PyQt5 ROS Image Subscriber
https://symfoware.blog.fc2.com/blog-entry-2298.html -
ROS rqt_image_view
https://github.com/ros-visualization/rqt_image_view