2nd Mission Start!!
1st Mission → 企画
アセットインポート
使用する3Dモデルやアニメーションをインポートします。
まずは必要最低限のものだけダウンロードし、必要になったら随時ダウンロードしていく予定。
※開発しながら記事を書いているため、随時追記してきます。
ダウンロード先↓
Mixamo
Unity Asset Store
Mixamo
プレイヤーモデル
- X bot(ダウンロード名: Player)
アニメーション
- Idle
- Run Forward
- Sword And Shield Run
- Sword And Shield Slash(コンボ用に3つに区切って)
- Sword And Shield Block
- Sword And Shield Impact(2種類)
- Death
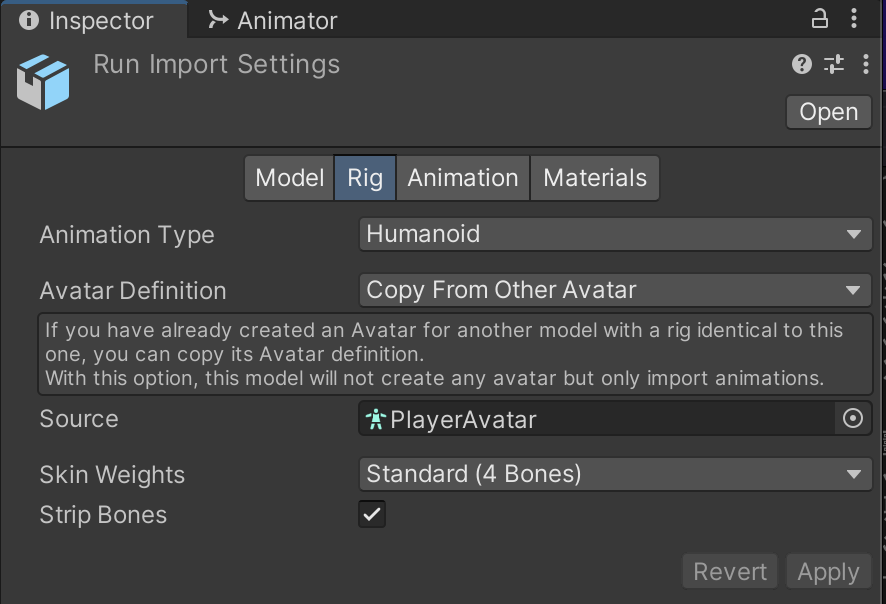
アニメーションダウンロード時の設定

アニメーションはインポート後、必ずRigの設定を画像のように変える。
Animation Type: Humanoid
Avatar Definition: Copy From Other Avatar
Source: PlayerAvatar
Unity Asset Store
武具
モデル調整
- Player.fbxをHierarchyにドラッグ&ドロップしてUnpack Prefab。
- Player.fbxのInspectorを開き、Materialsの設定を画像の通りに。

- Player > Beta_JointsのInspectorを開き、MaterialsにMetal8を設定。
- Player > Beta_SurfaceのInspectorを開き、MaterialsにWhiteBatteredを設定。
- PlayerのTransformをいい感じに設定。
- RPG Swords > Materials > sword01.fbx をPlayerのRightHandにドラッグ&ドロップしてUnpack Prefabし、名前をSwordに変更。
- SwordのInspectorを開き、MaterialsにSword_Textures01.matを設定。
- SwordのTransformをいい感じに設定。
- To Arms! Shield and Sword > Prefabs > Steel Buckler.prefab をPlayerのLeftHandのにドラッグ&ドロップしてUnpack Prefabし、名前をShieldに変更。
- ShieldのInspectorを開き、LOD GroupをRemove Component。
- Shield以下のBuckler_LOD0以外のオブジェクトを全て削除し、Buckler_LOD0の名前をBucklerに変更。
- ShieldとBucklerのTransformをいい感じに設定。
文字が並びすぎていて眩暈がしますが、できあがったものがこちらです。
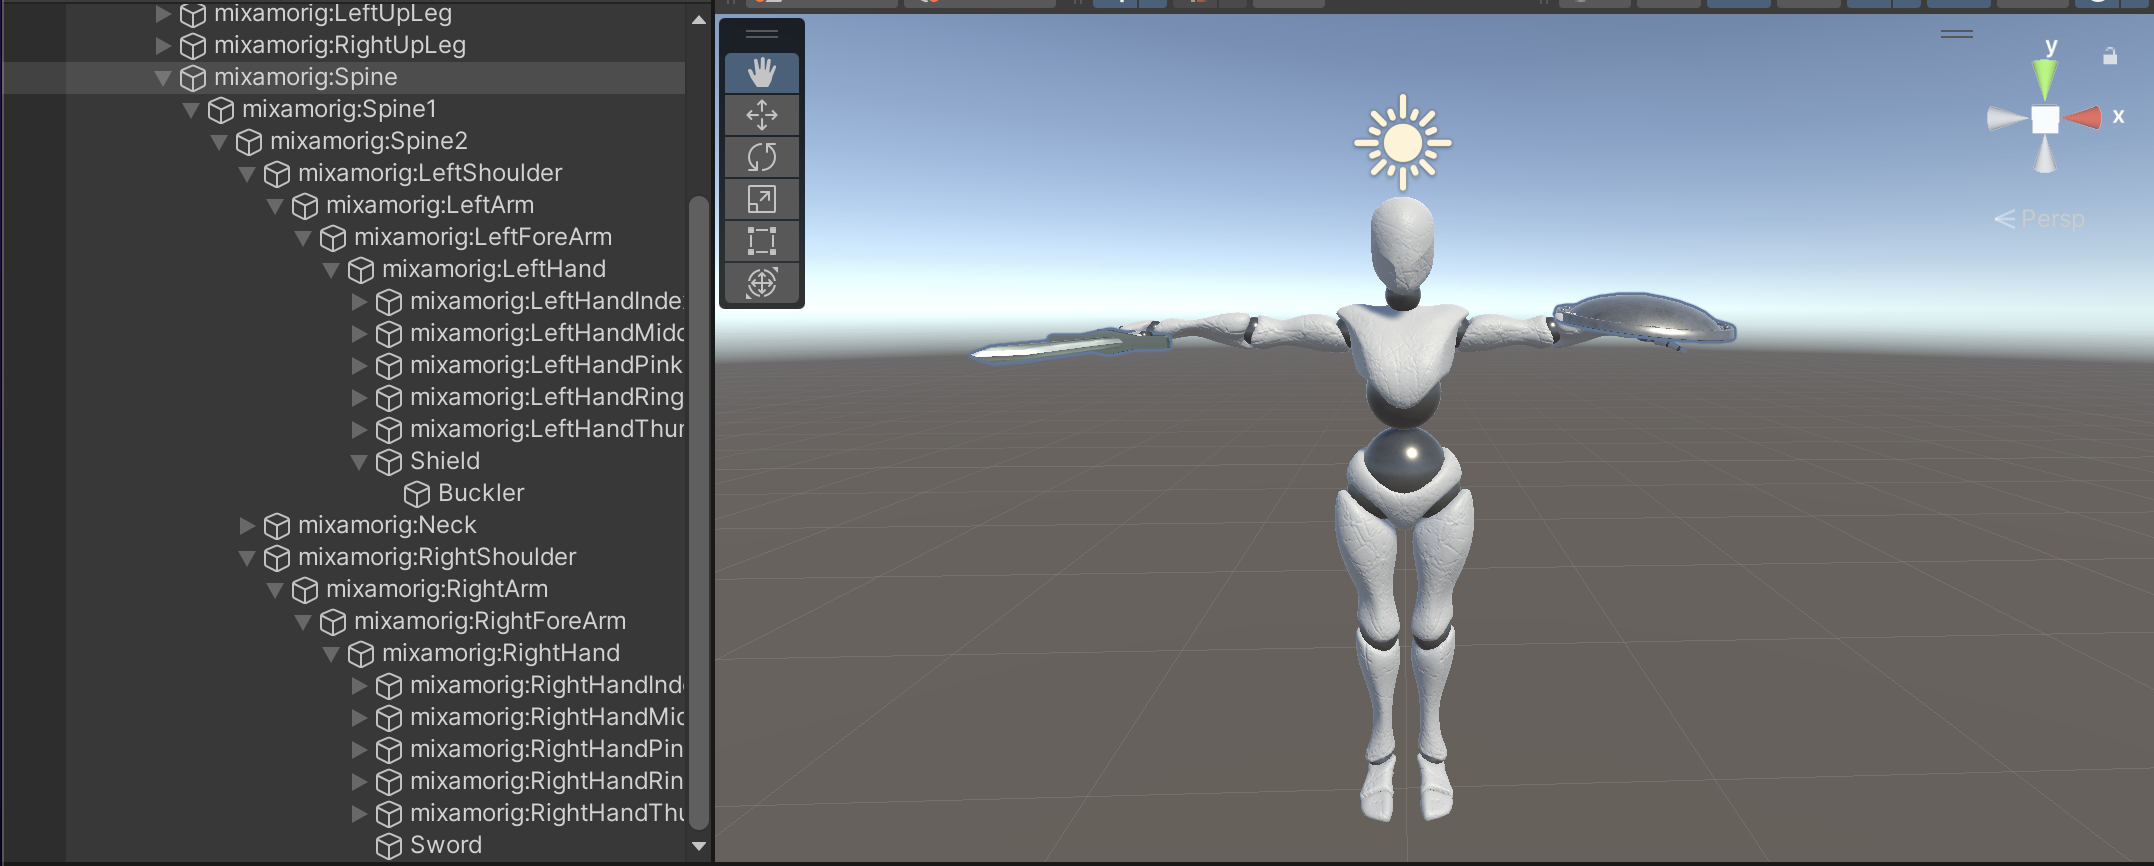
がんばったのでダサいとは言わないでください。
モデルがこんな見た目でいいのかという話ですが、精神世界ではこんな姿になってしまうという設定で押し切るつもりです。