0
0

Delete article

Deleted articles cannot be recovered.

Draft of this article would be also deleted.

Are you sure you want to delete this article?

【Google Cloud】App Engineでトラフィック分割する

0
Posted at

はじめに

App Engineのアプリケーションのトラフィック分割を試してみたので備忘録として記載します。

設定環境

導入する端末およびOSは以下の通りです。

  • 端末:MacBook Air, Apple M2 2022
  • OS:Mac OS Tahoe, バージョン26.2
  • python 3.13.12

またアプリケーションは過去に記事にした以下のものを使用します。

設定方法

1. Google Cloud Console へのログイン

Google Cloud Console にログインし、対象プロジェクトを選択します。今回はアカウント作成時に自動されたデフォルトのプロジェクトとします。

2. App Engine へのナビゲーション

検索欄で「App Engine」と入力し、「App Engine>ダッシュボード>バージョン」を選択します。

3. トラフィック分割を設定

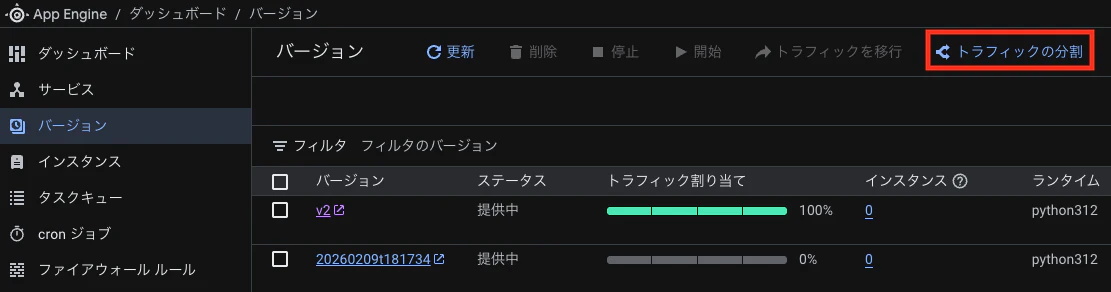
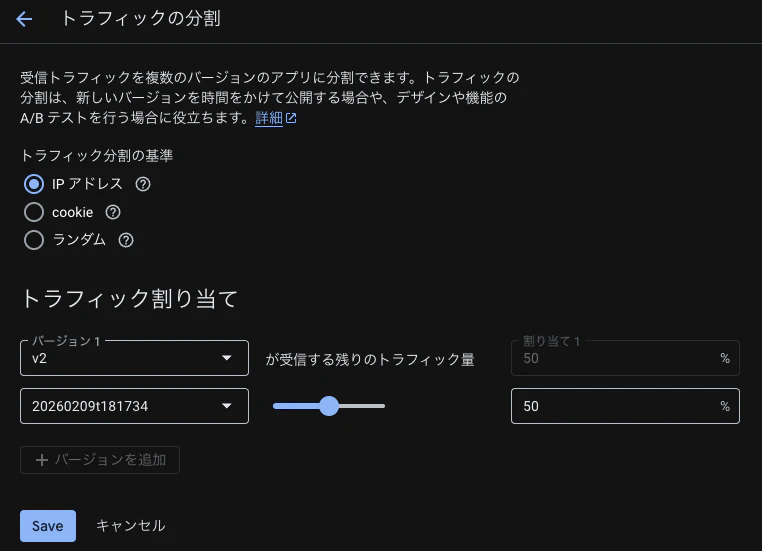
「v2」と「20260209t181734」のバージョンにトラフィックを分割します。

3-1. 「トラフィックを分割」を選択します。
スクリーンショット 2026-02-10 11.22.02.png

3-2. 分割基準を「IPアドレス」、各バージョンのトラフィック量を50%ずつに設定し、「Save」を保存します。
スクリーンショット 2026-02-10 11.26.16.png

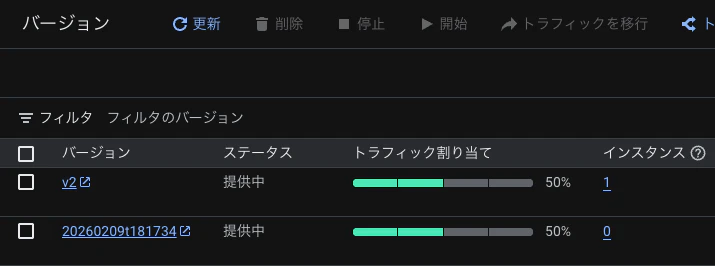
アプリケーションのトラフィック割り当てを確認すると、各バージョンに50%ずつトラフィックが流れる設定になっていることが確認できます。
スクリーンショット 2026-02-10 11.26.44.png

以上でApp Engineのトラフィック分割は完了です。

0
0
0

Register as a new user and use Qiita more conveniently

  1. You get articles that match your needs
  2. You can efficiently read back useful information
  3. You can use dark theme
What you can do with signing up
0
0

Delete article

Deleted articles cannot be recovered.

Draft of this article would be also deleted.

Are you sure you want to delete this article?