s3fsを使ってEC2からS3をマウントする方法
s3fs、fuseはインストールされている前提。
環境
| 項目 | 内容 |
|---|---|
| OS | Amazon Linux AMI |
| s3fs | 1.73 |
| fuse | 2.9.3-1.15.amzn1 |
| fuse-devel | 2.9.3-1.15.amzn1 |
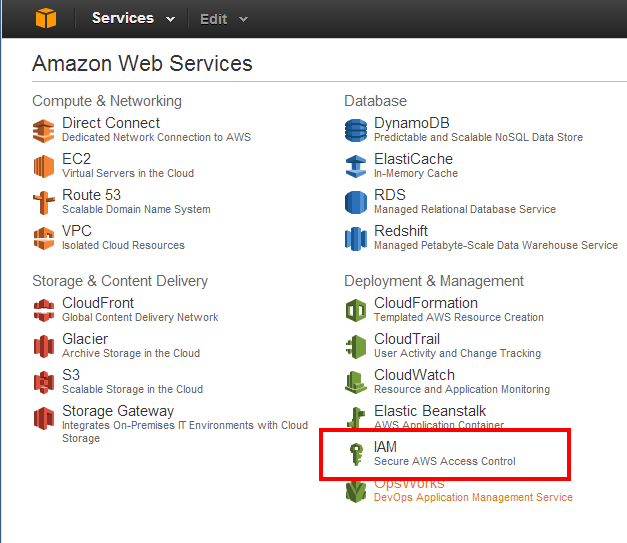
手順1. Console HomeからIAMを選択する。
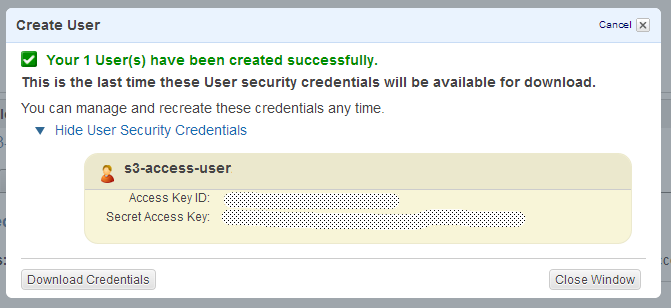
手順2. s3アクセス用のユーザーを作成する。(画像では「s3-access-user」で作成)
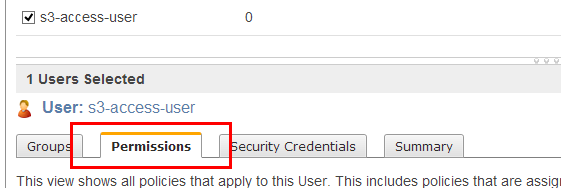
手順3. 作成したユーザーを選択し、「Permissions」タグを選択し、「Attach User Policy」ボタンを押下し、ポリシーを追加ポップアップを表示する。
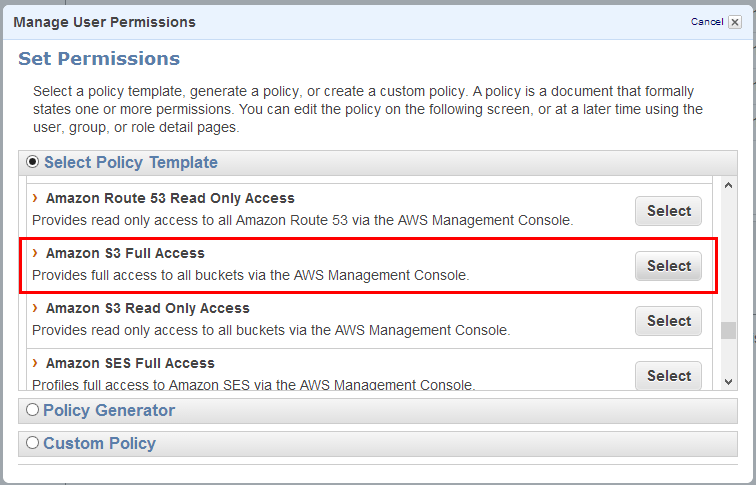
手順4. 「Amazon S3 Full Access」を選択する。(今回はフルアクセス)
手順5. ターミナル接続して、マウントする。
マウント
sudo echo "{Access Key ID}:{Secret Access Key}" > /etc/passwd-s3fs
sudo chmod 640 /etc/passwd-s3fs
sudo mkdir /mnt/s3
sudo /usr/local/bin/s3fs {bucket_name} /mnt/s3 -ouse_cache=/tmp
| 項目 | 値 |
|---|---|
| {Access Key ID} | 手順2でメモったAccess Key ID |
| {Secret Access Key} | 手順2でメモったSecret Access Key |
| {bucket_name} | s3のバケット名 |
手順6. マウントされているか確認する。
確認
# df
Filesystem           1K-blocks      Used Available Use% Mounted on
/dev/xvda1             8256952   6706132   1466964  83% /
tmpfs                   304236         0    304236   0% /dev/shm
s3fs                 274877906944         0 274877906944   0% /mnt/s3


