この記事は、「【連載】初めてのReact Native + Expo開発環境構築入門」の子記事です。環境などの条件は、親記事をご覧ください。
前回react-navigationが動作するところまで作りましたが、これを実際に小さいアプリを計画して画面構成を実現し、取り急ぎ画面遷移ができる状態までアプリを作ります。各画面コンポーネントはプロジェクトメンバーで分担して作ることを考え、コンポーネントごとにファイルに分割して独立させます。
この記事はReact Navigation V4を前提に書かれています。2020年10月時点最新のV5対応は、こちらの兄弟記事にお任せしました。
アプリの画面構成全体像を計画する
まずはアプリの画面構成をおおよそで計画します。Fluid UIなどでサクッとお絵描きしてみます。

今回はInvoice(請求書)アプリを想定します。簡単なCRUD機能を持つ端末アプリです。
- 初期画面はInvoiceのリスト画面。
- Invoiceの新規作成または編集ができるが、新規作成画面と編集画面は同一のコンポーネントで作る。
- Invoiceを保存するときは、支払い方法を選択するポップアップが出る。
- 支払い方法を選択した後、印刷ポップアップが出る。
- すべてのInvoiceのサマリー画面で集計結果をみることができる。
その他機能(設定画面、データのインポート・エクスポート、全削除確認、など)もきっと必要ですが、まずは基本の画面だけ作っていくことにします。
今回はStack Navigatorを使いますが、react-navigationでは他にもフッターにタブを並べて画面を選択させるTab navigatorなどもサポートしています。
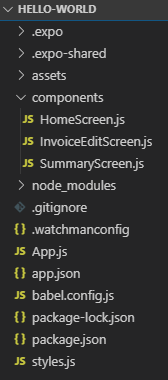
フォルダ構成はこれに基づき以下のようにします。componentsフォルダ内にコンポーネントを配置するのは、Reactの行儀作法に従っています。また、App.jsにあったスタイル情報はstyles.jsにまとめることにします。
Stack Navigatorの準備
まずはStack Navigatorを更新します。
const RootStack = createStackNavigator(
  {
    Home: HomeScreen,
    InvoiceEdit: InvoiceEditScreen,
    Summary: SummaryScreen,
  },
  {
    initialRouteName: 'Home',
  }
);
こうするためには、componentsフォルダに配置された各コンポーネントファイルからReact.Componentクラスをimportしなくてはいけません。App.js上部に以下を追記します。
import HomeScreen from './components/HomeScreen';
import InvoiceEditScreen from './components/InvoiceEditScreen';
import SummaryScreen from './components/SummaryScreen';
スタイル情報をファイルに独立させる
WebでいうCSSのように、スタイル情報はコンポーネント共通にしたいので、新設したstyles.jsにcontainerのスタイル定義を入れるよう以下のようにし、App.jsからstyles変数定義部分を削除します。
後で使うmodalのスタイル定義も入れました。
import { StyleSheet } from 'react-native';
export default StyleSheet.create({
    container: {
        flex: 1,
        backgroundColor: '#fff',
        alignItems: 'center',
        justifyContent: 'center',
    },
    modal: {
        flex: 1,
        backgroundColor: 'rgba(0,0,0, 0.8)',
        alignItems: 'center',
        justifyContent: 'center',
    },
});
Home画面を独立ファイル化する
import React from 'react';
import { StyleSheet, Button, Text, View } from 'react-native';
import styles from '../styles.js';
class HomeScreen extends React.Component {
render(){
return (
<View style={styles.container}>
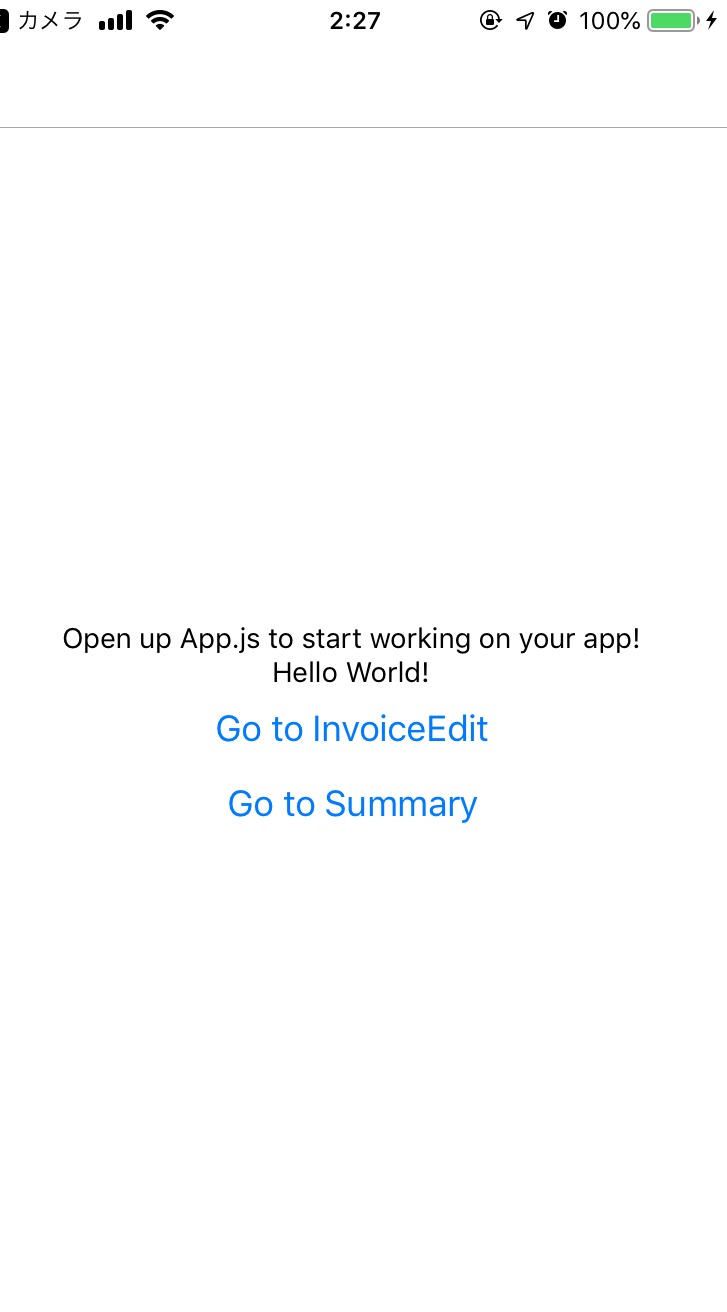
<Text>Open up App.js to start working on your app!</Text>
<Text>Hello World!</Text>
<Button
title="Go to InvoiceEdit"
onPress={() => this.props.navigation.navigate('InvoiceEdit')}
/>
<Button
title="Go to Summary"
onPress={() => this.props.navigation.navigate('Summary')}
/>
</View>
);
}
}
export default HomeScreen;
Summary を同様に作成する。
import React from 'react';
import { StyleSheet, Button, Text, View } from 'react-native';
import styles from '../styles.js';

export default class SummaryScreen extends React.Component {
  render() {
    return (
      <View style={styles.container}>
        <Text>Summary Screen</Text>
      </View>
    );
  }
}
Invoice画面のModal(ポップアップダイアログ)にはreact-navigationを使うべきか否か
react-navigationでは、Modalを作るときはStack Navigationをもう一つ作って、通常画面と同様にコールせよ、とOpening a full-screen modalのページに書いてあります。
この考え方はポップアップをアプリ内のコンポーネントで共通して使う場合には便利そうですが、特定のコンポーネント内でしか使わない場合は記述があまり素直ではないと感じられます。
したがって、コンポーネント内で独立して組み込めるReact Native自体のModalのほうが今回はベターであると判断し、react-navigationの画面構成設計からは除外することにします。
Invoice は Summary同様に作成し、modalの動作を加える。
import React from 'react';
import { Button, Text, View, Modal, Alert } from 'react-native';
import styles from '../styles.js';

export default class InvoiceEditScreen extends React.Component {
  state = {
    modalPaymentVisible: false,
    modalPrintVisible: false,
  };

  setModalPaymentVisible(visible) {
    this.setState({modalPaymentVisible: visible});
  }
  setModalPrintVisible(visible) {
    this.setState({modalPrintVisible: visible});
  }

  render() {
    return (
      <View style={styles.container}>
        <Text>Invoice Edit Screen</Text>
        <Modal
          animationType="slide"
          transparent={true}
          visible={this.state.modalPaymentVisible}
          onRequestClose={() => {
            Alert.alert('Modal has been closed.');
          }}>
          <View style={styles.modal}>
            <Text style={{color:'#fff'}}>Payment popup</Text>
            <Button
              title="Hide modal"
              onPress={() => {
                this.setModalPaymentVisible(false);
              }}>
            </Button>
            <Button
              title="Go to Print"
              onPress={() => {
                this.setModalPaymentVisible(false);
                this.setModalPrintVisible(true);
              }}>
            </Button>
          </View>
        </Modal>
        <Modal
          animationType="slide"
          transparent={true}
          visible={this.state.modalPrintVisible}
          onRequestClose={() => {
            Alert.alert('Modal has been closed.');
          }}>
          <View style={styles.modal}>
            <Text style={{color:'#fff'}}>Print popup</Text>
            <Button
              title="Hide modal"
              onPress={() => {
                this.setModalPrintVisible(false);
                this.props.navigation.goBack();
              }}>
            </Button>
          </View>
        </Modal>
        <Button
          title="Show modal"
          onPress={() => {
            this.setModalPaymentVisible(true);
          }}>
        </Button>
      </View>
    );
  }
}
Modalの表示・非表示コントロールはstateで簡単に表現でき、なおかつアニメーションが自動的に入ってかっこよく動きます。半透明の背景は、先程設定したstyles.jsで実現しています。
念のため、変更後のApp.jsは:
import React from 'react';
import { createAppContainer } from 'react-navigation';
import { createStackNavigator } from 'react-navigation-stack';

import HomeScreen from './components/HomeScreen';
import InvoiceEditScreen from './components/InvoiceEditScreen';
import SummaryScreen from './components/SummaryScreen';

const RootStack = createStackNavigator(
  {
    Home: HomeScreen,
    InvoiceEdit: InvoiceEditScreen,
    Summary: SummaryScreen,
  },
  {
    initialRouteName: 'Home',
  }
);

const AppContainer = createAppContainer(RootStack);

export default class App extends React.Component {
  render() {
    return <AppContainer />;
  }
}
これでInvoiceのポップアップも設計通りに動くようになりました。以下は動作させた場合の画面イメージで、上から順にHome、InvoiceEdit、InvoiceEdit内のPaymentポップアップ、InvoiceEdit内のPaymentポップアップから遷移するPrintポップアップです。