当記事の概要
GitHubが提供を開始した、ブラウザ上でVSCode環境を使用することができる「GitHub Codespaces」のベータ版が利用可能になりましたので試してみました。
GitHub Codespacesの概要
Codespacesの概要、および、試してみた結果は以下の通りです。
- Codespacesは、ブラウザで使えるVSCode環境
- Codespaces内でターミナルが使える。
Debian 9環境。Codespaces用のコンテナ環境。 - Docker、Java(JDK 11)、Gradle、Maven、Node.js、kubectlなどが最初から入っている
- SDKMANも入っており、Javaのバージョンを変えることもできる
- 追加で色々なツール・SWを導入することが可能。asdfなどのパッケージマネージャも入れることができ、そこからさらに他のパッケージも入れられる
- CodespacesのターミナルでWebアプリを動作させる(例えばDockerでnginxを動かす)と、Port Fowarding機能によりそのサーバにHTTPS(ポート443)でアクセスすることができる
- VSCodeのSettings Sync機能により、ローカルPCのVSCodeと設定・エクステンションを同期させることができる。Codespacesを起動するとローカルPCのVSCodeと同じ状態をすぐに再現可能
- ターミナルの環境はAzure上で稼働しているため、HTTPSでインターネットに出られさえすれば、社内の通信制約に縛られずに各種サービスを利用可能
Codespacesの利用開始
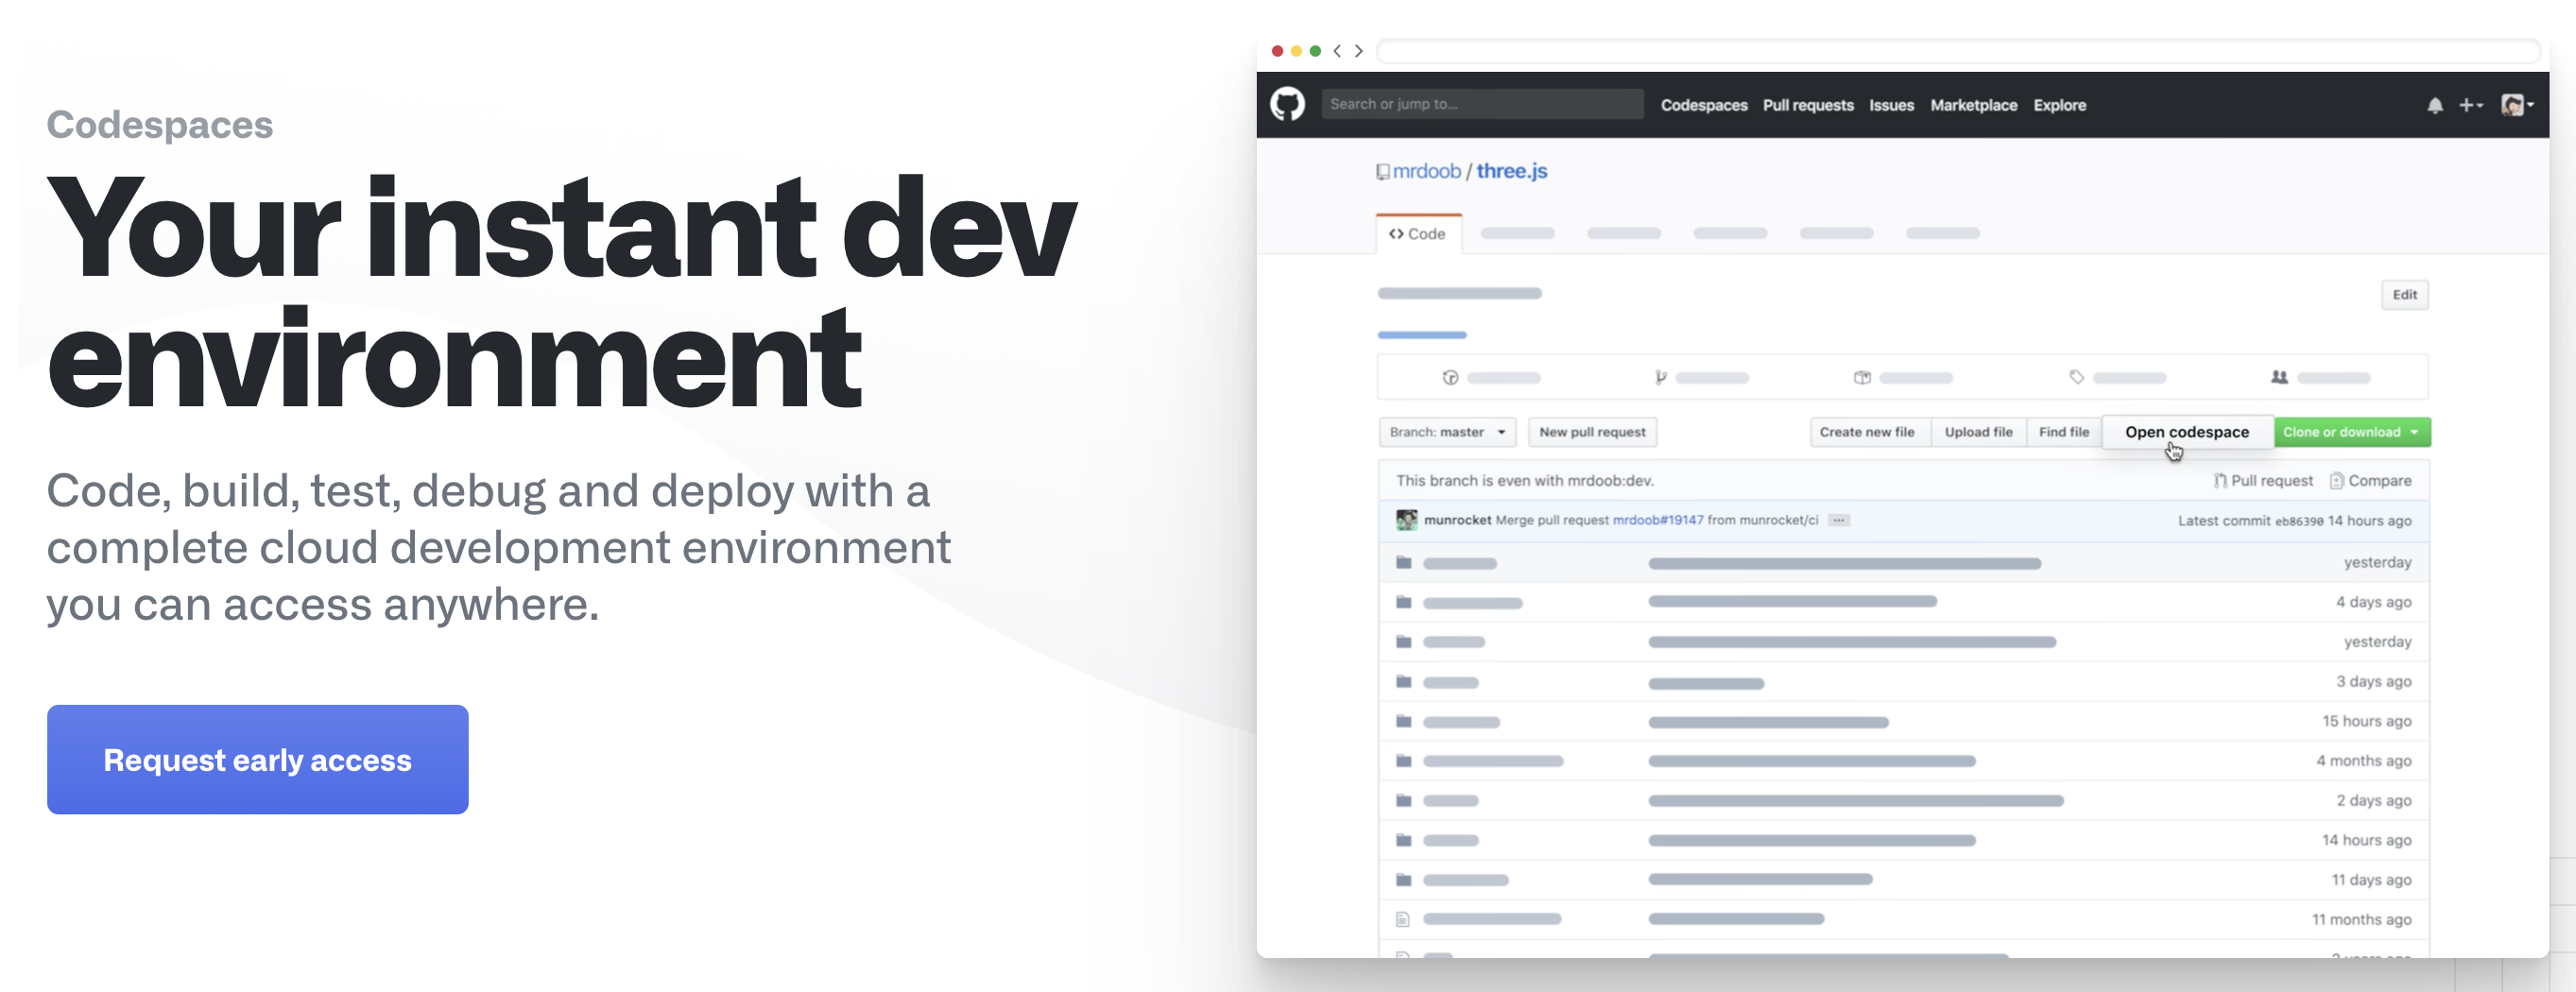
Codespacesは現時点(2020/10/9)で限定的なベータ版として提供されているため、Codespacesの申し込みページで、「Request early access」ボタンをクリックし、利用を申し込みます。
Codespacesが利用可能になると、GitHubから「You're now in the Codespaces beta!」というタイトルのメールが届きます。
その後、Codespacesの一覧・作成ページにアクセスすると、Codespacesの環境を作成することができます。Codespaces環境はGitHubのリポジトリと紐付けて作成しますので、最低でも1つのGitHubリポジトリを作成しておく必要があります。最近のGitHubではプライベートなリポジトリを作成できます。(不用意に公開すると事故るので)プライベートリポジトリを作成しましょう。
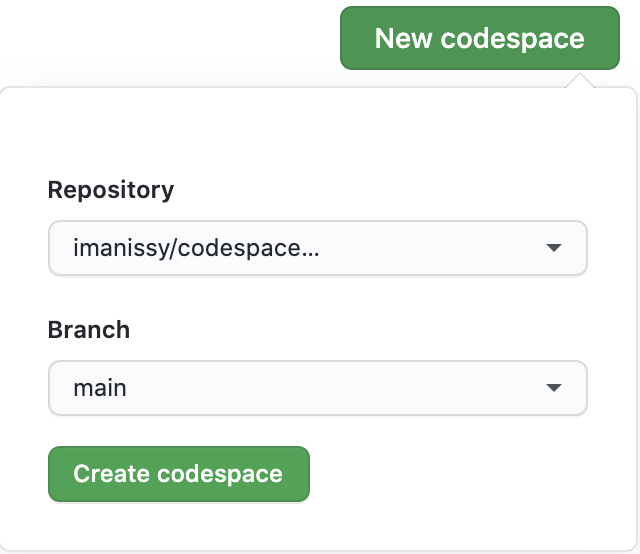
Codespacesを作成するには、以下の「New codespace」ボタンをクリックします。

以下のようなダイアログが表示されるので、Codespacesで利用するリポジトリとブランチを指定し、「Create codespace」ボタンをクリックします。
Codespaces環境が作成されると、以下のような画面が表示されます(いくつか設定済みのエクステンションが起動時に導入されたため、画面の内容は全く同じにはならないと思います)。まさにいつも使っているVSCodeそのままですよね。

ローカルPCでの設定、導入済みのエクステンションを同期する
VSCodeでは、端末間で設定・エクステンションを同期するための標準機能としてSettings Syncが提供されています(Stable版では2020年8月から提供)。
Settings Syncを利用することで、ローカルPCでの設定、導入したエクステンションがCodespaces環境にも自動的に適用・導入されます。
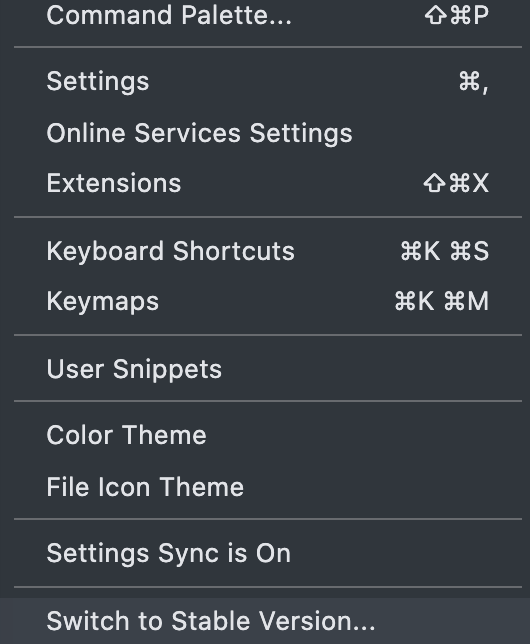
私の場合、1つ目に作成したCodespaces環境ではSettings Syncで同期させても、設定は同期されるものの、エクステンションは同期されませんでした。Codespaces環境は初期状態ではInsider versionが起動しますが、画面左下の歯車アイコンをクリックし、以下メニューの「Switch to Stable Version...」を選択し、Stable versionに変更することで、エクステンションの同期が始まりました。(ただ、2つ目に作成したCodespaces環境では初期状態のInsider versionでエクステンションまで同期されたので、関係がないのかもしれません)
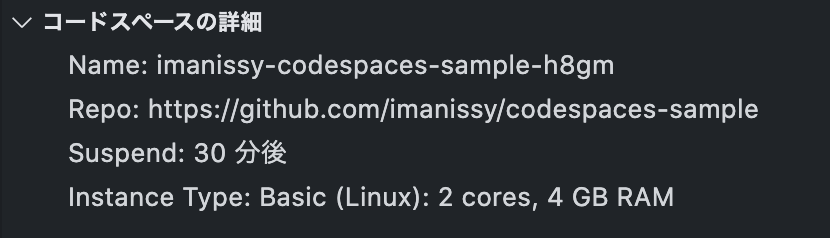
Codespaces環境のインスタンスは、以下の通り、CPU:2コア、メモリ:4GB というスペックになっています。
ターミナルの利用
以下のように、VSCodeと同様にターミナルが利用可能です。
ディスクの状態を見てみると以下の通りでした。
codespace ➜ ~/workspace/codespaces-sample (main) $ lsblk
NAME    MAJ:MIN RM  SIZE RO TYPE MOUNTPOINT
loop0     7:0    0   64G  0 loop /home/codespace/workspace
sda       8:0    0   16G  0 disk
└─sda1    8:1    0   16G  0 part /tmp
sdb       8:16   0   30G  0 disk
├─sdb1    8:17   0 29.9G  0 part /home/codespace/.codespaces/shared
├─sdb14   8:30   0    4M  0 part
└─sdb15   8:31   0  106M  0 part
sr0      11:0    1  628K  0 rom

codespace ➜ ~/workspace/codespaces-sample (main) $ df -H
Filesystem      Size  Used Avail Use% Mounted on
overlay          68G   14G   52G  21% /
tmpfs            68M     0   68M   0% /dev
tmpfs           2.1G     0  2.1G   0% /sys/fs/cgroup
shm              68M  8.2k   68M   1% /dev/shm
/dev/sdb1        32G  2.2G   29G   8% /usr/bin/docker
/dev/sda1        17G   47M   16G   1% /tmp
/dev/loop0       68G   14G   52G  21% /etc/hosts
tmpfs           413M  721k  413M   1% /run/docker.sock
tmpfs           2.1G     0  2.1G   0% /proc/acpi
tmpfs           2.1G     0  2.1G   0% /proc/scsi
tmpfs           2.1G     0  2.1G   0% /sys/firmware
どんなツール・ランタイムが最初から入っているか確認してみます。Git、Java、Node.js、Go、Ruby、Python、Gradle、Maven、Docker、kubectlなど、一通り入っていますね。
codespace ➜ ~/workspace/codespaces-sample (main) $ git --version
git version 2.28.0

codespace ➜ ~/workspace/codespaces-sample (main) $ java --version
openjdk 11.0.8 2020-07-14
OpenJDK Runtime Environment AdoptOpenJDK (build 11.0.8+10)
OpenJDK 64-Bit Server VM AdoptOpenJDK (build 11.0.8+10, mixed mode)

codespace ➜ ~/workspace/codespaces-sample (main) $ node --version
v12.16.3

codespace ➜ ~/workspace/codespaces-sample (main) $ go version
go version go1.15.2 linux/amd64

codespace ➜ ~/workspace/codespaces-sample (main) $ ruby --version
ruby 2.7.0p0 (2019-12-25 revision 647ee6f091) [x86_64-linux]

codespace ➜ ~/workspace/codespaces-sample (main) $ python --version
Python 2.7.13

codespace ➜ ~/workspace/codespaces-sample (main) $ gradle --version

Welcome to Gradle 6.6.1!

Here are the highlights of this release:
 - Experimental build configuration caching
 - Built-in conventions for handling credentials
 - Java compilation supports --release flag

For more details see https://docs.gradle.org/6.6.1/release-notes.html


------------------------------------------------------------
Gradle 6.6.1
------------------------------------------------------------

Build time:   2020-08-25 16:29:12 UTC
Revision:     f2d1fb54a951d8b11d25748e4711bec8d128d7e3

Kotlin:       1.3.72
Groovy:       2.5.12
Ant:          Apache Ant(TM) version 1.10.8 compiled on May 10 2020
JVM:          11.0.8 (AdoptOpenJDK 11.0.8+10)
OS:           Linux 5.4.0-1026-azure amd64

codespace ➜ ~/workspace/codespaces-sample (main) $ mvn --version
Apache Maven 3.6.3 (cecedd343002696d0abb50b32b541b8a6ba2883f)
Maven home: /usr/local/sdkman/candidates/maven/current
Java version: 11.0.8, vendor: AdoptOpenJDK, runtime: /usr/local/sdkman/candidates/java/11.0.8.hs-adpt
Default locale: en, platform encoding: UTF-8
OS name: "linux", version: "5.4.0-1026-azure", arch: "amd64", family: "unix"

codespace ➜ ~/workspace/codespaces-sample (main) $ docker --version
Docker version 19.03.12+azure, build 0ed913b885c8919944a2e4c8d0b80a318a8dd48b

codespace ➜ ~/workspace/codespaces-sample (main) $ kubectl version
Client Version: version.Info{Major:"1", Minor:"19", GitVersion:"v1.19.2", GitCommit:"f5743093fd1c663cb0cbc89748f730662345d44d", GitTreeState:"clean", BuildDate:"2020-09-16T13:41:02Z", GoVersion:"go1.15", Compiler:"gc", Platform:"linux/amd64"}
The connection to the server localhost:8080 was refused - did you specify the right host or port?
JVM関連のSDK管理ツールであるSDKMANが入っているので、Javaのバージョンを切り替えるといったことも容易にできます。
codespace ➜ ~/workspace/codespaces-sample (main) $ sdk install java 15.0.0.hs-adpt

Downloading: java 15.0.0.hs-adpt

In progress...

######################################################################## 100.0%

Repackaging Java 15.0.0.hs-adpt...
mkdir: created directory '/usr/local/sdkman/tmp/out'

Done repackaging...

Installing: java 15.0.0.hs-adpt
Done installing!

Do you want java 15.0.0.hs-adpt to be set as default? (Y/n): y

Setting java 15.0.0.hs-adpt as default.


codespace ➜ ~/workspace/codespaces-sample (main) $ java -version
openjdk version "15" 2020-09-15
OpenJDK Runtime Environment AdoptOpenJDK (build 15+36)
OpenJDK 64-Bit Server VM AdoptOpenJDK (build 15+36, mixed mode, sharing)
パッケージマネージャのasdfを入れることで、さらに多くのツールを容易に導入することも可能です。以下では、Red Hat OpenShiftのCLIであるocを導入してみます。
GitHubからasdfをcloneします。
git clone https://github.com/asdf-vm/asdf.git ~/.asdf --branch v0.8.0
~/.bashrcに以下を追記します。
. $HOME/.asdf/asdf.sh
. $HOME/.asdf/completions/asdf.bash
~/.bashrcを読み込みます。
source ~/.bashrc
asdfでocをインストールします。
codespace ➜ ~/workspace/codespaces-sample (main) $ asdf plugin add oc
initializing plugin repository...
Cloning into '/home/codespace/.asdf/repository'...
remote: Enumerating objects: 21, done.
remote: Counting objects: 100% (21/21), done.
remote: Compressing objects: 100% (15/15), done.
remote: Total 2347 (delta 9), reused 12 (delta 6), pack-reused 2326
Receiving objects: 100% (2347/2347), 547.57 KiB | 557.00 KiB/s, done.
Resolving deltas: 100% (1070/1070), done.
codespace ➜ ~/workspace/codespaces-sample (main) $ asdf install oc 4.6
######################################################################## 100.0%
codespace ➜ ~/workspace/codespaces-sample (main) $ asdf global oc 4.6
codespace ➜ ~/workspace/codespaces-sample (main) $ oc
OpenShift Client

This client helps you develop, build, deploy, and run your applications on any
OpenShift or Kubernetes cluster. It also includes the administrative
commands for managing a cluster under the 'adm' subcommand.

To familiarize yourself with OpenShift, login to your cluster and try creating a sample application:

    oc login mycluster.mycompany.com
    oc new-project my-example
    oc new-app django-psql-example
    oc logs -f bc/django-psql-example

To see what has been created, run:

    oc status

and get a command shell inside one of the created containers with:

    oc rsh dc/postgresql

To see the list of available toolchains for building applications, run:

    oc new-app -L

Since OpenShift runs on top of Kubernetes, your favorite kubectl commands are also present in oc,
allowing you to quickly switch between development and debugging. You can also run kubectl directly
against any OpenShift cluster using the kubeconfig file created by 'oc login'.

For more on OpenShift, see the documentation at https://docs.openshift.com.

To see the full list of commands supported, run 'oc --help'.
Port Fowarding機能
CodespacesでWebサーバ・アプリを立ち上げた場合、Port Forwarding機能により、ローカルからそのサーバ・アプリにアクセスすることができるようになります。
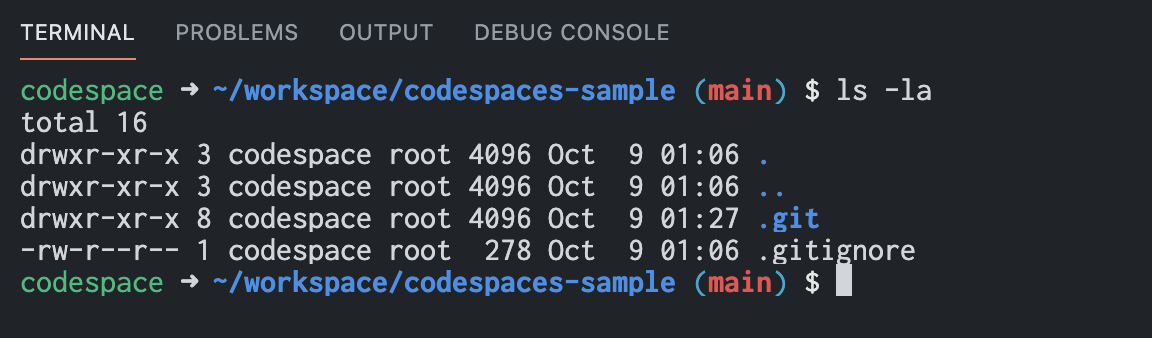
Dockerでnginxのコンテナを実行します。コンテナのポート80をホストのポート8099に割り当てています。
docker run --name nginx -d --rm -p 8099:80 nginx:latest
curlで localhost:8099 にアクセスすると、正常にレスポンスが返ります。
codespace ➜ ~/workspace/codespaces-sample (main) $ curl http://localhost:8099/
<!DOCTYPE html>
<html>
<head>
<title>Welcome to nginx!</title>
<style>
    body {
        width: 35em;
        margin: 0 auto;
        font-family: Tahoma, Verdana, Arial, sans-serif;
    }
</style>
</head>
<body>
<h1>Welcome to nginx!</h1>
<p>If you see this page, the nginx web server is successfully installed and
working. Further configuration is required.</p>

<p>For online documentation and support please refer to
<a href="http://nginx.org/">nginx.org</a>.<br/>
Commercial support is available at
<a href="http://nginx.com/">nginx.com</a>.</p>

<p><em>Thank you for using nginx.</em></p>
</body>
</html>
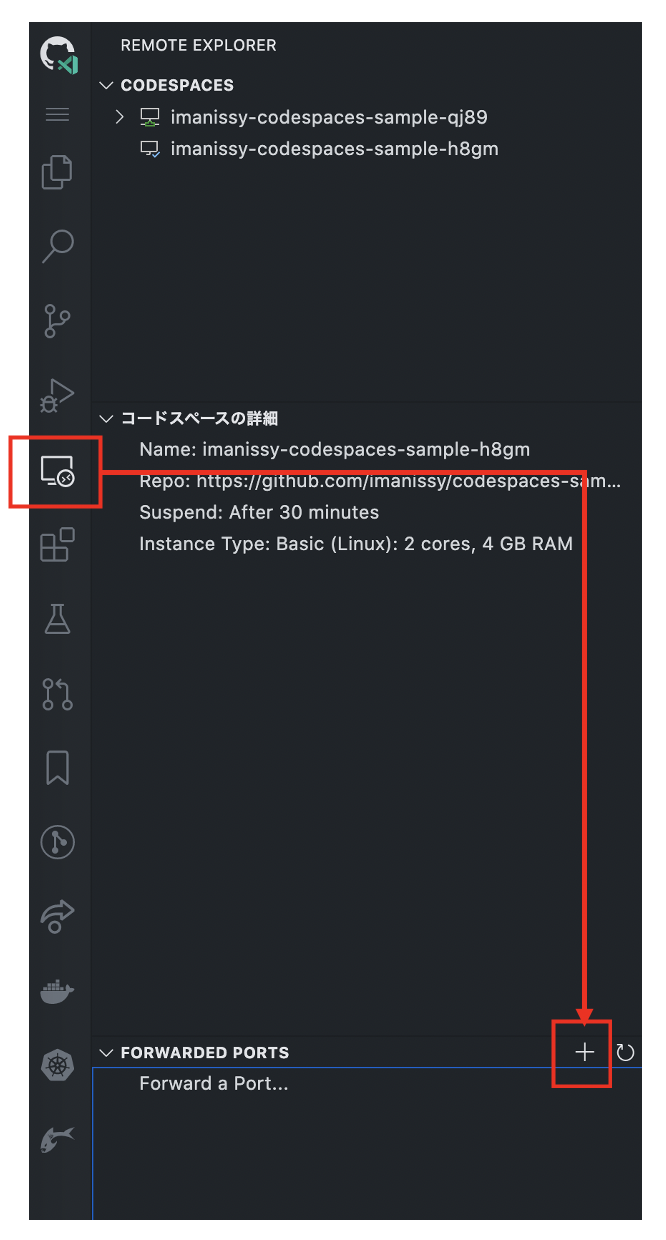
次に、Port Forwardingの設定を行い、ローカルPCのブラウザからnginxにアクセスしてみます。画面左側のRemote Explorerのアイコンをクリックし、「FORWARDED PORTS」の横の「+」アイコンをクリックします。
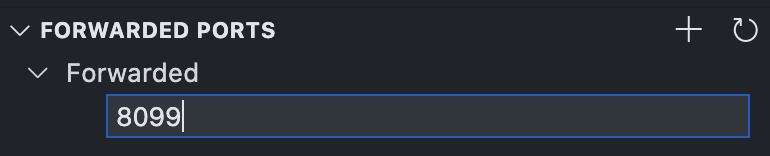
先ほどポート8099でnginxのコンテナを起動しましたので、8099と入力してEnterを押します。
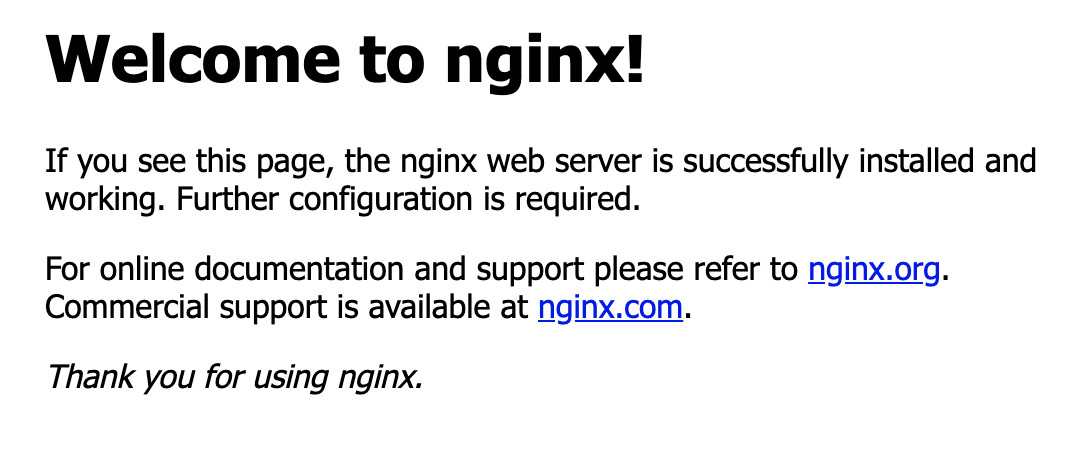
登録後、表示されている行の右側の地球アイコン(Open in a Browser)をクリックします。

すると、ブラウザが起動し、以下のようなnginxのWelcome画面が表示されます。このときのURLはhttps://xxxxxxxxxxxxx.apps.codespaces.githubusercontent.com/ のようになっています。
Codespaces利用上の注意点
以下のような注意点を理解したうえでの利用が必要です。
- 2020年10月時点ではベータ版です。可用性についての保証はありません。
- 利用せずに30分間置いておくと、Codespaces環境が一旦suspendされます。再度アクセスすると起動しますが、若干の待ち時間が必要です。suspendされると、作成したファイルなどはそのまま残っていますが、Dockerコンテナはストップしていました。
- ベータ版は無料での利用が可能ですが、GA後は有料になる予定です。Codespaces環境がアクティブな状態のときのみ課金されます。上記の通り、30分間利用しないでいると自動的にsuspendされ、suspend状態では課金されないようです。
以上です。