はじめに
この記事はNext.jsのサンプルアプリケーションにPassport+Auth0を利用して認証・認可機能を追加する手順で、こちらの原文を元に作成しています。Node.jsとnpmのインストール、Auth0の無料アカウントの取得とテナントの作成が完了していることが前提となっています。まだの方はこちらの記事を参照の上ご準備をお願いします。
完成版のソースコードはここで公開しています。
環境
-
OS :
macOS Mojave 10.14.5 -
Node.js :
10.15.3 -
npm :
6.4.1
手順
準備と基本プロジェクトの作成
NPM Project Directoryを作成して初期化します。
$ mkdir nextjs-passport
$ cd nextjs-passport
$ npm init -y
必要なパッケージをインストールします。
$ npm i body-parser bootstrap dotenv \
  dotenv-webpack express isomorphic-fetch \
  next react react-bootstrap \
  react-dom styled-components
.babelrcを作成してコンパイルパラメータを設定します。
// ./.babelrc

{
  "presets": ["next/babel"],
  "plugins": [["styled-components", { "ssr": true }]]
}
.envを作成して環境変数を設定します。このタイミングではPORTだけで問題ありません。
# ./.env

PORT=3000
next.config.jsを作成して.envファイルのパスを指定します。
// ./next.config.js

require("dotenv").config();

const path = require("path");
const Dotenv = require("dotenv-webpack");

module.exports = {
  webpack: config => {
    config.plugins = config.plugins || [];

    config.plugins = [
      ...config.plugins,

      // Read the .env file
      new Dotenv({
        path: path.join(__dirname, ".env"),
        systemvars: true
      })
    ];

    return config;
  }
};
ソースコードを保管するディレクトリを作成します。
$ mkdir -p src/components
$ mkdir src/pages
$ mkdir src/state
src/pages配下にindex.jsを作成します。
// ./src/pages/index.js
import styled from "styled-components";

const Rocket = styled.div`
  text-align: center;
  img {
    width: 630px;
  }
`;

function Index() {
  return (
    <Rocket>
      <img src="https://media.giphy.com/media/QbumCX9HFFDQA/giphy.gif" />
    </Rocket>
  );
}

export default Index;
src/pages配下に_document.jsを作成します。
// ./src/pages/_document.js

import Document, { Head, Html, Main, NextScript } from "next/document";
import { ServerStyleSheet } from "styled-components";

export default class MyDocument extends Document {
  static async getInitialProps(ctx) {
    const sheet = new ServerStyleSheet();
    const originalRenderPage = ctx.renderPage;

    try {
      ctx.renderPage = () =>
        originalRenderPage({
          enhanceApp: App => props => sheet.collectStyles(<App {...props} />)
        });

      const initialProps = await Document.getInitialProps(ctx);
      return {
        ...initialProps,
        styles: (
          <>
            {initialProps.styles}
            {sheet.getStyleElement()}
          </>
        )
      };
    } finally {
      sheet.seal();
    }
  }

  render() {
    return (
      <Html>
        <Head>
          <link
            rel="stylesheet"
            href="https://bootswatch.com/4/darkly/bootstrap.min.css"
          />
        </Head>
        <body>
          <Main />
          <NextScript />
        </body>
      </Html>
    );
  }
}
package.jsonのscriptsプロパティを下記のように修正します。
// ./package.json

"scripts": {
    "test": "echo \"Error: no test specified\" && exit 1",
    "dev": "next ./src"
  },
npm run devを実行してアプリケーションを起動しChromeでhttp://localhost:3000にアクセスします。画面が正常に表示されれば成功です。
$ npm run dev

Applicationの作成
src配下にthoughts-api.jsを作成してAPI Endpointを定義します。
// ./src/thoughts-api.js

const bodyParser = require("body-parser");
const express = require("express");

const router = express.Router();

router.use(bodyParser.json());

const thoughts = [
  { _id: 123, message: "I love pepperoni pizza!", author: "unknown" },
  { _id: 456, message: "I'm watching Netflix.", author: "unknown" }
];

router.get("/api/thoughts", (req, res) => {
  const orderedThoughts = thoughts.sort((t1, t2) => t2._id - t1._id);
  res.send(orderedThoughts);
});

router.post("/api/thoughts", (req, res) => {
  const { message } = req.body;
  const newThought = {
    _id: new Date().getTime(),
    message,
    author: "unknown"
  };
  thoughts.push(newThought);
  res.send({ message: "Thanks!" });
});
src配下にserver.jsを作成してhttpリクエストをlistenします。
// ./src/server.js

require("dotenv").config();
const express = require("express");
const http = require("http");
const next = require("next");
const thoughtsAPI = require("./thoughts-api");

const dev = process.env.NODE_ENV !== "production";
const app = next({
  dev,
  dir: "./src"
});
const handle = app.getRequestHandler();

app.prepare().then(() => {
  const server = express();

  server.use(thoughtsAPI);

  // handling everything else with Next.js
  server.get("*", handle);

  http.createServer(server).listen(process.env.PORT, () => {
    console.log(`listening on port ${process.env.PORT}`);
  });
});
package.jsonのscriptsプロパティを下記のように修正します。
// ./package.json

"scripts": {
  "dev": "node ./src/server.js",
  "build": "next build ./src",
  "start": "NODE_ENV=production node ./src/server.js"
},
npm run devを実行してアプリケーションを起動しChromeでhttp://localhost:3000/api/thoughtsにアクセスします。画面が正常に表示されれば成功です。
$ npm run dev

src/components配下にThought.js, Thoughts.jsを作成してAPIを呼び出します。
// ./src/components/Thought.js

import Card from "react-bootstrap/Card"

export default function Thought({ thought }) {
  const cardStyle = { marginTop: "15px" };
  return (
    <Card bg="secondary" text="white" style={cardStyle}>
      <Card.Body>
        <Card.Title>{thought.message}</Card.Title>
        <Card.Text>by {thought.author}</Card.Text>
      </Card.Body>
    </Card>
  );
}
// ./src/components/Thoughts.js

import Col from "react-bootstrap/Col";
import Row from "react-bootstrap/Row";
import Thought from "./Thought";

export default function Thoughts(props) {
  return (
    <Row>
      <Col xs={12}>
        <h2>Latest Thoughts</h2>
      </Col>
      {props.thoughts &&
        props.thoughts.map(thought => (
          <Col key={thought._id} xs={12} sm={6} md={4} lg={3}>
            <Thought thought={thought} />
          </Col>
        ))}
      {!props.thoughts && <Col xs={12}>Loading...</Col>}
    </Row>
  );
}
src/pages/index.jsを修正してAPI経由で取得するデータを表示します。
// ./src/pages/index.js

import Container from "react-bootstrap/Container";
import fetch from "isomorphic-fetch";
import Thoughts from "../components/Thoughts";

function Index(props) {
  return (
    <Container>
      <Thoughts thoughts={props.thoughts} />
    </Container>
  );
}

Index.getInitialProps = async ({ req }) => {
  const baseURL = req ? `${req.protocol}://${req.get("Host")}` : "";
  const res = await fetch(`${baseURL}/api/thoughts`);
  return {
    thoughts: await res.json()
  };
};

export default Index;
npm run devを実行してアプリケーションを起動しChromeでhttp://localhost:3000にアクセスします。画面が正常に表示されれば成功です。

src/components配下にNavbar.jsを、src/pages配下に_app.jsを作成してナビゲーションバーを追加します。
// ./src/components/Navbar.js

import Link from "next/link";
import Container from "react-bootstrap/Container";
import Navbar from "react-bootstrap/Navbar";
import Nav from "react-bootstrap/Nav";

export default function AppNavbar() {
  const navbarStyle = { marginBottom: "25px" };
  return (
    <Navbar bg="light" expand="lg" style={navbarStyle}>
      <Container>
        <Navbar.Brand>
          <Link href="/">
            <a>Thoughts!</a>
          </Link>
        </Navbar.Brand>
        <Navbar.Toggle aria-controls="basic-navbar-nav" />
        <Navbar.Collapse id="basic-navbar-nav">
          <Nav className="mr-auto">
            <Link href="/share-thought">
              <a className="nav-link">New Thought</a>
            </Link>
          </Nav>
        </Navbar.Collapse>
      </Container>
    </Navbar>
  );
}
// ./src/pages/_app.js

import React from "react";
import App, { Container as NextContainer } from "next/app";
import Head from "next/head";
import Container from "react-bootstrap/Container";
import Jumbotron from "react-bootstrap/Jumbotron";
import Navbar from "../components/Navbar";

class MyApp extends App {
  render() {
    const { Component, pageProps } = this.props;

    return (
      <NextContainer>
        <Head>
          <title>Thoughts!</title>
        </Head>
        <Navbar />
        <Container>
          <Jumbotron>
            <Component {...pageProps} />
          </Jumbotron>
        </Container>
      </NextContainer>
    );
  }
}

export default MyApp;
src/pages配下にshare-thought.jsを作成して新しいルートを定義します。
// ./src/pages/share-thought.js

import Form from "react-bootstrap/Form";
import Router from "next/router";
import Button from "react-bootstrap/Button";
import Container from "react-bootstrap/Container";
const { useState } = require("react");

export default function ShareThought() {
  const [message, setMessage] = useState("");

  async function submit(event) {
    event.preventDefault();
    await fetch("/api/thoughts", {
      method: "POST",
      headers: {
        "Content-Type": "application/json"
      },
      body: JSON.stringify({
        message
      })
    });
    Router.push("/");
  }

  return (
    <Container>
      <Form onSubmit={submit}>
        <Form.Group>
          <Form.Label>What is in your mind?</Form.Label>
          <Form.Control
            type="text"
            placeholder="Say something"
            onChange={e => setMessage(e.target.value)}
            value={message}
          />
        </Form.Group>
        <Button variant="primary" type="submit">
          Share
        </Button>
      </Form>
    </Container>
  );
}
npm run devを実行してアプリケーションを起動しChromeでhttp://localhost:3000/api/thoughtsにアクセスします。画面が正常に表示されれば成功です。

認証機能の組み込み
Auth0にログインしてテナントを作成します。この記事では詳細な手順は割愛しています。こちらをご参照お願いします。
作成したApplicationをAuth0に登録します。左のペインからApplicationsをクリックして+CREATE APPLICATIONを押します。

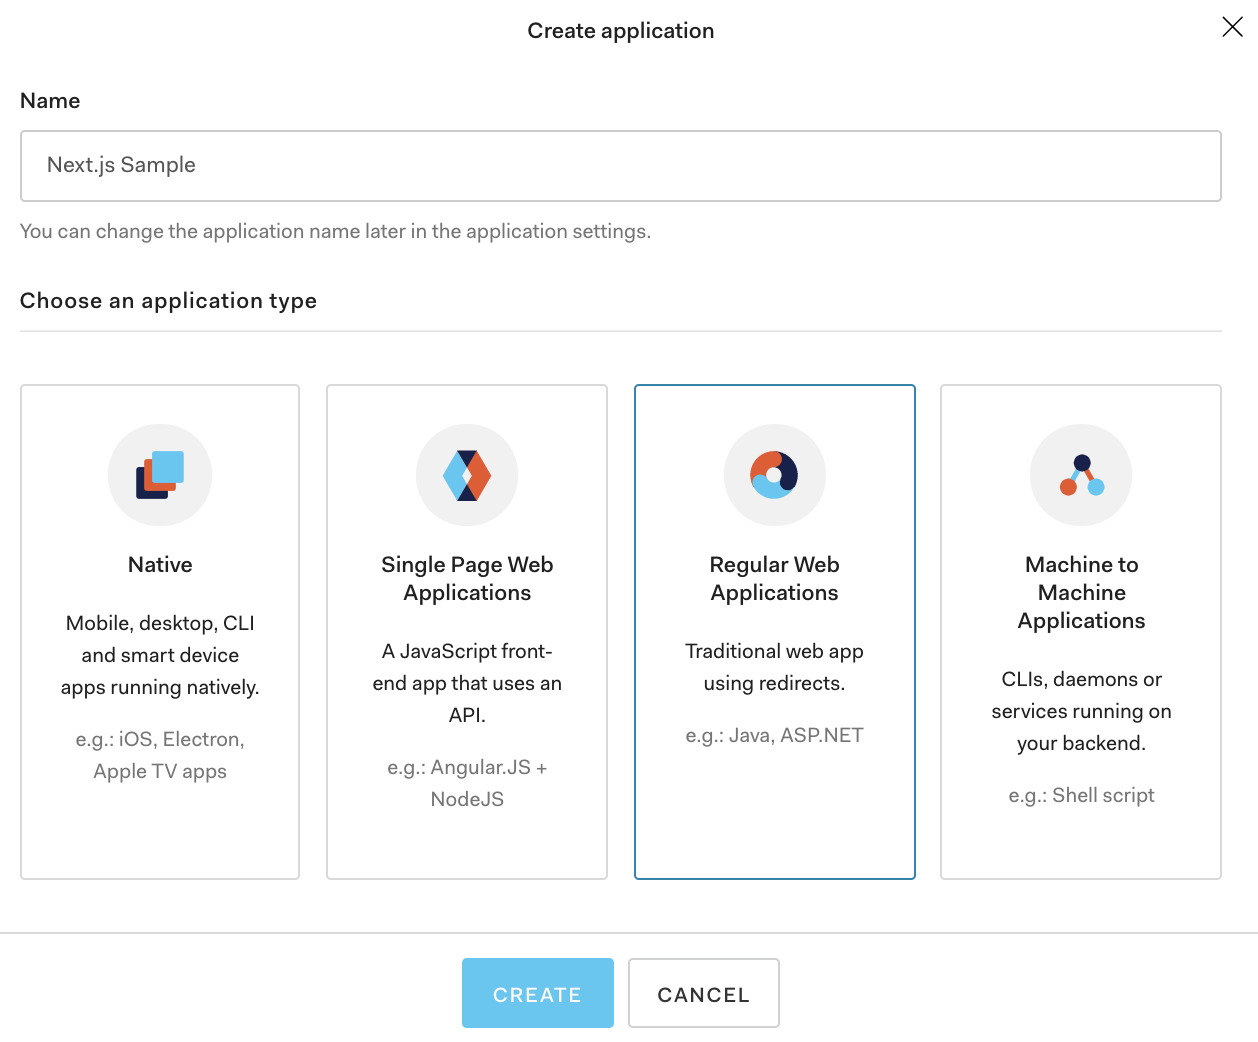
Nameに任意の名前を入力、Choose an application typeでRegular Web Applicationsを選択してCREATEを押します。

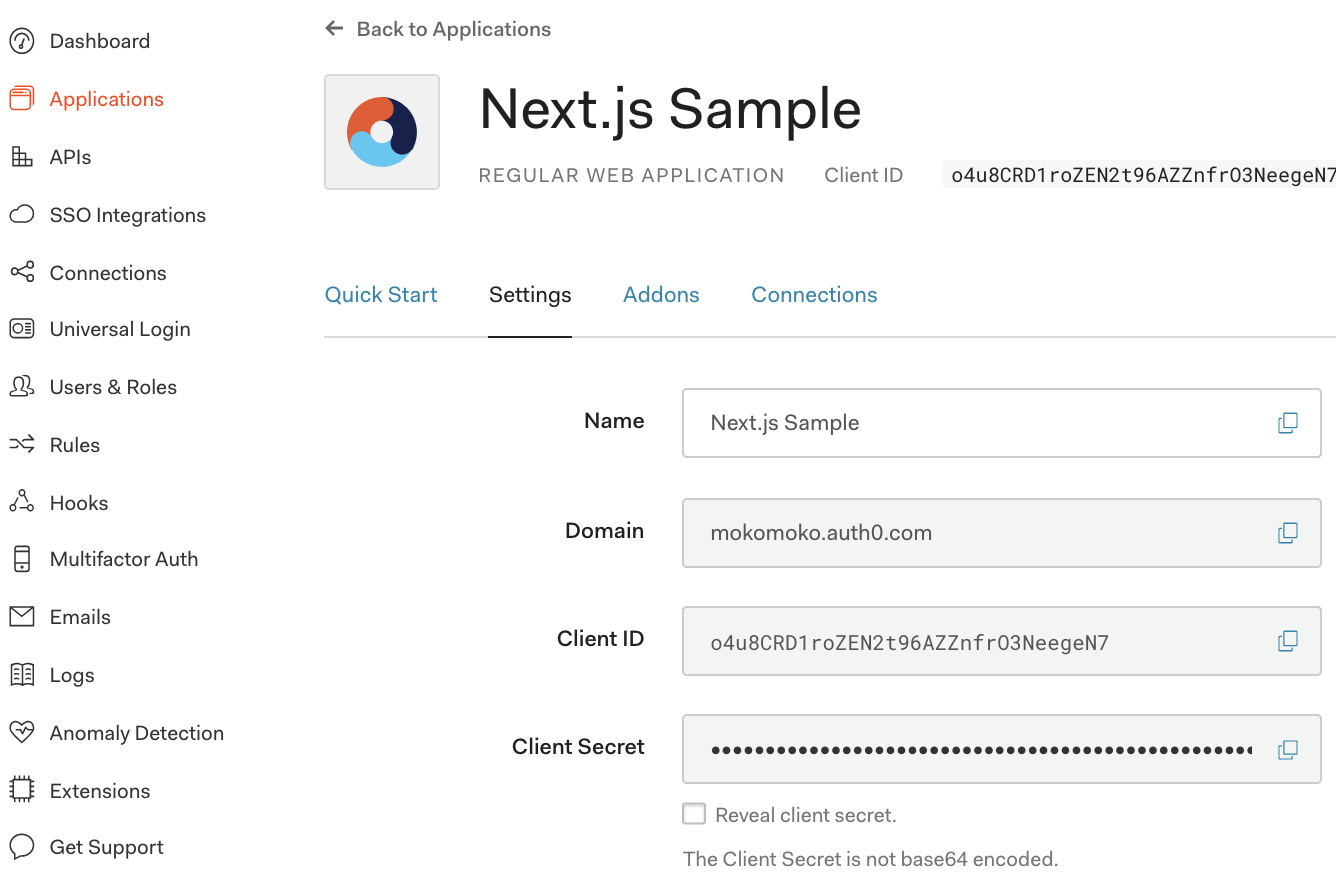
Login/Logout後にリダイレクトさせるURLを指定するため、Settingsタブを選択してAllowed Callback URLs, Allowed Logout URLsに下記の値を入力してSAVE CHANGESを押します。
-
Allowed Callback URLs :
http://localhost:3000/callback -
Allowed Logout URLs :
http://localhost:3000

必要なパッケージをインストールします。
$ npm install passport passport-auth0 express-session uid-safe
src配下のserver.jsを修正します。
// ./src/server.js

require("dotenv").config();
const express = require("express");
const http = require("http");
const next = require("next");
const session = require("express-session");
// 1 - importing dependencies
const passport = require("passport");
const Auth0Strategy = require("passport-auth0");
const uid = require('uid-safe');
const authRoutes = require("./auth-routes");
const thoughtsAPI = require("./thoughts-api");

const dev = process.env.NODE_ENV !== "production";
const app = next({
  dev,
  dir: "./src"
});
const handle = app.getRequestHandler();

app.prepare().then(() => {
  const server = express();

  // 2 - add session management to Express
  const sessionConfig = {
    secret: uid.sync(18),
    cookie: {
      maxAge: 86400 * 1000 // 24 hours in milliseconds
    },
    resave: false,
    saveUninitialized: true
  };
  server.use(session(sessionConfig));

  // 3 - configuring Auth0Strategy
  const auth0Strategy = new Auth0Strategy(
    {
      domain: process.env.AUTH0_DOMAIN,
      clientID: process.env.AUTH0_CLIENT_ID,
      clientSecret: process.env.AUTH0_CLIENT_SECRET,
      callbackURL: process.env.AUTH0_CALLBACK_URL
    },
    function(accessToken, refreshToken, extraParams, profile, done) {
      return done(null, profile);
    }
  );

  // 4 - configuring Passport
  passport.use(auth0Strategy);
  passport.serializeUser((user, done) => done(null, user));
  passport.deserializeUser((user, done) => done(null, user));

  // 5 - adding Passport and authentication routes
  server.use(passport.initialize());
  server.use(passport.session());
  server.use(authRoutes);

  server.use(thoughtsAPI);

  // 6 - you are restricting access to some routes
  const restrictAccess = (req, res, next) => {
    if (!req.isAuthenticated()) return res.redirect("/login");
    next();
  };

  server.use("/profile", restrictAccess);
  server.use("/share-thought", restrictAccess);

  // handling everything else with Next.js
  server.get("*", handle);

  http.createServer(server).listen(process.env.PORT, () => {
    console.log(`listening on port ${process.env.PORT}`);
  });
});
src配下にauth-routes.jsを作成して認証ルートを定義します。
// ./src/auth-routes.js

const express = require("express");
const passport = require("passport");

const router = express.Router();

router.get("/login", passport.authenticate("auth0", {
  scope: "openid email profile"
}), (req, res) => res.redirect("/"));

router.get("/callback", (req, res, next) => {
  passport.authenticate("auth0",  (err, user) => {
    if (err) return next(err);
    if (!user) return res.redirect("/login");
    req.logIn(user, (err) => {
      if (err) return next(err);
      res.redirect("/");
    });
  })(req, res, next);
});

router.get("/logout", (req, res) => {
  req.logout();

  const {AUTH0_DOMAIN, AUTH0_CLIENT_ID, BASE_URL} = process.env;
  res.redirect(`https://${AUTH0_DOMAIN}/logout?client_id=${AUTH0_CLIENT_ID}&returnTo=${BASE_URL}`);
});

module.exports = router;
.envに必要な環境変数を追加します。
PORT=3000
AUTH0_DOMAIN=mokomoko.auth0.com
AUTH0_CLIENT_ID=o4u8CRD1roZEN2t96AZZnfrO3NeegeN7
AUTH0_CLIENT_SECRET=...
AUTH0_CALLBACK_URL=http://localhost:3000/callback
BASE_URL=http://localhost:3000
AUTH0_DOMAIN, AUTH0_CLIENR_ID, AUTH0_CLIENT_SECRETはApplications->Settingsから確認できます。

src配下のthoughts-api.jsを修正します。
const bodyParser = require("body-parser");
const express = require("express");

const router = express.Router();

router.use(bodyParser.json());

const thoughts = [
  { _id: 123, message: "I love pepperoni pizza!", author: "unknown" },
  { _id: 456, message: "I'm watching Netflix.", author: "unknown" }
];

router.get("/api/thoughts", (req, res) => {
  const orderedThoughts = thoughts.sort((t1, t2) => t2._id - t1._id);
  res.send(orderedThoughts);
});

function ensureAuthenticated(req, res, next) {
  if (req.isAuthenticated()) return next();
  res.send(401);
}

router.post("/api/thoughts", ensureAuthenticated, (req, res) => {
  const { message } = req.body;
  const newThougth = {
    _id: new Date().getTime(),
    message,
    author: req.user.displayName
  };
  thoughts.push(newThougth);
  res.send({ message: "Thanks!" });
});

module.exports = router;
src/components配下のNavbar.jsを修正します。
// ./src/components/Navbar.js

import Link from "next/link";
import Container from "react-bootstrap/Container";
import Navbar from "react-bootstrap/Navbar";
import Nav from "react-bootstrap/Nav";

export default function AppNavbar({ user }) {
  const navbarStyle = { marginBottom: "25px" };
  return (
    <Navbar bg="light" expand="lg" style={navbarStyle}>
      <Container>
        <Navbar.Brand>
          <Link href="/">
            <a>Thoughts!</a>
          </Link>
        </Navbar.Brand>
        <Navbar.Toggle aria-controls="basic-navbar-nav" />
        <Navbar.Collapse id="basic-navbar-nav">
          <Nav className="mr-auto">
            {user && (
              <>
                <Link href="/share-thought">
                  <a className="nav-link">New Thought</a>
                </Link>
                <Link href="/profile">
                  <a className="nav-link">Profile</a>
                </Link>
                <Link href="/logout">
                  <a className="nav-link">Log Out</a>
                </Link>
              </>
            )}
            {!user && (
              <Link href="/login">
                <a className="nav-link">Log In</a>
              </Link>
            )}
          </Nav>
        </Navbar.Collapse>
      </Container>
    </Navbar>
  );
}
src/pages配下にprofile.jsを作成してユーザプロファイル画面を表示します。
// ./src/pages/profile.js

import styled from "styled-components";

const Picture = styled.img`
  border-radius: 50%;
  border: 3px solid white;
  width: 100px;
`;

function Profile({ user }) {
  return (
    <div>
      <h2>
        <Picture src={user.picture} alt={user.displayName} /> Hello, {user.displayName}
      </h2>
      <p>This is what we know about you:</p>
      <ul>
        { Object.keys(user).map(key => (
          <li key={key}>{key}: {user[key].toString()}</li>
        ))}
      </ul>
    </div>
  );
}

export default Profile;
src/pages配下の_app.jsを修正します。
// ./src/pages/_app.js

import React from "react";
import App, { Container as NextContainer } from "next/app";
import Head from "next/head";
import Container from "react-bootstrap/Container";
import Jumbotron from "react-bootstrap/Jumbotron";
import Navbar from "../components/Navbar";

class MyApp extends App {
  static async getInitialProps({ Component, ctx }) {
    let pageProps = {};
    if (Component.getInitialProps) {
      pageProps = await Component.getInitialProps(ctx);
    }
    if (ctx.req && ctx.req.session.passport) {
      pageProps.user = ctx.req.session.passport.user;
    }
    return { pageProps };
  }

  constructor(props) {
    super(props);
    this.state = {
      user: props.pageProps.user
    };
  }

  render() {
    const { Component, pageProps } = this.props;

    const props = {
      ...pageProps,
      user: this.state.user,
    };

    return (
      <NextContainer>
        <Head>
          <title>Thoughts!</title>
        </Head>
        <Navbar user={this.state.user} />
        <Container>
          <Jumbotron>
            <Component {...props} />
          </Jumbotron>
        </Container>
      </NextContainer>
    );
  }
}

export default MyApp;
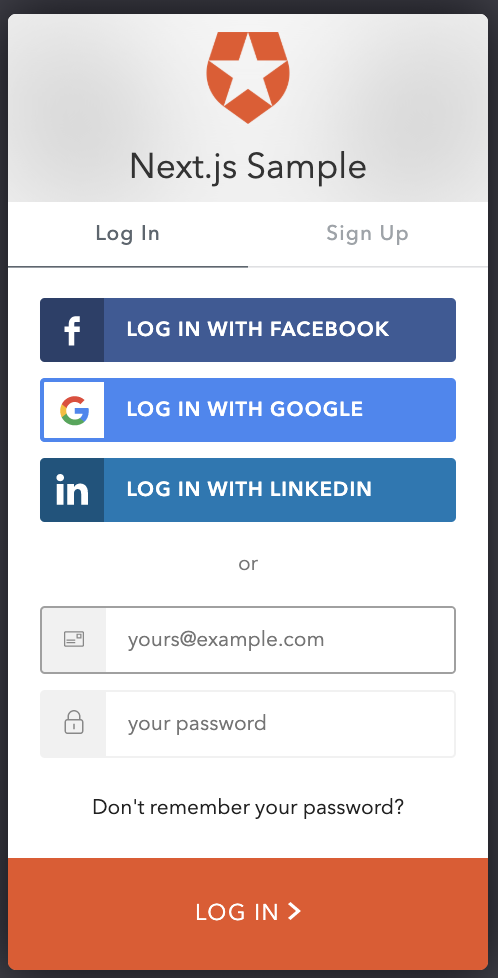
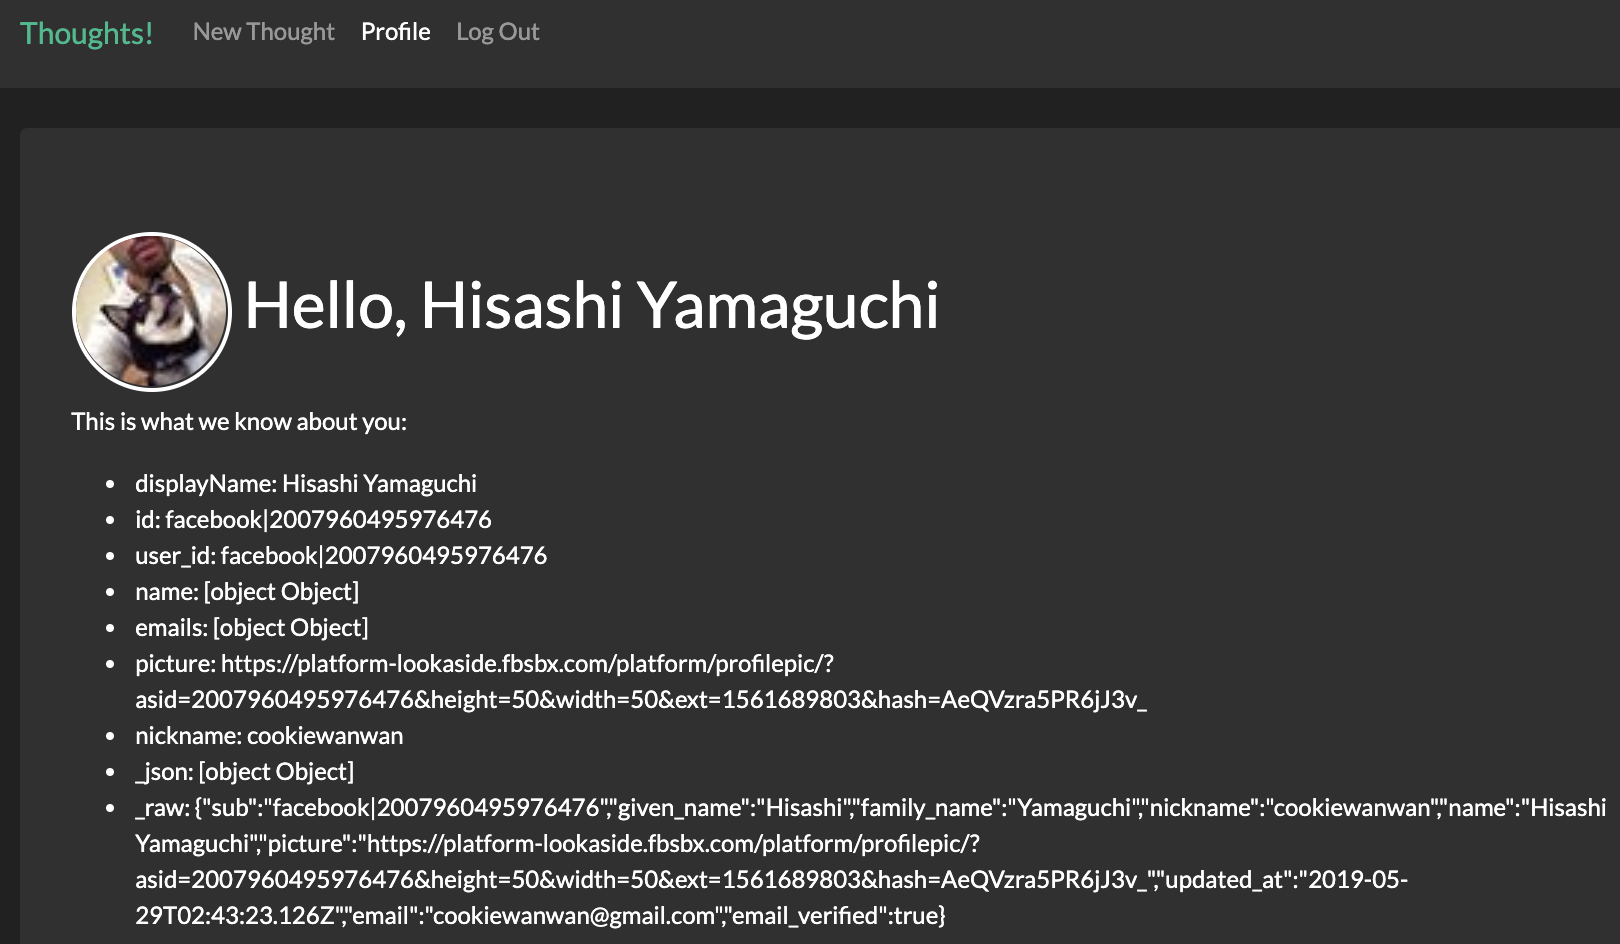
npm run devを実行してアプリケーションを起動しChromeでhttp://localhost:3000にアクセスします。Auth0の組み込みLogin画面が表示されて、ログイン後Profileタブをクリックしてユーザプロファイル正常に表示されてれば成功です。


おわりです。