こんにちは。
この記事は Next.js Advent Calendar 2019 11日目の記事です。
Next.js Advent Calendar 2019 に誘ってくださり、飛び入り参加でも快く受け入れてくださった @tkdn さん、ありがとうございました!!
皆さんは、普段Webアプリを公開する場合どこで公開していますか?
Next.jsなら zeit now でしょうか。
Netlify? Firebase hosting?
この辺りは、知見が充実していそうですね。
私はAzureが結構好きなのですが
Next.jsをAzureで公開するにはどうするのがいいか、
調べても日本語の記事があまりなかったので、英語の記事を見ながらやってみました。
今回Webアプリを公開するために使用する Azure Web Apps はこちらですね。
AzureのPaasという扱いになります。
Next.jsのプロジェクトを作成する
まずはプロジェクトを作成します。
これはなんでもいいんですけど、この時はAzureに置くことは考えてなくて
FizzBuzz書いたことなかったな〜書いてみよっかな〜くらいの気持ちでプロジェクトを作成しました。
# nodeのバージョンは、Azure側と合わせる必要があると言われています。
# うまくいかない場合は、合わせてみてください。(私はズレたままやっちゃいました)
$ node -v
v10.16.0

# プロジェクトの作成。別にtypescriptじゃなくてもいいです。
$ npx create-next-app --example with-typescript next-fizzbuzz

# 一応ローカルで起動するかどうかの確認
$ cd next-fizzbuzz
$ npm i ; npm run dev
ローカルで起動することが確認できたら、
githubにあげましょう。
Azure Web Appsを作成する
Azureのリソースの作成からWebアプリを選びます。
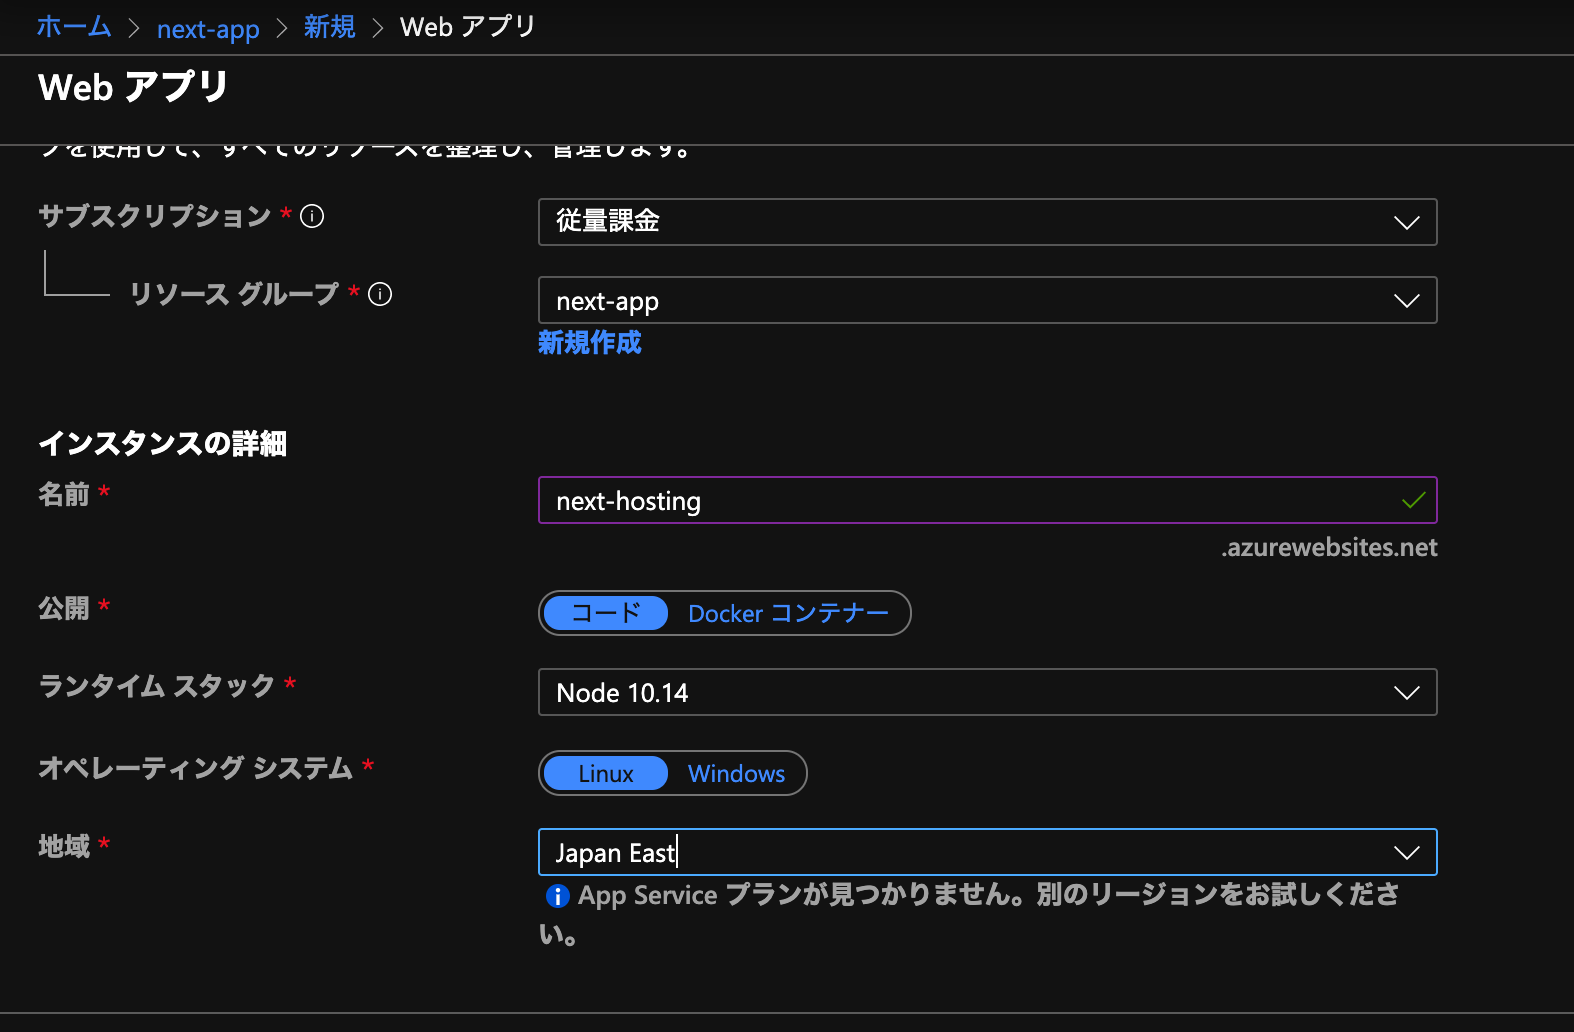
- リソースグループ
- わかりやすいものを新規作成から作ってください。(既存のものを使ってもいいです)
- 名前
- なんでもいいです。グローバルで一意になっている必要があるはず
- 公開
- コードにしてください
- ランタイムスタック
- Node 10.14(新しめのものを選んでます)
- オペレーティングシステム
- Linux
- 地域
- Japan East
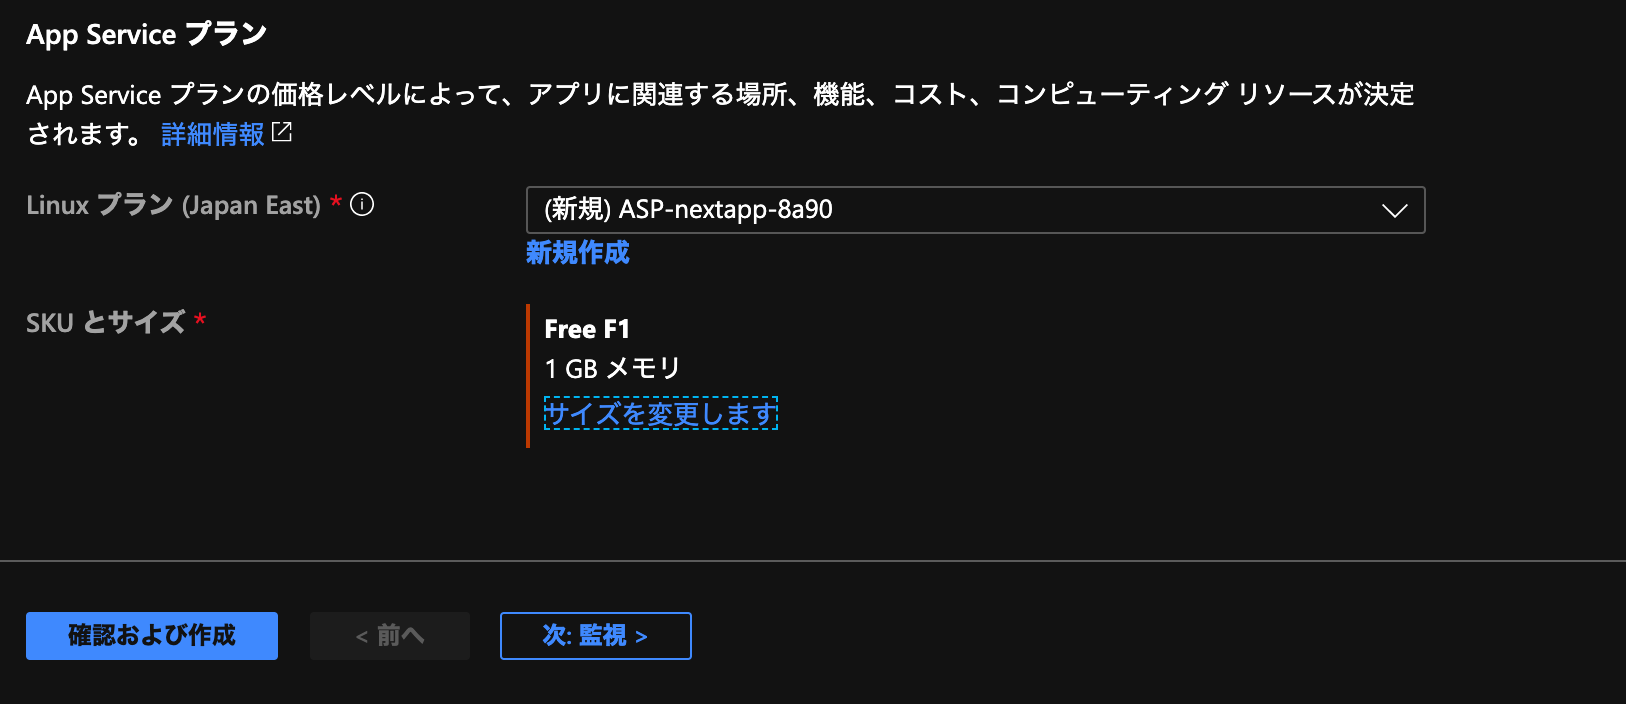
プランはデフォルトは課金されるプランになっているはずですが
しっかりとF1(無料)のプランにしておきましょう。
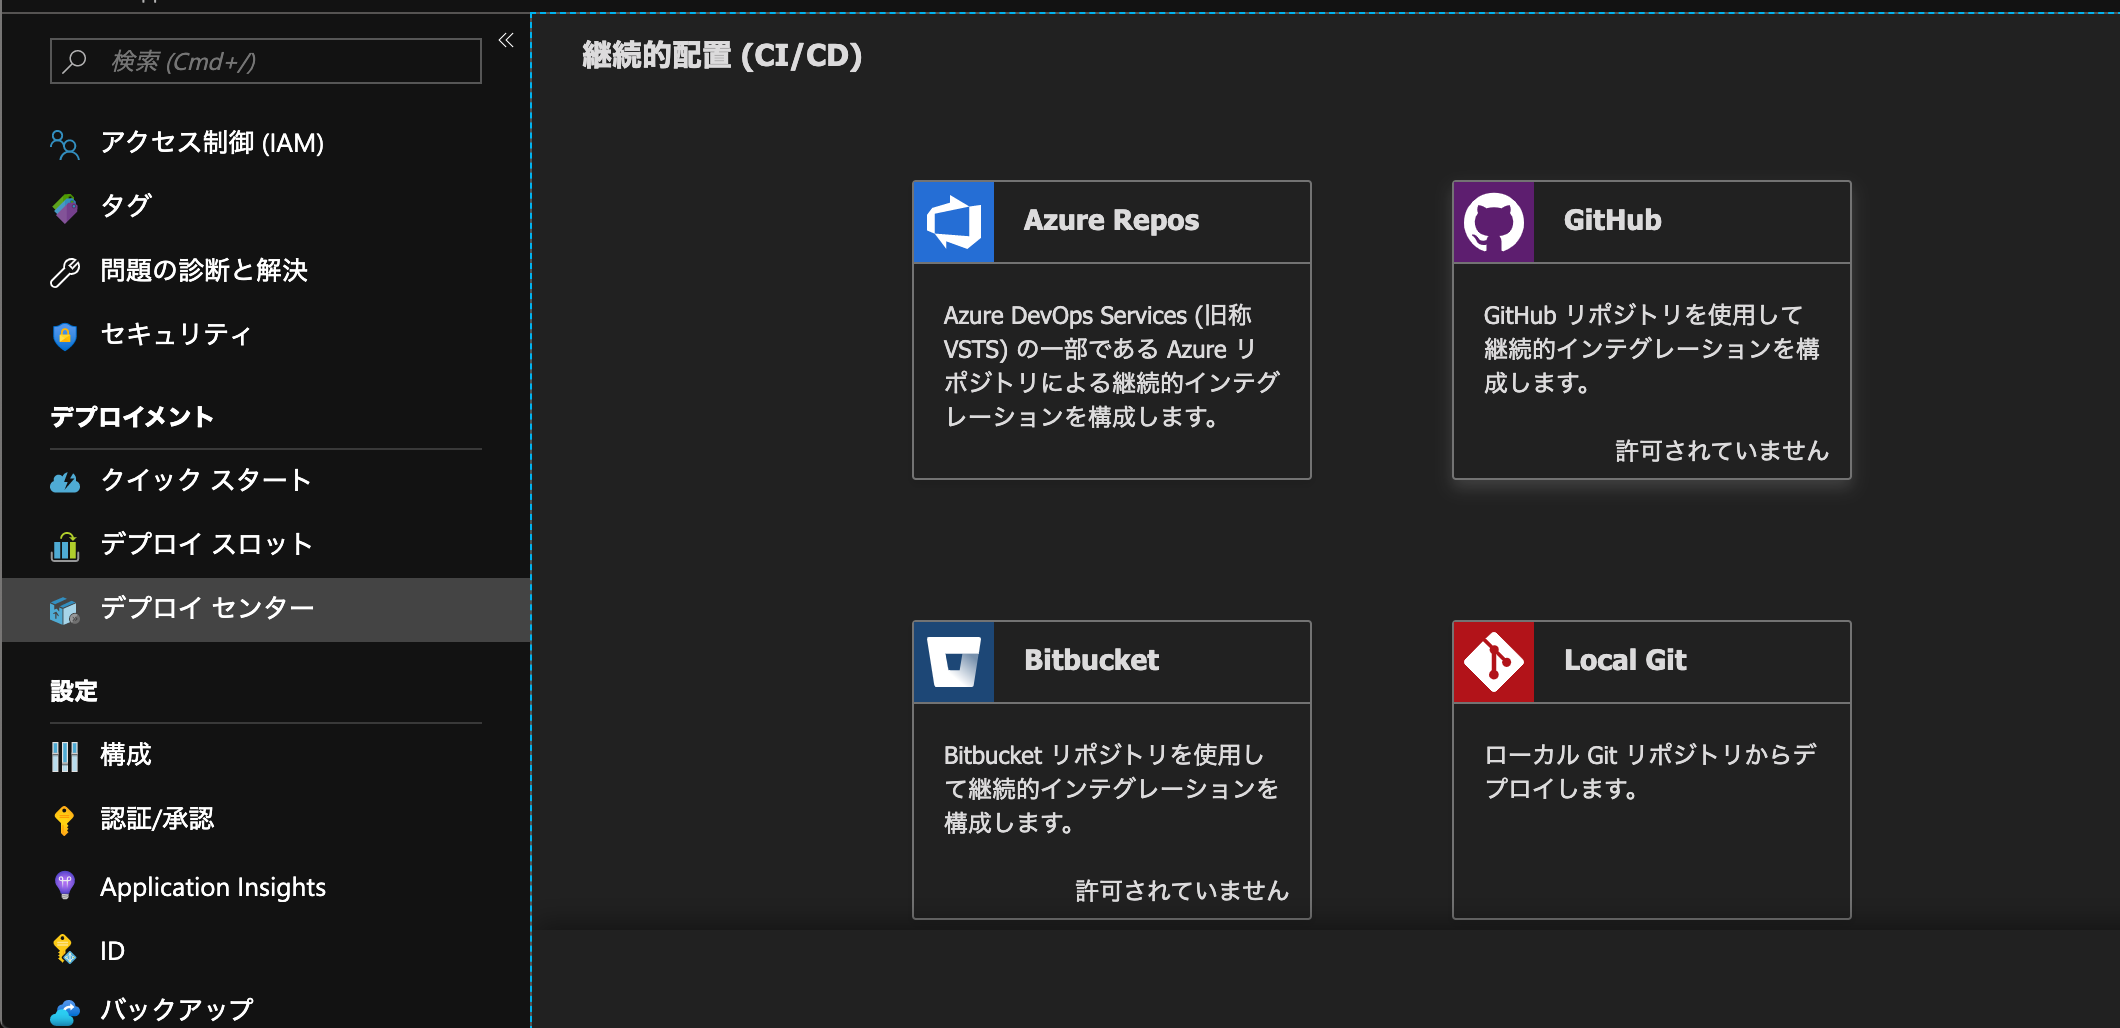
Web Appsにコードをデプロイする
Web Apps自体を作成し終えたら、Web Appsを開き、デプロイセンターをクリック
今回はGitHubからデプロイしたいのでGitHubを選択します。
画像のように「許可されていません」と出ている場合は、クリックするとGitHubとの連携画面に遷移するかと思います。
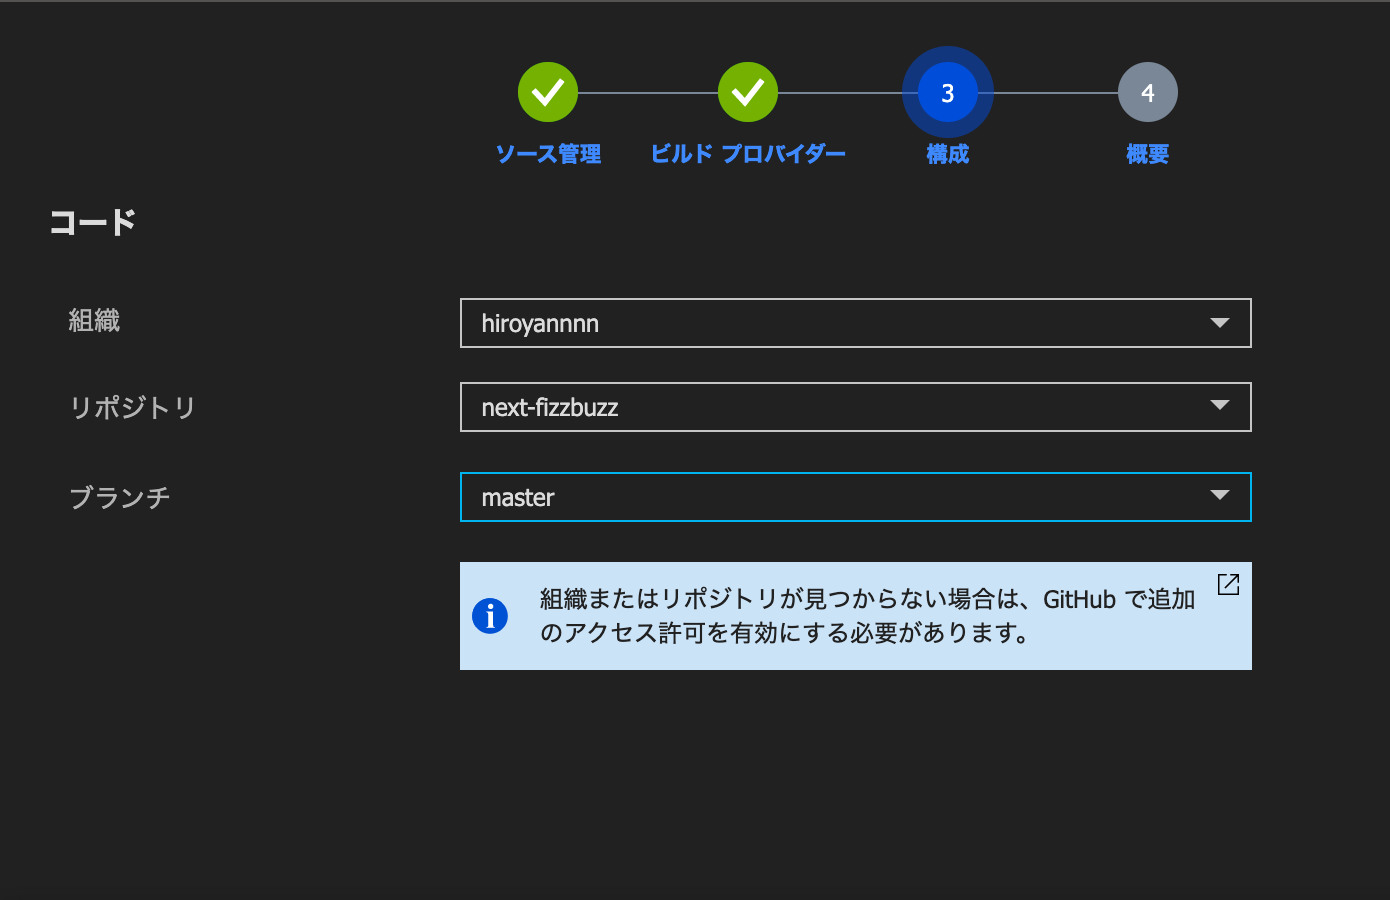
プレビュー版ですが、Azure Pipelines(DevOps)の方を選択しましょう。

組織・リポジトリ・ブランチを選択してください。
ビルド以下
Azure DevOps組織は、よくわかってないですが、
最初は新規でやりました。
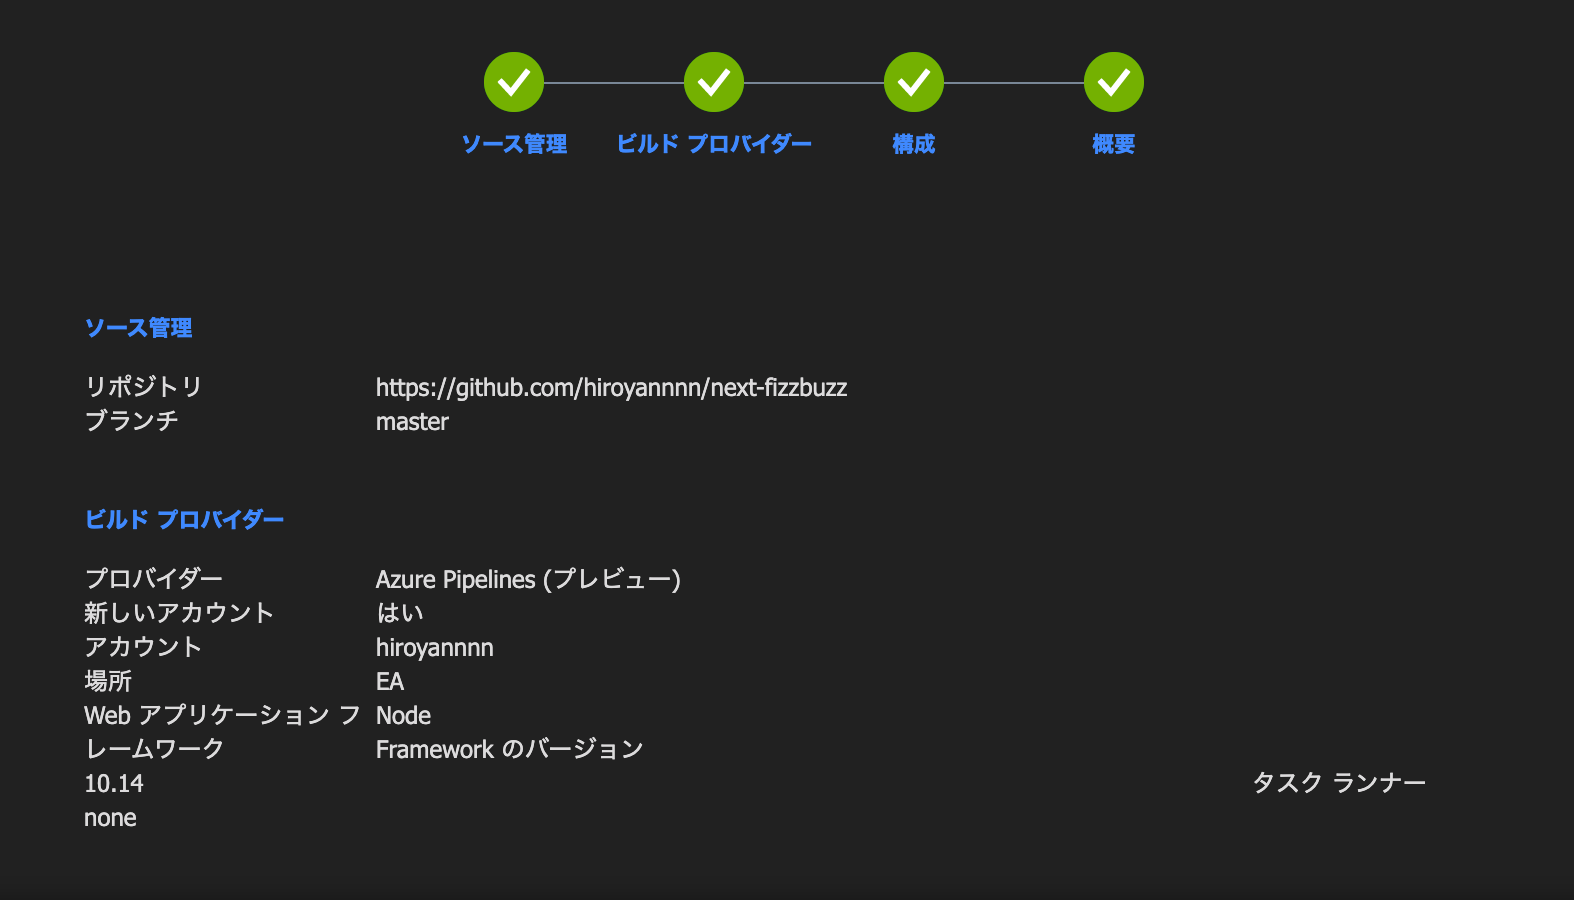
そして以下を入力
- Webアプリケーションフレームワーク
- Node.JS
- version
- 10.14
- タスクランナー
- None
- スタートアップコマンド
- npm start

作成確認画面
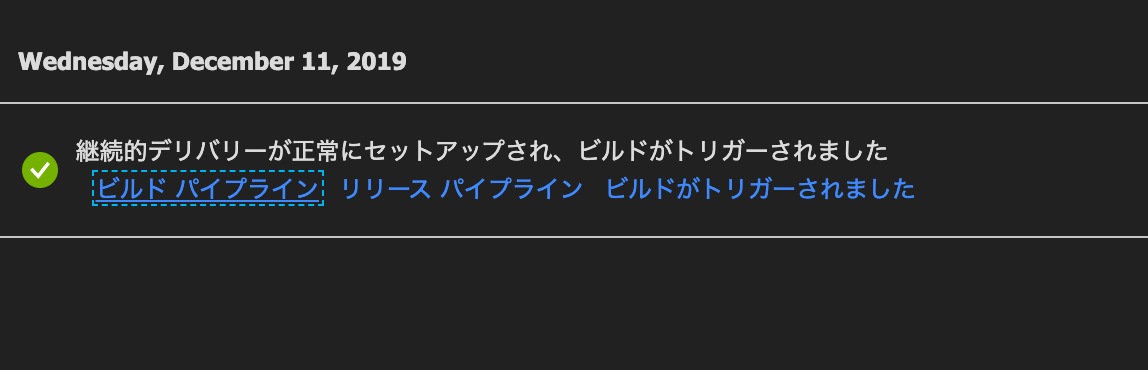
Azure Pipelinesの設定
設定が終わると、ビルドパイプラインの表示が出るので、クリックします。
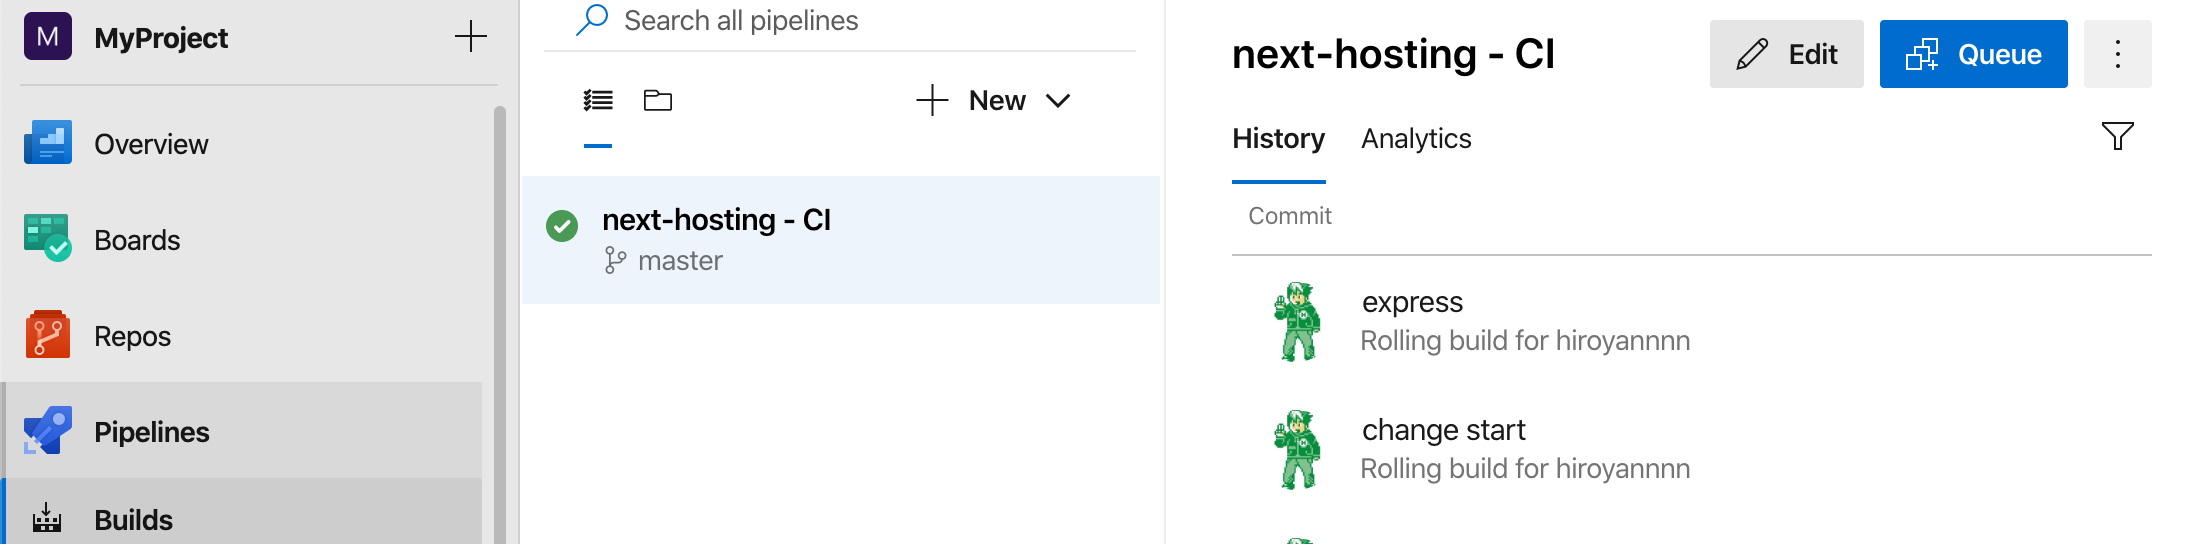
ビルドパイプラインの画面。
Azure Pipelinesを初めて使う場合は、ユーザー名の指定とかあるかと思いますが、
この画面はその後の画面です。
画面右側の方に「Edit」があるので、クリックします。
デフォルトでnpmがいると思うので、
npm command のところが installになっていることを確認します。
他は特に変更してないはず。
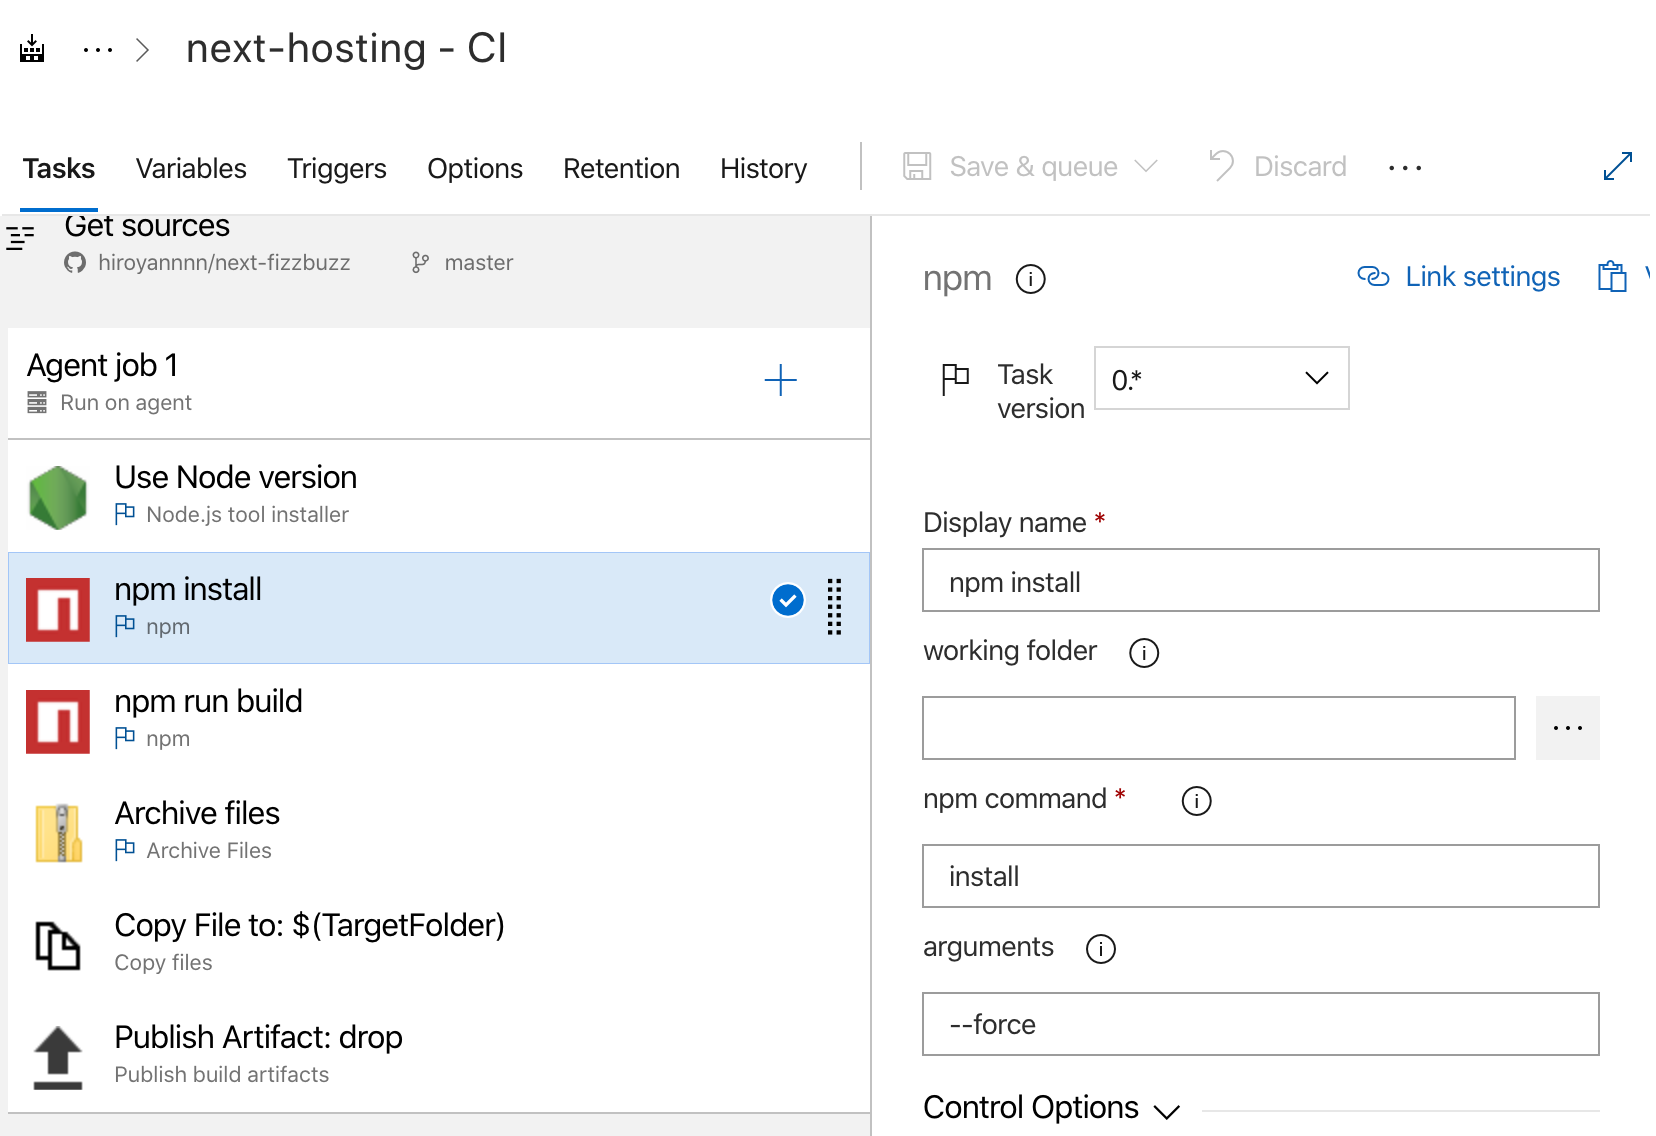
で npm installを右クリック→clone task(s)して npm run buildのタスクを作成します。
npm run buildのタスクは、
npm commandを run にして
arguments に build を入れます。
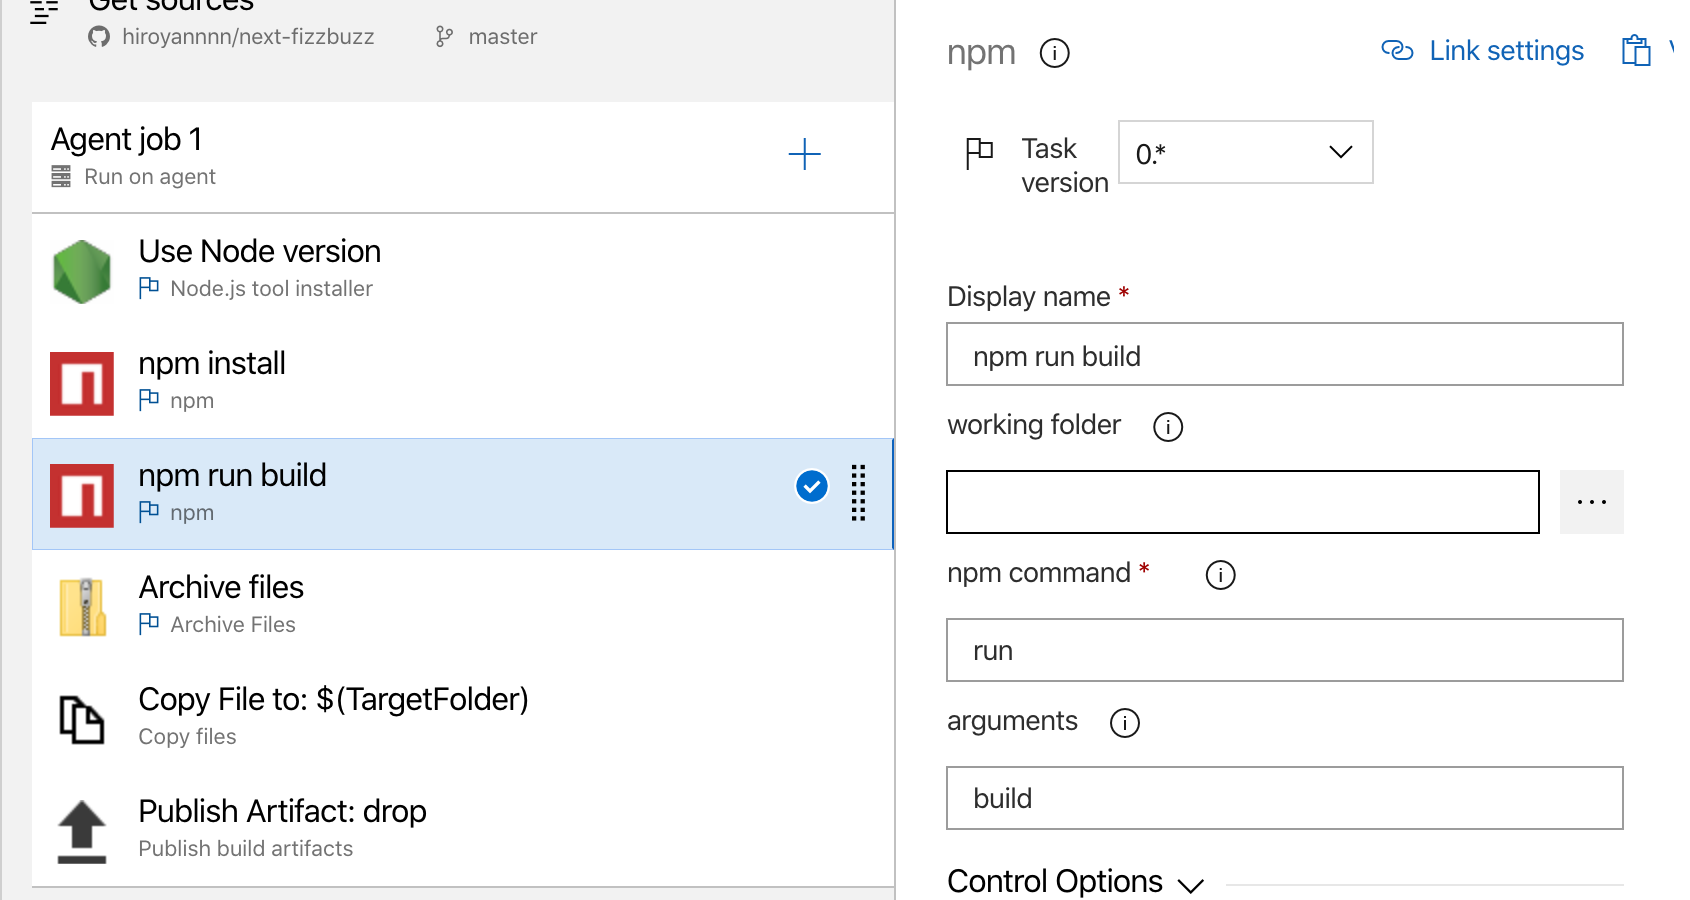
他のタスクは特に弄らず。
これでbuildの設定ができました。
右上のSave&Queueから保存して、
run させてみると、ターミナルで動く様がみれたりします。
これでweb appsのURL叩いてみると・・・見れない。
何かがおかしいとググってみると
こんな動画を発見しました。
いくつか設定を変えてみる
基本的にはここからファイルを持ってくるだけです。
web.configを新規作成
<?xml version="1.0" encoding="utf-8"?>
<!--
     This configuration file is required if iisnode is used to run node processes behind
     IIS or IIS Express.  For more information, visit:

     https://github.com/tjanczuk/iisnode/blob/master/src/samples/configuration/web.config
-->

<configuration>
  <system.webServer>
    <!-- Visit http://blogs.msdn.com/b/windowsazure/archive/2013/11/14/introduction-to-websockets-on-windows-azure-web-sites.aspx for more information on WebSocket support -->
    <webSocket enabled="false" />
    <handlers>
      <!-- Indicates that the server.js file is a node.js site to be handled by the iisnode module -->
      <add name="iisnode" path="server.js" verb="*" modules="iisnode"/>
    </handlers>
    <rewrite>
      <rules>
        <!-- Do not interfere with requests for node-inspector debugging -->
        <rule name="NodeInspector" patternSyntax="ECMAScript" stopProcessing="true">
          <match url="^server.js\/debug[\/]?" />
        </rule>

        <!-- First we consider whether the incoming URL matches a physical file in the /public folder -->
        <rule name="StaticContent">
          <action type="Rewrite" url="public{REQUEST_URI}"/>
        </rule>

        <!-- All other URLs are mapped to the node.js site entry point -->
        <rule name="DynamicContent">
          <conditions>
            <add input="{REQUEST_FILENAME}" matchType="IsFile" negate="True"/>
          </conditions>
          <action type="Rewrite" url="server.js"/>
        </rule>
      </rules>
    </rewrite>

    <!-- 'bin' directory has no special meaning in node.js and apps can be placed in it -->
    <security>
      <requestFiltering>
        <hiddenSegments>
          <remove segment="bin"/>
        </hiddenSegments>
      </requestFiltering>
    </security>

    <!-- Make sure error responses are left untouched -->
    <httpErrors existingResponse="PassThrough" />

    <!--
      You can control how Node is hosted within IIS using the following options:
        * watchedFiles: semi-colon separated list of files that will be watched for changes to restart the server
        * node_env: will be propagated to node as NODE_ENV environment variable
        * debuggingEnabled - controls whether the built-in debugger is enabled

      See https://github.com/tjanczuk/iisnode/blob/master/src/samples/configuration/web.config for a full list of options
    -->
    <!--<iisnode watchedFiles="web.config;*.js"/>-->
  </system.webServer>
</configuration>
server.js を新規作成
const express = require('express')
const next = require('next')

const dev = process.env.NODE_ENV !== 'production'
const port = process.env.PORT || 3000
const app = next({ dev })
const handle = app.getRequestHandler()

app.prepare()
.then(() => {
  const server = express()

  server.get('/p/:id', (req, res) => {
    const actualPage = '/post'
    const queryParams = { title: req.params.id }
    app.render(req, res, actualPage, queryParams)
  })

  server.get('*', (req, res) => {
    return handle(req, res)
  })

  server.listen(port, (err) => {
    if (err) throw err
    console.log('> Ready on http://localhost:' + port)
  })
})
.catch((ex) => {
  console.error(ex.stack)
  process.exit(1)
})
package.json の変更
- startコマンドを
node server.jsに変更 - dependencies に expressを追加
{
  "name": "with-typescript",
  "version": "1.0.0",
  "scripts": {
    "dev": "next",
    "build": "next build",
    "start": "node server.js",
    "type-check": "tsc"
  },
  "dependencies": {
    "express": "^4.17.1",
    "isomorphic-unfetch": "3.0.0",
    "next": "latest",
    "react": "^16.10.1",
    "react-dom": "^16.10.1"
  },
  "devDependencies": {
    "@types/node": "^12.7.8",
    "@types/react": "^16.9.3",
    "@types/react-dom": "^16.9.1",
    "typescript": "3.6.3"
  },
  "license": "ISC"
}
これらをcommit -> GitHubにpush
Azure Pipelinesを設定しているので、
GitHub上のmasterブランチに反映されれば、自動でCI/CDが動いて、
Azure Web Appsにデプロイされます。
アクセスしてみる
SSRされたNext.jsのページが表示されました。
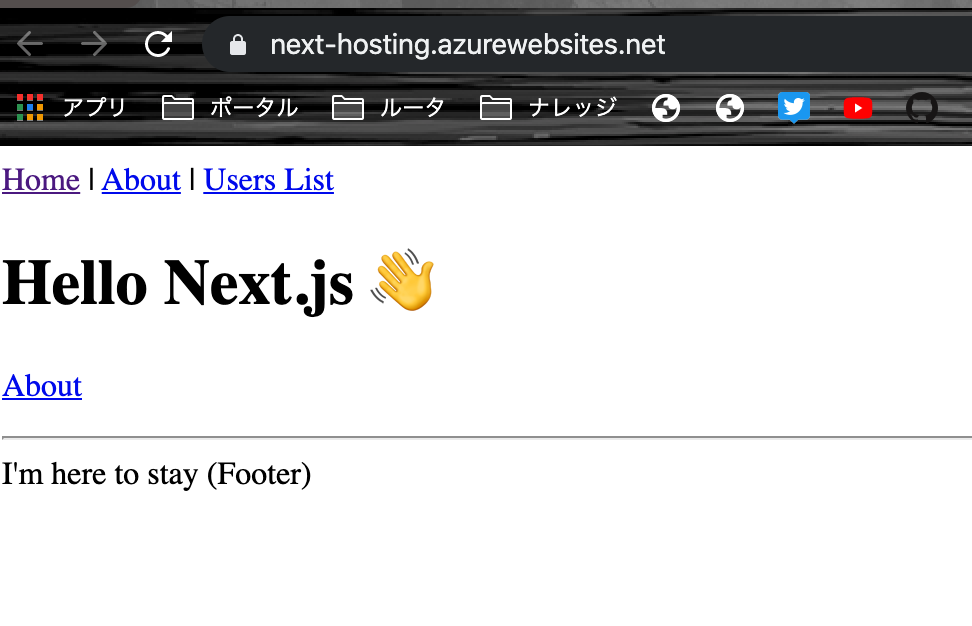
UserListのページだけうまく表示できないので、api周りはまたもうちょっと設定が必要なのかな?(server.jsのルーティング周りかな?)
もう少しみてみます!
振り返り
Next.jsをさくっと公開するなら、 nowが一番楽だと思いますが、
Azure Pipelinesを使用して DevOpsを意識したやり方も悪くないかもなと思いました。