
概要
Firebased上で家計簿のwebアプリを作成した時に利用した、FirebaseUIとFirebaseAuthを使ってログイン作ってみたので、そのメモ
- vue-cli3を利用して、シングルページアプリケーション(SPA)で作成してます。
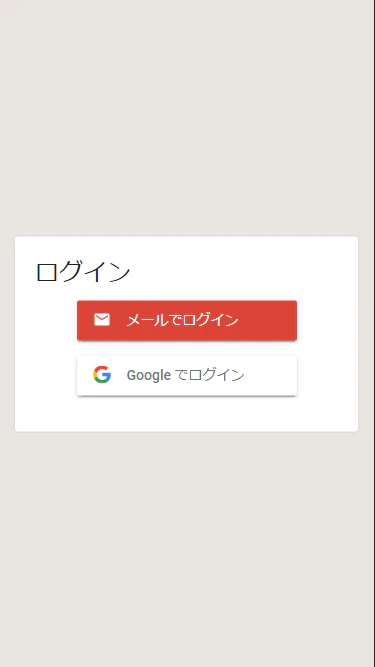
今回作った画面
スマートフォンを意識したので、PCで見るともっとダサい
npm モジュール インストール
下記の「npm モジュール」が必要なのでインストールしてください。
npm install firebase --save
npm install firebaseui --save
npm install firebaseui-ja --save
初期設置
「main.ts」でインポートしました。Firebaseの初期化もここで行いました。
\src\main.ts
import Vue from 'vue';
import BootstrapVue from "bootstrap-vue";
import App from './App.vue'

//追加(Firebaseの初期化用)
import FirebaseApp from "./plugins/firebaseApp";

import './registerServiceWorker'
import router from './router'
import store from './store'

//追加
import "firebaseui-ja/dist/firebaseui.css";

//追加(Firebaseの初期化用)
FirebaseApp.init();

Vue.config.productionTip = false

new Vue({
  router,
  store,
  render: h => h(App)
}).$mount('#app')
Firebaseの初期化
\src\0plugins\firebaseApp.ts
import firebase from "@firebase/app";

// Initialize Firebase ここはプロジェクトごとに変更する。
var firebaseConfig = {
  apiKey: "api-key",
  authDomain: "project-id.firebaseapp.com",
  databaseURL: "https://project-id.firebaseio.com",
  projectId: "project-id",
  storageBucket: "project-id.appspot.com",
  messagingSenderId: "sender-id",
  appID: "app-id",
};
export default {
  init() {
    firebase.initializeApp(config);
  },
};
画面ソース
bootstrap-vueを使っているため、いろいろと入ってますが重要なのは、
「<div id="firebaseui-auth-container"></div>」です。
\src\views\Login.vue
<template>
  <div class="Login">
    <b-container fluid>
      <b-card title="ログイン" >
        <div id="firebaseui-auth-container"></div>
      </b-card>
    </b-container>
  </div>
</template>

<script lang="ts">
import { Component , Vue } from 'vue-property-decorator';
import firebase from "firebase";
import firebaseui from "firebaseui-ja";
import store from "../store";

@Component
export default class Login extends Vue{

  public mounted()  {
    // FirebaseUIインスタンス初期化
    const ui = firebaseui.auth.AuthUI.getInstance() || new firebaseui.auth.AuthUI(firebase.auth());
    firebase.auth().setPersistence(firebase.auth.Auth.Persistence.LOCAL);

    // FirebaseUIの各種設定
    const uiConfig: firebaseui.auth.Config = {
      callbacks: {
        signInSuccessWithAuthResult: (authResult) => {
          //console.info(authResult.user.uid);

          //routerでログイン成功後に別ページへ飛ばしている。
          this.$router.push('/');

          //storeでログイン管理
          store.commit('onAuthStateChanged',authResult.user);
          store.commit('onUserStatusChanged',authResult.user.uid? true:false);
          return false;
        },
      },
      signInSuccessUrl : "http://localhost:8080/",//ローカルテスト用
      signInOptions: [
        // サポートするプロバイダを指定
        firebase.auth.EmailAuthProvider.PROVIDER_ID,
        firebase.auth.GoogleAuthProvider.PROVIDER_ID,
      ],
      // Terms of service url.(サービス利用規約ページの)
      tosUrl: '',
      //アカウント選択を行う画面の防止
      credentialHelper: firebaseui.auth.CredentialHelper.NONE
    };

    // FirebaseUI描画開始
    ui.start('#firebaseui-auth-container', uiConfig );

  }
}
</script>

<style lang="scss" scoped>
.container-fluid{
  width : 100%;
  position: absolute;
  top: 50%;
  -webkit-transform : translate(0%,-50%);
  transform : translate(0%,-50%);
}
</style>
作ってみて
TypeScriptの書き方に慣れなくて、最初は型の指定が上手く行かなかったりしたが、何とか実装することができた。
特に「callbacks」の実装が大変でした。それ以外はFirebaseAuthが分かっていれば何とかなるかと。