はじめに
今日はフロントエンドの設定を行います。
フロントエンドをDjangoと独立させてマネジメントできるようにwebpackを追加する
一先ず、今後どうなるかは分かりませんがRails5の開発と同じくバックエンドとフロントエンドでそれぞれの別に、独立したマネジメントツールで運用したいため、Djangoにもwebpackをインストールする事にします。
以前、npmマネージャーからwebpackをインストールしていましたが、今回はyarnマネージャーからインストールする事にします。
% sudo pkg update
% sudo pkg install yarn
なお、Djangoでwebpackを読み込むためにjango-webpack-loaderと言うWrapperを使います。
こちらは、webpack-bundle-trackerによって生成された出力ファイルをDjangoで使えるようにします。
また、今回はフロントエンドはbootstrap-vueを使う訳なのですが、それに伴いJavaScriptからcssをimportできるように、各ローダを一緒にインストールしておきます。
webpack, vue-bootstrapをインストール
% yarn add --dev webpack
% yarn add --dev bootstrap-vue
% yarn add --dev webpack-bundle-tracker css-loader style-loader babel-loader @babel/core vue
では、webpack.config.jsの設定を行なっていきましょう。
webpack.config.jsの設定
var path = require('path')
var BundleTracker = require('webpack-bundle-tracker')

module.exports = {
    entry: './frontend/packs/application.js',
    output: {
      path: path.resolve(__dirname, './public/bundles/'),
      filename: "[name]-[hash].js",
    },
    plugins: [
      new BundleTracker({filename: './webpack-stats.json'})
    ],
    module: {
        rules: [
            {
                test: /\.js$/,
                include: [ // use `include` vs `exclude` to white-list vs black-list
                    path.resolve(__dirname, "node_modules"), // white-list your app source files
                    require.resolve("bootstrap-vue"), // white-list bootstrap-vue
                ],
                loader: "babel-loader"
            },
            {
                test: /\.css$/,
                use: ['style-loader', 'css-loader']
            }
        ]
    }
}
エントリーポイントのapplication.jsを編集
application.jsでbootstrap-vueをimportするように記述します。ついでに必要なディレクトリを作成していきます。
% mkdir -p frontend/packs
% mkdir -p public/bundles
import Vue from 'vue'
import BootstrapVue from 'bootstrap-vue'

Vue.use(BootstrapVue);

import 'bootstrap/dist/css/bootstrap.css'
import 'bootstrap-vue/dist/bootstrap-vue.css'
以上で、development環境でwebpackのコンパイルを行います。
% ./node_modules/.bin/webpack --config webpack.config.js --mode=development
続いてはDjango側の設定です。
Djangoのwebpack設定
pipでdjango-webpack-loaderをインストールします。その後、Djangoのsettings.pyを以下のように設定してあげましょう。
% pip install django-webpack-loader
STATICFILES_DIRS = (
    os.path.join(BASE_DIR, 'public'),
)
WEBPACK_LOADER = {
    'DEFAULT': {
        'BUNDLE_DIR_NAME': 'bundles/',
        'STATS_FILE': os.path.join(BASE_DIR, 'webpack-stats.json'),
    }
}
INSTALLED_APPS = [
    'django.contrib.admin',
    'django.contrib.auth',
    'django.contrib.contenttypes',
    'django.contrib.sessions',
    'django.contrib.messages',
    'django.contrib.staticfiles',
    'webpack_loader',
]
テンプレートエンジンでwebpack_loaderとコンパイルしたmain.jsを読み込めるようにします。
{% load render_bundle from webpack_loader %}
<!DOCTYPE html>
<html lang="ja">
  <head>
    <meta charset="utf-8">
    <title>{% block title %}Django Auth Tutorial{% endblock %}</title>
      {% render_bundle 'main' %}
  </head>
  <body>
    <main>
      {% block content %}
      {% endblock %}
    </main>
  </body>
</html>
ログイン画面改善
webpackによるコンパイルが完了したので、BootStrapでログイン画面のデザインを改良してきましょう。下記のテンプレートを参考にします。
https://getbootstrap.com/docs/4.0/examples/sign-in/
html,
body {
  height: 100%;
}

body {
  display: -ms-flexbox;
  display: flex;
  -ms-flex-align: center;
  align-items: center;
  padding-top: 40px;
  padding-bottom: 40px;
  background-color: #f5f5f5;
}

.form-signin {
  width: 100%;
  max-width: 330px;
  padding: 15px;
  margin: auto;
}
.form-signin .checkbox {
  font-weight: 400;
}
.form-signin .form-control {
  position: relative;
  box-sizing: border-box;
  height: auto;
  padding: 10px;
  font-size: 16px;
}
.form-signin .form-control:focus {
  z-index: 2;
}
.form-signin input[type="email"] {
  margin-bottom: -1px;
  border-bottom-right-radius: 0;
  border-bottom-left-radius: 0;
}
.form-signin input[type="password"] {
  margin-bottom: 10px;
  border-top-left-radius: 0;
  border-top-right-radius: 0;
}
import Vue from 'vue'
import BootstrapVue from 'bootstrap-vue'

Vue.use(BootstrapVue);

import 'bootstrap/dist/css/bootstrap.css'
import 'bootstrap-vue/dist/bootstrap-vue.css'
import '../css/login.css'
{% extends 'application.html' %}

{% block title %}Login{% endblock %}
{% block content %}
<form method="post" class="form-signin">
  <h1 class="h3 mb-3 font-weight-normal"">ログイン画面</h1>
  {% csrf_token %}
  {{ form.as_p }}
  <button class="btn btn-lg btn-primary btn-block" type="submit">ログイン</button>
</form>
{% endblock %}
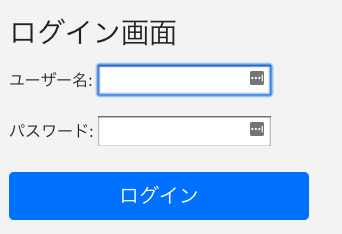
以上の設定でログイン画面を実装できました。
まとめ
ログイン画面の画面がようやくリッチ(?)になりました。ただし、よく見てもらうと、form.as_pで展開しているフォーム部分にclass指定をしていないため、後々loginのviewをカスタマイズする必要があります。
ですが、そろそろ中身の実装に行きたいので、今回はここまで。
