InterfaceBuilderで、SmartNewsのような動的レイアウトを作る方法です。
SmartNews | 話題のニュースがサクサク読めるスマホアプリ
完成イメージ
こういった画面を目指します。
(サムネ画像はとりあえずのサンプル画像)
アプリ設計の構想
Interface Builderを使って作ります。
UIViewControllerをベースにして、
- UIView → タイトルバー(Beaunosy)
- UIView → アップデート日時バー(5/26(日) 20:54 発行)
- UITableView → 記事レイアウト部分
という構成です。
記事レイアウト部分の設計
上述した通りUITableViewがベースです。このテーブルビューに読み込ませるセルを動的にします。動的といっても単に複数のxibファイルを用意し、それを順番に読みこませるだけです。
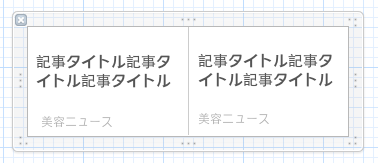
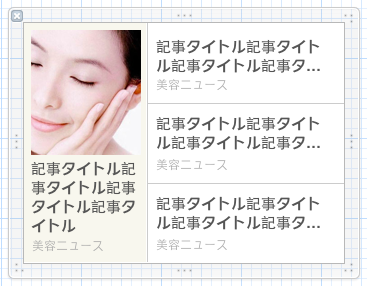
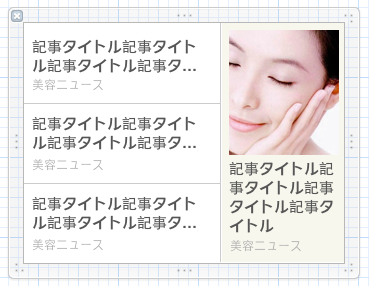
今回は以下の3パターンのxibファイルを使いました。
パターンA(1x1)
パターンB(1x3)
パターンC(3x1)
(サムネ画像は適当)
テーブルビューの描画
今回は分かりやすくするため、xibの組み合わせパターンは固定とします。
| index | xibパターン |
|---|---|
| 0, 5 | パターンB(1x3) |
| 1, 3, 4, 6 | パターンA(1x1) |
| 2 | パターンC(3x1) |
セルの高さの指定
- (CGFloat)tableView:(UITableView *)tableView heightForRowAtIndexPath:(NSIndexPath *)indexPath {
    // 1x3 or 3x1
    if (indexPath.row == 0
        || indexPath.row == 2
        || indexPath.row == 5) {
        return 240;
    }
    // 1x1
    else {
        return 109;
    }
}
xibファイルの登録
- (void)viewDidLoad
{
    [super viewDidLoad];

    // カスタムCellを登録
    [self.tableView registerNib:[UINib
                                 nibWithNibName:@"Article1x1TableViewCell"
                                 bundle:[NSBundle mainBundle]]
         forCellReuseIdentifier:@"Cell1x1"];
    [self.tableView registerNib:[UINib
                                 nibWithNibName:@"Article1x3TableViewCell"
                                 bundle:[NSBundle mainBundle]]
         forCellReuseIdentifier:@"Cell1x3"];
    [self.tableView registerNib:[UINib
                                 nibWithNibName:@"Article3x1TableViewCell"
                                 bundle:[NSBundle mainBundle]]
         forCellReuseIdentifier:@"Cell3x1"];
}
セルの描画
- (UITableViewCell *)tableView:(UITableView *)tableView cellForRowAtIndexPath:(NSIndexPath *)indexPath {
    // 1x3 or 3x1
    if (indexPath.row == 0
        || indexPath.row == 2
        || indexPath.row == 5) {

        NSString *CellIdentifier = nil;
        if (indexPath.row == 0 || indexPath.row == 5) {
            CellIdentifier = @"Cell3x1";
        }
        else {
            CellIdentifier = @"Cell1x3";
        }
        Article1x3TableViewCell *cell = [tableView dequeueReusableCellWithIdentifier:CellIdentifier];

        NSInteger rowNumber = indexPath.row*4;
        cell.rowNumber = rowNumber;
        cell.leftFeed = _feedList[rowNumber];
        cell.rightTopFeed = _feedList[rowNumber+1];
        cell.rightMiddleFeed = _feedList[rowNumber+2];
        cell.rightBottomFeed = _feedList[rowNumber+3];
        cell.delegate = self;

        return cell;
    }
    // 1x1
    else {
        Article1x1TableViewCell *cell = [tableView dequeueReusableCellWithIdentifier:@"Cell1x1"];

        NSInteger rowNumber = indexPath.row;
        cell.rowNumber = rowNumber*2;
        cell.leftFeed = [_feedList objectAtIndex:rowNumber*2];
        cell.rightFeed = [_feedList objectAtIndex:(rowNumber*2+1)];
        cell.delegate = self;

        return cell;
    }
}
_feedListというのはNSMutableArray型のインスタンス変数で、
表示する記事の情報が入っている想定です。
Article1x1TableViewCell や Article3x1TableViewCell は UITableViewCell の拡張クラスで、feedオブジェクトがセットされるとIBOutletが更新されるようになっています。
実行結果
当初想定していた↓のような画面ができたはず。
あとはxibファイルの組み合わせロジックを作りこめば動的レイアウトの完成です。
元記事


