Proxmox VE 7 で Amazon Liunx 2 を走らせる手順まとめ
1. ノードのシェルで、ローカルの適当な場所にAWSの公式イメージを落としておきます。
# wget https://cdn.amazonlinux.com/os-images/2.0.20221004.0/kvm/amzn2-kvm-2.0.20221004.0-x86_64.xfs.gpt.qcow2
2. 別途、seed.isoを作って、GUIからアップロードしておきます。詳しくはこちら。
# nano meta-data

local-hostname: hogehoge
network-interfaces: |
  auto eth0
  iface eth0 inet dhcp
# nano user-data

#cloud-config
users:
  - default
chpasswd:
  list: |
    ec2-user:supersecret
ssh_pwauth: True
locale: ja_JP.UTF-8

runcmd:
  - [ cp, /usr/share/zoneinfo/Asia/Tokyo, /etc/localtime]
# genisoimage -output seed.iso -volid cidata -joliet -rock user-data meta-data
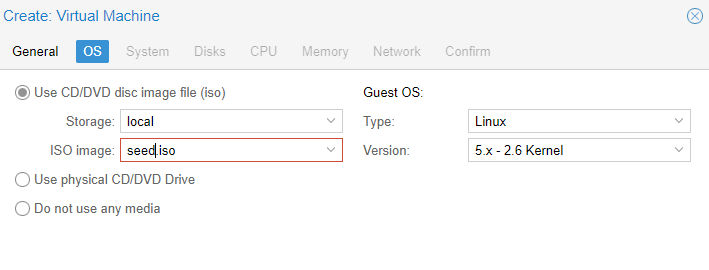
3.seed.isoをCDにマウントして普通にVMを作ります。

この際、すべてをvirtio等にしてしまうと、VMに供給されるエントロピーが不足して、gssproxyなど、乱数を使用するデーモンが起動できなくなる場合がありますので、CPUはhostにしておく等の必要があります。
また、cloud-initデバイスでログインID等を構成する場合は、isoのマウント等は必要ありません。
4.ノードのシェルで、VMにAWS公式イメージ(先ほどダウンロードしたもの)をインポートします。qmコマンドについて詳しくはこちら。
# qm importdisk 100 ~/amzn2-kvm-2.0.20221004.0-x86_64.xfs.gpt.qcow2 local-lvm -format qcow2


