更新情報
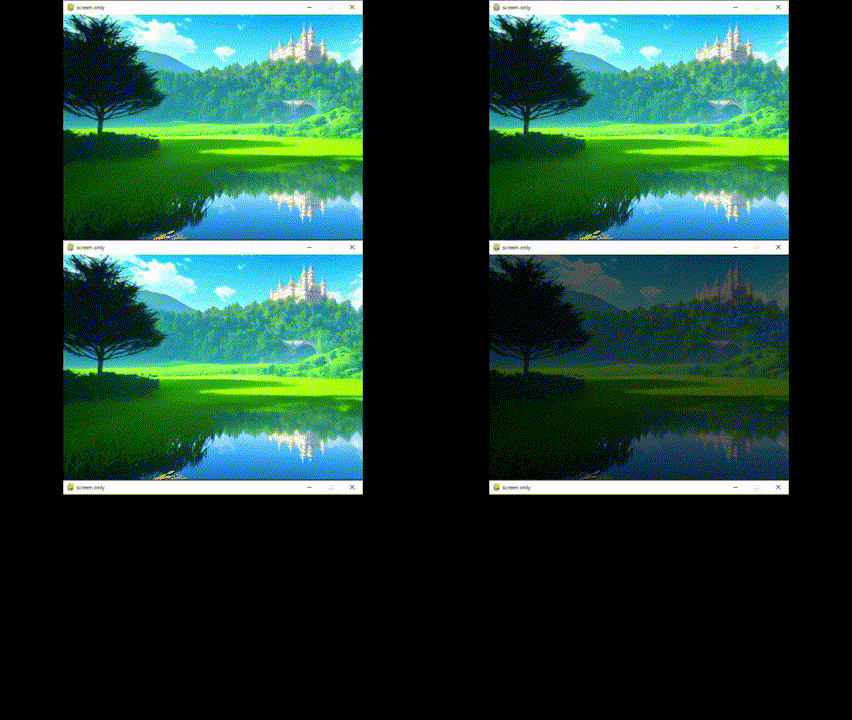
透明テキスト(マスク)に追加しました。
#背景サーフェスに透明色を設定
surface.set_colorkey(transparent)
GIF
半透明の図形
ここをクリックしてください
import pygame
import sys

pygame.init()
screen = pygame.display.set_mode((320, 320))
pygame.display.set_caption('Semi-transparent')
# 半透明のSurfaceを作成
transparent_surface = pygame.Surface((40, 40), pygame.SRCALPHA)
# RGBA (黒, 透明度128)
transparent_surface.fill((0, 0, 0, 128))

clock = pygame.time.Clock()
running = True
while running:
    clock.tick(60)
    screen.fill((255, 255, 255))
    # 半透明のSurfaceを描画
    screen.blit(transparent_surface, (140, 140))
    pygame.display.update()
    for event in pygame.event.get():
        if event.type == pygame.QUIT:
            pygame.quit()
            sys.exit()
transparent_surface = pygame.Surface((40, 40), pygame.SRCALPHA)
(40,40)大きさです。(幅、高さ)
#RGBA (黒, 透明度128)
transparent_surface.fill((0, 0, 0, 128))
(0,0,0,128)色と透明度です。
0が完全な透明。255が透明ではありません。
screen.blit(transparent_surface, (140, 140))
(140,140)座標です。(よこ、たて)
マウスで半透明の図形表示
ここをクリックしてください
カーソルの位置によって図形が表示されたり、されなかったりします。
import pygame
import sys

pygame.init()
screen = pygame.display.set_mode((160, 160))
pygame.display.set_caption("mouse_rect")
x,y = 0,0
# 半透明のSurfaceを作成
transparent_surface = pygame.Surface((40, 40), pygame.SRCALPHA)
# RGBA (黒, 透明度128)
transparent_surface.fill((0, 0, 0, 128))

clock = pygame.time.Clock()
running = True
while running:
    clock.tick(60)

    # 画面を青で塗りつぶす
    screen.fill((0, 0, 255))
    # 半透明のSurfaceを描画
    if x >= 60 and x <= 100:
        if y >= 60 and y <= 100:
            screen.blit(transparent_surface, (60, 60))

    pygame.display.update()
    for event in pygame.event.get():
        if event.type == pygame.QUIT:
            running = False
        mouse_pos = pygame.mouse.get_pos()
        x = mouse_pos[0]
        y = mouse_pos[1]


pygame.quit()
sys.exit()
フェードアウト
ここをクリックしてください
import pygame
import sys
from pygame.locals import *
import time

pygame.init()
screen = pygame.display.set_mode((640, 480))
pygame.display.set_caption('fade_out')
change = 0
#ここに背景のパスを貼り付ける
img = pygame.image.load(パス)
# 半透明のSurfaceを作成
transparent_surface = pygame.Surface((640, 480), pygame.SRCALPHA)
transparent_surface.fill((0, 0, 0, change))

clock = pygame.time.Clock()
running = True
while running:
    clock.tick(60)
    screen.blit(img,(0,0))
    if change < 255:
        change += 1
    time.sleep(0.01)
    transparent_surface.fill((0, 0, 0, change))
    #透明のSurfaceを描画
    screen.blit(transparent_surface, (0, 0))
    pygame.display.update()
    for event in pygame.event.get():
        if event.type == pygame.QUIT:
            pygame.quit()
            sys.exit()
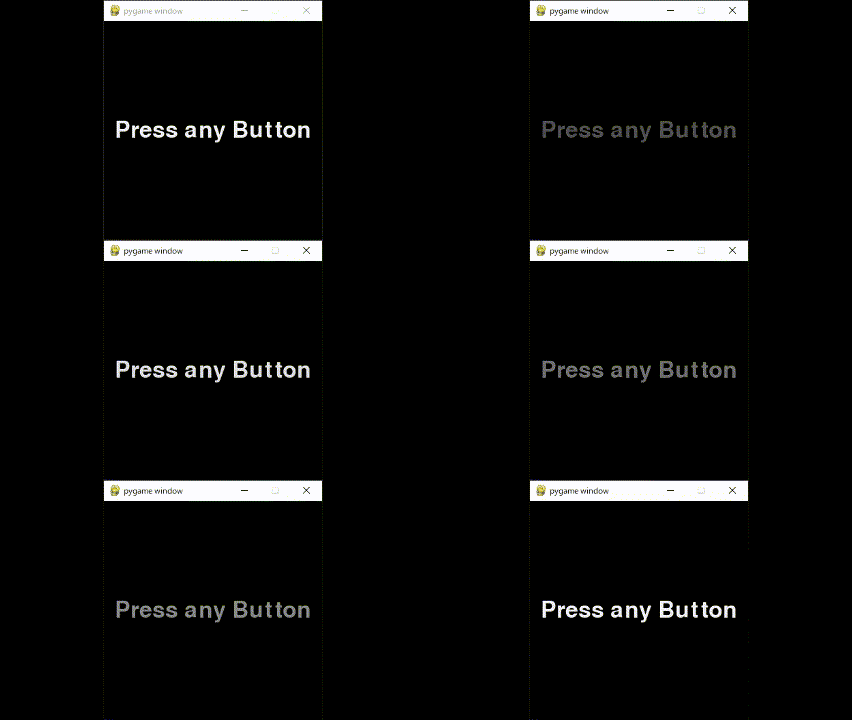
テキスト明滅
ここをクリックしてください
import pygame
import sys
import time
# Pygameを初期化
pygame.init()
# 画面を作成
screen = pygame.display.set_mode((320, 320))
# フォントを作成
font = pygame.font.Font(None, 50)
# テキストをレンダリング
text = font.render("Press any Button", True, (255, 255, 255))
text_rect = text.get_rect(center=(160, 160))
# メインループ
running = True
alpha = 220
delta = -3
clock = pygame.time.Clock()
while running:
    # フレームレートを設定
    clock.tick(60)
    # 画面を黒で塗りつぶす
    screen.fill((0, 0, 0))
    # テキストの透明度を変更
    text.set_alpha(alpha)
    screen.blit(text, text_rect)
    # 透明度を変化させる
    alpha += delta
    if alpha <= 70 or alpha >= 240:
        delta = -delta
        time.sleep(0.5)
    # 画面を更新
    pygame.display.update()
    for event in pygame.event.get():
        if event.type == pygame.QUIT:
            pygame.quit()
            sys.exit()
-
初期設定
alpha = 220 # 初期透明度(不透明に近い) delta = -3 # 透明度の変化量-
alphaは透明度、deltaはその増減値(-3なので徐々に薄くなる)。
-
-
テキストの透明度調整
text.set_alpha(alpha)-
text.set_alpha(alpha)で透明度を設定(0: 完全透明, 255: 完全不透明)。
-
-
透明度の変化
alpha += delta if alpha <= 70 or alpha >= 240: delta = -delta time.sleep(0.5)-
alphaの値をdelta分増減。 -
alphaが70以下または240以上になったらdeltaを反転し、透明度の変化方向を逆に。 -
time.sleep(0.5)で0.5秒間動きを止める(ちらつきを抑える効果)。
-
透明テキスト(マスク)
ここをクリックしてください
import pygame
import sys

# Pygameを初期化
pygame.init()

# 画面を設定
width, height = 400, 300
screen = pygame.display.set_mode((width, height))
pygame.display.set_caption("Transparent Text Inside Shape")

# 色を定義
black = (0, 0, 0)
transparent = (0, 0, 0, 0)
#背景画像のパスを貼り付ける
surface = pygame.image.load(パス)
#textの中に描く画像のパスを貼り付ける
img = pygame.image.load(パス)
# フォントオブジェクトを作成
font = pygame.font.SysFont(None, 200)

# テキストをレンダリング
text_surface = font.render("Text", True, black)

# テキストの矩形を取得
text_rect = text_surface.get_rect(center=(width // 2, height // 4))

# テキストのマスクを作成
text_mask = pygame.mask.from_surface(text_surface)

# 背景サーフェスに透明色を設定
surface.set_colorkey(transparent)

# テキストエリアを透明にするためにマスクを背景のサーフェスに適用
for x in range(text_rect.width):
    for y in range(text_rect.height):
        if text_mask.get_at((x, y)):
            surface.set_at((text_rect.x + x, text_rect.y + y), transparent)


# メインループ
clock = pygame.time.Clock()
running = True
while running:
    clock.tick(60)
    screen.blit(img,(0,0))
    # 背景のサーフェスを画面にブリット
    screen.blit(surface, (0, 0))

    # 画面を更新
    pygame.display.flip()
    for event in pygame.event.get():
        if event.type == pygame.QUIT:
            running = False

# Pygameを終了
pygame.quit()
sys.exit()
半透明の画像
ここをクリックしてください
import pygame

pygame.init()
screen = pygame.display.set_mode((640, 480))
# 画像のパスを貼り付ける
image = pygame.image.load(パス)
clock = pygame.time.Clock()
running = True
while running:
    clock.tick(60)
    screen.fill((255,255,255))
    # 画像の透明度を設定(例:128)
    image.set_alpha(128)
    screen.blit(image, (270, 190))
    pygame.display.flip()
    for event in pygame.event.get():
        if event.type == pygame.QUIT:
            running = False

pygame.quit()
画像にグラデーション
タイトルロゴに使えそうです。
ここをクリックしてください
import pygame
import sys

# Pygameの初期化
pygame.init()

# 画面サイズの設定
screen_width, screen_height = 320, 320
screen = pygame.display.set_mode((screen_width, screen_height))

# ここに画像のパスを貼り付ける
image = pygame.image.load(パス)
width, height = image.get_size()
for x in range(width):
    for y in range(height):
        # 各ピクセルの色を取得
        r, g, b, a = image.get_at((x, y))
        # 白に変換
        white = 255
        # ピクセルの色を変更
        image.set_at((x, y), (white, white, white, a))

width, height = image.get_size()

# グラデーションを作成
gradient_surface = pygame.Surface((width, height), pygame.SRCALPHA)
for x in range(width):
    for y in range(height):
        # (255, 153, 255) から (153, 255, 255) のグラデーション
        r = 255 - int((255 - 153) * (x / width))
        g = 153 + int((255 - 153) * (x / width))
        color = (r, g, 255, 255)
        gradient_surface.set_at((x, y), color)

# 画像とグラデーションを合成
image.blit(gradient_surface, (0, 0), special_flags=pygame.BLEND_RGBA_MULT)

# メインループ
clock = pygame.time.Clock()
running = True
while running:
    clock.tick(60)
    for event in pygame.event.get():
        if event.type == pygame.QUIT:
            running = False

    screen.fill((255, 255, 255))
    screen.blit(image, (85, 85))
    pygame.display.flip()

pygame.quit()
sys.exit()
画像の一部を半透明
ここをクリックしてください
画像ファイルを半透明にするコードです。
pygameで半透明にするコードではありません。
いずれ茂みに入った時、体の一部が半透明となるようにしたいです。
背景が透明の画像に使用します。背景が透明でない画像ではうまくいきません。
import cv2
import numpy as np
import os

k = 0
# スクリプトが存在するフォルダのパスを取得
folder_path = os.path.dirname(os.path.abspath(__file__))

# 32x32のタイルのサイズ
tile_size = 32
# フォルダ内のすべてのファイルを処理
for filename in os.listdir(folder_path):
    if filename.endswith(".png"):
        file_path = os.path.join(folder_path, filename)
        image = cv2.imread(file_path, cv2.IMREAD_UNCHANGED)

        # アルファチャンネルを追加(3チャンネルの場合)
        if image.shape[2] == 3:
            image = cv2.cvtColor(image, cv2.COLOR_BGR2BGRA)

        # 各タイルごとに処理
        for i in range(0, image.shape[0], tile_size):
            for j in range(0, image.shape[1], tile_size):
                #tile_size / ここの数値で透明の範囲が決まる
                for y in range(int(i + tile_size / 1.25), i + tile_size):
                    for x in range(j, j + tile_size):
                        image[y, x, 3] = int(image[y, x, 3] * 0.5)

        # 変更後の画像を保存
        cv2.imwrite(f'semi_transparent_image{k}.png', image)
        k += 1

print("完了しました")
これだけではまだ使えません。
load_image()を変更します。
image = image.convert()に _alpha をたします。
def load_image(filename, colorkey=None):
    filename = os.path.join("data", filename)
    try:
        image = pygame.image.load(filename)
    except (pygame.error, message):
        print ("Cannot load image:"), filename
        raise (SystemExit, message)
    image = image.convert_alpha()#ここ
    if colorkey is not None:
        if colorkey == -1:
            colorkey = image.get_at((0,0))
        image.set_colorkey(colorkey, RLEACCEL)
    return image
def split_image()も変更する必要があります。
def split_image(image):
    """128x128のキャラクターイメージを32x32の16枚のイメージに分割
    分割したイメージを格納したリストを返す"""
    GS = 32
    imageList = []

    for i in range(0, 128, GS):
        for j in range(0, 128, GS):
            # キャラクター画像の透明ピクセルをチェック
            temp_surface = pygame.Surface((GS, GS), pygame.SRCALPHA)
            temp_surface.blit(image, (0, 0), (j, i, GS, GS))
            # 中央ピクセルが透明なら透明サーフェスを作成
            if temp_surface.get_at((0, 0))[3] == 0:
                surface = pygame.Surface((GS, GS), pygame.SRCALPHA)
                surface.fill((0, 0, 0, 0))
            # 透明でないなら通常のサーフェスを作成
            else:
                surface = pygame.Surface((GS, GS))
                surface.fill((255, 255, 255))  # 白で塗りつぶし

            surface.blit(image, (0, 0), (j, i, GS, GS))
            surface.set_colorkey(surface.get_at((0, 0)), pygame.RLEACCEL)
            imageList.append(surface)

    return imageList


