はじめに
NetApp BlueXPとはオンプレミス及びハイブリッド・マルチクラウド環境におけるストレージとデータサービスにおいて、シンプルなハイブリッドマルチクラウドを統合管理・運用する為のコントロールプレーンサービスです。こちらの「ドキュメント」により、多くの場合はBlueXPを使ってオンプレミスやクラウドを管理する為、Connectorが必要となります。Connectorは、BlueXPの日々の使用にとって重要なコンポーネントです。これにより、BlueXPはパブリッククラウド環境内のリソースとプロセスを管理することができます。例えば、NetApp Cloud Volumes ONTAP(CVO)と言うストレージサービスをAzure、AmazonやGoogleなどのCloud上で利用する時に、まずConnectorを作成します。
こちらの記事「[小ネタ]BlueXPのオンプレミスコネクターを使ってみる」と「BlueXPのConnecorをAmazon Cloudに作成」にはBlueXP Connectorをオンプレミス、AWSに作成する手順を載せています。今回の記事ではGoogle Cloud上にBlueXP Connectorを作ってみたいと思います。
手順
1.Google Consoleにより、必要なIAM roleなどを準備
2.BlueXPのGUIにより、connectorを作成
1.Google Consoleにより、必要なIAM roleなどを準備
「Create a Connector in Google Cloud from BlueXP」の手順を参照し、Create Project->IAM Role->Create Service accounts->Enable APIの順番で行きます。
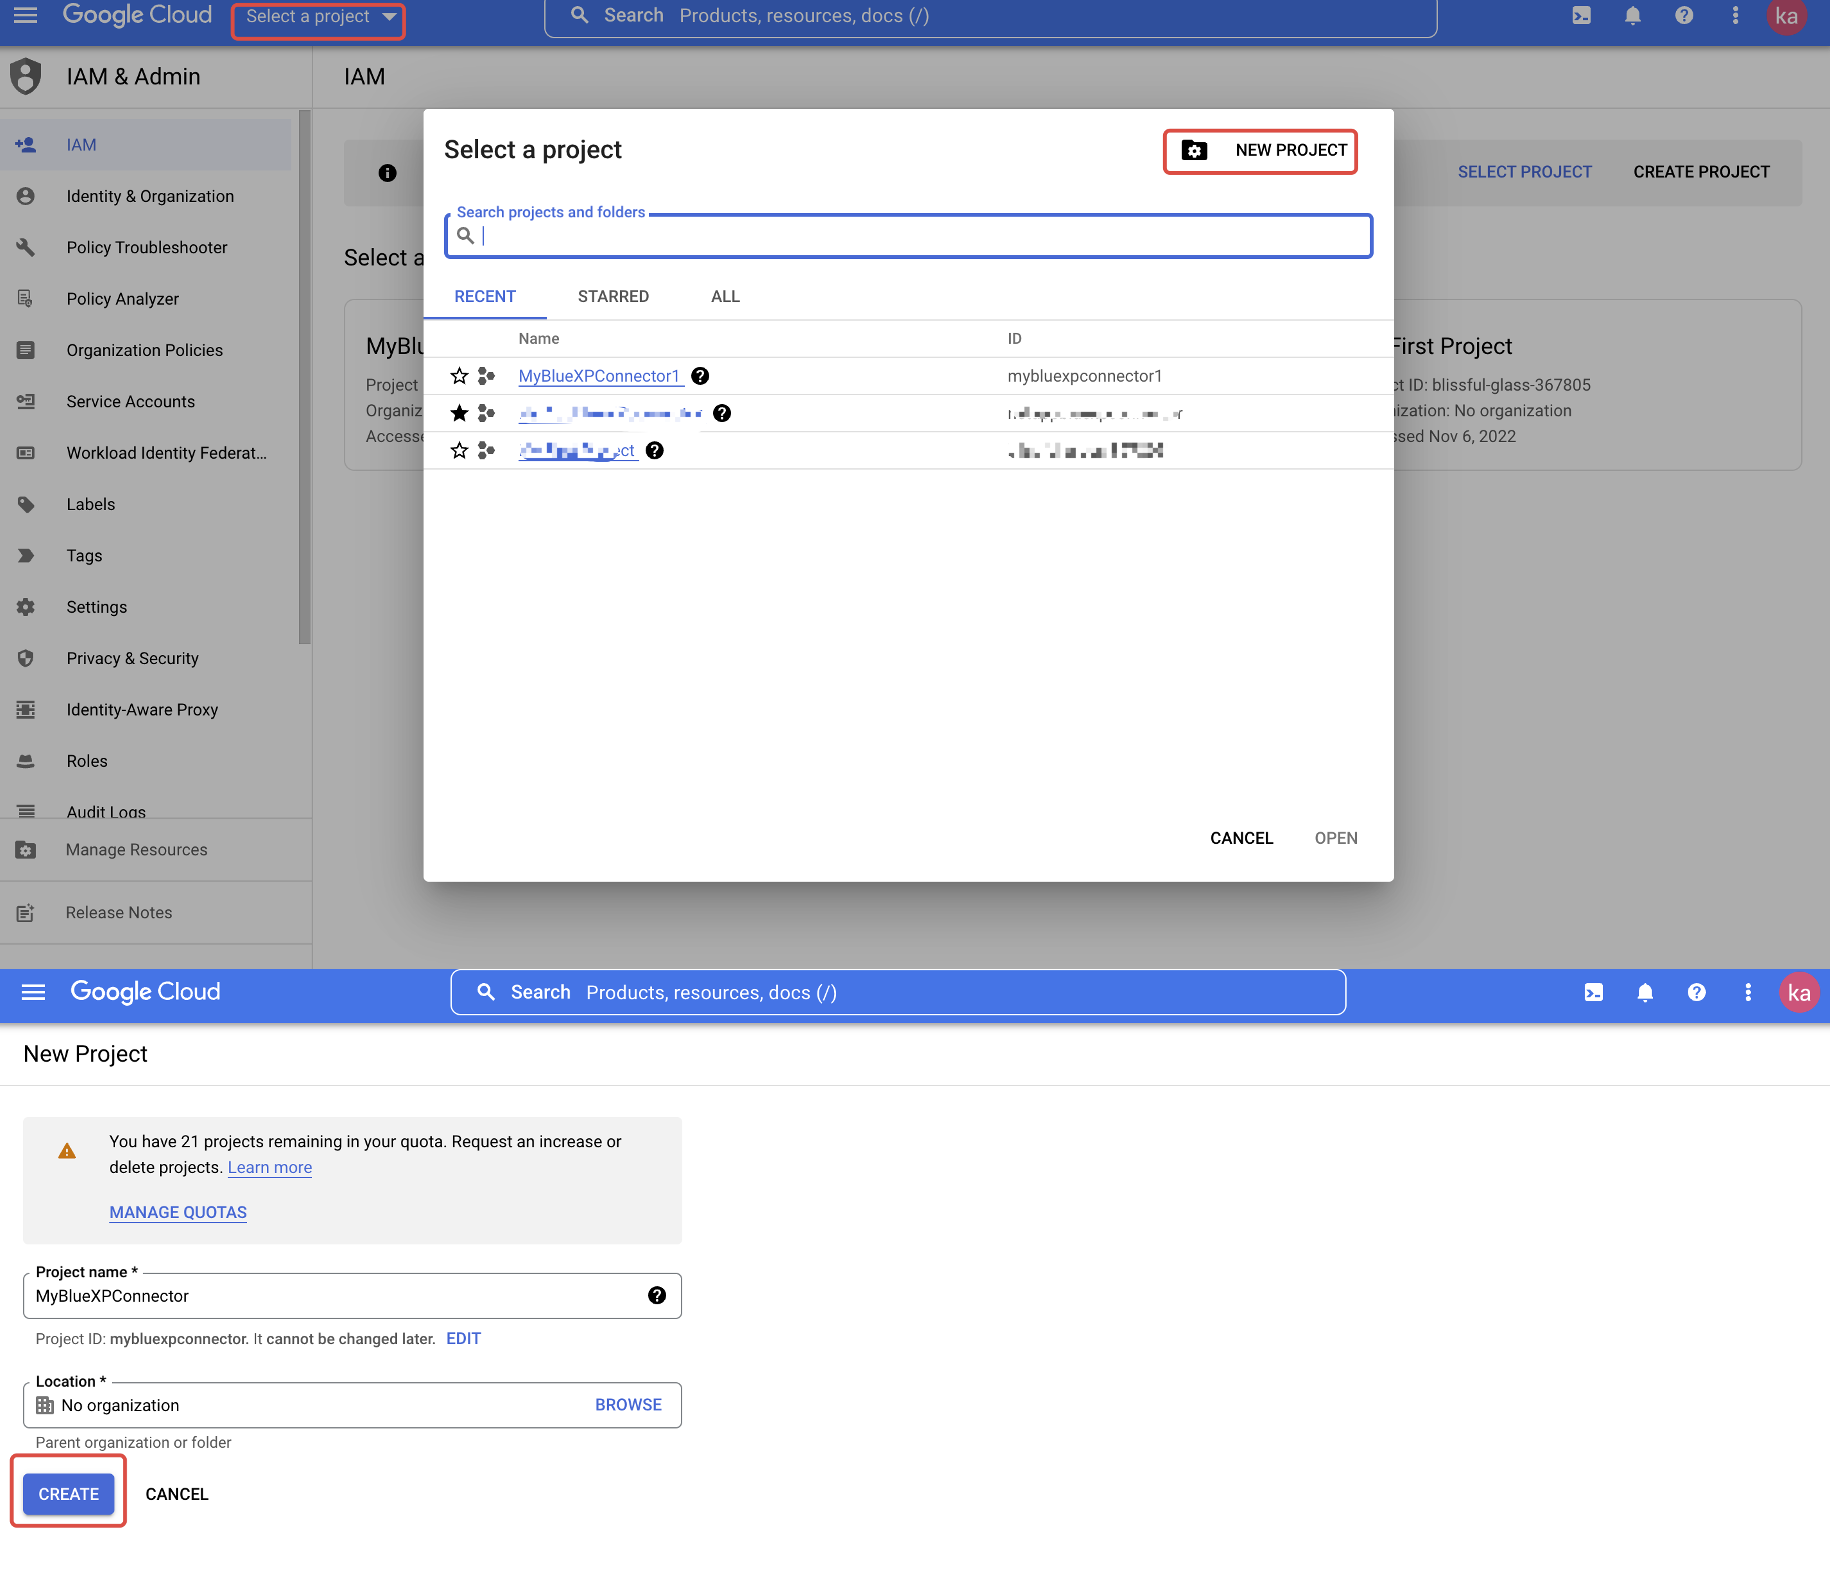
- Create Project
Google Consoleにログインして、Select project->NEW PROJECTをクリックしてprojectを作成します。
- IAM Role
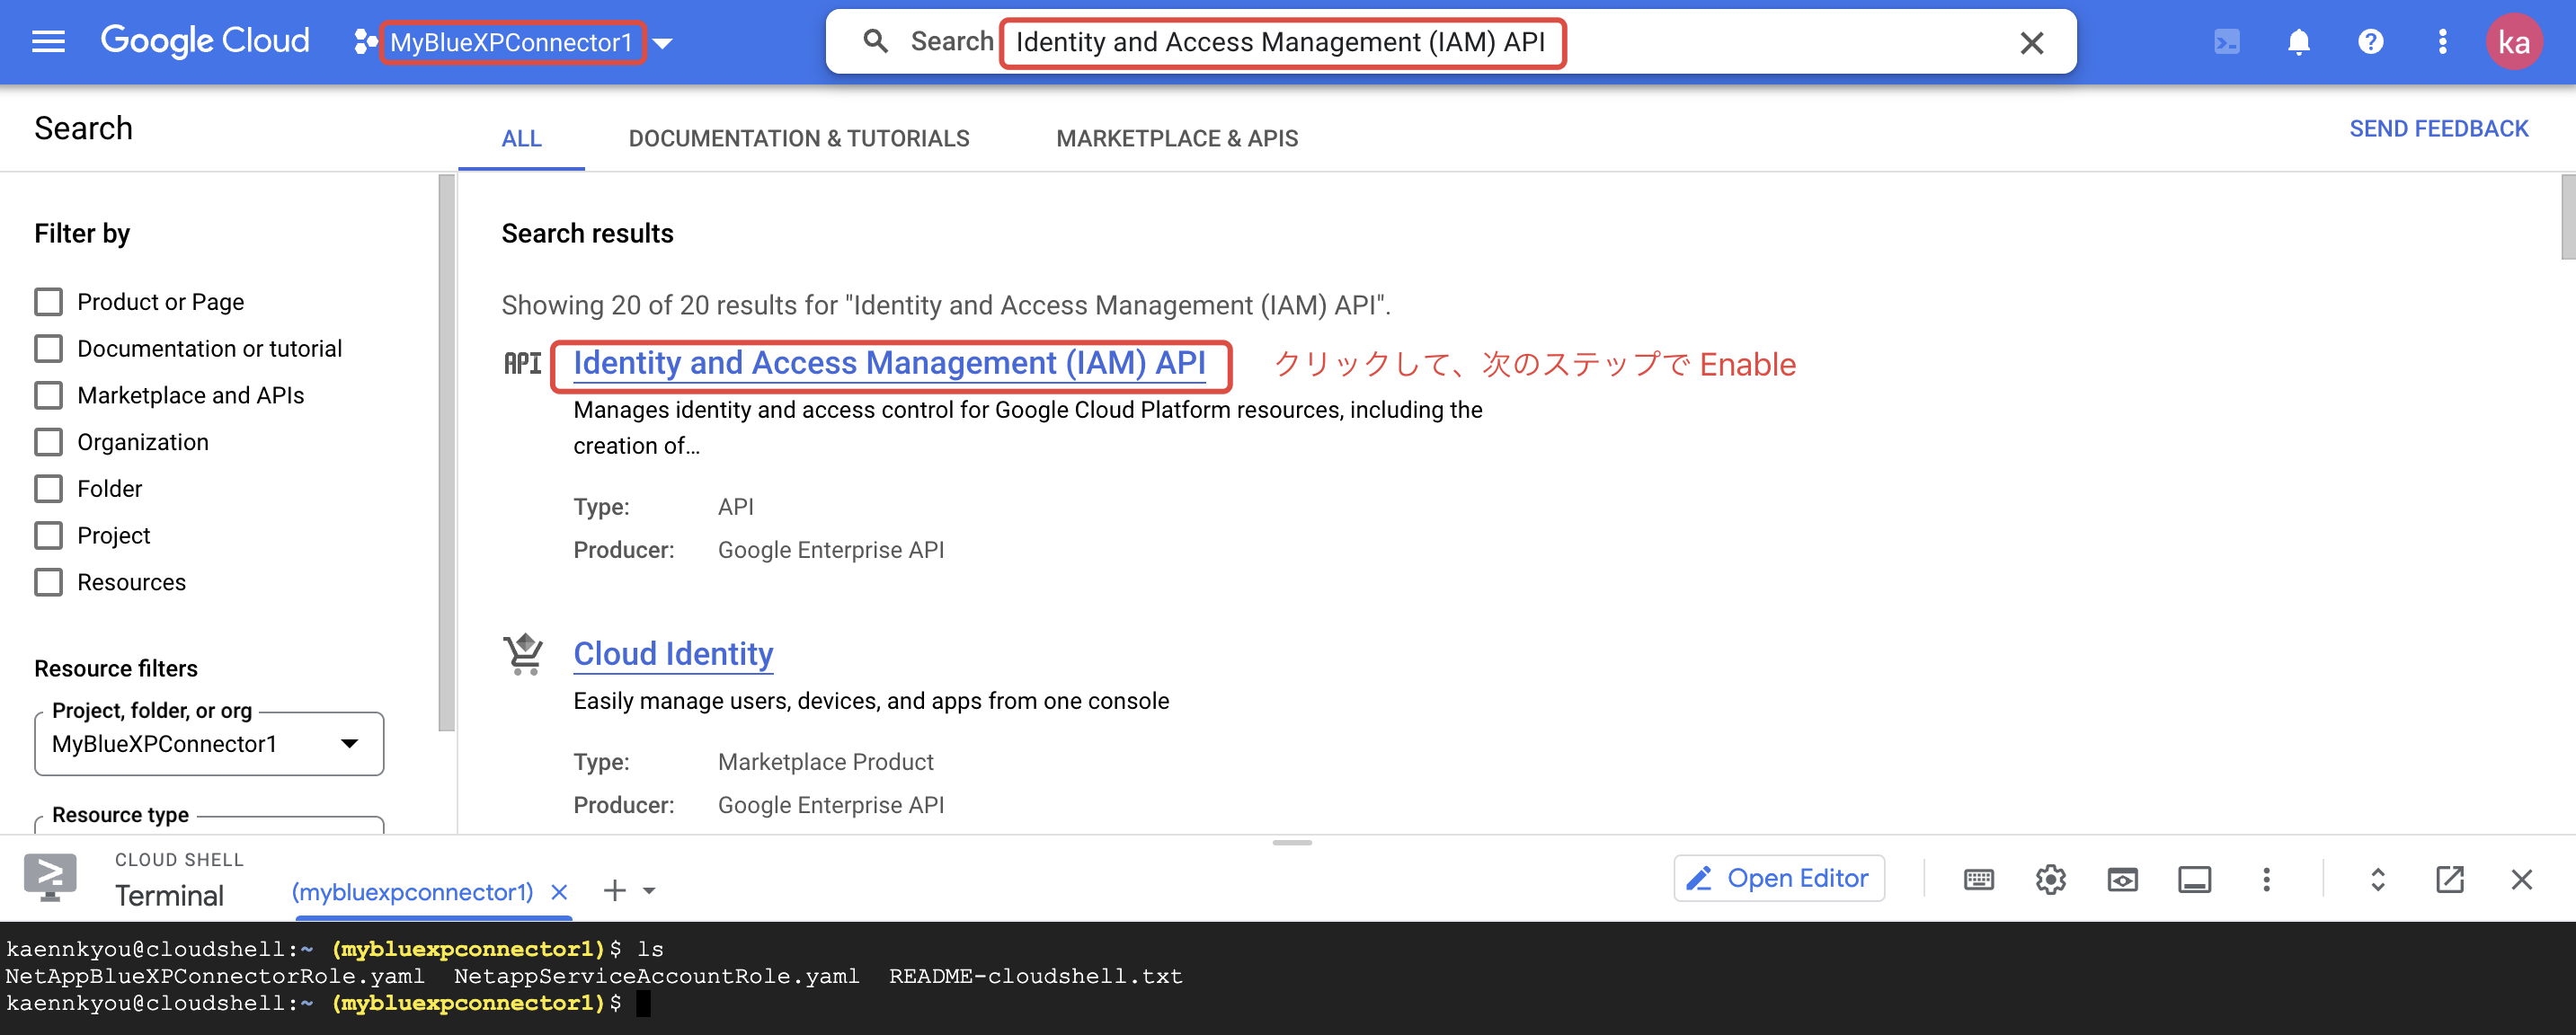
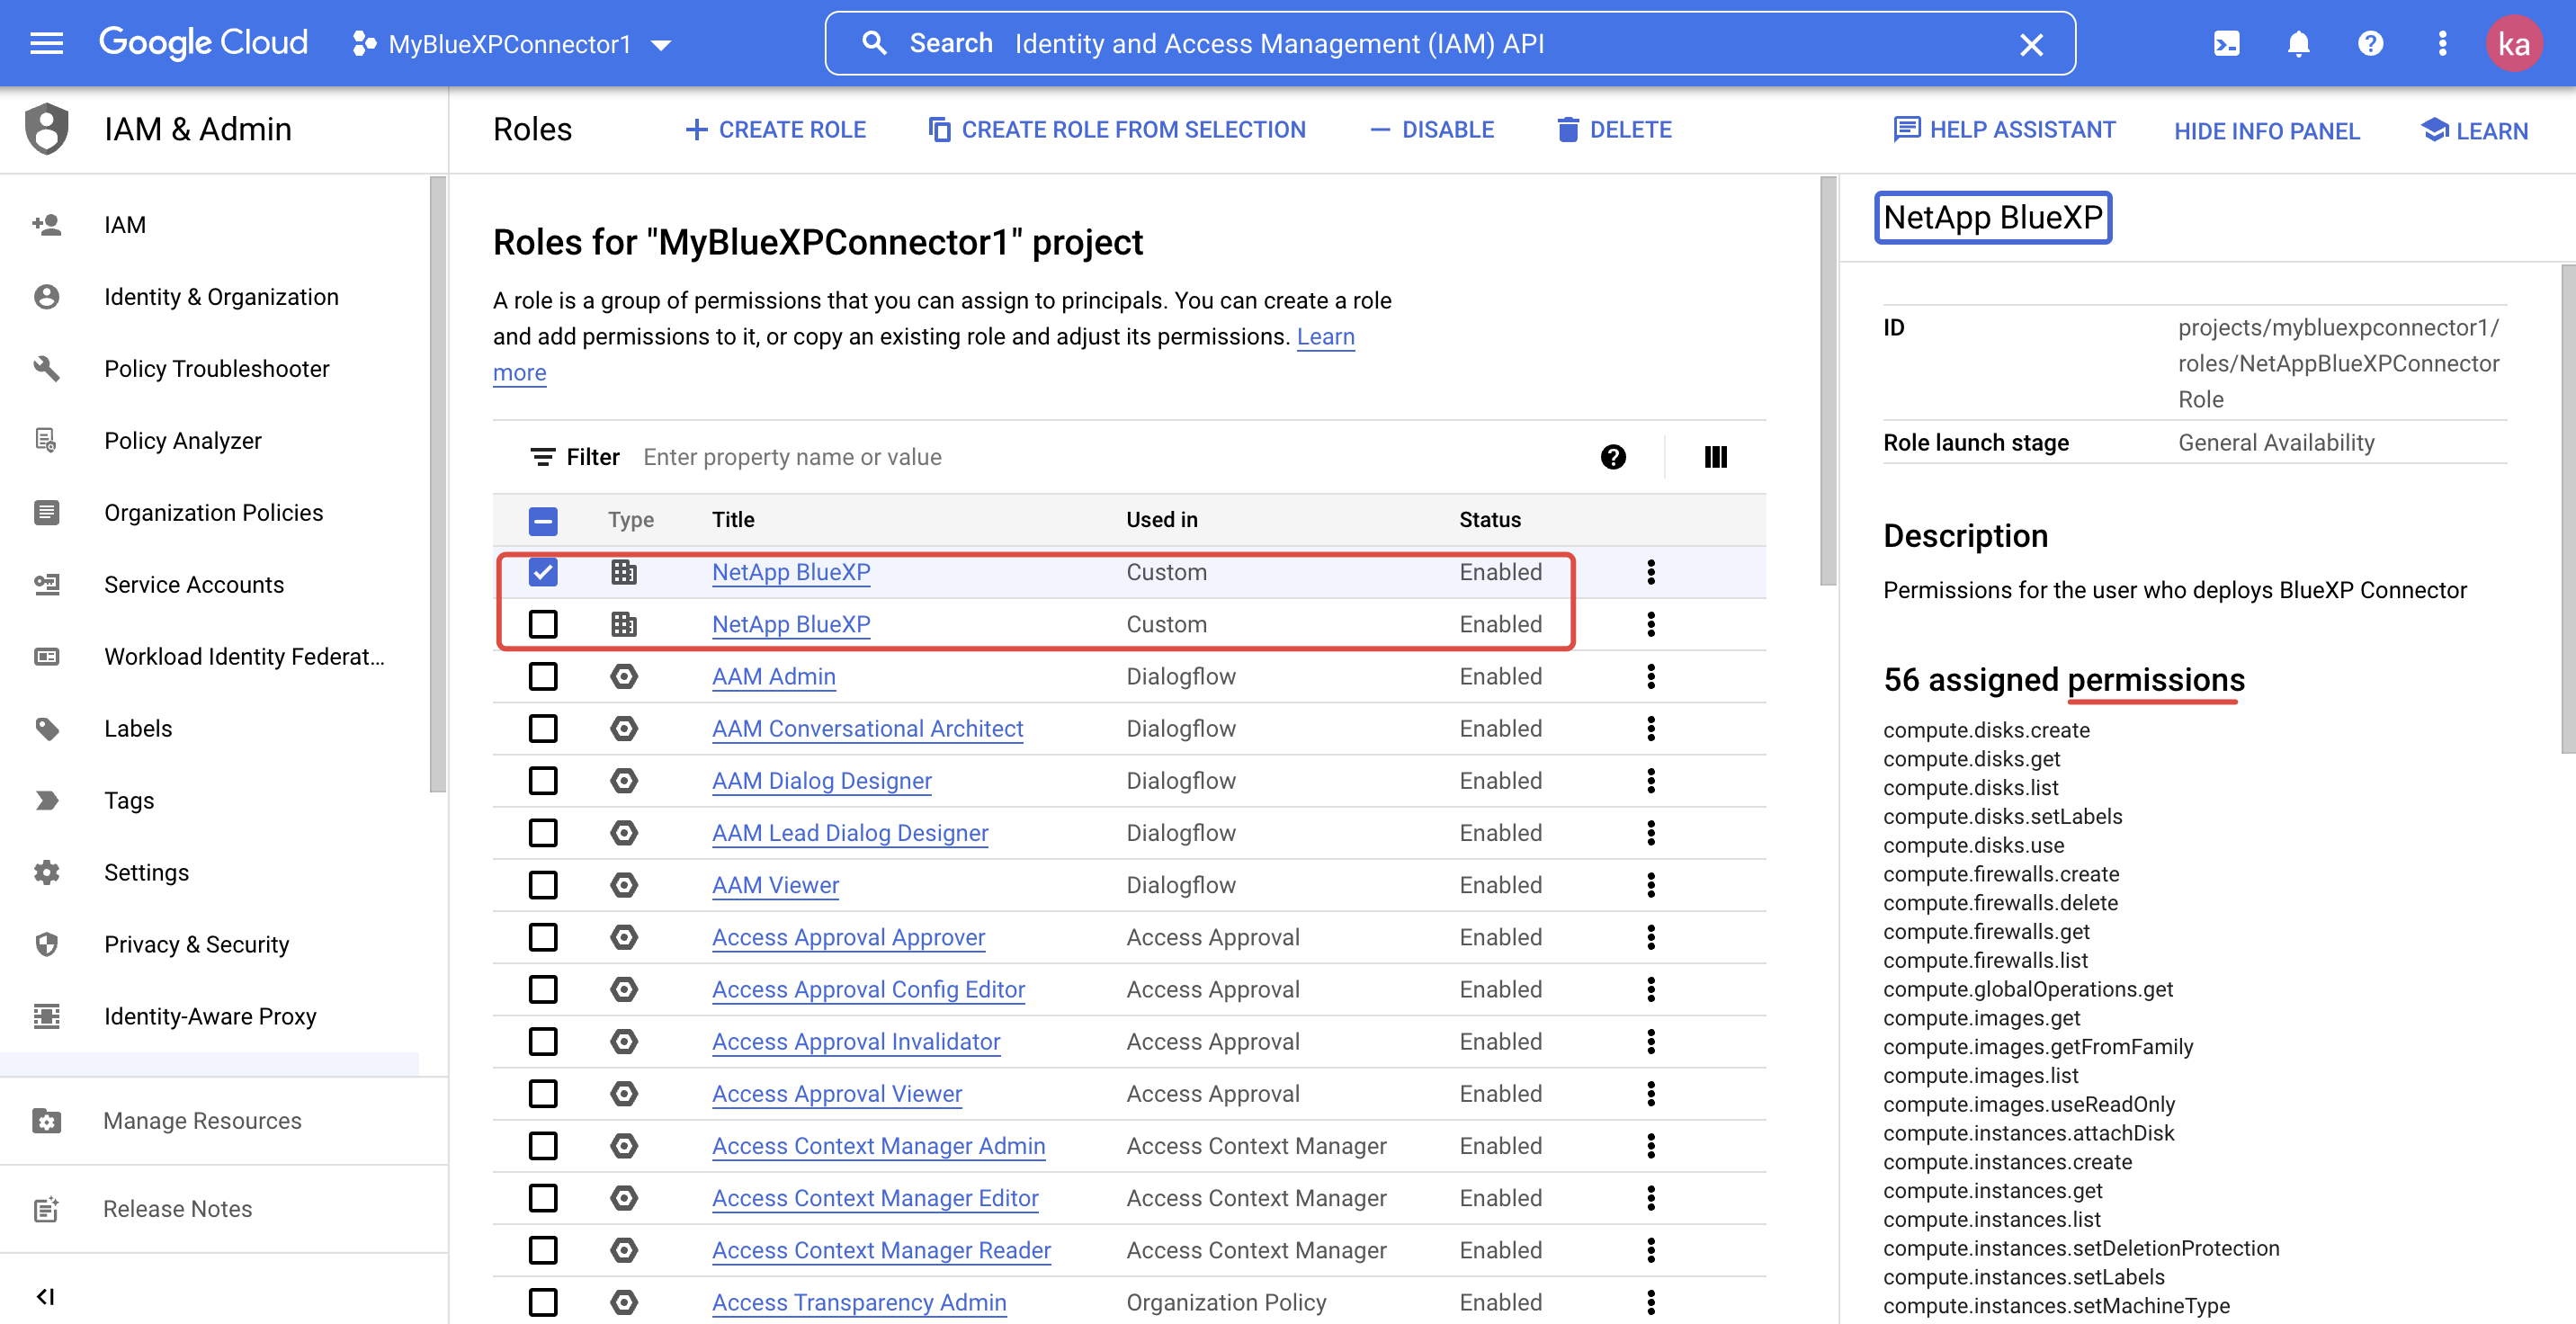
BlueXPのGUIに表示されているBlueXP Connector-Google Cloudの手順、またこちらのドキュメント「 Creating and managing custom roles」も参照できます。
上記のドキュメントにより、まずEnable the IAM APIが必要となります。
これからの手順は下記の図ようにBlueXPのガイドを参照します。

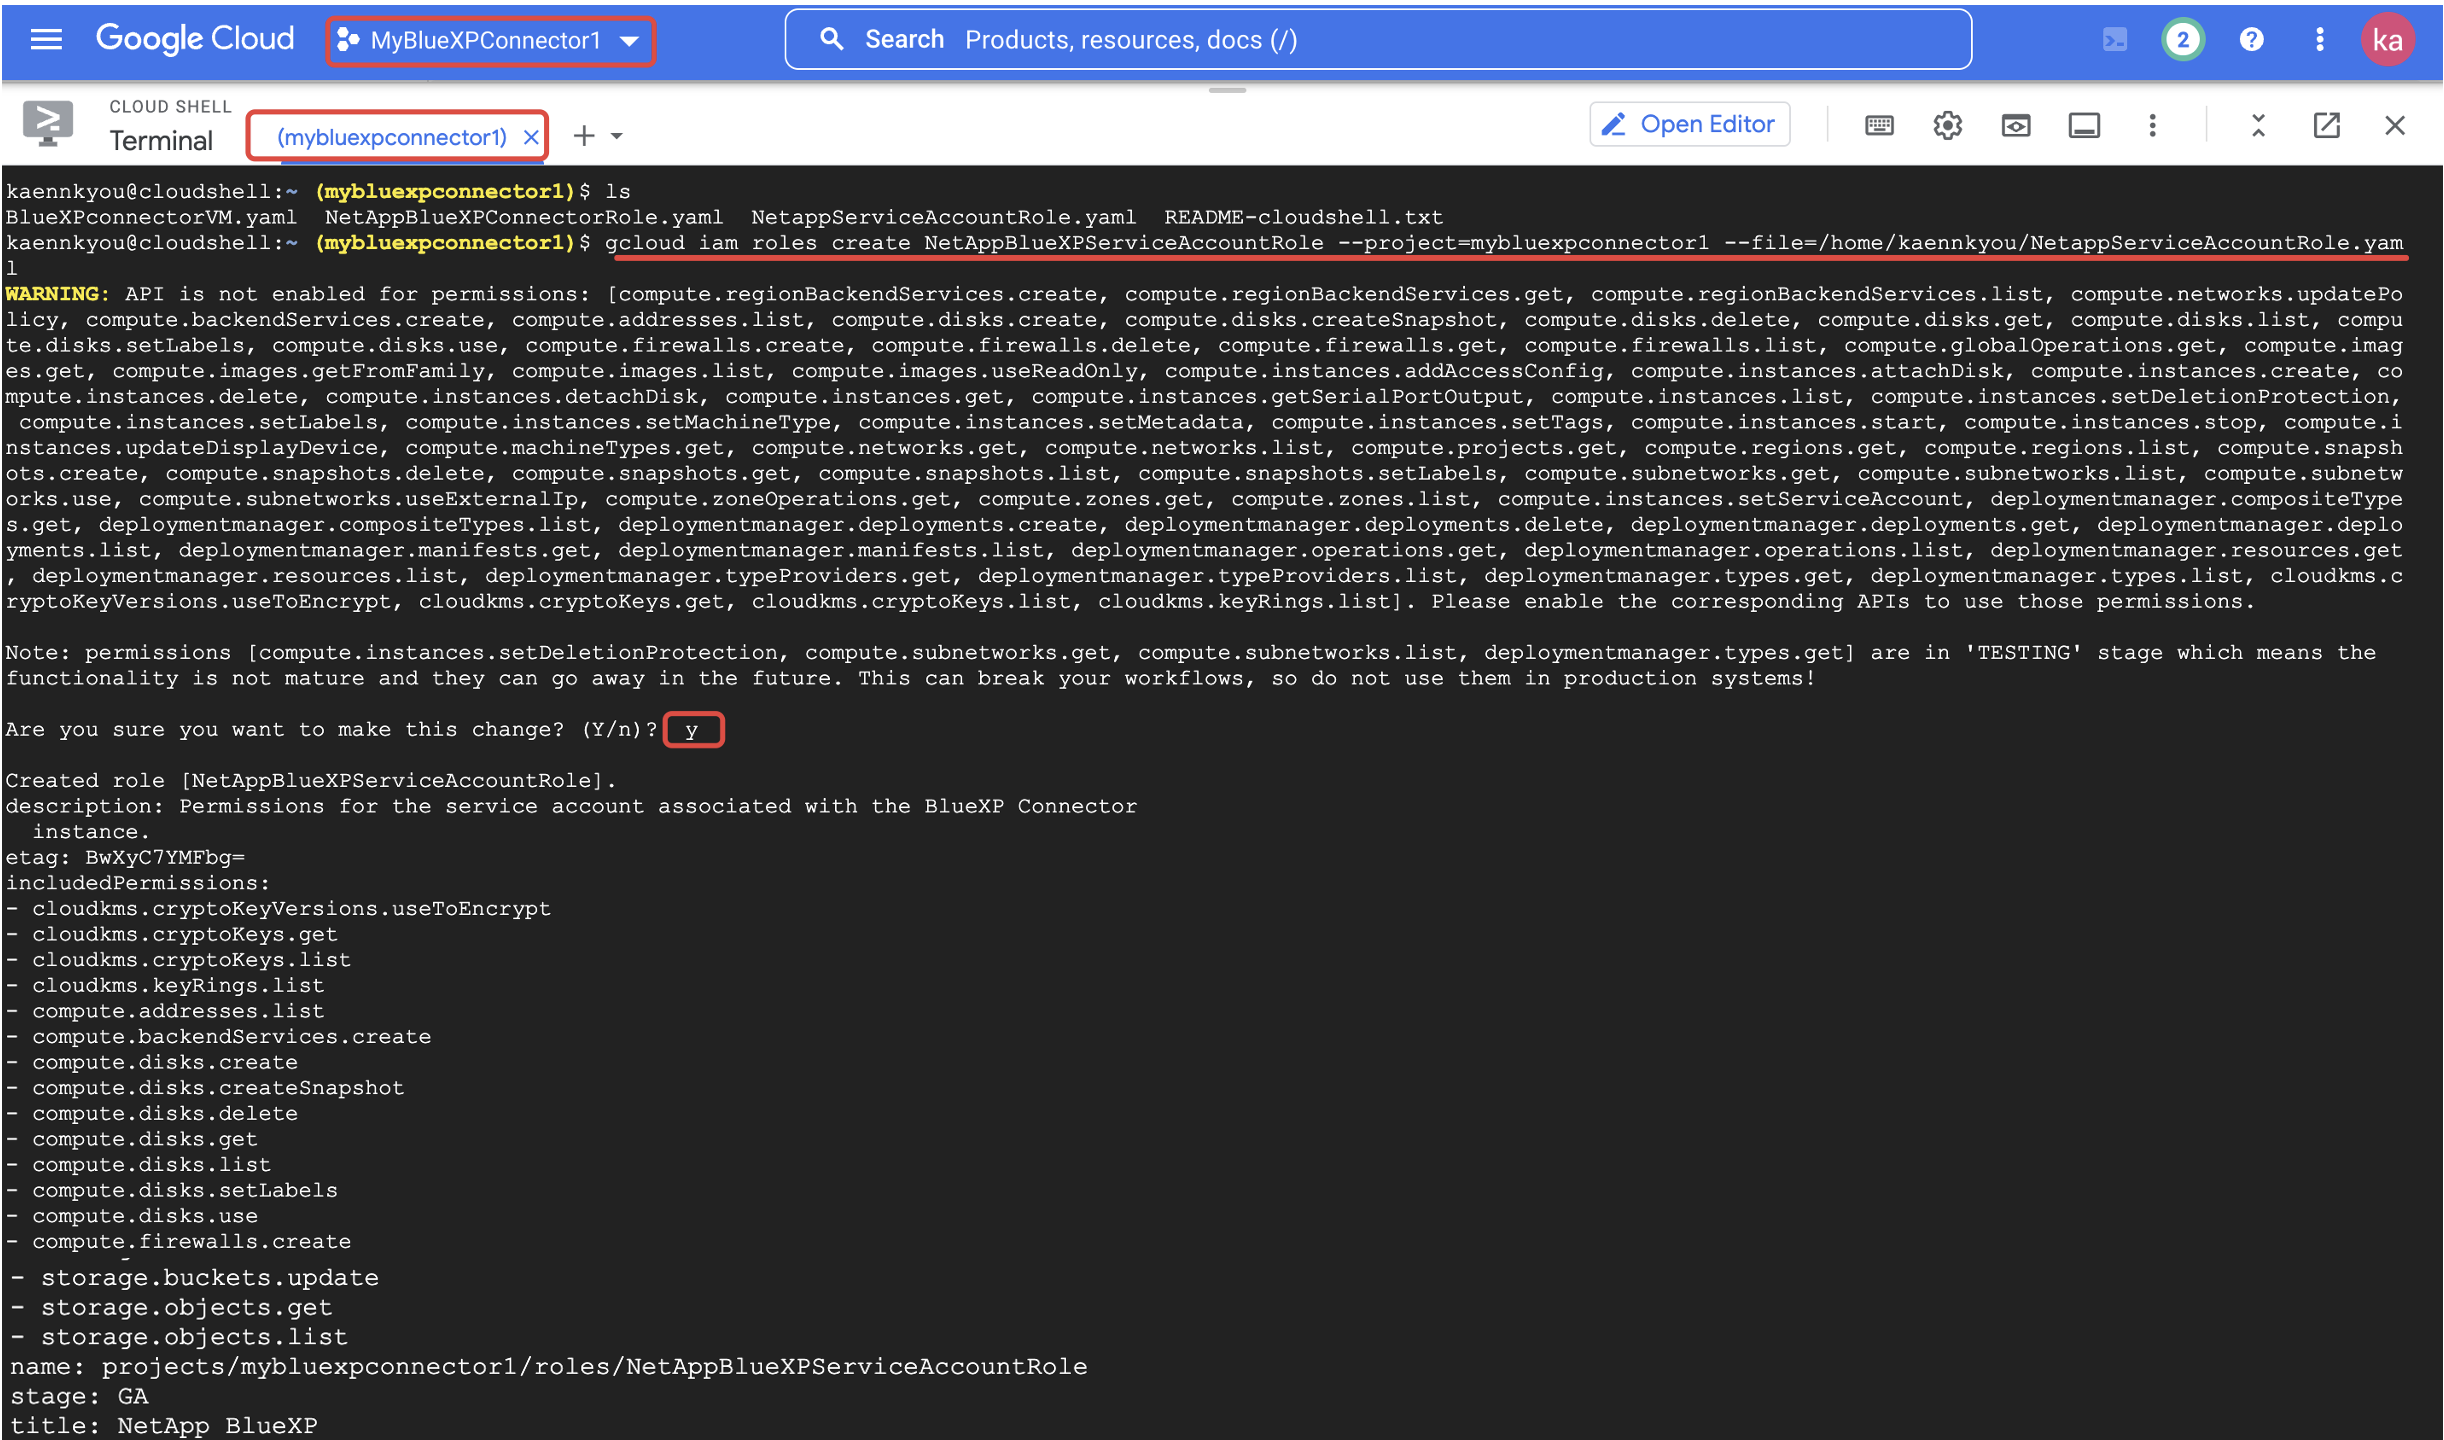
上記のYAMLをコピーして、Google Cloud CLIにより、NetAppBlueXPConnectorRole.yamlを作って、gcloud iam roles create Your_NetAppBlueXPServiceAccountRole --project=Your_mybluexpconnector1 --file=/home/YourDirectory/NetappServiceAccountRole.yaml
- Create Service accounts
同じように、BlueXP Connector's Service AccountのYAMLをコピーします。
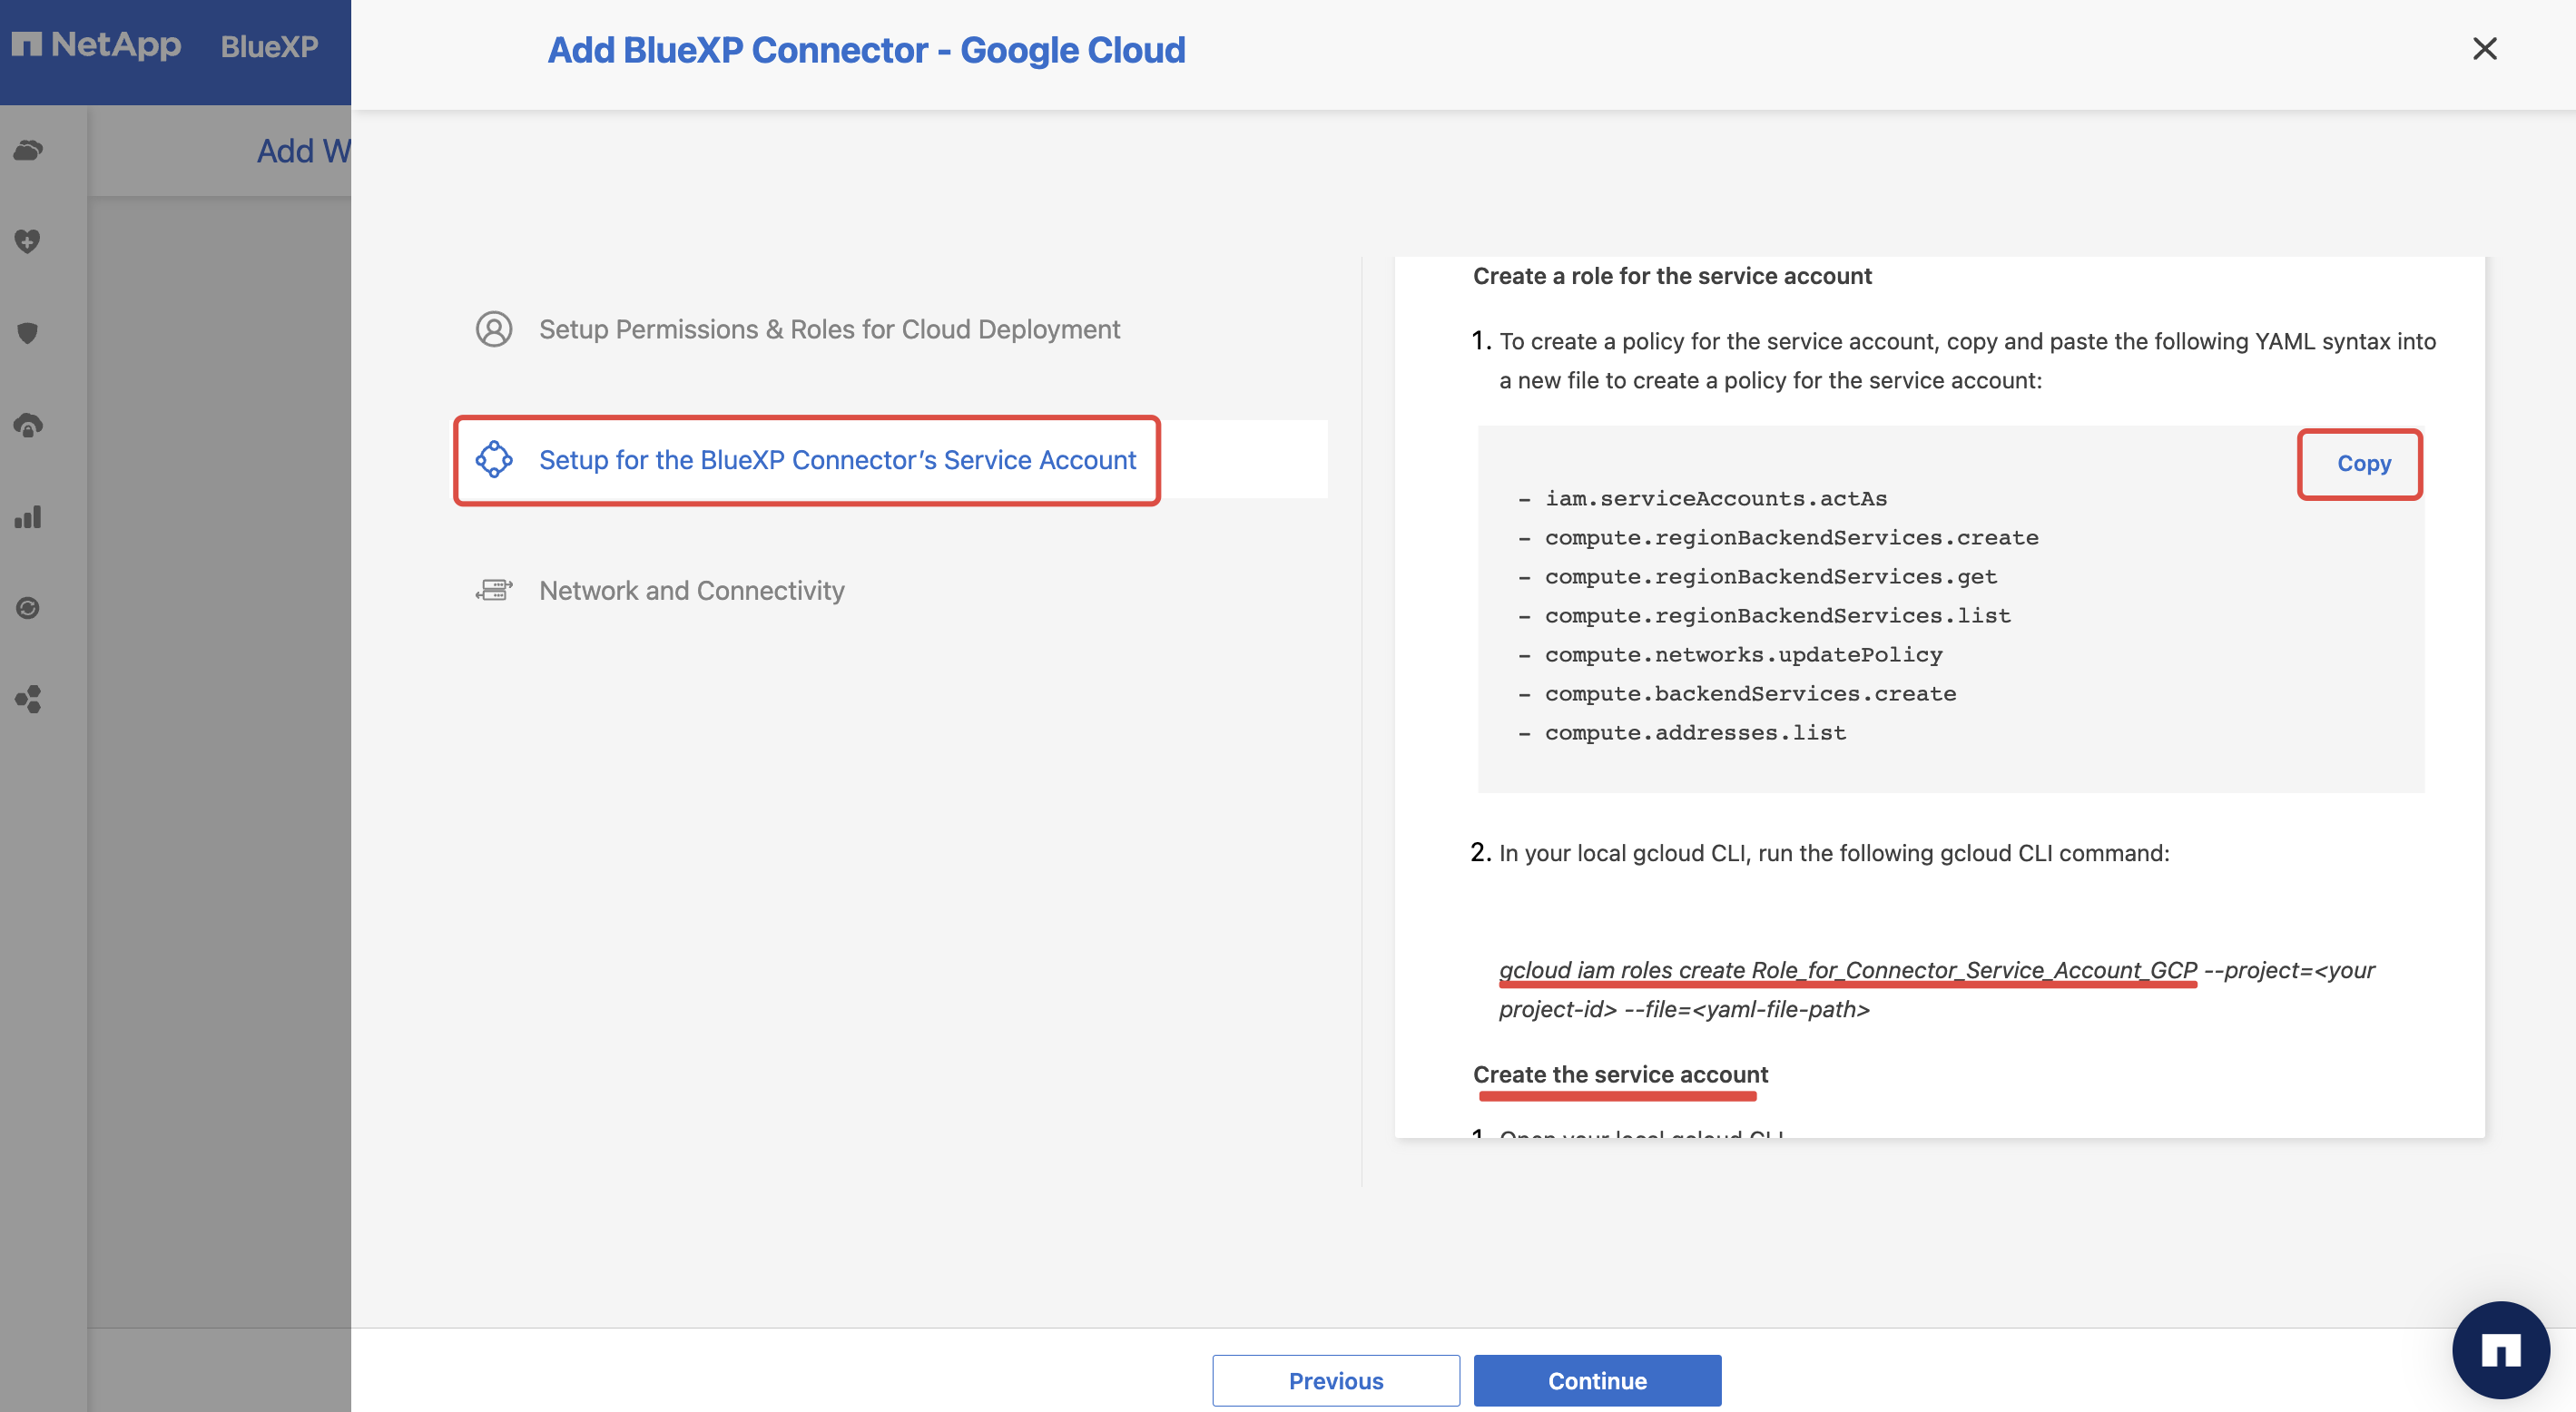
- Service Roleを作成:
gcloud iam roles create YourNetAppBlueXPServiceRole --project=<your project-id> --file=<yaml-file-path> - Service Accountを作成:
gcloud iam service-accounts create cloud-manager-service-account --description="BlueXP Connector Service Account" --display-name="BlueXP Connector Service Account" - 上記のService RoleとService Accountを作成したprojectに
bindingします。gcloud projects add-iam-policy-binding YourProjectID --member="serviceAccount:cloud-manager-service-account@YourProjectId.iam.gserviceaccount.com" --role="projects/YourProjectID/roles/YourNetAppBlueXPServiceRole"

上記の作成がうまくできたら、IAM&Admin ->Rolesから確認できます。
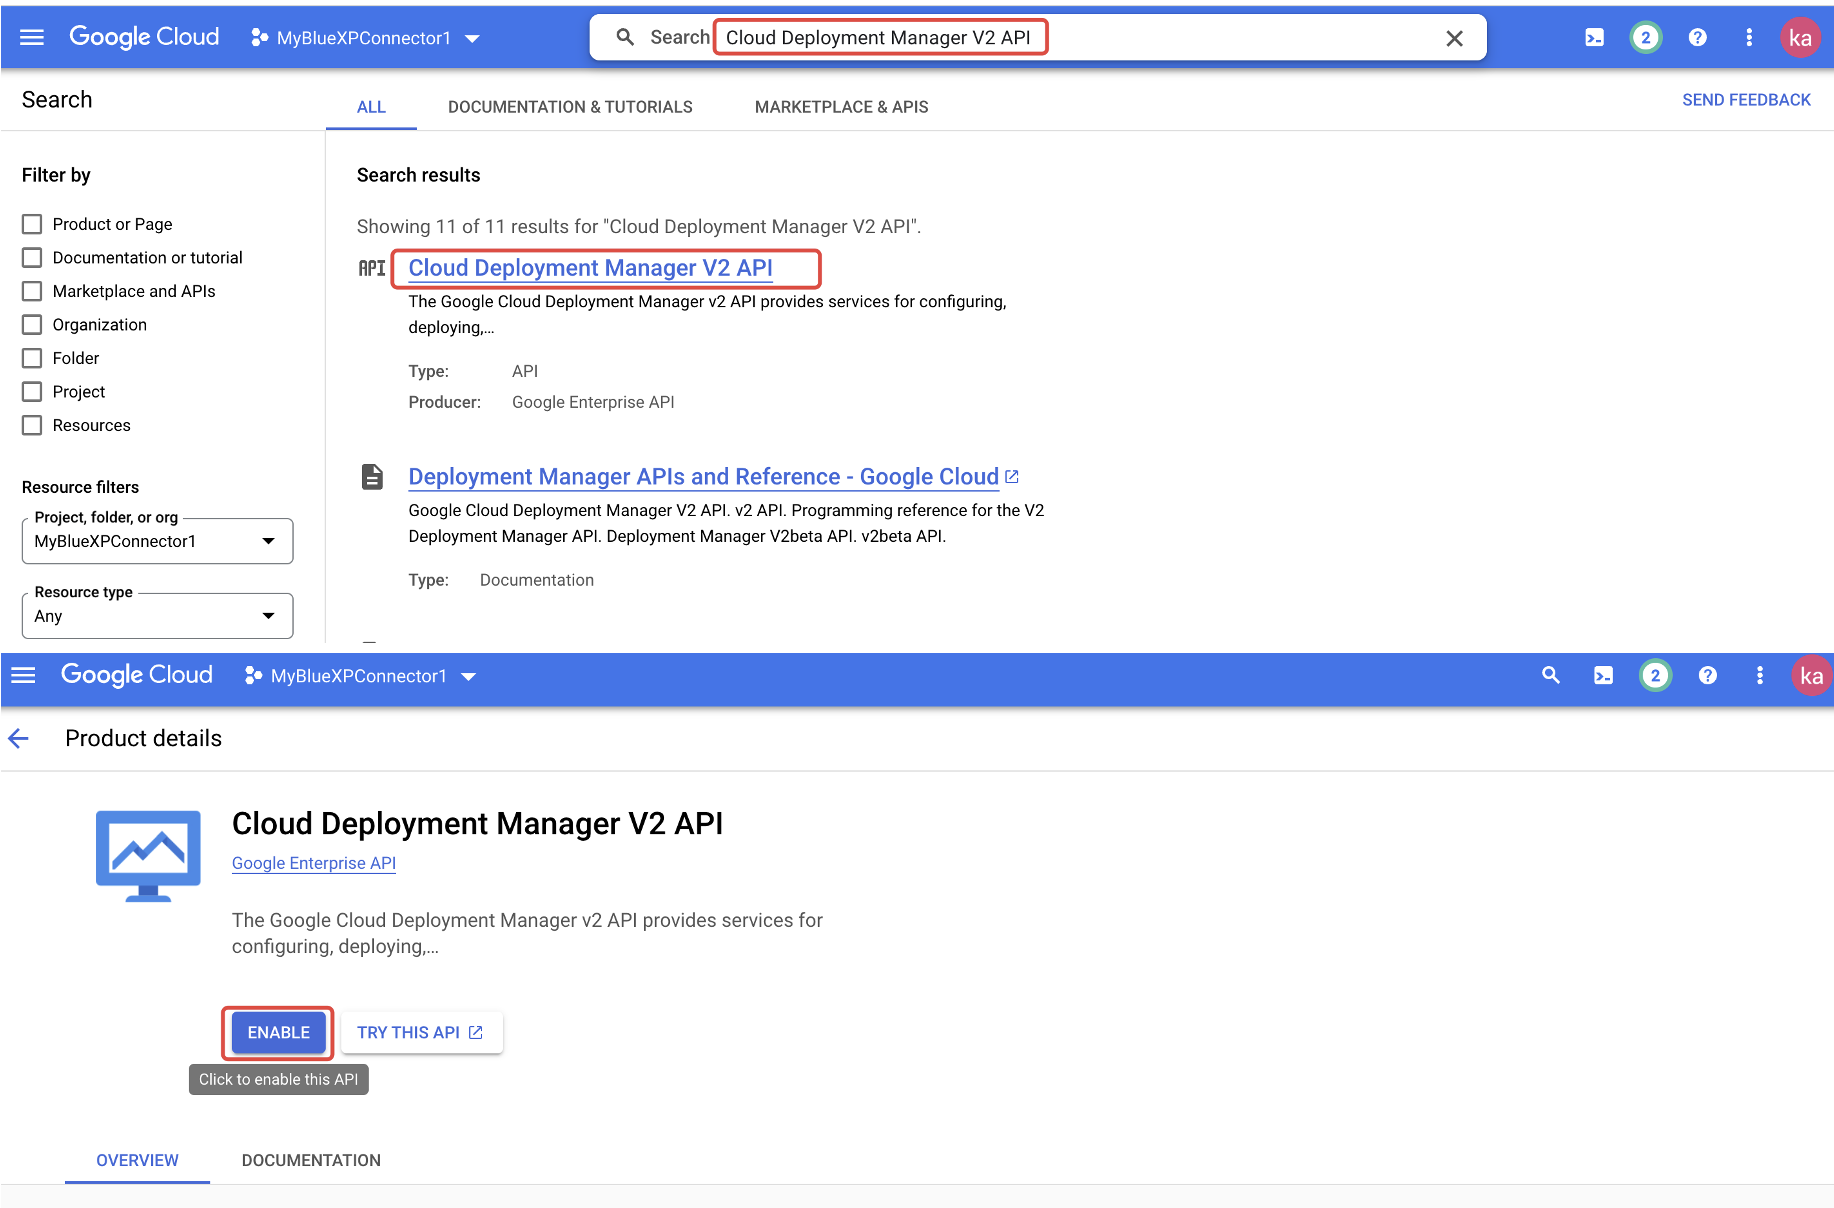
- Enable API
Enable Google Cloud APIsに書かれているAPIを確認します。
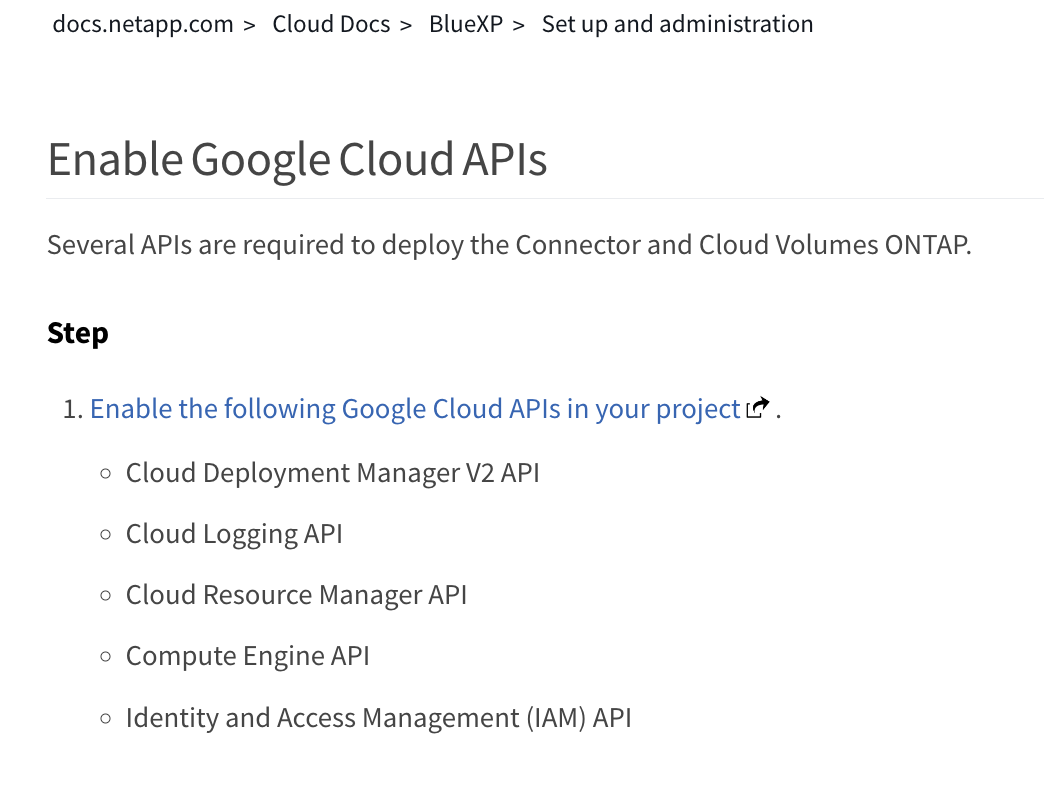
Google Consoleから検索してEnableします。
ここまではGoogle Consoleからの準備は完了です。
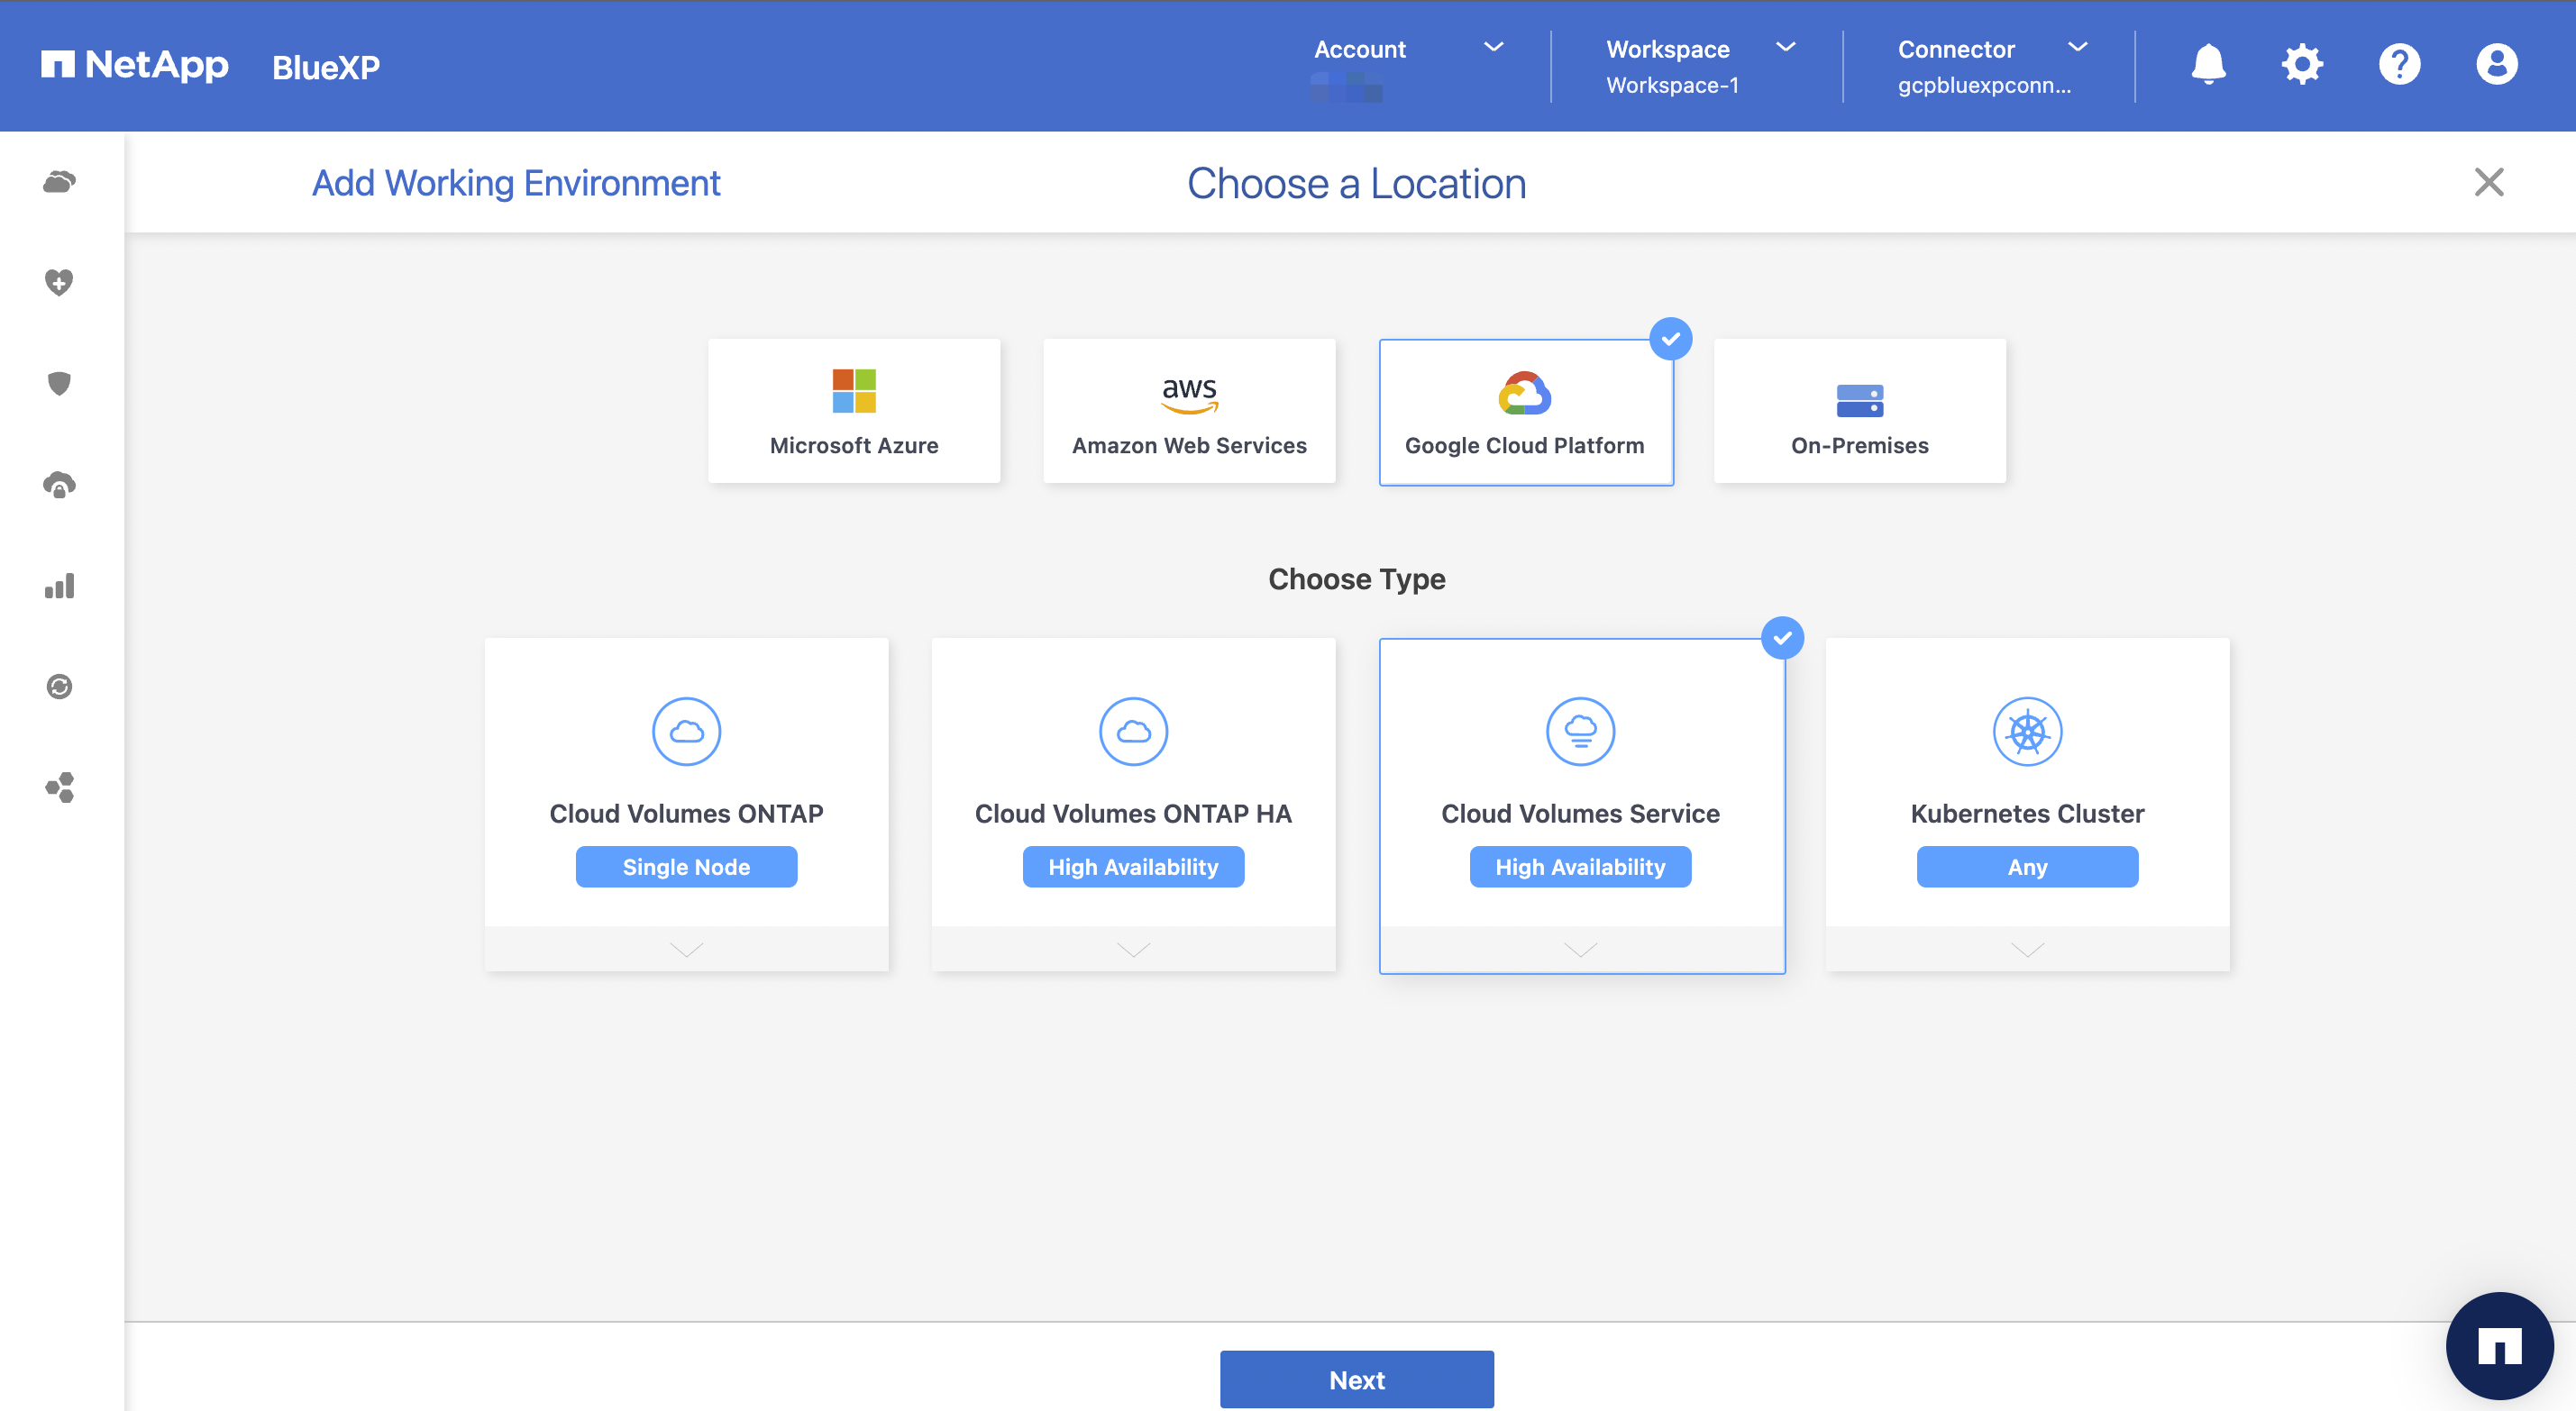
2.BlueXPのGUIにより、connectorを作成
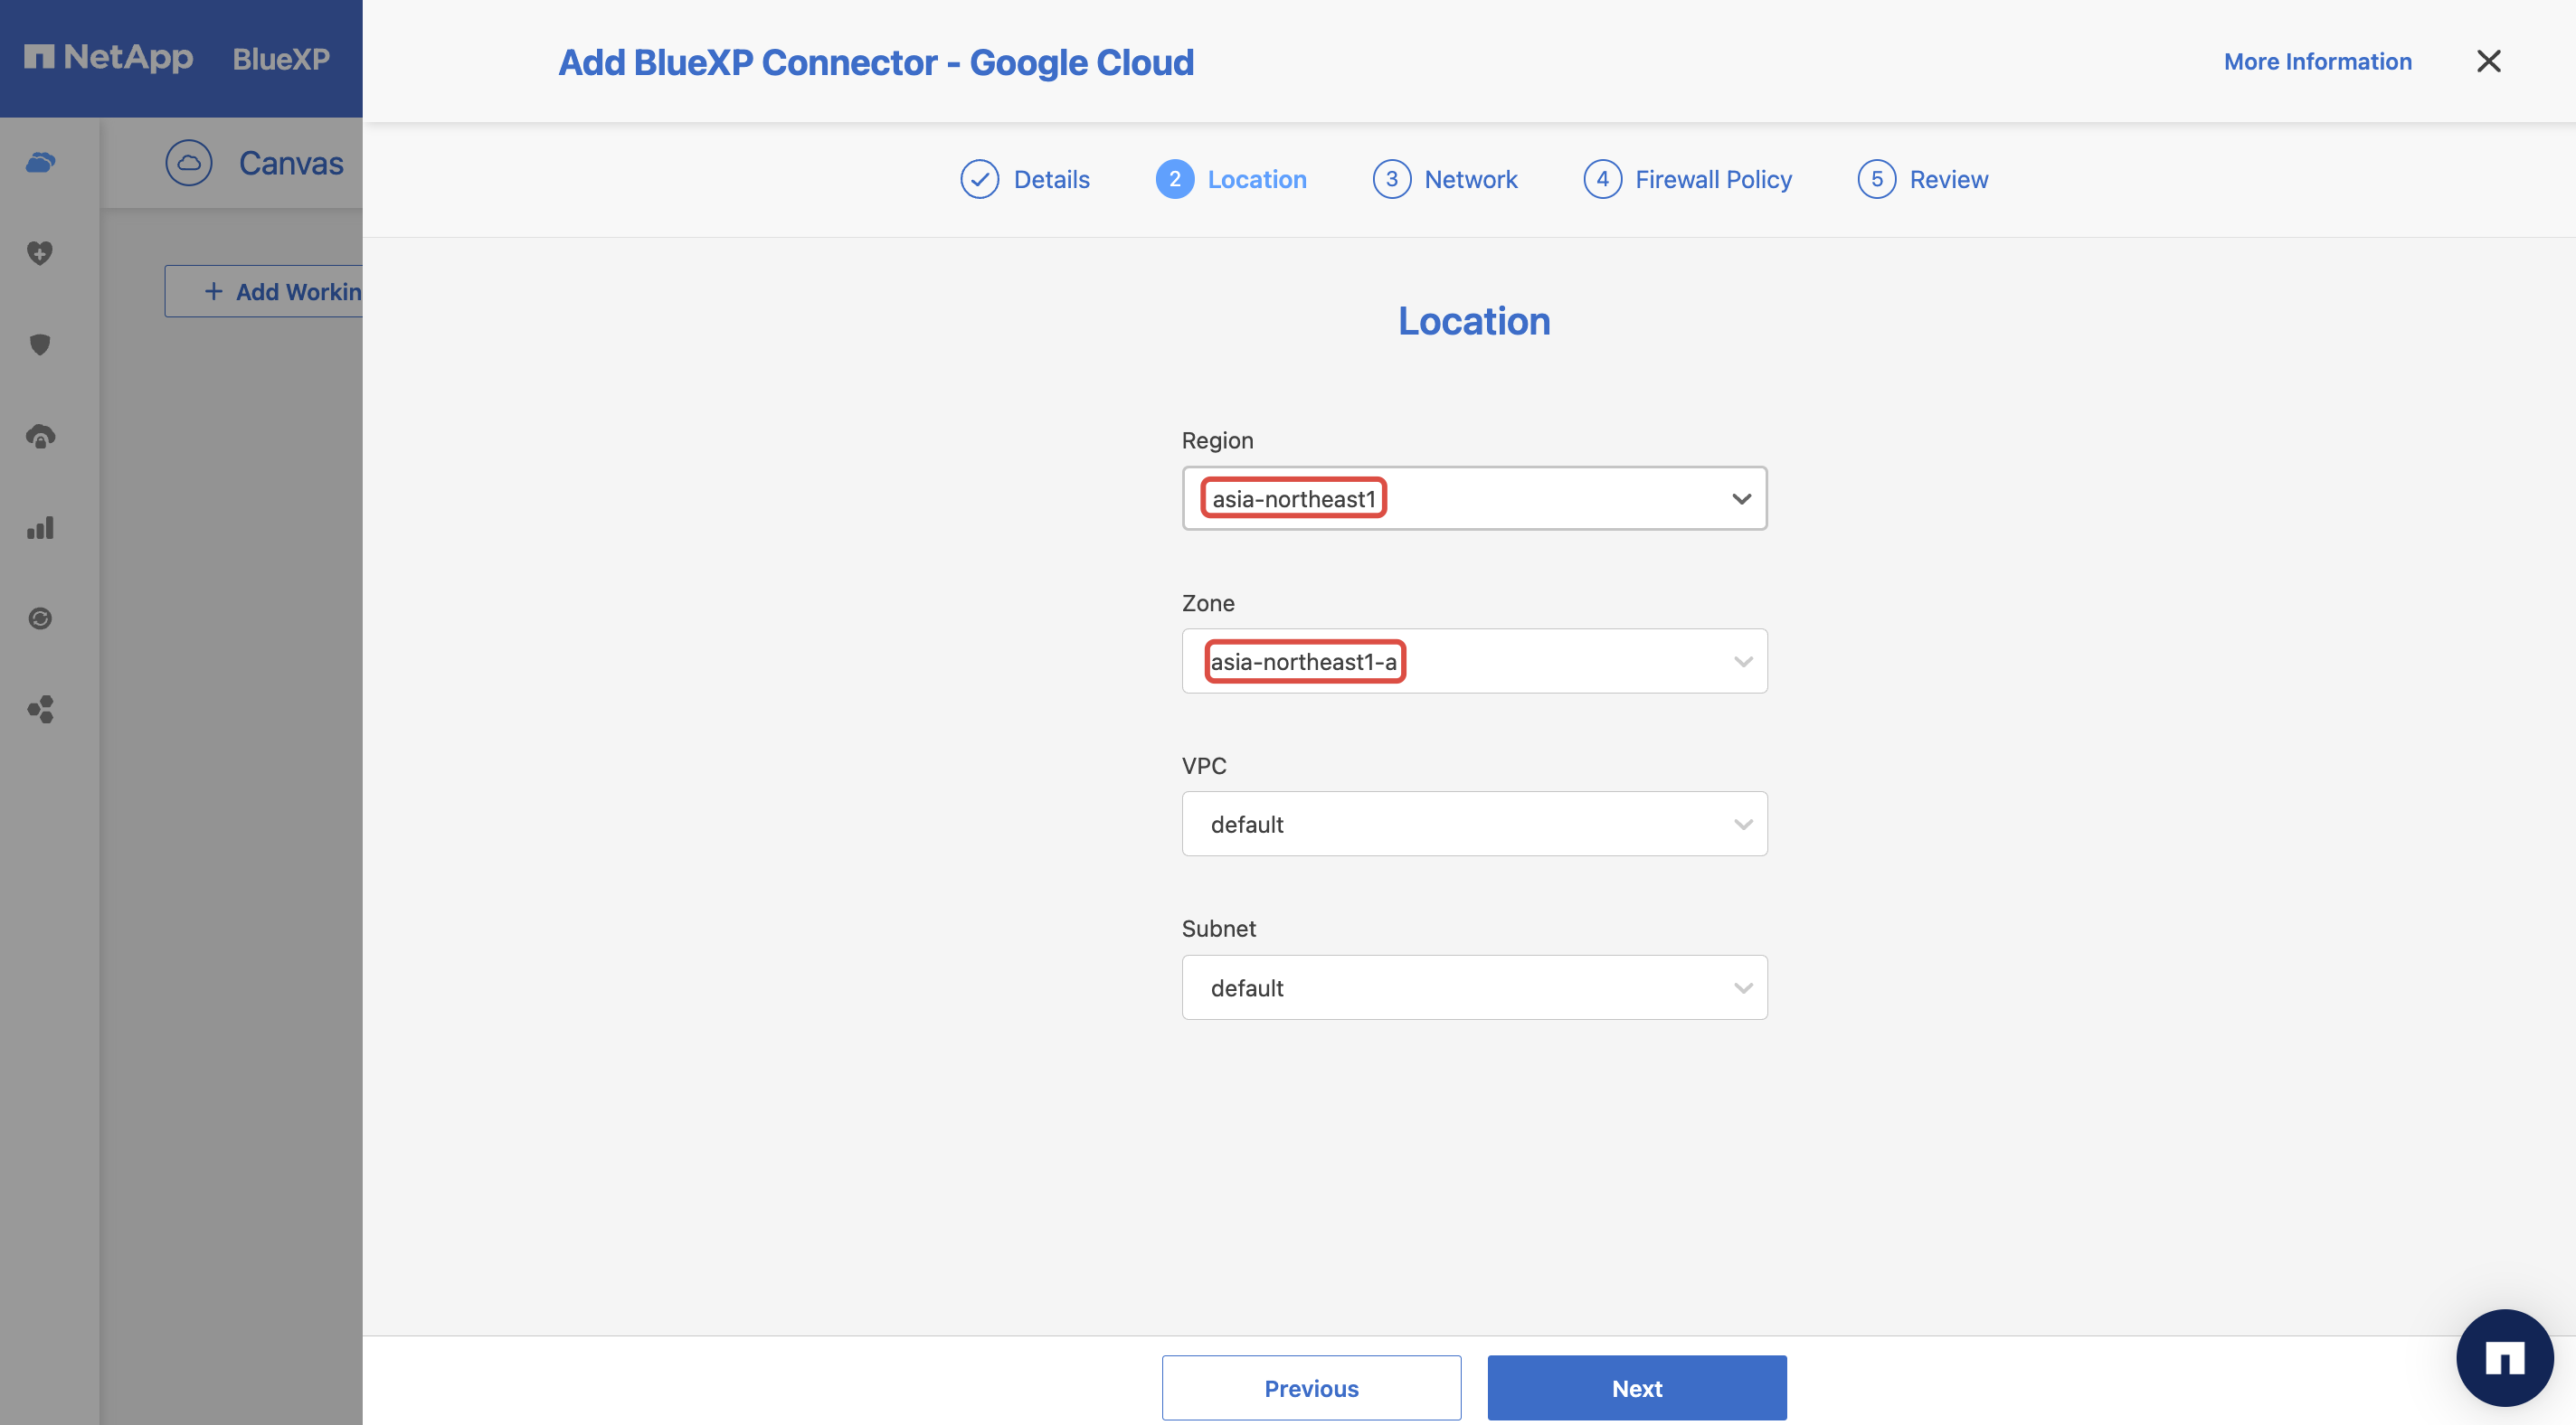
- 作成
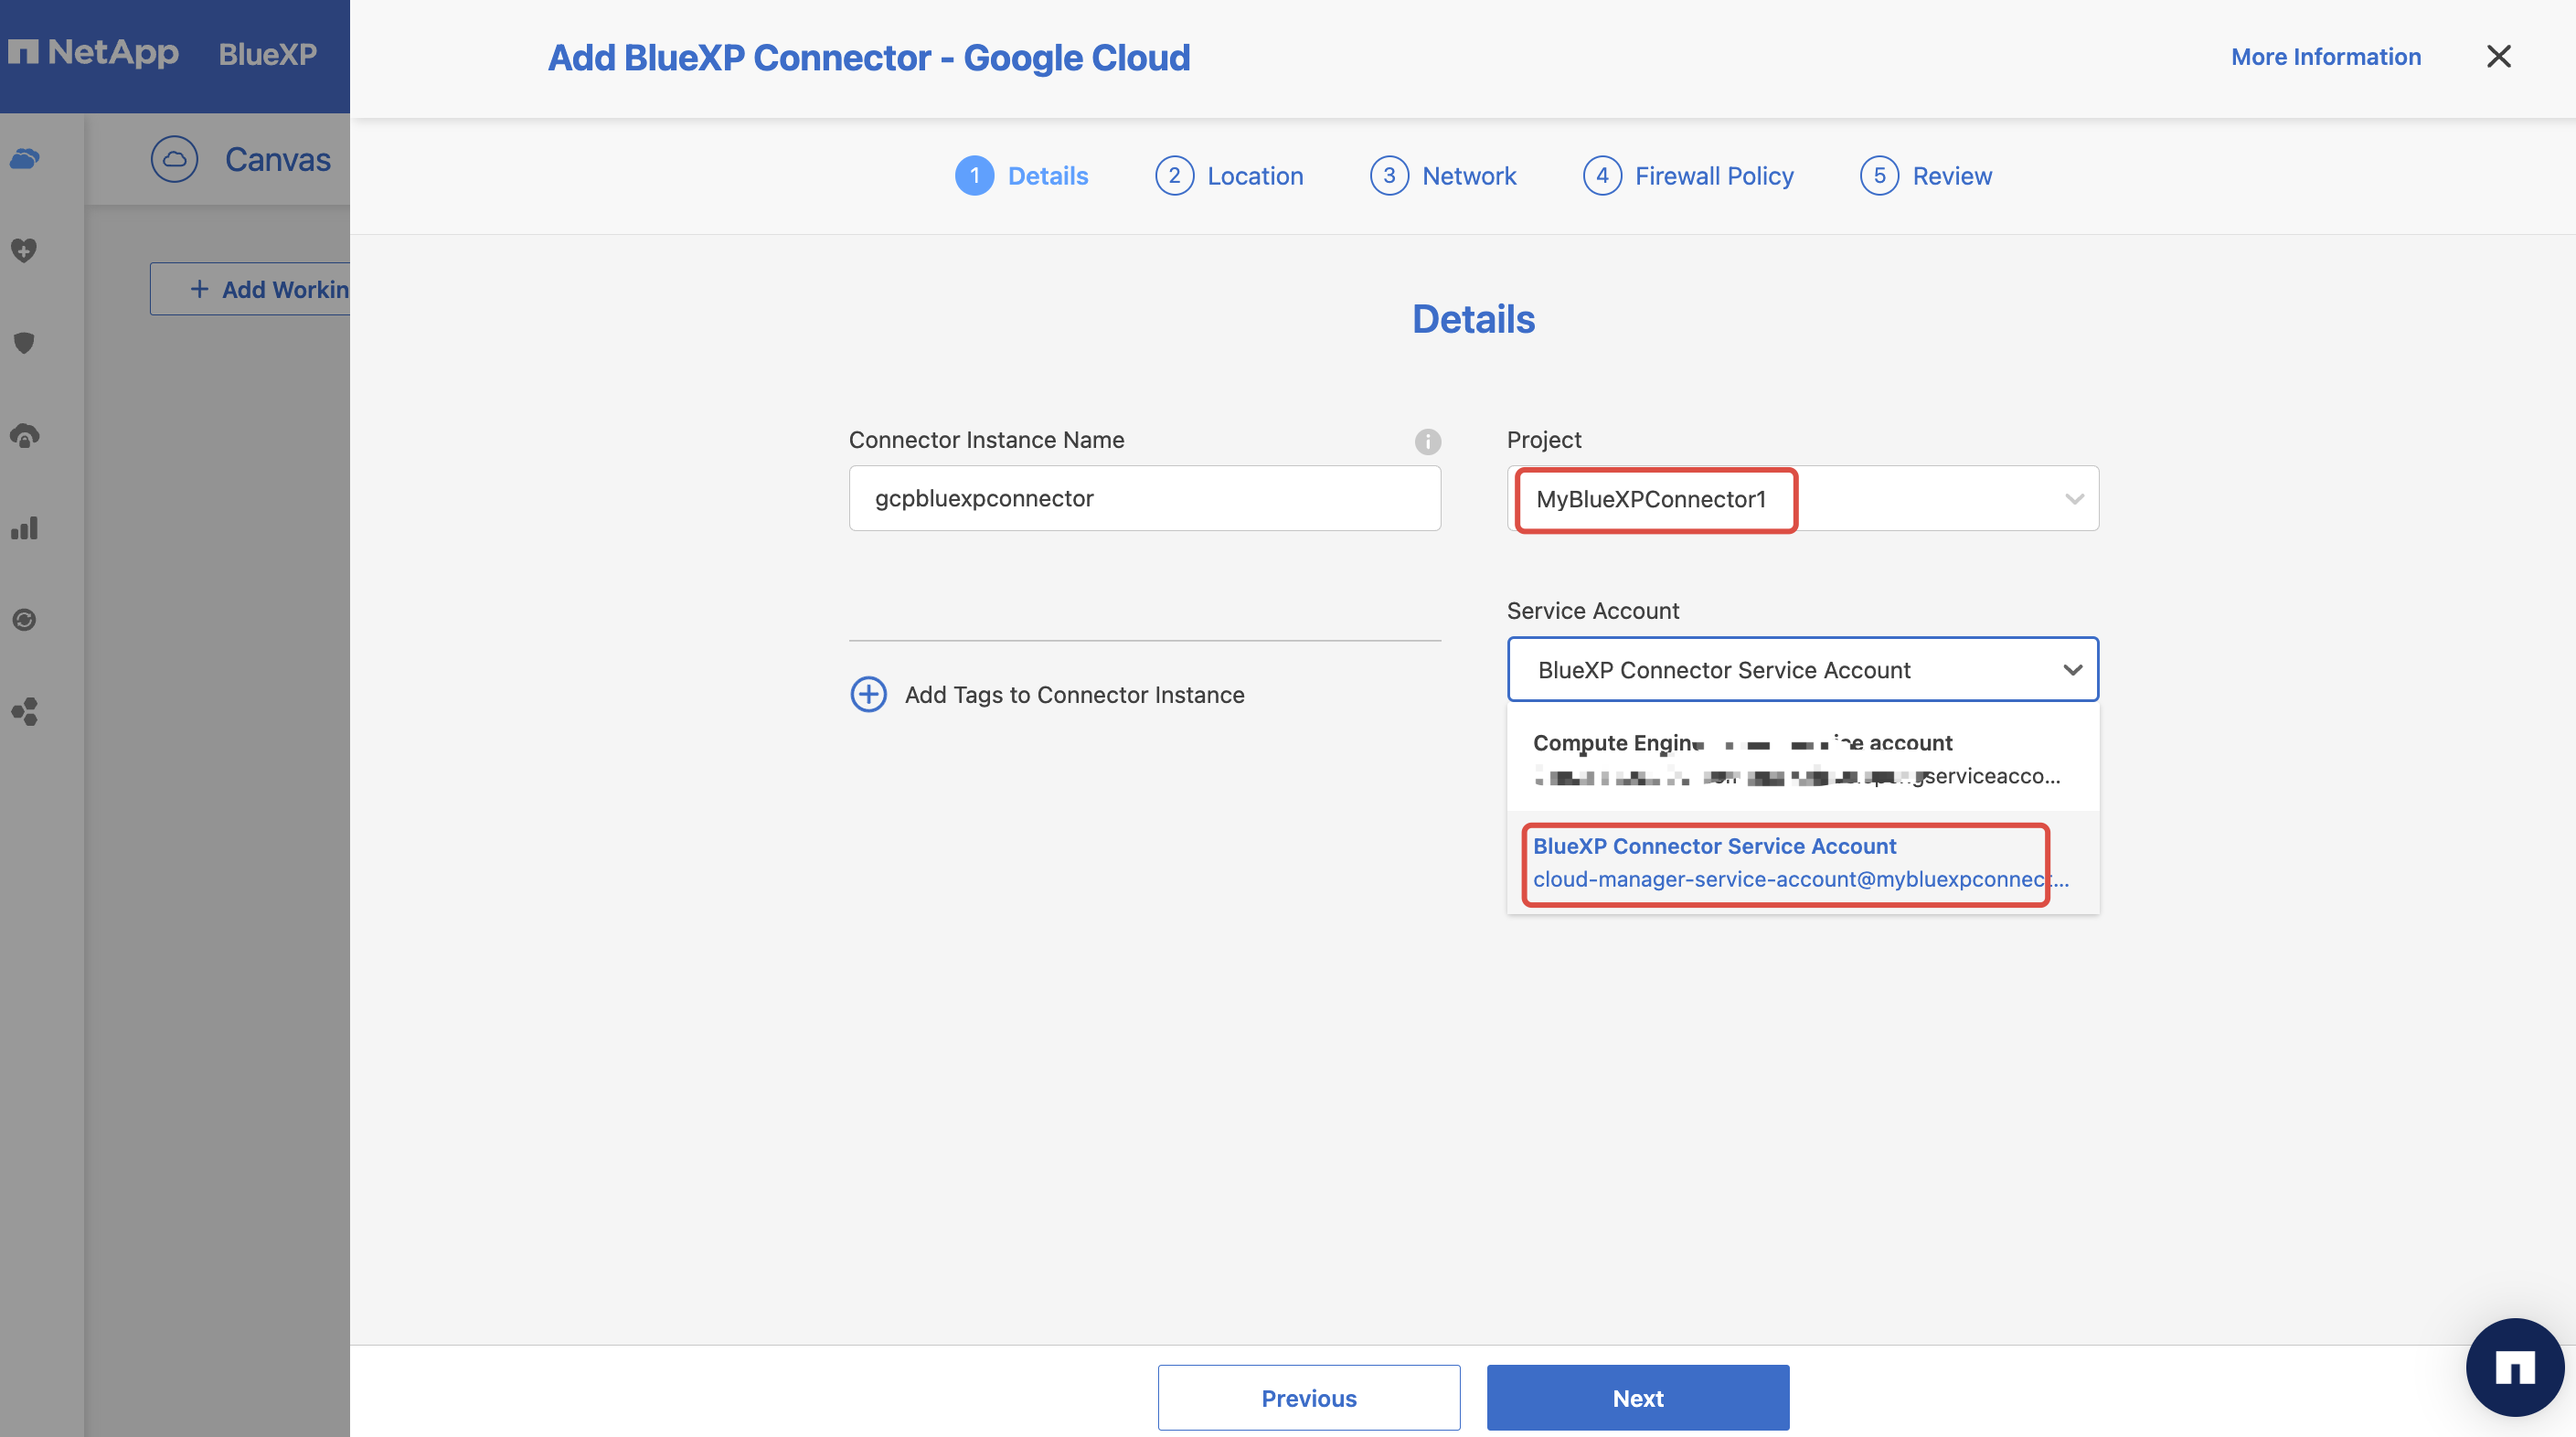
「Google Cloud document:Regions and zones」より、Tokyoはasia-northest1なので、asia-northest1-aを選び、今回はデモの為、defaultVPCを使います。
情報をレビューしてAddします。
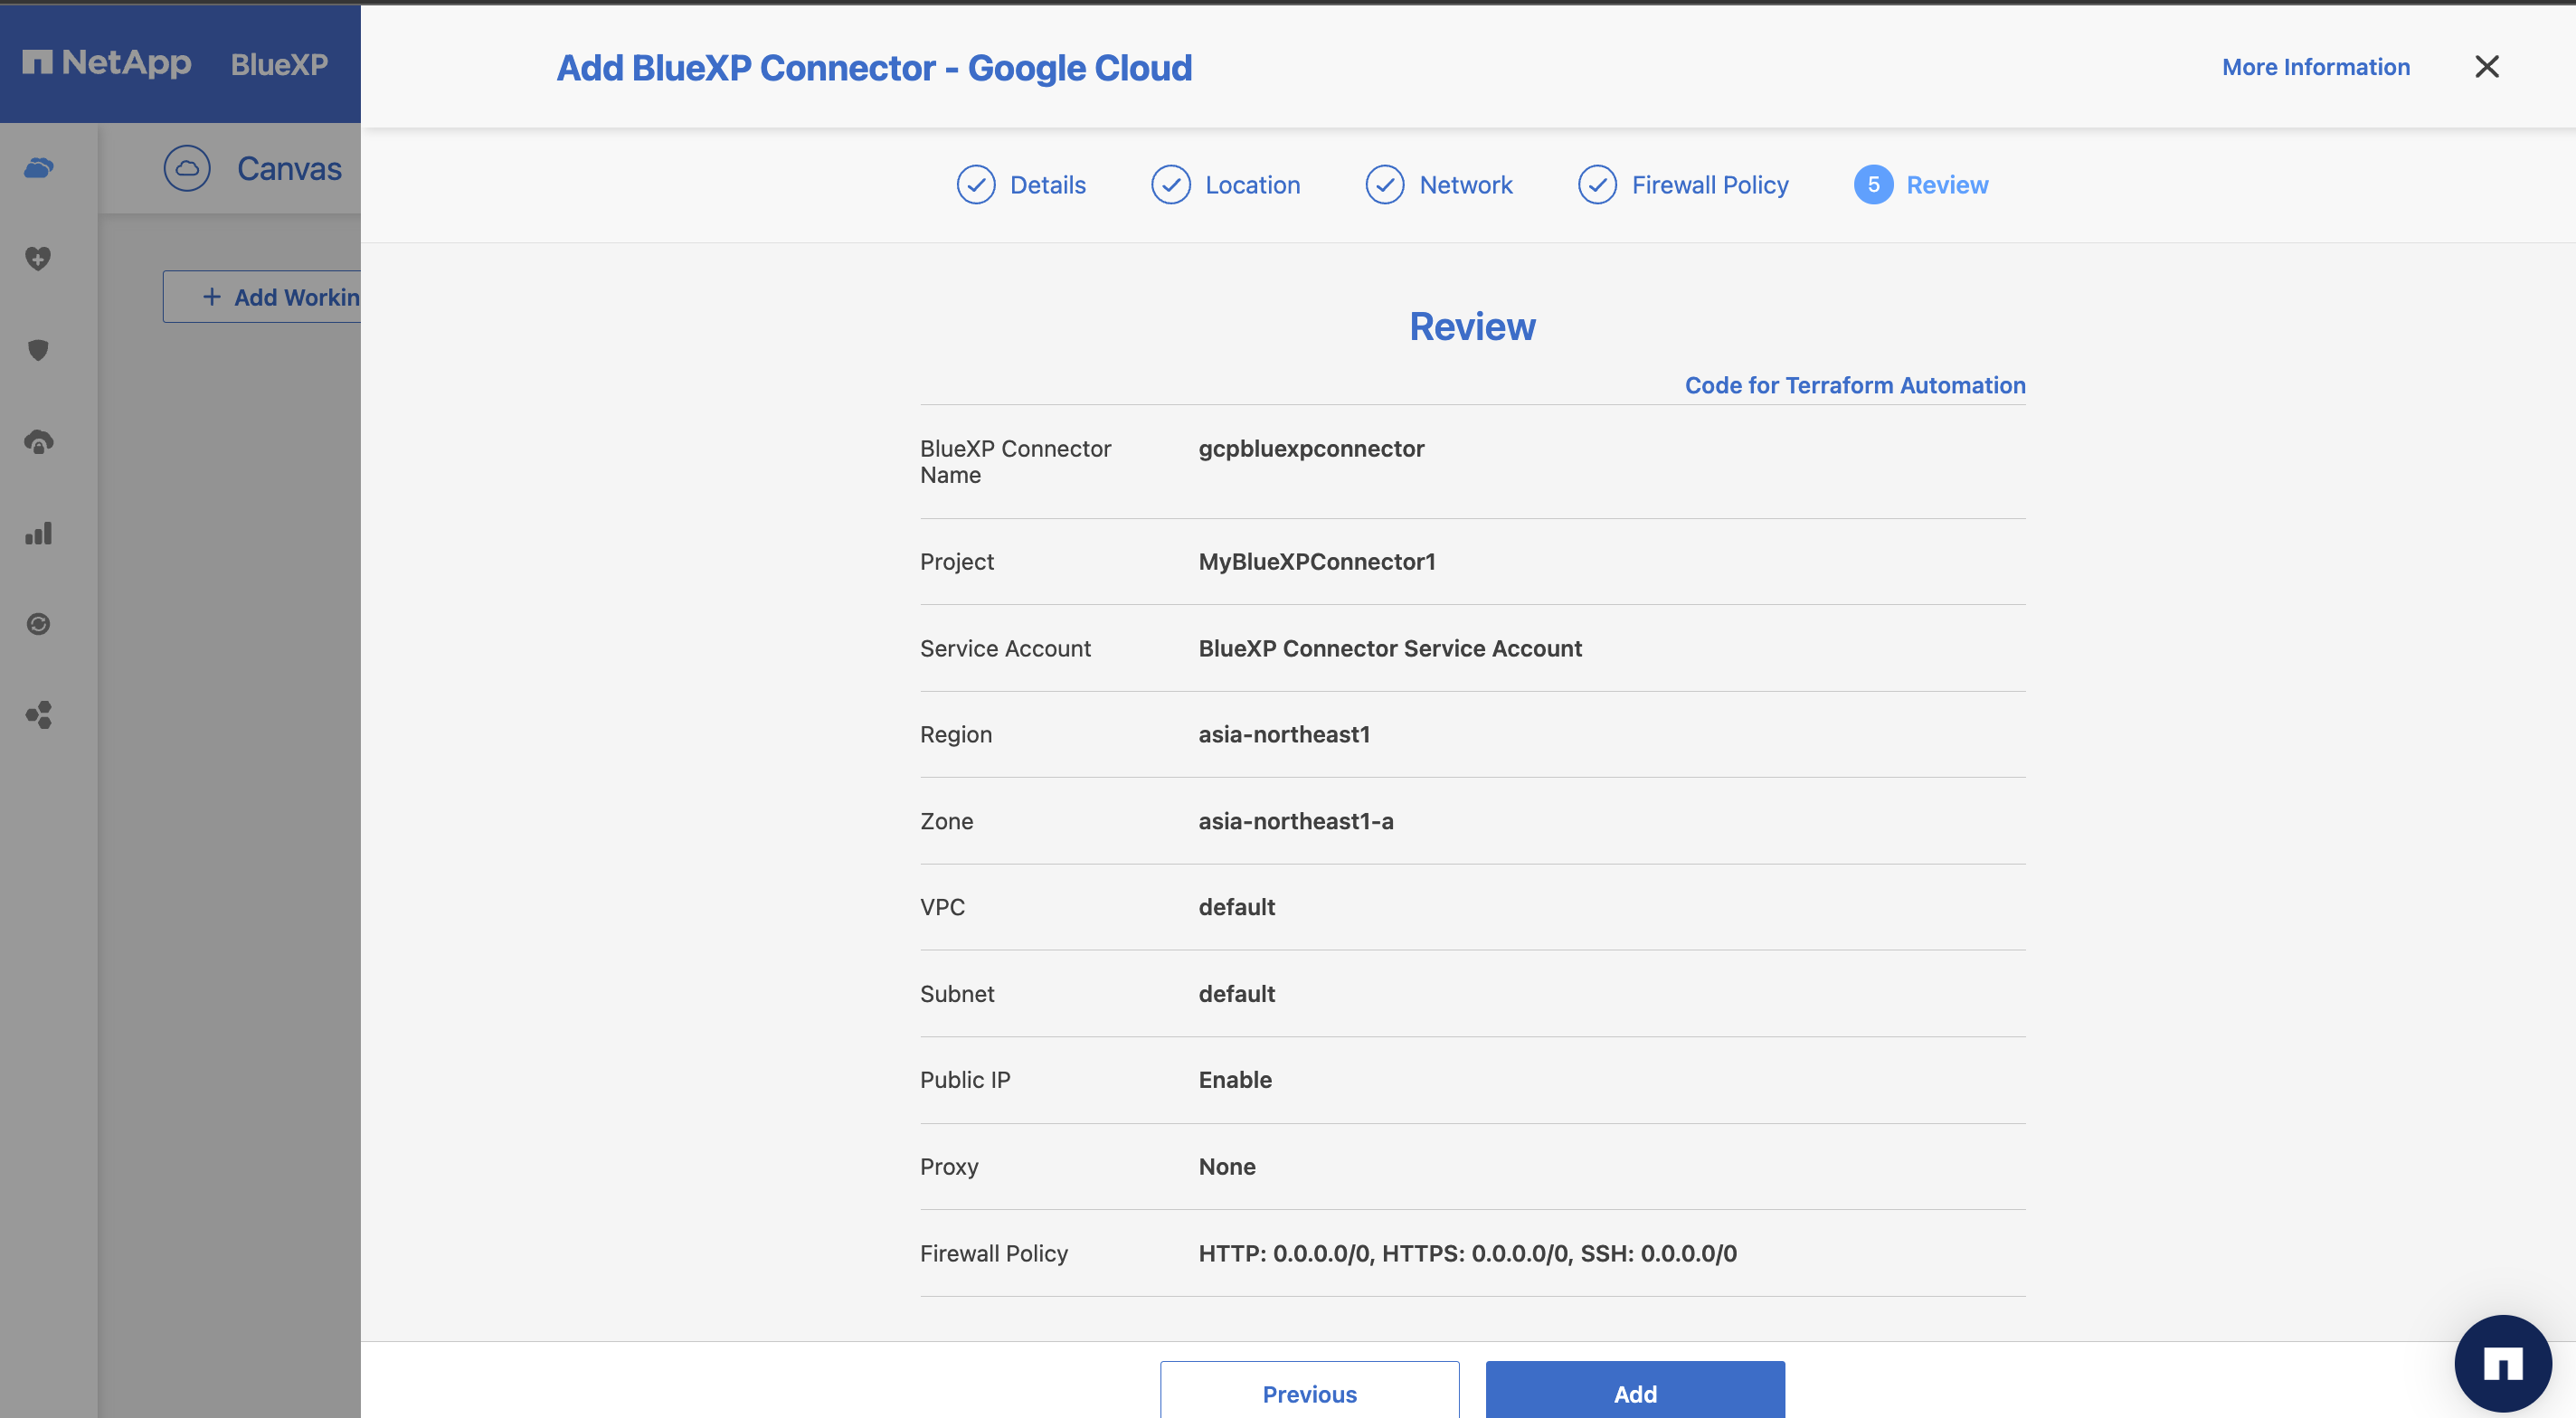
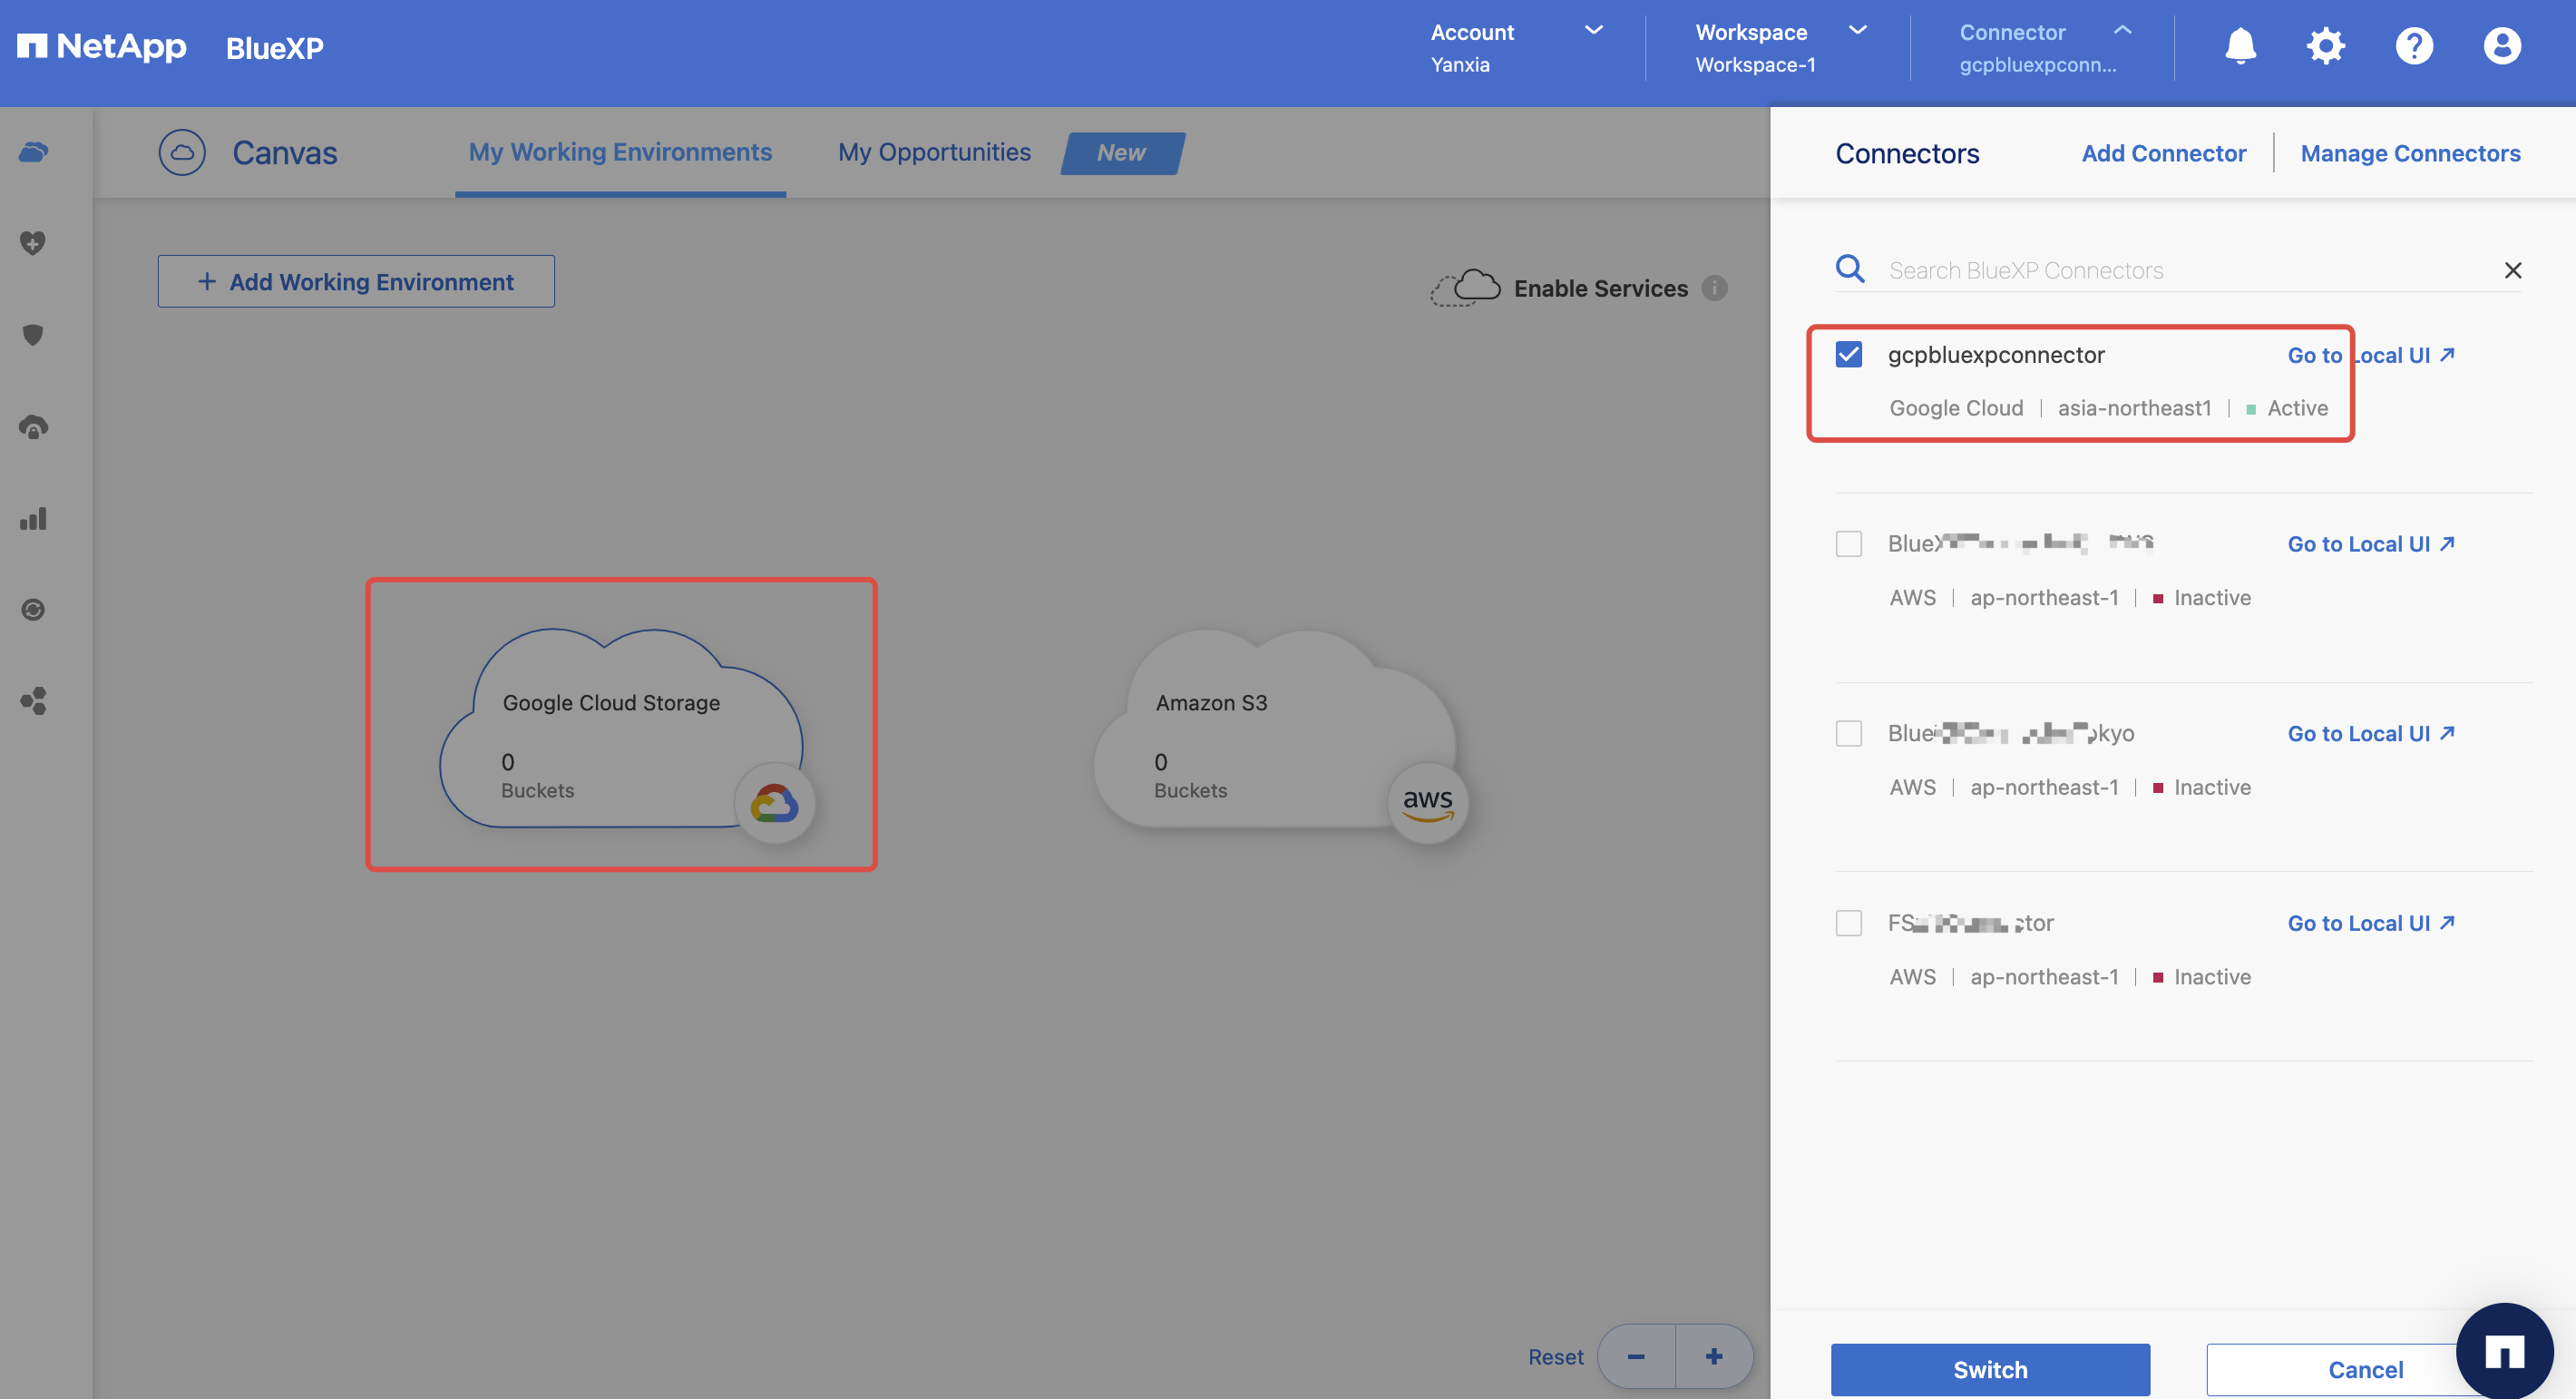
暫く待つと、BlueXPのGUIにActiveと表示されます。
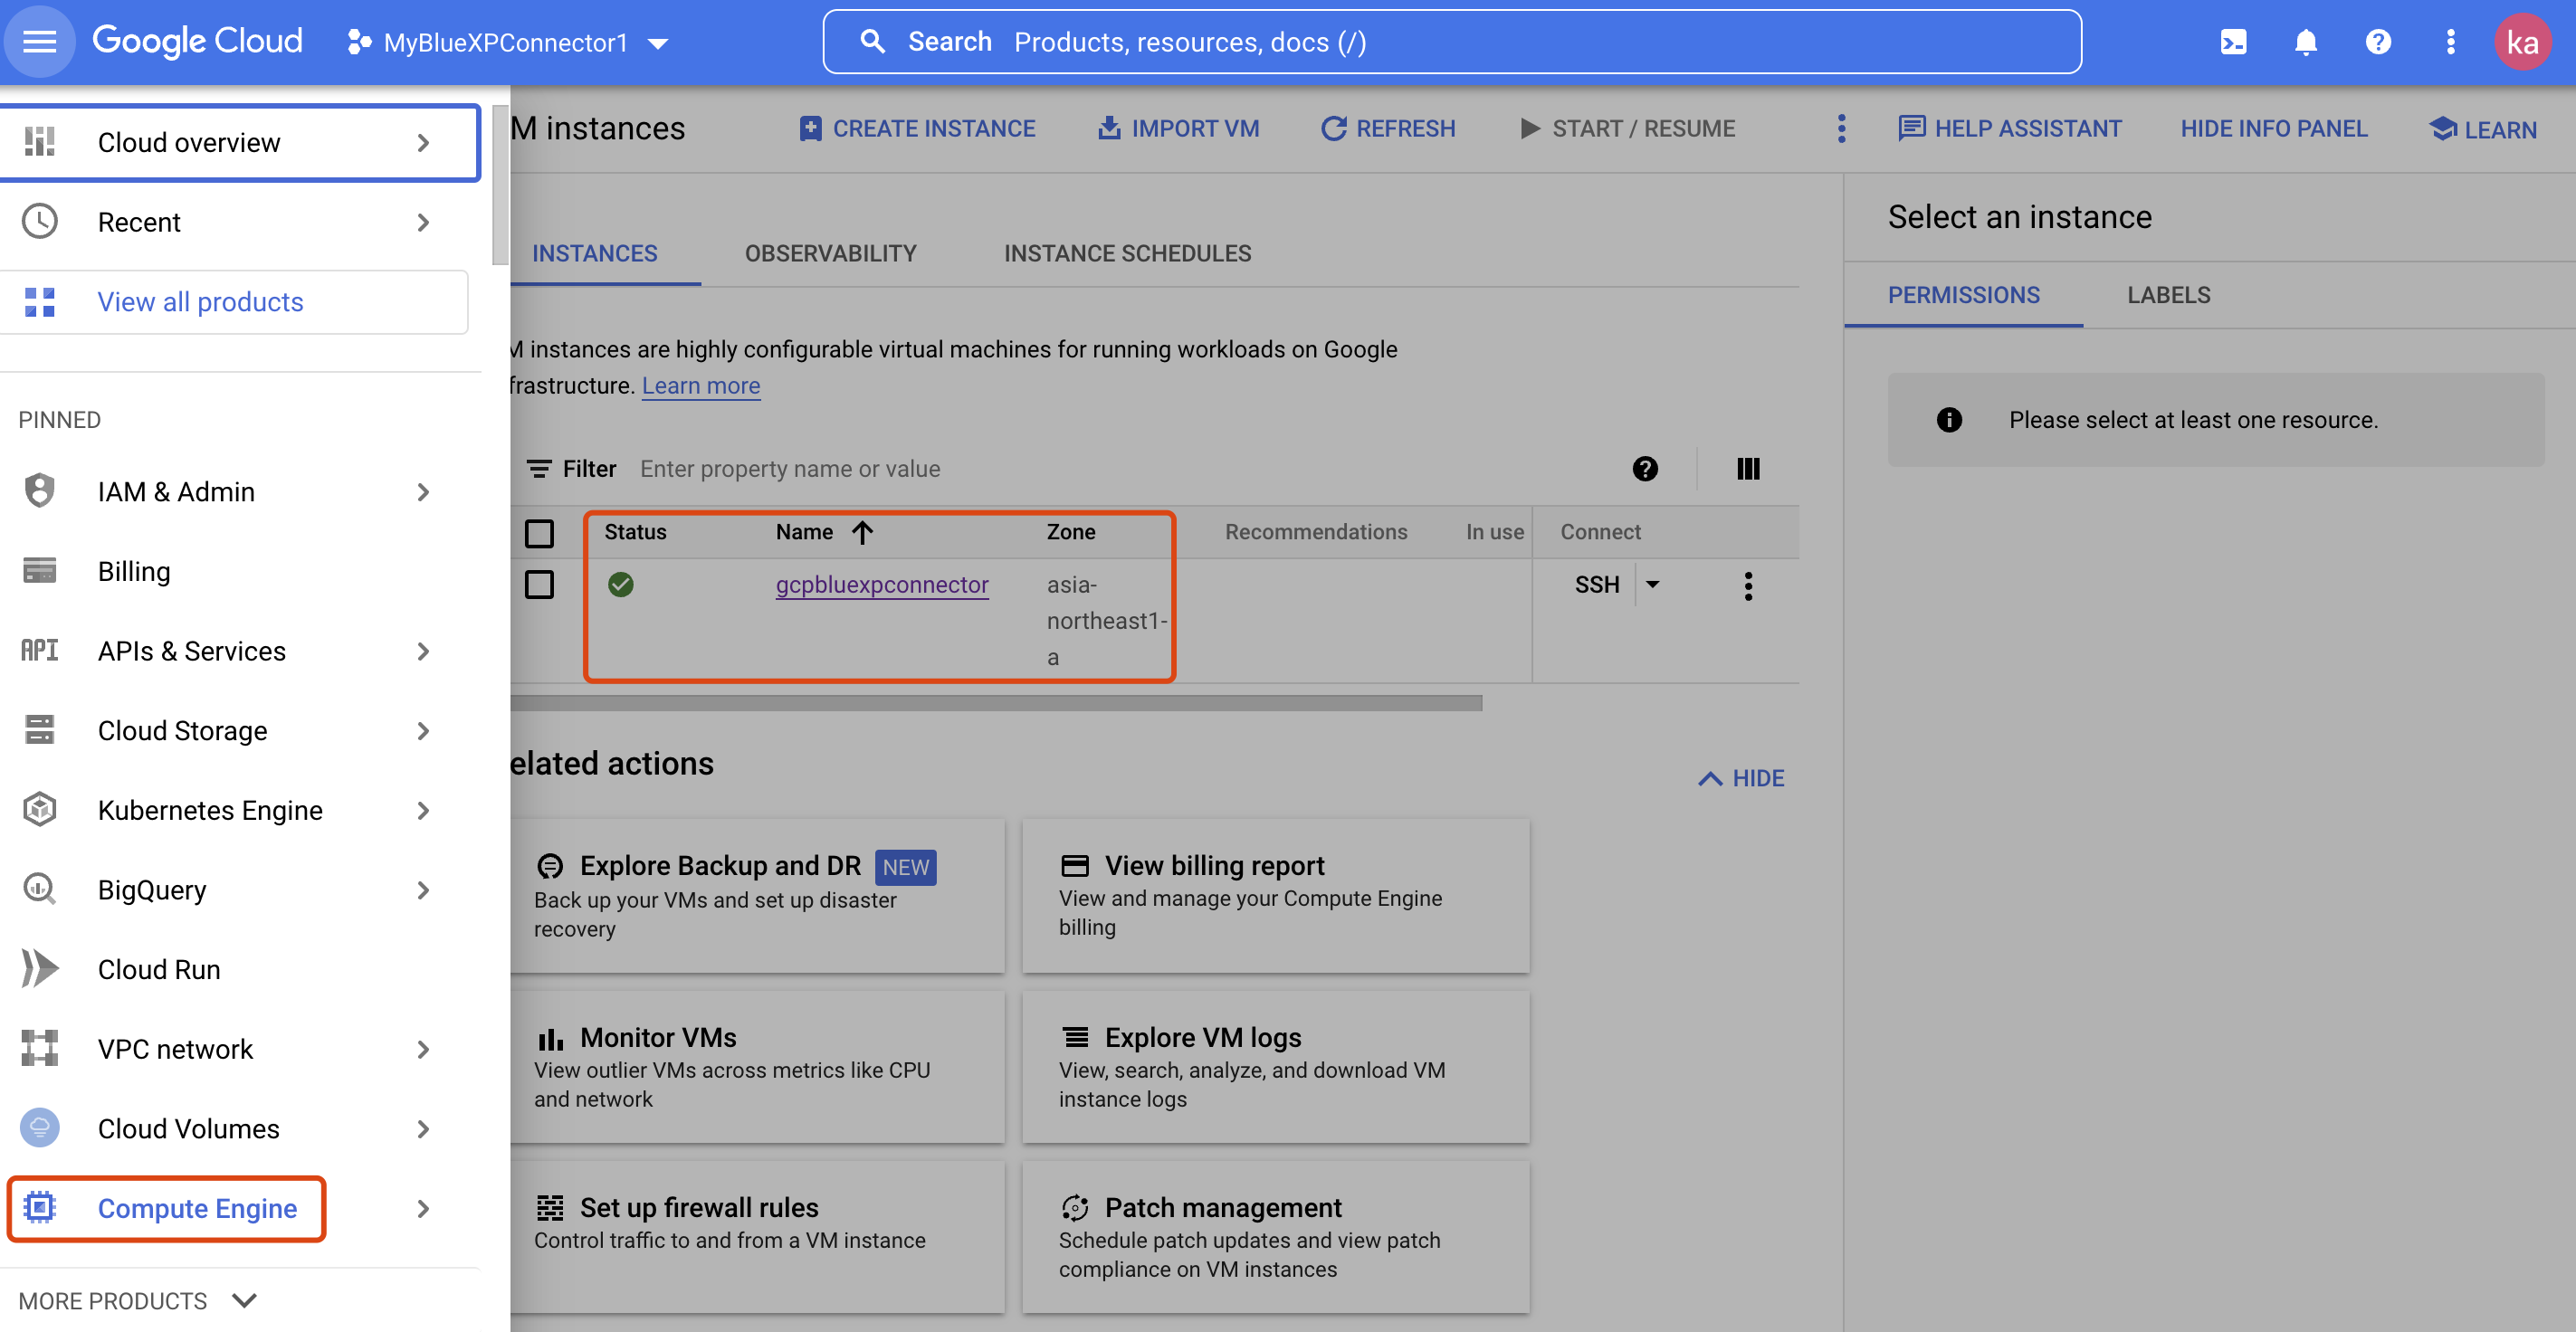
- 確認
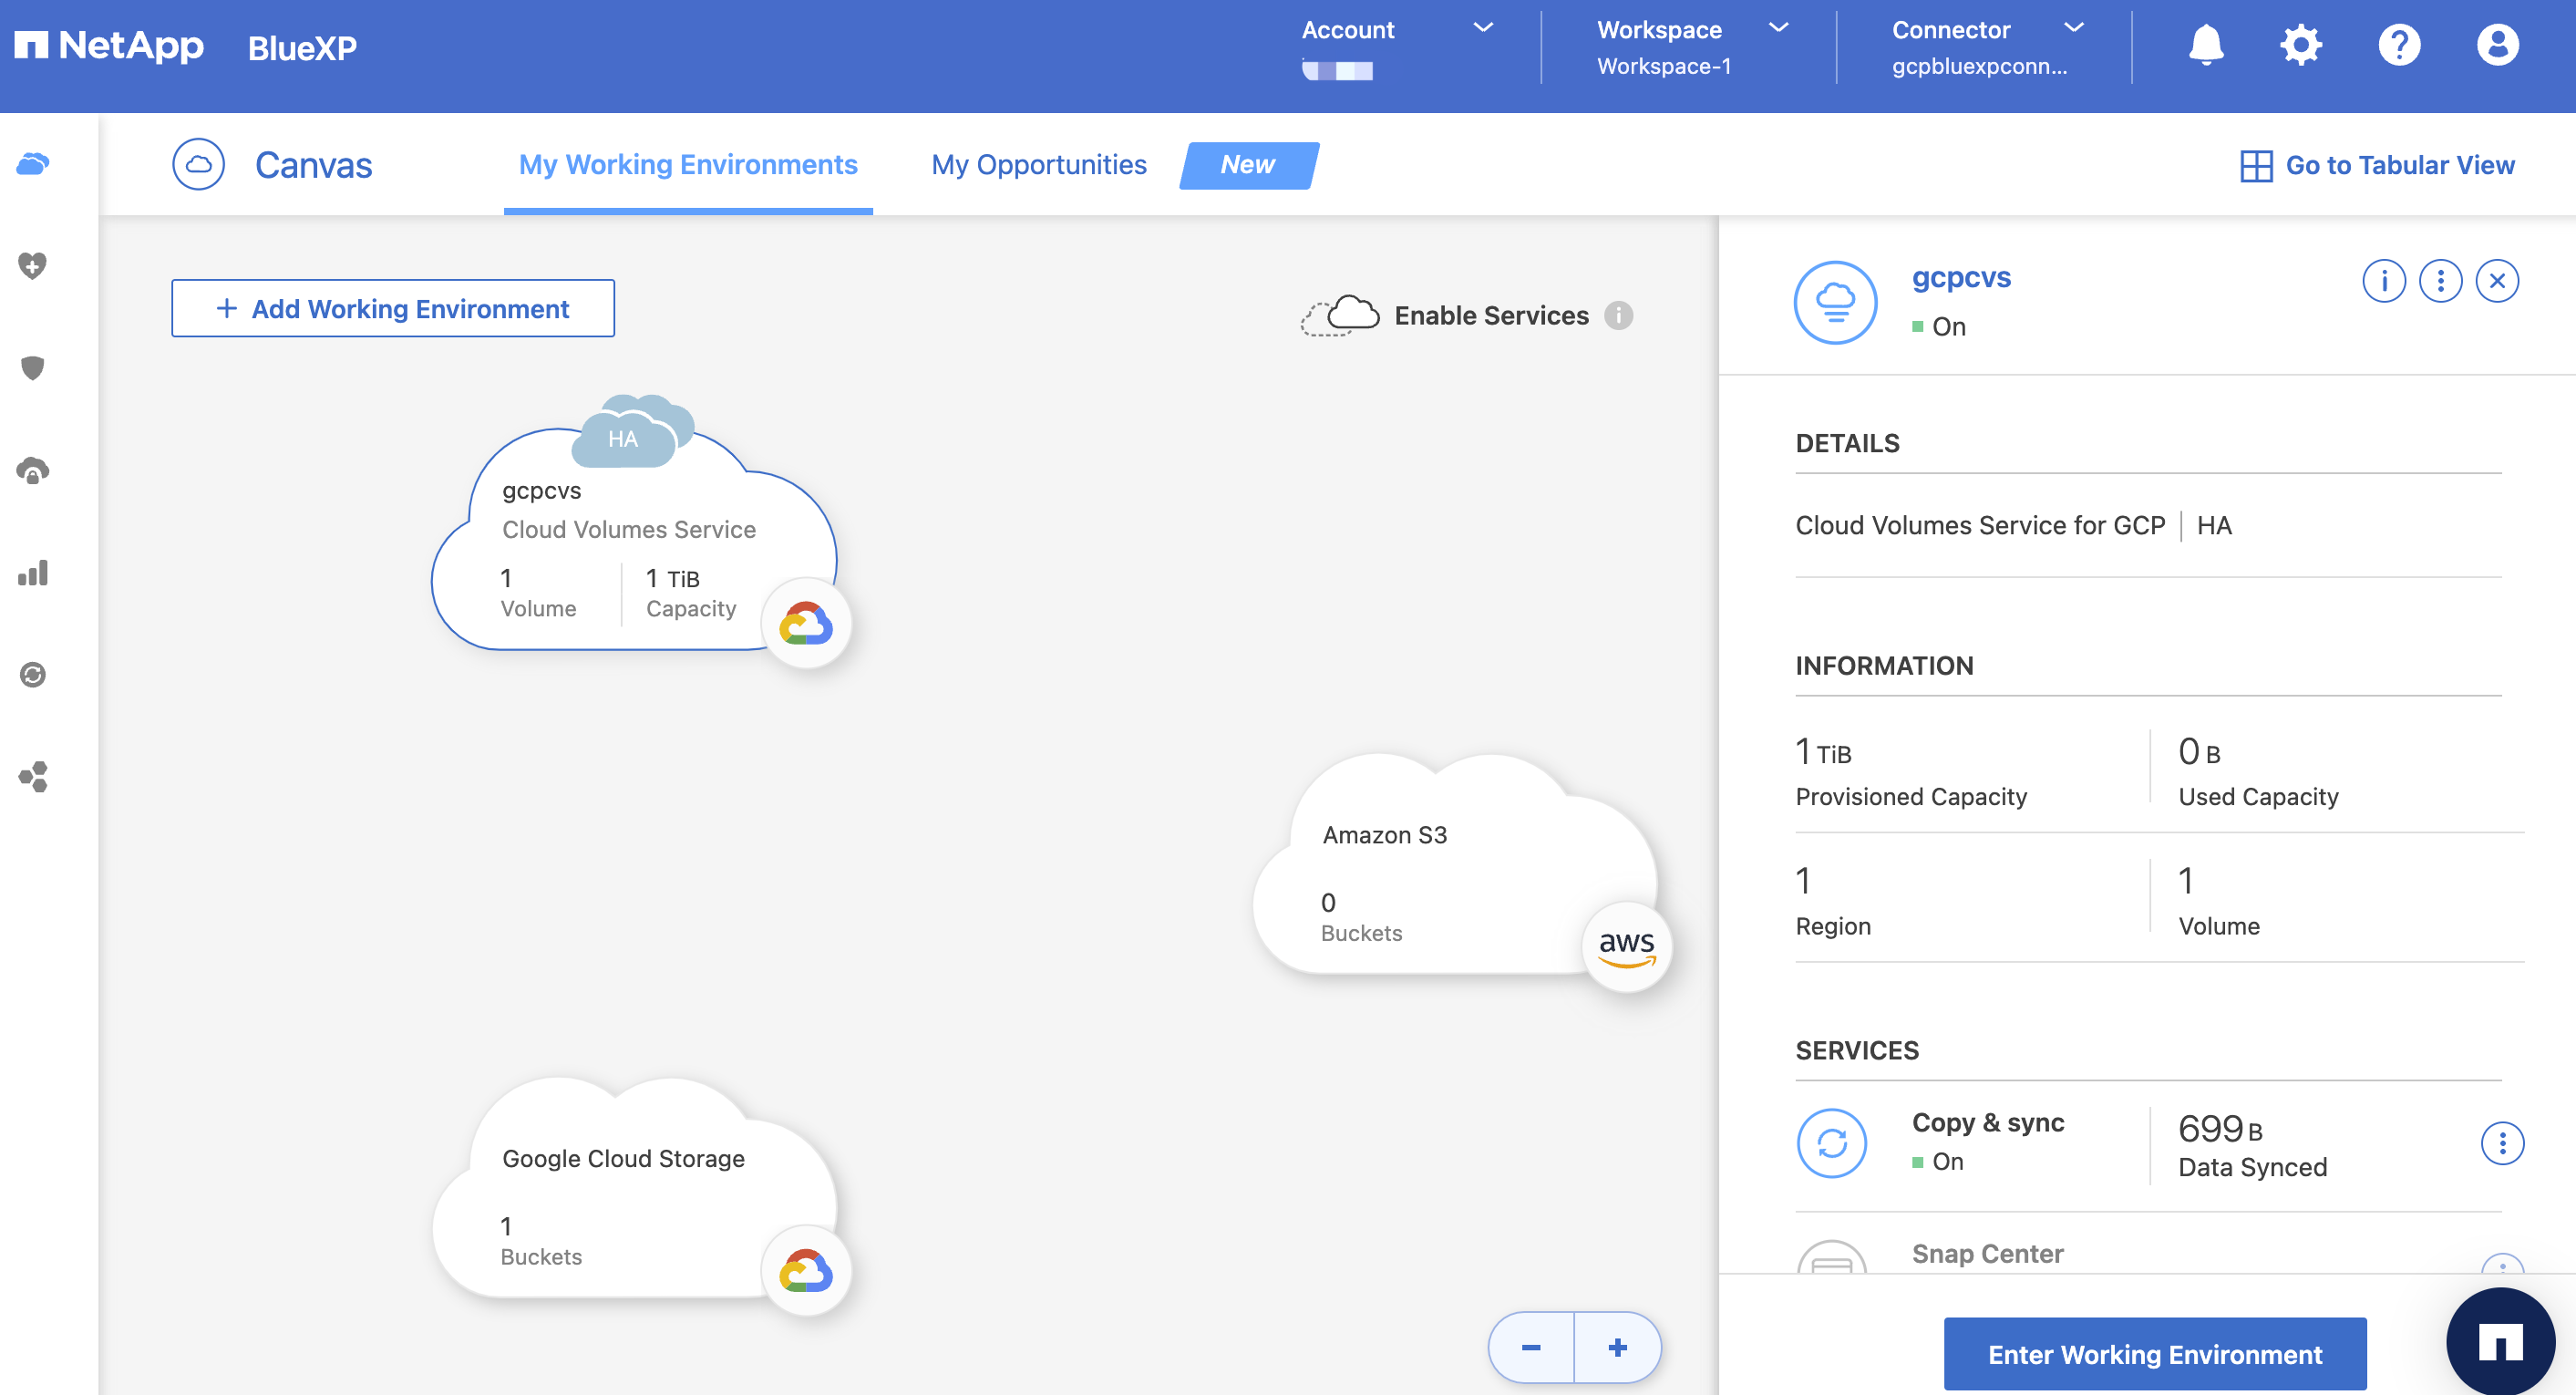
Google Console -> Compute EngineからBlueXP Connector instanceを確認できます。
更にConnectorを確認する為、BlueXPのGUIからGoogle CloudにNetApp Cloud SyncのDataBrokerを作りました。

また、NetApp Cloud Volumes Service for Google Cloud(CVS)をBlueXPのGUIからデプロイができることも確認できます。
Google Cloud上のCVSやCloud Syncなどの詳細な手順はまた別の記事でご紹介します。
まとめ
オンプレミス、Amazon Cloudなどの他に、Google Cloud Platform上にNetApp BlueXP Connectorを作成することができました。BlueXPを使ってクラウドサービスを利用する場合は、Connectorが必要となるかどうか、こちらのガイドより確認できます。

参考リンク
1.NetApp BlueXP: Create a Connector in Google Cloud from BlueXP
2.Google Cloud Platform:Creating a custom role
3.Google Cloud Platform:Creating a service account
4.BlueXP: Learn about Connectors
5.Google Cloud Document: Regions and zones
6.How to Deploy Cloud Volumes ONTAP Using NetApp Cloud Manager Terraform Provider
7.When a Connector is required
8.Creating a new data broker in Google Cloud