はじめに
自身のメモとして、本記事ではmacOS上でパッケージ管理するシステムのひとつであるHomebrewのbrew bundleの使い方について記述します.brew bundleを利用することでHomebrewでパッケージ及びGUIのアプリの一括管理を行うことが出来ます.
Homebrewとは
Homebrew(ほーむぶるー)とは、macOS上で動作するパッケージ管理システムです.パッケージ管理システムとはパッケージをインストールしたりアンインストールしたい出来るシステムのことを指します.Homebrewを利用することで、Macのターミナルから簡単にパッケージの追加・削除を行うことが出来ます.
動作環境の確認
今回動作確認するHomebrewのバージョンを確認します.
$ brew -v
Homebrew 3.1.12
Homebrew/homebrew-core (git revision a82b26bb6f; last commit 2021-06-15)
Homebrew/homebrew-cask (git revision 71d323d9f3; last commit 2021-06-14)
brew bundleの概要
Homebrewではターミナル上で動作するパッケージとGUIアプリ管理ができます.brewのコマンドを都度実行し、パッケージの追加削除を行っても良いのですが、brew bundleを利用することで一括で追加・削除ができ、とても便利です.brew bundleは設定ファイルのBrewfileを読み込みむことで、パッケージを自動的に追加・削除してくれます.
brew bundleを使うメリットしては、新たにPCのセットアップするする際に、Brewfileさえあれば必要なパッケージを一括インストールができ、設定の手間が省けます.
下記がBrewfileの一例です.以降で、下記の内容を噛み砕いて説明していきます.
cask_args appdir: "/Applications"

brew 'anyenv'
brew 'ctop'
brew 'curl'
brew 'jq'
brew 'htop'
brew 'mackup'
brew 'mas'
brew 'peco'
brew 'tree'
brew 'zsh'

cask "1password"
cask "aws-vpn-client"
cask "discord"
cask "docker"
cask "google-backup-and-sync"
cask "google-chrome"
cask "google-japanese-ime"
cask "iterm2"
cask "kindle"
cask "microsoft-auto-update"
cask "microsoft-office"
cask "miro"
cask "notion"
cask "parallels"
cask "visual-studio-code"
cask "webex-meetings"

mas "Keynote", id: 409183694
mas "Slack", id: 803453959
mas "ScreenFlow9", id: 1475796517
mas "TweetDeck", id: 485812721

# cask "sourcetree"
brewでのパッケージ管理
ターミナル上で動作するパッケージの記述は下記になります.インストールしたパッケージを記載します.
brew 'anyenv'
brew 'ctop'
brew 'curl'
brew 'jq'
brew 'htop'
brew 'mackup'
brew 'mas'
brew 'peco'
brew 'tree'
brew 'zsh'
masでのパッケージ管理
Mac App Storeからインストールするアプリケーションはmasを利用してインストールします.下記では、Mac App StoreからKeynote、Slack、TweetDeck、そして有料のScreenFlow9をインストールします.
mas "Keynote", id: 409183694
mas "Slack", id: 803453959
mas "ScreenFlow9", id: 1475796517
mas "TweetDeck", id: 485812721
下記がフォーマットになります.
mas "<application_name>", id: <application_id>
Mac Apple Storeからアプリケーションをインストールする場合は、アプリケーション名とアプリケーションのIDが必要です.これらを取得するために、まずGoogle検索を行います.App Storeの検索結果をクリックします.
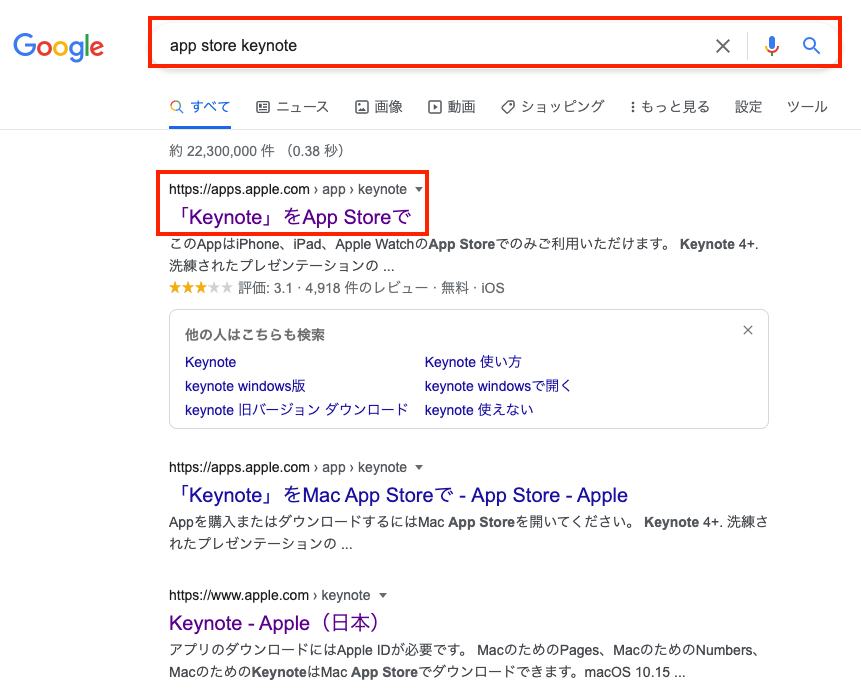
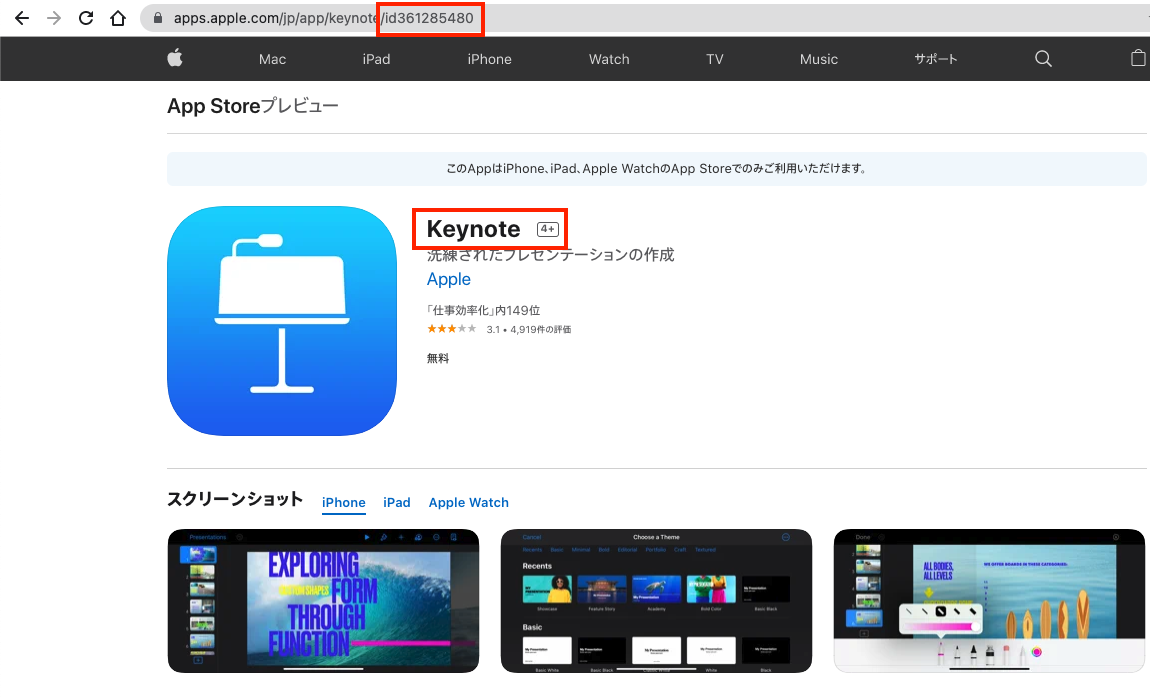
「Keynote」のApp StoreのURLにアプリケーションIDは埋め込まれています.Keynoteの場合は、アプリケーション名は「Keynote」、アプリケーションIDは「361285480」となります.なお、アプリケーションを一意に特定するのはアプリケーションIDのため、厳密にはアプリケーション名は任意の文字列を指定出来ます.
https://apps.apple.com/jp/app/keynote/id361285480
よって、Keynoteをbrew bundleでインストールするのに必要な1行は下記になります.
mas "Keynote", id: 409183694
masを利用する際の注意点としてMac App Store一度登録しているアプリケーションが対象となるため、新規にアプリケーションをインストールする場合は、一度Mac App Storeで手動で購入してからアプリケーションを削除しbrew bundleで登録すると良いです.
caskでのパッケージ管理
Mac App Storeを介さないアプリケーションはcaskを利用してインストールします.下記が例になります.
cask_args appdir: "/Applications"

cask "1password"
cask "aws-vpn-client"
cask "discord"
cask "docker"
cask "google-backup-and-sync"
cask "google-chrome"
cask "google-japanese-ime"
cask "iterm2"
cask "kindle"
cask "microsoft-auto-update"
cask "microsoft-office"
cask "miro"
cask "notion"
cask "parallels"
cask "visual-studio-code"
cask "webex-meetings"
下記がフォーマットとなります.
cask "<application_name>"
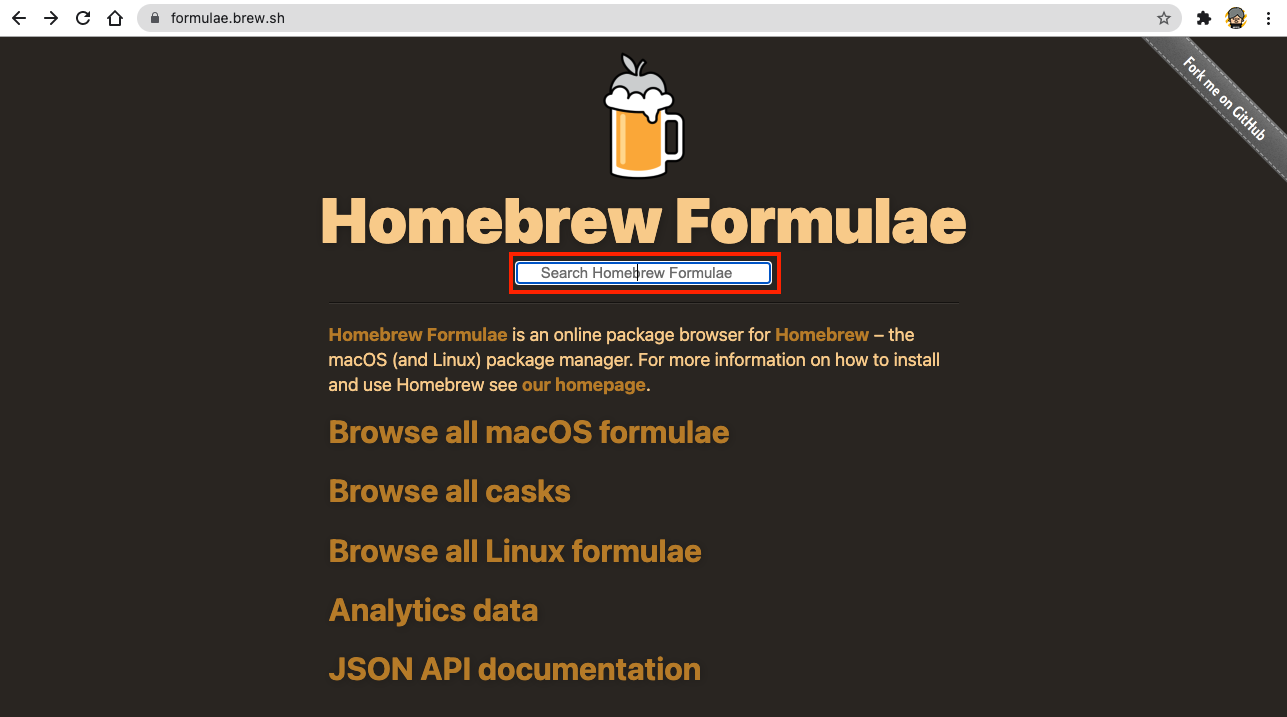
caskでアプリをインストールするには、<application_name>を特定する必要がります.Homebrew Fomulaeのサイトからアプリケーション名を検索することが出来ます.検索ボックスに対象となるアプリケーション名を記入し検索します.今回は1Passwordのアプリケーションを検索します.
検索結果が下記になります.アプリケーション名は1passwordになります.
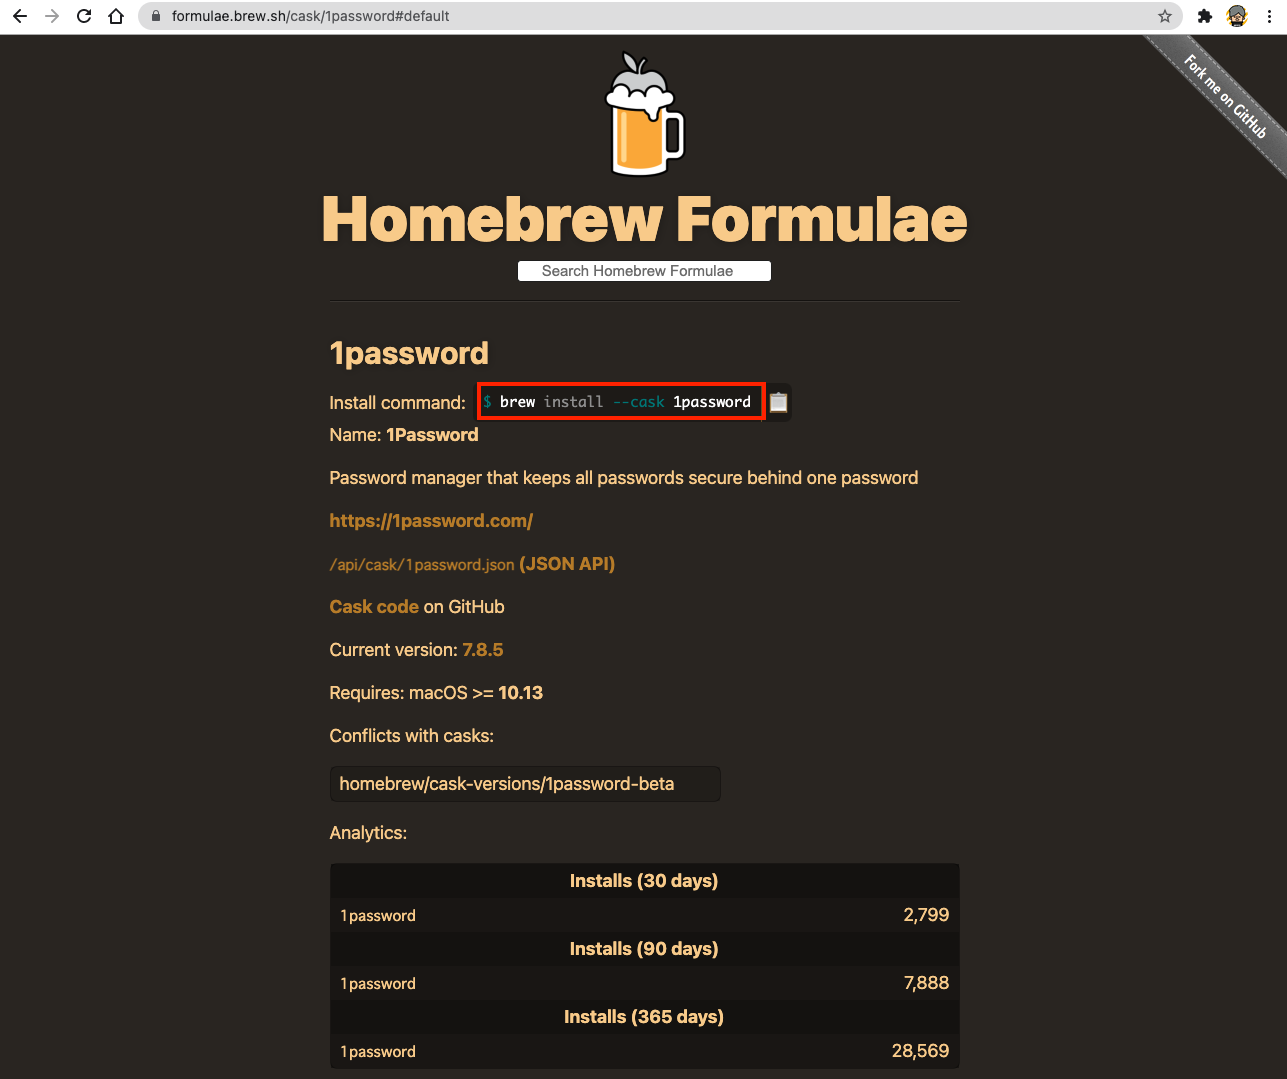
よって、1Passwordをbrew bundleでインストールするのに必要な1行は下記になります.
cask "1password"
brew bundleでパッケージを一括管理
brew bundleの実行してパッケージの追加・更新・削除を行います.処理が完了するまで数分時間がかかります.
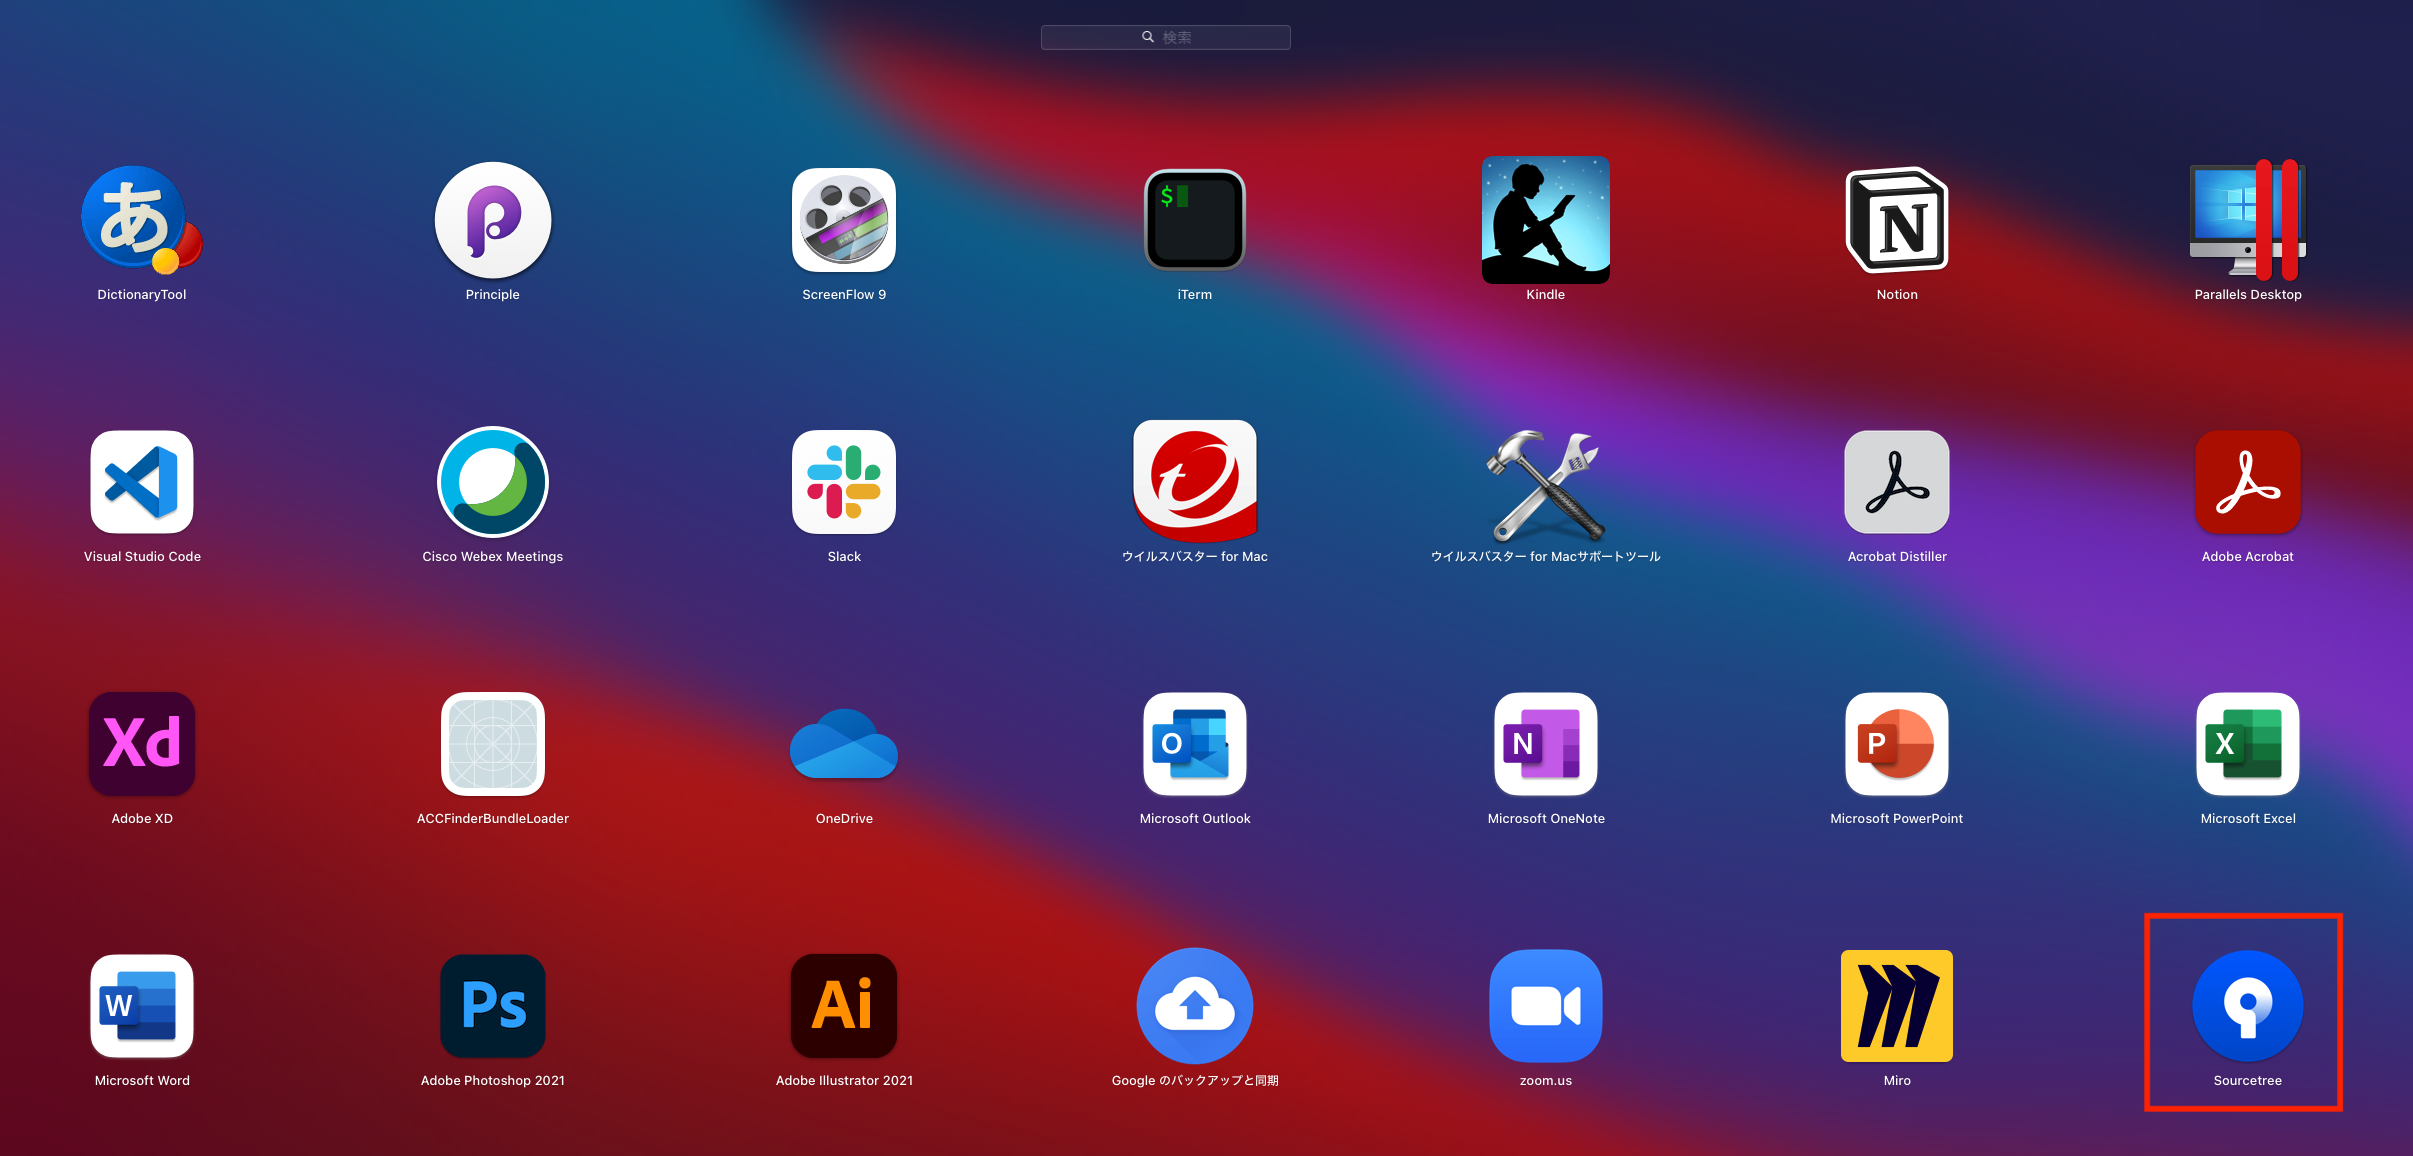
ここでは、参考までに 「sourcetree」を新規に追加してbrew bundleを実行します.「sourcetree」が追加されていれば成功です.
Brewfileにcask "sourcetree"を追加
cask_args appdir: "/Applications"

brew 'anyenv'
brew 'ctop'
brew 'curl'
brew 'jq'
brew 'htop'
brew 'mackup'
brew 'mas'
brew 'peco'
brew 'tree'
brew 'zsh'

cask "1password"
cask "aws-vpn-client"
cask "discord"
cask "docker"
cask "google-backup-and-sync"
cask "google-chrome"
cask "google-japanese-ime"
cask "iterm2"
cask "kindle"
cask "microsoft-auto-update"
cask "microsoft-office"
cask "miro"
cask "notion"
cask "parallels"
cask "visual-studio-code"
cask "webex-meetings"

mas "Keynote", id: 409183694
mas "Slack", id: 803453959
mas "ScreenFlow9", id: 1475796517
mas "TweetDeck", id: 485812721

cask "sourcetree"
brew bundleで追加
$ brew bundle

Using anyenv
Using ctop
Using curl
Using jq
Using htop
Using mackup
Using mas
Using peco
Using tree
Using zsh
Using 1password
Using aws-vpn-client
Using discord
Using docker
Using google-backup-and-sync
Using google-chrome
Using google-japanese-ime
Using iterm2
Using kindle
Using microsoft-auto-update
Using microsoft-office
Using miro
Using notion
Using parallels
Using visual-studio-code
Using webex-meetings
Using Keynote
Using Slack
Using ScreenFlow9
Using TweetDeck
Installing sourcetree
Homebrew Bundle complete! 31 Brewfile dependencies now installed.
sourcetreeが追加された
今度はsourcetreeをアンインストールする.Brewfileからコメントアウト
cask_args appdir: "/Applications"

brew 'anyenv'
brew 'ctop'
brew 'curl'
brew 'jq'
brew 'htop'
brew 'mackup'
brew 'mas'
brew 'peco'
brew 'tree'
brew 'zsh'

cask "1password"
cask "aws-vpn-client"
cask "discord"
cask "docker"
cask "google-backup-and-sync"
cask "google-chrome"
cask "google-japanese-ime"
cask "iterm2"
cask "kindle"
cask "microsoft-auto-update"
cask "microsoft-office"
cask "miro"
cask "notion"
cask "parallels"
cask "visual-studio-code"
cask "webex-meetings"

mas "Keynote", id: 409183694
mas "Slack", id: 803453959
mas "ScreenFlow9", id: 1475796517
mas "TweetDeck", id: 485812721

# cask "sourcetree"
brew bundle cleanupでBrewfileに存在しないパッケージを削除.
$ brew bundle cleanup

Would uninstall casks:
sourcetree
Would uninstall formulae:
libmetalink                                                                                        pcre2
Would untap:
homebrew/cask
理由はわからないが削除されない場合は、brew uninstallで削除
$ brew uninstall sourcetree
Dropboxにて設定ファイルを保存
筆者の環境では、BrewfileはDropboxに置いています.何かあっても、Dropboxに常時設定ファイルが保存されているので安心です.
$ cd ~/Dropbox
$ ls Brewfile
参考
- https://brew.sh/index_ja
- https://qiita.com/zaburo/items/29fe23c1ceb6056109fd
- https://original-game.com/homebrew/
- https://ja.wikipedia.org/wiki/Homebrew_(パッケージ管理システム)
- http://bcl.sci.yamaguchi-u.ac.jp/~jun/notebook/mac/brew/
- https://forest.watch.impress.co.jp/docs/news/1305182.html
- https://forest.watch.impress.co.jp/docs/news/1292914.html
- https://fukatsu.tech/homebrew
- https://qiita.com/vochicong/items/f20afc89a6847cd58f0f