この記事でできるもの
デモ
https://react-pokemon-app-c3d8a.firebaseapp.com/
※画像は非表示にしています
ソースコード
https://github.com/hato-taka/pokemon-app
はじめに
この記事の目的は
React開発の楽しさを伝えることです!
詳しい内部のロジックには触れていません。
楽しく学んでもらうために、PokeAPIというポケモンデータを集めたAPIを使用します。
https://pokeapi.co/
この記事を作成するにあたり下記2つの動画を参照しました。
- 【Reactアプリ開発】3種類のReactアプリケーションを構築して、Reactの理解をさらに深めるステップアップ講座
- Build Pokemon App Using React Js |Pokemon Api |2022
記事の対象者
Reactの初学者
(HTML/CSS/JSの解説は省略しています)
記事で身につくスキル
- Reactの基礎的な書き方
- React hooksの使い方
- useState()
- useEffect()
- APIの呼び出し方
- fetch() メソッド
- 配列操作
- map() 関数
- forEach() 関数
- find() 関数
- firebaseでdeployの仕方
前提知識
- エディターはVScodeを使用します
- node.jp / npm がインストール済み
- シェルはbashを使用
STEP1 create-react-appで環境構築
ターミナルに
npx create-react-app pokemon-app
とコマンドを入力し、Reactの環境構築をする
1~3分ほど環境構築に時間がかかる
Happy hacking!と表示されれば、インストール完了です
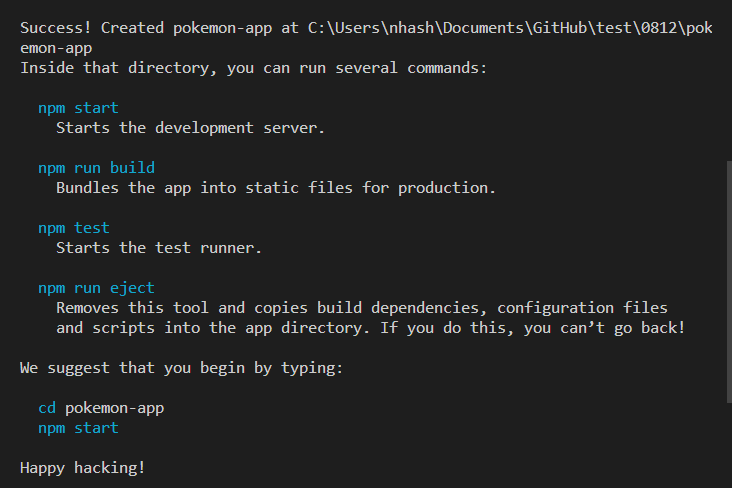
指示通り、以下のコマンドを入力します
cd pokemon-app
# VScodeを開き直します
code .
npm start
ブラウザが起動し、Reactのデフォルトページが開きます
不要なファイルは削除しておきます
rm src/App.test.js src/logo.svg src/reportWebVitals.js src/setupTests.js
不要なコードも削除します
import React from 'react';
import ReactDOM from 'react-dom/client';
import './index.css';
import App from './App';
-import reportWebVitals from './reportWebVitals';

const root = ReactDOM.createRoot(document.getElementById('root'));
root.render(
  <React.StrictMode>
    <App />
  </React.StrictMode>
);

-// If you want to start measuring performance in your app, pass a function
-// to log results (for example: reportWebVitals(console.log))
-// or send to an analytics endpoint. Learn more: https://bit.ly/CRA-vitals
-reportWebVitals();
-import logo from './logo.svg';
import './App.css';

function App() {
  return (
    <div className="App">
-      <header className="App-header">
-        <img src={logo} className="App-logo" alt="logo" />
-        <p>
-          Edit <code>src/App.js</code> and save to reload.
-        </p>
-        <a
-          className="App-link"
-          href="https://reactjs.org"
-          target="_blank"
-          rel="noopener noreferrer"
-        >
-          Learn React
-        </a>
-      </header>
    </div>
  );
}

export default App;
ブラウザでhttp://localhost:3000/を開き直すと、真っ白になっていればOKです
STEP2 子コンポーネントの作成&propsの受け渡し
①子コンポーネントの作成
一匹ずつポケモンを表示する<PokemonThumbnails />コンポーネントを作成します
まずは、
src/PokemonThumbnails.jsxを作成
touch src/PokemonThumbnails.jsx
import React from "react";

// アロー関数でコンポーネントを定義
const PokemonThumbnails = () => {
  return <div>PokemonThumbnails</div>;
};

// デフォルトエクスポートする
export default PokemonThumbnails;
子コンポーネントを作成したら、親コンポーネントに反映します
import './App.css';
+import PokemonThumbnails from './PokemonThumbnails';

function App() {
  return (
    <div className="App">
+      <PokemonThumbnails />
    </div>
  );
}
export default App;
②propsを親⇒子を受け渡す
まずは、ハードコーディングで仮のデータを用意します。
import PokemonThumbnails from './PokemonThumbnails';

function App() {
+  // 仮でデータを作成する
+  const pokemon = {
+    id: 1,
+    name: "フシギダネ",
+    image: "https://raw.githubusercontent.com/PokeAPI/sprites/master/sprites/pokemon/other/official-artwork/1.png",
+    type: "くさ"
+  }

  return (
    <div className="App">
      <PokemonThumbnails
+       id={pokemon.id}
+       name={pokemon.name}
+       image={pokemon.image}
+       type={pokemon.type}
       />
    </div>
  );
}
export default App;
import React from "react";

+const PokemonThumbnails = ({ id, name, image, type }) => {
  return (
    <div>
+     <div className="number">
+        <small>#0{id}</small>
+      </div>
+      <img src={image} alt={name} />
+      <div className="detail-wrapper">
+        <h4>{name}</h4>
+        <h3>{type}</h3>
+      </div>
    </div>
  );
};

export default PokemonThumbnails;
STEP3 CSSの実装
CSSの実装は今回、省略します。
以下のCSSのコードをsrc/index.cssにコピペしてください。
CSSのコード
body {
  margin: 0;
  font-family: -apple-system, BlinkMacSystemFont, 'Segoe UI', 'Roboto', 'Oxygen',
    'Ubuntu', 'Cantarell', 'Fira Sans', 'Droid Sans', 'Helvetica Neue',
    sans-serif;
  -webkit-font-smoothing: antialiased;
  -moz-osx-font-smoothing: grayscale;
}

code {
  font-family: source-code-pro, Menlo, Monaco, Consolas, 'Courier New',
    monospace;
}

.rock {
  background-color: rgb(148, 81, 81);
}

.ghost {
  background-color: rgb(247, 247, 247);
}

.electric {
  background-color: rgb(255, 255, 161);
}

.bug {
  background-color: #F6D6A7;
}

.poison {
  background-color: #e0a7f6;
}

.normal {
  background-color: #F4F4F4;
}

.fairy {
  background-color: rgba(255, 192, 203, 0.863);
}

.fire {
  background-color: #FBE3DF;
}

.grass {
  background-color: #E2F9E1;
}

.water {
  background-color: #E0F1FD;
}

.dark {
  background-color: #9E9169;
}

.psychic {
  background-color: #FC5FD0;
}

.ground {
  background-color: #BC7B3D;
}

.steel {
  background-color: #6C676E;
}

.fighting {
  background-color: #DE911F;
}

.ice {
  background-color: #92C3F4;
}

.dragon {
  background-color: #E08B2B;
}

.app-container {
  display: flex;
  flex-direction: column;
  align-items: center;
  justify-content: center;
  min-height: 100vh;
  padding: 3rem 0.5rem;
}

.pokemon-container {
  display: flex;
  flex-direction: column;
  align-items: center;
  justify-content: center;
}

.all-container {
  display: flex;
  flex-wrap: wrap;
  align-items: center;
  justify-content: center;
}

.thumb-container {
  display: flex;
  flex-direction: column;
  align-items: center;
  justify-content: center;
  padding: 1.5rem 0;
  margin: 0.3rem;
  border: 1px solid #efefef;
  border-radius: 0.2rem;
  min-width: 160px;
  text-align: center;
  box-shadow: 0 3px 15px rgba(0, 0, 0, 0.089);
  transition: 0.3s;
  position: relative;
  cursor: pointer;
}

.thumb-container:hover {
  transform: scale(1.2);
  z-index: 100;
}

h3 {
  margin-bottom: 0.2rem;
}

.thumb-container .number {
  border-radius: 1rem;
  padding: 0.2rem 0.4rem;
  background-color: rgba(255, 255, 255, 0.3);
}

.thumb-container img {
  width: 120px;
  height: 120px;
}

.thumb-container .icon-image {
  border: 1px solid #000;
  border-radius: 50%;
  width: 60px;
  height: 60px;
  background-color: #fff;
  position: absolute;
  top: 0;
  left: 0;
  transform: translate(-50%, -50%);
  display: none;
}

.thumb-container:hover .icon-image {
  display: block;
}

.thumb-container small {
  /* text-transform: capitalize; */
}

.detail-wrapper {
  display: flex;
  flex-direction: column;
  width: 100%;
}

.detail-wrapper button {
  color: rgb(22, 22, 22);
  padding: .5rem;
  margin-top: 1rem;
  border: none;
  border-radius: 0.2rem;
  cursor: pointer;
  background-color: rgba(0, 0, 0, 0.185);
}

.detail-wrapper h3,
h4 {
  margin: 0.2rem;
}

.detail-wrapper h4 {
  font-weight: normal;
}

.load-more {
  background: #f5f5f5 linear-gradient(#f5f5f5, #f1f1f1) repeat-x;
  border-radius: 2px;
  border: 1px solid #c6c6c6;
  color: #444;
  padding: 0.5rem 1.5rem;
  min-width: 50%;
  margin-top: 1rem;
  cursor: pointer;
}
CSSに合わせてsrc/App.js , src/PokemonThumbnails.jsx を修正していきます。
※クラス名のタイピングミスにご注意ください!
import PokemonThumbnails from './PokemonThumbnails';

function App() {

  // 仮でデータを配列にする
  const pokemon = [
    {
      id: 1,
      name: "フシギダネ",
      image: "https://raw.githubusercontent.com/PokeAPI/sprites/master/sprites/pokemon/other/official-artwork/1.png",
      type: "くさ"
    },
    {
      id: 2,
      name: "フシギソウ",
      image: "https://raw.githubusercontent.com/PokeAPI/sprites/master/sprites/pokemon/other/official-artwork/2.png",
      type: "くさ"
    },
    {
      id: 3,
      name: "フシギバナ",
      image: "https://raw.githubusercontent.com/PokeAPI/sprites/master/sprites/pokemon/other/official-artwork/3.png",
      type: "くさ"
    },
  ]

  return (
    <div className="app-container">
      <h1>ポケモン図鑑</h1>
      <div className='pokemon-container'>
        <div className='all-container'>
        {/* 仮で3つの子コンポーネントを表示する */}
          <PokemonThumbnails
            id={pokemon[0].id}
            name={pokemon[0].name}
            image={pokemon[0].image}
            type={pokemon[0].type} />
          <PokemonThumbnails
            id={pokemon[1].id}
            name={pokemon[1].name}
            image={pokemon[1].image}
            type={pokemon[1].type} />
          <PokemonThumbnails
            id={pokemon[2].id}
            name={pokemon[2].name}
            image={pokemon[2].image}
            type={pokemon[2].type} />
        </div>
      </div>
    </div>
  );
}
const PokemonThumbnails = ({ id, name, image, type }) => {

  return (
    <div className="thumb-container grass">
      <div className="number">
        <small>#0{id}</small>
      </div>
      <img src={image} alt={name} />
      <div className="detail-wrapper">
        <h4>{name}</h4>
        <h3>{type}</h3>
      </div>
    </div>
  );
};
STEP4 pokeAPIからデータを取得
fetch()で、APIからデータを取得します。
今回はPokeAPIというオープンソースのAPIを使います。
https://pokeapi.co/
useEffect()を使って制御します。
src/App.jsを修正
// useEffect をインポート
+import { useEffect } from 'react';
import PokemonThumbnails from './PokemonThumbnails';

function App() {

  // 仮でデータを作成する
  const pokemon = [
    {
      id: 1,
      name: "フシギダネ",
      image: "https://raw.githubusercontent.com/PokeAPI/sprites/master/sprites/pokemon/other/official-artwork/1.png",
      type: "くさ"
    },
    {
      id: 2,
      name: "フシギソウ",
      image: "https://raw.githubusercontent.com/PokeAPI/sprites/master/sprites/pokemon/other/official-artwork/2.png",
      type: "くさ"
    },
    {
      id: 3,
      name: "フシギバナ",
      image: "https://raw.githubusercontent.com/PokeAPI/sprites/master/sprites/pokemon/other/official-artwork/3.png",
      type: "くさ"
    },
  ]

+  // APIからデータを取得する
+  const url = "https://pokeapi.co/api/v2/pokemon";
+
+  useEffect(() => {
+    fetch(url)
+      .then(res => res.json())
+      .then(data => {
+        console.log(data);
+      })
+  }, [])

  return (
    <div className="app-container">
      <h1>ポケモン図鑑</h1>
      <div className='pokemon-container'>
        <div className='all-container'>
          <PokemonThumbnails
            id={pokemon[0].id}
            name={pokemon[0].name}
            image={pokemon[0].image}
            type={pokemon[0].type} />
          <PokemonThumbnails
            id={pokemon[1].id}
            name={pokemon[1].name}
            image={pokemon[1].image}
            type={pokemon[1].type} />
          <PokemonThumbnails
            id={pokemon[2].id}
            name={pokemon[2].name}
            image={pokemon[2].image}
            type={pokemon[2].type} />
        </div>
      </div>
    </div>
  );
}

export default App;
開発者ツールのコンソール画面に以下のような表示がされます

STEP5 useStateで状態管理
state(状態)管理のために、useStateを使います。
const [変数名, set変数名] = useState(初期値)
ここではポケモンの名前をstateで管理します。
ソースコード src/App.js
// useEffect をインポート
+import { useEffect, useState } from 'react';
import PokemonThumbnails from './PokemonThumbnails';

function App() {

+  const [pokemonNames, setPokemonNames] = useState([]);

  // 仮でデータを作成する
  const pokemon = [
    {
      id: 1,
      image: "https://raw.githubusercontent.com/PokeAPI/sprites/master/sprites/pokemon/other/official-artwork/1.png",
      type: "くさ"
    },
    {
      id: 2,
      image: "https://raw.githubusercontent.com/PokeAPI/sprites/master/sprites/pokemon/other/official-artwork/2.png",
      type: "くさ"
    },
    {
      id: 3,
      image: "https://raw.githubusercontent.com/PokeAPI/sprites/master/sprites/pokemon/other/official-artwork/3.png",
      type: "くさ"
    },
  ]

  // APIからデータを取得する
  const url = "https://pokeapi.co/api/v2/pokemon";

  useEffect(() => {
    fetch(url)
      .then(res => res.json())
      .then(data => {
        console.log(data.results[0].name);
        // 仮で3つのポケモンの名前をセットする
+        const names = [
+          data.results[0].name,
+          data.results[1].name,
+          data.results[2].name,
+        ]
+        setPokemonNames(names);
      })
  }, [])

  return (
    <div className="app-container">
      <h1>ポケモン図鑑</h1>
      <div className='pokemon-container'>
        <div className='all-container'>
          <PokemonThumbnails
            id={pokemon[0].id}
+            name={pokemonNames[0]}
            image={pokemon[0].image}
            type={pokemon[0].type} />
          <PokemonThumbnails
            id={pokemon[1].id}
+            name={pokemonNames[1]}
            image={pokemon[1].image}
            type={pokemon[1].type} />
          <PokemonThumbnails
            id={pokemon[2].id}
+            name={pokemonNames[2]}
            image={pokemon[2].image}
            type={pokemon[2].type} />
        </div>
      </div>
    </div>
  );
}

export default App;
STEP6 map()関数で繰り返し処理
-     const pokemon = [
+     const pokemons = [
        {
          id: 1,
          name: "フシギダネ",
          image:
            "https://raw.githubusercontent.com/PokeAPI/sprites/master/sprites/pokemon/other/official-artwork/1.png",
          type: "くさ",
        },
        {
          id: 2,
          name: "フシギソウ",
          image:
            "https://raw.githubusercontent.com/PokeAPI/sprites/master/sprites/pokemon/other/official-artwork/2.png",
          type: "くさ",
        },
        {
          id: 3,
          name: "フシギバナ",
          image:
            "https://raw.githubusercontent.com/PokeAPI/sprites/master/sprites/pokemon/other/official-artwork/3.png",
          type: "くさ",
        },
      ];

      ...

      <h1>ポケモン図鑑</h1>
      <div className='pokemon-container'>
        <div className='all-container'>
-          <PokemonThumbnails
-            id={pokemon[0].id}
-            name={pokemonNames[0]}
-            image={pokemon[0].image}
-            type={pokemon[0].type} />
-          <PokemonThumbnails
-            id={pokemon[1].id}
-            name={pokemonNames[1]}
-            image={pokemon[1].image}
-            type={pokemon[1].type} />
-          <PokemonThumbnails
-            id={pokemon[2].id}
-            name={pokemonNames[2]}
-            image={pokemon[2].image}
-            type={pokemon[2].type} />
+          {pokemons.map((pokemon, index) => (
+            <PokemonThumbnails
+              id={pokemon.id}
+              name={pokemonNames[index]}
+              image={pokemon.image}
+              type={pokemon.type}
+              key={index}
+            />
+          ))}
        </div>
      </div>
STEP7 個別のポケモンのデータを1つ1つ取得
ポケモン1匹1匹のデータを取り出すために、
createPokemonObjectという関数を作ります
  // 仮でフシギダネのURLを使用する
  const pokemonUrl = "https://pokeapi.co/api/v2/pokemon/bulbasaur"
  const createPokemonObject = () => {
    fetch(pokemonUrl)
      .then(res => res.json())
      .then(data => {
        console.log(data);
        // ポケモンの画像の場所
        // - (ハイフン)にlintで自動で半角スペースが入ってしまうため、[]で対応
        // data.sprites.other.official-artwork.front_default でも大丈夫です
        console.log(data.sprites.other["official-artwork"].front_default);
        // ポケモンのタイプの場所
        console.log(data.types[0].type.name);
      })
  }
APIの呼び出しはgetAllPokemonsという関数にまとめて、
useEffectでは関数を呼び出すように書き換えます。
-  useEffect(() => {
+  const getAllPokemons = () => {
       fetch(url)
      .then(res => res.json())
      .then(data => {
        console.log(data.results)
        setAllPokemons(data.results);
        // 次の20件をURLにセットする
        setUrl(data.next);
      })

+  useEffect(() => {
+    getAllPokemons();
+    createPokemonObject();
   }, [])
App.jsのコード全体
// useEffect をインポート
import { useEffect, useState } from 'react';
import PokemonThumbnails from './PokemonThumbnails';

function App() {

  const [allPokemons, setAllPokemons] = useState([]);

  // 仮でデータを作成する
  // 複数形pokemons に修正
  const pokemons = [
    {
      id: 1,
      image: "https://raw.githubusercontent.com/PokeAPI/sprites/master/sprites/pokemon/other/official-artwork/1.png",
      type: "くさ"
    },
    {
      id: 2,
      image: "https://raw.githubusercontent.com/PokeAPI/sprites/master/sprites/pokemon/other/official-artwork/2.png",
      type: "くさ"
    },
    {
      id: 3,
      image: "https://raw.githubusercontent.com/PokeAPI/sprites/master/sprites/pokemon/other/official-artwork/3.png",
      type: "くさ"
    },
  ]

  // APIからデータを取得する
  // パラメータにlimitを設定し、20件取得する
  const [url, setUrl] = useState("https://pokeapi.co/api/v2/pokemon?limit=20");
  // 仮でフシギダネのURLを使用する
  const pokemonUrl = "https://pokeapi.co/api/v2/pokemon/bulbasaur"

  const getAllPokemons = () => {
    fetch(url)
      .then(res => res.json())
      .then(data => {
        console.log(data.results)
        setAllPokemons(data.results);

        // 次の20件をURLにセットする
        setUrl(data.next);
      })
  }

  const createPokemonObject = () => {
    fetch(pokemonUrl)
      .then(res => res.json())
      .then(data => {
        console.log(data);
        // ポケモンの画像の場所
        // - (ハイフン)にlintで自動で半角スペースが入ってしまうため、[]で対応
        console.log(data.sprites.other["official-artwork"].front_default);
        // ポケモンのタイプの場所
        console.log(data.types[0].type.name);
      })
  }

  useEffect(() => {
    getAllPokemons();
    createPokemonObject();
  }, [])

  return (
    <div className="app-container">
      <h1>ポケモン図鑑</h1>
      <div className='pokemon-container'>
        <div className='all-container'>
          {pokemons.map((pokemon, index) => (
            <PokemonThumbnails
              id={pokemon.id}
              // 初回レンダリングの際にエラーになるので、オプショナルチェーン(?)をつける
              name={allPokemons[index]?.name}
              image={pokemon.image}
              type={pokemon.type}
              key={index}
            />
          ))}
        </div>
      </div>
    </div>
  );
}

export default App;
STEP8 forEach()で繰り返し処理
forEach()で繰り返し処理をするように、createPokemonObject と getAllPokemonsを書き換えます
-  const createPokemonObject = () => {
-    fetch(pokemonUrl)
-      .then(res => res.json())
-      .then(data => {
-        console.log(data);
-        // ポケモンの画像の場所
-        // - (ハイフン)にlintで自動で半角スペースが入ってしまうため、[]で対応
-        console.log(data.sprites.other["official-artwork"].front_default);
-        // ポケモンのタイプの場所
-        console.log(data.types[0].type.name);
-      })

+  const createPokemonObject = (results) => {
+    results.forEach(pokemon => {
+      const pokemonUrl = `https://pokeapi.co/api/v2/pokemon/${pokemon.name}`
+      fetch(pokemonUrl)
+        .then(res => res.json())
+        .then(data => {
+          const image = data.sprites.other["official-artwork"].front_default;
+          const type = data.types[0].type.name;
+          console.log(data.name, image, type);
+        })
+    })
+  }
  const getAllPokemons = () => {
    fetch(url)
      .then(res => res.json())
      .then(data => {
        setAllPokemons(data.results);
+        createPokemonObject(data.results);
        // 次の20件をURLにセットする
        setUrl(data.next);
      })
  }


  ...

  useEffect(() => {
    getAllPokemons();
-   createPokemonObject();
  }, [])
STEP9 API から取得したデータを画面に表示
APIから全てのポケモンデータが取得できたので、画面に表示させます。
createPokemonObjectで取得したポケモンのデータをstateにセットしていきます
const createPokemonObject = (results) => {
    results.forEach(pokemon => {
      const pokemonUrl = `https://pokeapi.co/api/v2/pokemon/${pokemon.name}`
      fetch(pokemonUrl)
        .then(res => res.json())
        .then(data => {
          const _image = data.sprites.other["official-artwork"].front_default;
          const _type = data.types[0].type.name;
          const newList = {
            id: data.id,
            name: data.name,
            image: _image,
            type: _type
          }
          // 既存のデータを展開し、新しいデータを追加する
          setAllPokemons(currentList => [...currentList, newList]);
        })
    })
  }
allPokemonsをmap()関数で繰り返し処理し、画面に表示します
      <h1>ポケモン図鑑</h1>
      <div className='pokemon-container'>
        <div className='all-container'>
          {allPokemons.map((pokemon, index) => (
            <PokemonThumbnails
              id={pokemon.id}
              name={pokemon.name}
              image={pokemon.image}
              type={pokemon.type}
              key={index}
            />
          ))}
        </div>
      </div>
STEP10 「もっとみる!」ボタンの追加
onClickイベントにgetAllPokemonsの関数を渡します。
※注意!
onClickには関数オブジェクトを渡さないといけない。
関数を実行してはいけない!
  return (
    <div className="app-container">
      <h1>ポケモン図鑑</h1>
      <div className='pokemon-container'>
        <div className='all-container'>
          {allPokemons.map((pokemon, index) => (
            <PokemonThumbnails
              id={pokemon.id}
              name={pokemon.name}
              image={pokemon.image}
              type={pokemon.type}
              key={index}
            />
          ))}
        </div>
+        <button className='load-more' onClick={getAllPokemons}>
+          もっとみる!
+        </button>
      </div>
    </div>
  );
}
        // 関数を実行してしまっている!
        <button className='load-more' onClick={getAllPokemons()}>
          もっとみる!
        </button>
STEP11 ローディング中の表示の追加
ローディング中かどうかを判定するために、isLoadingというstateを作成し、判定します
+ const [isLoading, setIsLoading] = useState(false);

  const getAllPokemons = () => {
+   setIsLoading(true);
    fetch(url)
      .then(res => res.json())
      .then(data => {
        // 次の20件をURLにセットする
        setUrl(data.next);
        createPokemonObject(data.results);
      })
+     .finally(() => {
+       setIsLoading(false);
+     })
  }
3項演算子を使って、ローディング中とローディングが終わった後で表示を切り替えます
-        <button className='load-more' onClick={getAllPokemons}>
-          もっとみる!
-        </button>
+        {isLoading ? (
+          <div className='load-more'>now loading...</div>
+        ) : (
+          <button className='load-more' onClick={getAllPokemons}>
+            もっとみる!
+          </button>
+        )}
STEP12 ポケモンのアイコン画像の追加
ホバーした時に表示されるアイコン画像を追加します。
  const createPokemonObject = (results) => {
    results.forEach(pokemon => {
      const pokemonUrl = `https://pokeapi.co/api/v2/pokemon/${pokemon.name}`
      fetch(pokemonUrl)
        .then(res => res.json())
        .then(data => {
          const _image = data.sprites.other["official-artwork"].front_default;
+         const _iconImage = data.sprites.other.dream_world.front_default;
          const _type = data.types[0].type.name;
          const newList = {
            id: data.id,
            name: data.name,
+           iconImage: _iconImage,
            image: _image,
            type: _type
          }
          // 既存のデータを展開し、新しいデータを追加する
          setAllPokemons(currentList => [...currentList, newList]);
        })
    })
  }
        <div className='all-container'>
          {allPokemons.map((pokemon, index) => (
            <PokemonThumbnails
              id={pokemon.id}
              name={pokemon.name}
              image={pokemon.image}
+             iconImage={pokemon.iconImage}
              type={pokemon.type}
              key={index}
            />
          ))}
        </div>
import React from "react";

const PokemonThumbnails = ({ id, name, image, type }) => {
const PokemonThumbnails = ({ id, name, image, iconImage, type }) => {
  const style = `thumb-container ${type}`;

  return (
    <div className={style}>
      <div className="number">
        <small>#0{id}</small>
      </div>
-     <img src={image} alt={name} />
+     <img src={iconImage} alt={name} className="icon-image" />
      <div className="detail-wrapper">
        <h4>{name}</h4>
        <h3>{type}</h3>
      </div>
    </div>
  );
};
export default PokemonThumbnails;
STEP13 sort() で番号順に並び替える
ポケモンの順番が番号順に表示したいので、sort()関数で並び替えます
          // 既存のデータを展開し、新しいデータを追加する
          setAllPokemons(currentList => [...currentList, newList]);
          setAllPokemons(currentList => [...currentList, newList].sort((a, b) => a.id - b.id));
STEP14 ポケモンの名前・タイプを日本語に変換
英語⇔日本語の対応表をJSONで作成したので、それを使用します。
英語⇔日本語の対応表のJSONファイル
[
  {
      "ja": "フシギダネ",
      "en": "Bulbasaur"
  },
  {
      "ja": "フシギソウ",
      "en": "Ivysaur"
  },
  {
      "ja": "フシギバナ",
      "en": "Venusaur"
  },
・・・・以下省略
ポケモン名の対応表に関して、全部は収まりきらないので、下記URLからコードをコピーしてください
https://github.com/hato-taka/pokemon-app/blob/bba24f9ecefd2a73581f7e9327657bd4a3cc90b3/src/pokemon.json
{
  "grass": "くさ",
  "fire": "ほのお",
  "water" : "みず",
  "bug": "むし",
  "normal": "ノーマル",
  "poison": "どく",
  "electric": "でんき",
  "ground" : "じめん",
  "fairy": "ようせい",
  "fighting": "かくとう",
  "psychic": "エスパー",
  "rock": "いわ",
  "ice": "こおり",
  "dragon": "ドラゴン",
  "ghost": "ゴースト",
  "steel": "はがね",
  "dark": "あく"
}
import { useEffect, useState } from 'react';
import PokemonThumbnails from './PokemonThumbnails';
+import pokemonJson from "./pokemon.json";
+import pokemonTypeJson from "./pokemonType.json";
英語⇒日本語に変換するために、translateToJapanese関数を作成します。
  const createPokemonObject = (results) => {
    results.forEach(pokemon => {
      const pokemonUrl = `https://pokeapi.co/api/v2/pokemon/${pokemon.name}`
      fetch(pokemonUrl)
        .then(res => res.json())
-       .then(data => {
+       .then(async (data) => {
          const _image = data.sprites.other["official-artwork"].front_default;
          const _iconImage = data.sprites.other.dream_world.front_default;
          const _type = data.types[0].type.name;
+         const japanese = await translateToJapanese(data.name, _type);
          const newList = {
            id: data.id,
            name: data.name,
            iconImage: _iconImage,
            image: _image,
            type: _type,
+           jpName: japanese.name,
+           jpType: japanese.type
          }
          // 既存のデータを展開し、新しいデータを追加する
          setAllPokemons(currentList => [...currentList, newList]);
        })
    })
  }

+  const translateToJapanese = async (name, type) => {
+    const jpName = await pokemonJson.find(
+      (pokemon) => pokemon.en.toLowerCase() === name
+    ).ja;
+    const jpType = await pokemonTypeJson[type];
+    console.log(jpType)
+    return { name: jpName, type: jpType };
+  }
        <div className='all-container'>
          {allPokemons.map((pokemon, index) => (
            <PokemonThumbnails
              id={pokemon.id}
              name={pokemon.name}
              image={pokemon.image}
              iconImage={pokemon.iconImage}
              type={pokemon.type}
              key={index}
+             jpName={pokemon.jpName}
+             jpType={pokemon.jpType}
            />
          ))}
        </div>
STEP15 firebase でデプロイ
アプリが完成したので、firebase Hostingでwebに公開します
firebase Hostingの詳しい使い方に関しては以下の記事が参考になりました。
参考記事:
Firebase でデプロイしよう!
① Firebase のプロジェクトを作成
② パッケージのインストール
npm install -g firebase-tools
npm install --save firebase
③ firebase に login
firebase login
④ プロジェクトを初期化
firebase init
スペースキーで「Hosting」を選択して、Enter
「Use an existing project」を選択
What do you want to use as your public directory? (public) => build と入力
Configure as a single-page app (rewrite all urls to /index.html)? Noで大丈夫です
⑤ デプロイする
firebase deploy
まとめ
いかがだったでしょうか?
検索機能やクリックするとポケモンを個別にポップアップ表示するなど
pokeAPIはいろいろカスタマイズできて遊べそうです。
また、今回は初学者向けに基本部分だけ実装していますが、実際のサービス作成時にはAPI呼び出し時などエラー処理も必要ですね
この記事がご参考になれば幸いです。
分からない点がございましたら、コメント欄よりお気軽にご質問ください。