シリーズ
Oracle ApexでCRUD画面を爆速開発 - その1(構成周り、一覧表示)
Oracle ApexでCRUD画面を爆速開発 - その2(詳細表示)
Oracle ApexでCRUD画面を爆速開発 - その3(登録/更新処理,Validation,アクセス制限など)
Oracle ApexでCRUD画面を爆速開発 - その4(選択リストの内容で一覧表示内容を更新させる)
今回の主な内容
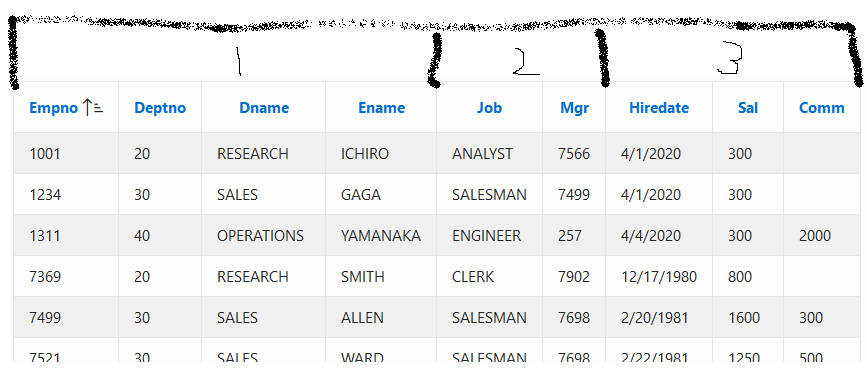
- ClassicReportのヘッダーを2段にしてグループ化したい
ClassicReportのヘッダーを2段組にしてグループ化したい
※ Excelだと簡単にできるんだけどなぁと言われちゃう思っちゃうこういうヤツです。
 |
|---|
Template(Standard)のコピー
※ 今回はデフォルトでReportに設定されているStandardをコピーして作成したStandard2に対して内容変更をします。
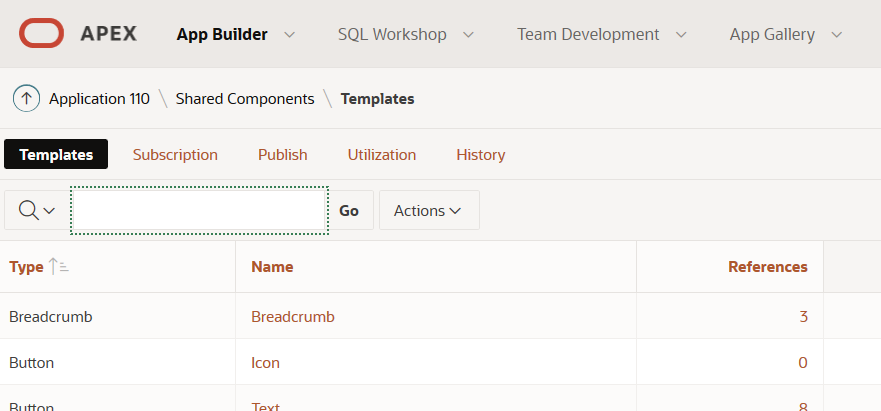
1 Shared Component>Templateを開きます。
 |
|---|
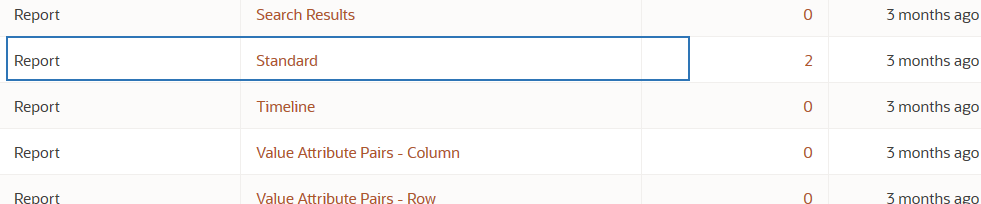
2 下の方にスクロールするとType:Report Name:Standardが見つかります。
!
|
|---|
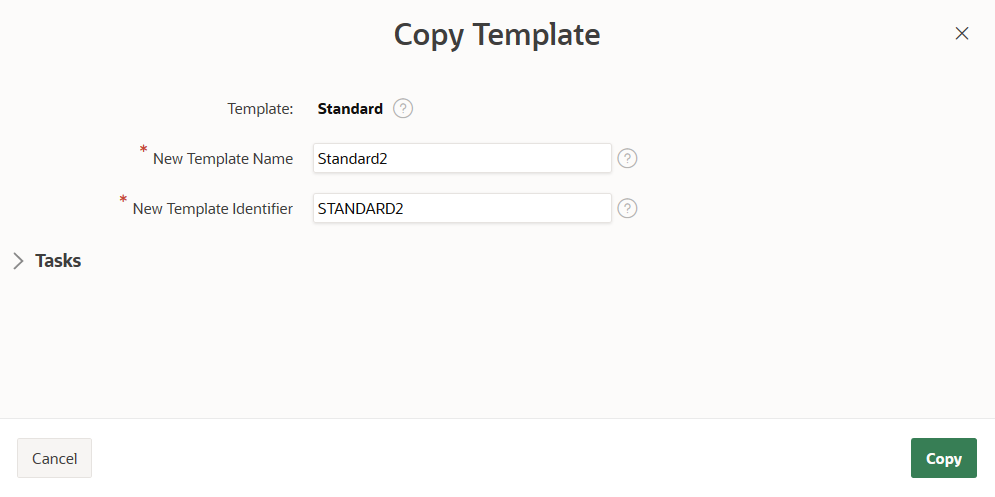
3 対象行の右側にある「Copyボタン」をクリックし開かれたダイアログでコピー先名称を入力します。終わったら「Copy」ボタンをクリックします。
 |
|---|
4 "Standard2"が作成されたことを確認します。
 |
|---|
テンプレート(Standard2)の修正
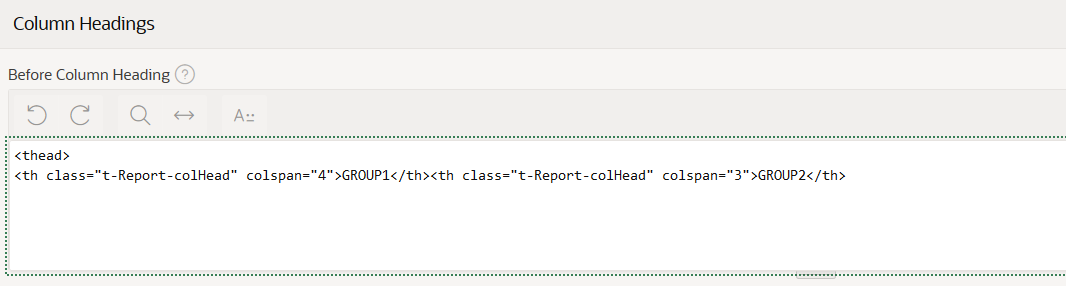
1 作成したStandard2テンプレートを開き、"Column Headings-Before Column Heading"項目を探します。
2 以下のHTMLコードをの後に追記します。
 |
|---|
<th class="t-Report-colHead" colspan="4">GROUP1</th><th class="t-Report-colHead" colspan="3">GROUP2</th>
2 右上の「Apply Changes」で保存し、新しいテンプレートを適用させたいClassicReportに戻る。
テンプレート(Standard2)の適用
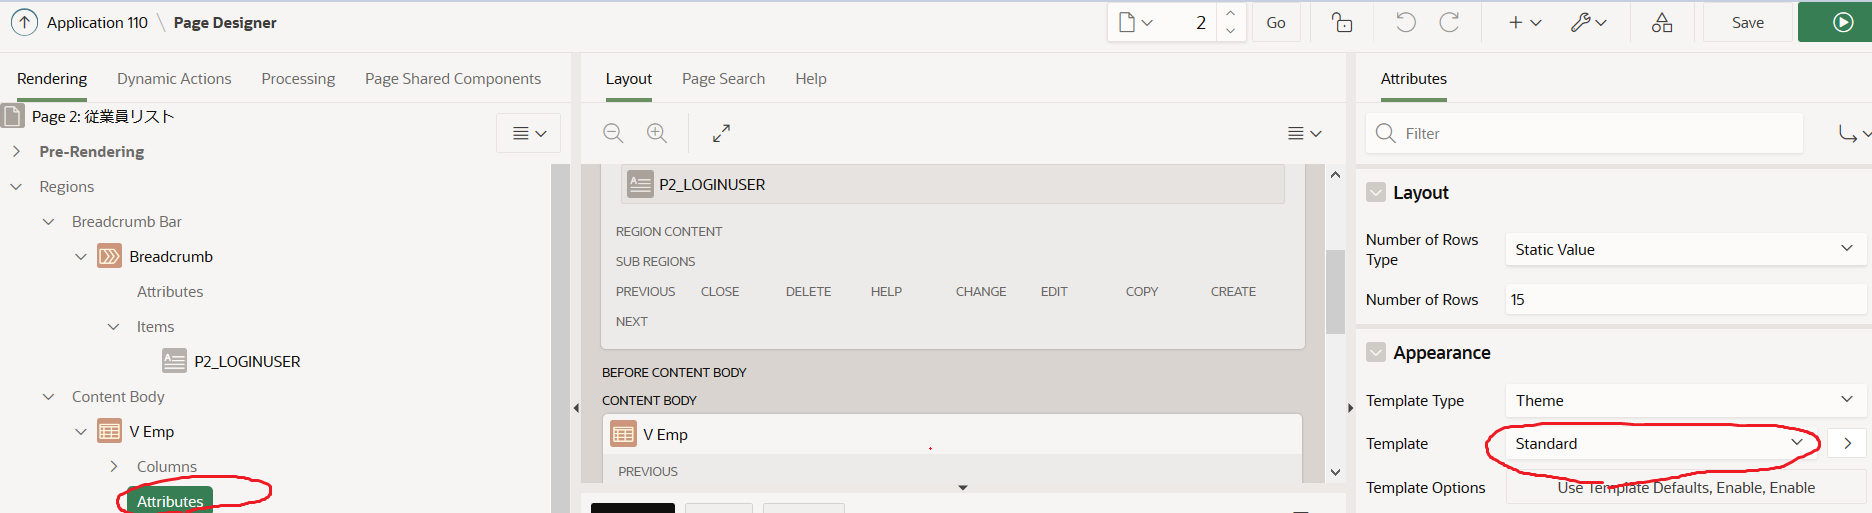
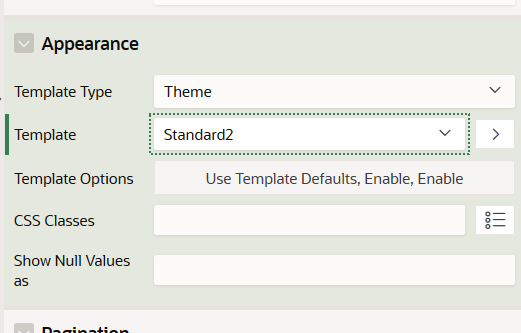
1 対象のClassic Reportの"Attribute"をクリック。"Appearance"にてTemplateを"Standard2"に変更。
 |
|---|
↓
 |
|---|
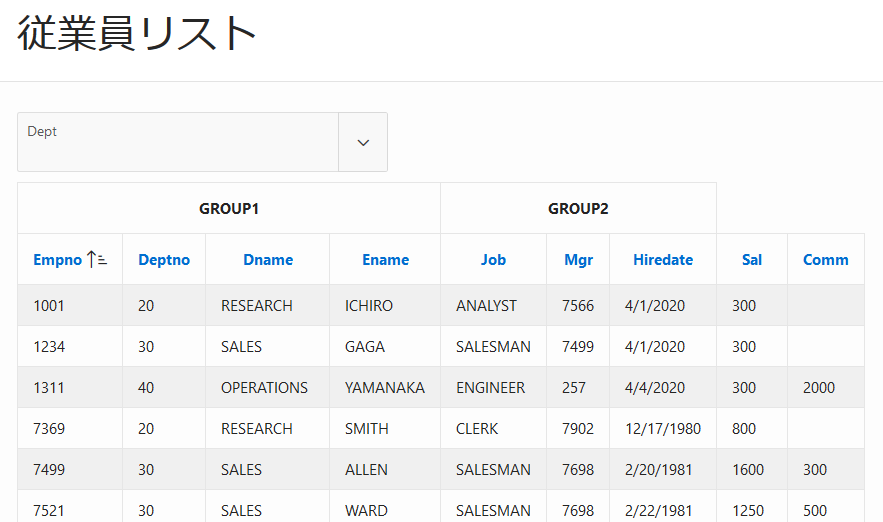
2 Saveして実行
※Colspan指定の不足も含めて、きちんと反映されました。
 |
|---|