1 はじめに
ubuntuに関する雑多な記事をまとめました。
2 環境
VMware Workstation 15 Player上の仮想マシンを使いました。
仮想マシンの版数は以下のとりです。
root@server:~# cat /etc/os-release
NAME="Ubuntu"
VERSION="18.04.4 LTS (Bionic Beaver)"
ID=ubuntu
ID_LIKE=debian
PRETTY_NAME="Ubuntu 18.04.4 LTS"
VERSION_ID="18.04"
HOME_URL="https://www.ubuntu.com/"
SUPPORT_URL="https://help.ubuntu.com/"
BUG_REPORT_URL="https://bugs.launchpad.net/ubuntu/"
PRIVACY_POLICY_URL="https://www.ubuntu.com/legal/terms-and-policies/privacy-policy"
VERSION_CODENAME=bionic
UBUNTU_CODENAME=bionic
root@server:~# uname -r
4.15.0-76-generic
3 rootパスワードの設定方法
デフォルト設定では root ユーザーはパスワードが設定されていません。
ここでは、rootのパスワード設定方法を説明します。
idコマンドを実行すると、一般ユーザ(hana_shin)であることがわかります。
hana_shin@server:~$ id
uid=1000(hana_shin) gid=1000(hana_shin) groups=1000(hana_shin),4(adm),24(cdrom),27(sudo),30(dip),46(plugdev),108(lxd)
hana_shin@server:~$
sudoコマンドを実行します。
このとき、一般ユーザ自身のパスワードを入力します。
hana_shin@server:~$ sudo -s
[sudo] password for hana_shin:
次に、rootのパスワードを設定します。
root@server:~# passwd root
Enter new UNIX password:
Retype new UNIX password:
passwd: password updated successfully
4 viの設定変更
文字に色がついていると見にくいので、文字に色を付けないようにしました。
root@server:~# vi ~/.vimrc
root@server:~# cat ~/.vimrc
syntax off
5 DNSキャッシュサーバの変更方法
設定内容を確認するため、オリジナルの設定ファイルを保存します。
root@server:~# cp /etc/systemd/resolved.conf /etc/systemd/resolved.conf.org
設定ファイルを変更します。変更内容は次を参照してください。
root@server:~# vi /etc/systemd/resolved.conf
変更内容は次のとおりです。
resolved.confファイルのDNS行に192.168.3.1を設定しました。
192.168.3.1は、DNSキャッシュサーバのIPアドレスです。
環境により変化しますので、ご自身の環境にあわせて変更してください。
root@server:~# diff -Nur /etc/systemd/resolved.conf.org /etc/systemd/resolved.conf
--- /etc/systemd/resolved.conf.org      2020-07-23 18:08:18.124306780 +0900
+++ /etc/systemd/resolved.conf  2020-07-23 18:08:41.592449099 +0900
@@ -12,7 +12,7 @@
 # See resolved.conf(5) for details

 [Resolve]
-#DNS=
+DNS=192.168.3.1
 #FallbackDNS=
 #Domains=
 #LLMNR=no
systemd-resolvedを再起動します。
root@server:~# systemctl restart systemd-resolved.service
curlコマンドでwww.example.comにアクセスしてみます。
正常(HTTP/1.1 200 OK)にアクセスできていることがわかります。
curlコマンドの使い方は、curlコマンドの使い方を参照ください。
root@server:~# curl -I http://www.example.com
HTTP/1.1 200 OK
Content-Encoding: gzip
Accept-Ranges: bytes
Age: 583485
Cache-Control: max-age=604800
Content-Type: text/html; charset=UTF-8
Date: Thu, 23 Jul 2020 09:12:21 GMT
Etag: "3147526947"
Expires: Thu, 30 Jul 2020 09:12:21 GMT
Last-Modified: Thu, 17 Oct 2019 07:18:26 GMT
Server: ECS (sjc/4FB8)
X-Cache: HIT
Content-Length: 648
6 dpkgによるパッケージ管理
6.1 パッケージ一覧を表示する方法(-l)
インストールされているすべてのパッケージを表示します。
root@server:~# dpkg -l
Desired=Unknown/Install/Remove/Purge/Hold
| Status=Not/Inst/Conf-files/Unpacked/halF-conf/Half-inst/trig-aWait/Trig-pend
|/ Err?=(none)/Reinst-required (Status,Err: uppercase=bad)
||/ Name                                Version                Architecture           Description
+++-===================================-======================-======================-============================================================================
ii  accountsservice                     0.6.45-1ubuntu1        amd64                  query and manipulate user account information
ii  acl                                 2.2.52-3build1         amd64                  Access control list utilities
ii  acpid                               1:2.0.28-1ubuntu1      amd64                  Advanced Configuration and Power Interface event daemon
-snip-
6.2 パッケージの詳細情報を表示する方法(-s)
bcパッケージの詳細情報を表示してみます。
root@server:~# dpkg -s bc
Package: bc
Status: install ok installed
Priority: standard
Section: math
Installed-Size: 218
Maintainer: Ubuntu Developers <ubuntu-devel-discuss@lists.ubuntu.com>
Architecture: amd64
Multi-Arch: foreign
Version: 1.07.1-2
Depends: libc6 (>= 2.14), libreadline7 (>= 6.0)
Description: GNU bc arbitrary precision calculator language
 GNU bc is an interactive algebraic language with arbitrary precision which
 follows the POSIX 1003.2 draft standard, with several extensions including
 multi-character variable names, an `else' statement and full Boolean
 expressions.  GNU bc does not require the separate GNU dc program.
Original-Maintainer: Ryan Kavanagh <rak@debian.org>
Homepage: http://ftp.gnu.org/gnu/bc/
6.3 パッケージに含まれるファイルを表示する方法(-L)
bcパッケージに含まれるファイル一覧を表示してしてみます。
root@server:~# dpkg -L bc
/usr/share/doc
/usr/share/doc/bc
/usr/share/doc/bc/AUTHORS
/usr/share/doc/bc/NEWS.gz
/usr/share/doc/bc/README
-snip-
6.4 ファイルが含まれるパッケージを確認する方法(-S)
mkfs.xfsコマンドのパスを確認します。
パスは、/sbin/mkfs.xfsであることがわかります。
root@server:~# which mkfs.xfs
/sbin/mkfs.xfs
mkfs.xfsコマンドは、xfsprogsパッケージに含まれていることがわかります。
root@server:~# dpkg -S /sbin/mkfs.xfs
xfsprogs: /sbin/mkfs.xfs
7 リポジトリの管理
7.1 リポジトリの追加方法
リポジトリの情報は、/etc/apt/sources.listに設定されています。
root@server:~# cat /etc/apt/sources.list
# See http://help.ubuntu.com/community/UpgradeNotes for how to upgrade to
# newer versions of the distribution.
deb http://jp.archive.ubuntu.com/ubuntu bionic main restricted
-snip-
debuginfoのリポジトリを追加します。
root@server:~# add-apt-repository http://ddebs.ubuntu.com
Hit:1 http://jp.archive.ubuntu.com/ubuntu bionic InRelease
Get:2 http://jp.archive.ubuntu.com/ubuntu bionic-updates InRelease [88.7 kB]
Get:3 http://jp.archive.ubuntu.com/ubuntu bionic-backports InRelease [74.6 kB]
Get:4 http://jp.archive.ubuntu.com/ubuntu bionic-security InRelease [88.7 kB]
Get:5 http://jp.archive.ubuntu.com/ubuntu bionic/restricted amd64 Packages [9,184 B]
Get:6 http://jp.archive.ubuntu.com/ubuntu bionic/restricted Translation-en [3,584 B]
Get:7 http://jp.archive.ubuntu.com/ubuntu bionic/universe amd64 Packages [8,570 kB]
Ign:8 http://ddebs.ubuntu.com bionic InRelease
Get:9 http://ddebs.ubuntu.com bionic Release [34.7 kB]
Get:10 http://ddebs.ubuntu.com bionic Release.gpg [819 B]
Ign:10 http://ddebs.ubuntu.com bionic Release.gpg
Get:11 http://jp.archive.ubuntu.com/ubuntu bionic/universe Translation-en [4,941 kB]
Get:12 http://jp.archive.ubuntu.com/ubuntu bionic/multiverse amd64 Packages [151 kB]
Get:13 http://jp.archive.ubuntu.com/ubuntu bionic/multiverse Translation-en [108 kB]
Get:14 http://jp.archive.ubuntu.com/ubuntu bionic-updates/main amd64 Packages [1,023 kB]
Get:15 http://jp.archive.ubuntu.com/ubuntu bionic-updates/main Translation-en [344 kB]
Get:16 http://jp.archive.ubuntu.com/ubuntu bionic-updates/restricted amd64 Packages [82.8 kB]
Get:17 http://jp.archive.ubuntu.com/ubuntu bionic-updates/restricted Translation-en [18.3 kB]
Get:18 http://jp.archive.ubuntu.com/ubuntu bionic-updates/universe amd64 Packages [1,094 kB]
Get:19 http://jp.archive.ubuntu.com/ubuntu bionic-updates/universe Translation-en [341 kB]
Get:20 http://jp.archive.ubuntu.com/ubuntu bionic-updates/multiverse amd64 Packages [11.5 kB]
Get:21 http://jp.archive.ubuntu.com/ubuntu bionic-updates/multiverse Translation-en [4,832 B]
Get:22 http://jp.archive.ubuntu.com/ubuntu bionic-backports/main amd64 Packages [7,516 B]
Get:23 http://jp.archive.ubuntu.com/ubuntu bionic-backports/main Translation-en [4,764 B]
Get:24 http://jp.archive.ubuntu.com/ubuntu bionic-backports/universe amd64 Packages [7,736 B]
Get:25 http://jp.archive.ubuntu.com/ubuntu bionic-backports/universe Translation-en [4,588 B]
Get:26 http://jp.archive.ubuntu.com/ubuntu bionic-security/main amd64 Packages [798 kB]
Get:27 http://jp.archive.ubuntu.com/ubuntu bionic-security/main Translation-en [250 kB]
Get:28 http://jp.archive.ubuntu.com/ubuntu bionic-security/restricted amd64 Packages [73.9 kB]
Get:29 http://jp.archive.ubuntu.com/ubuntu bionic-security/restricted Translation-en [16.2 kB]
Get:30 http://jp.archive.ubuntu.com/ubuntu bionic-security/universe amd64 Packages [680 kB]
Get:31 http://jp.archive.ubuntu.com/ubuntu bionic-security/universe Translation-en [226 kB]
Get:32 http://jp.archive.ubuntu.com/ubuntu bionic-security/multiverse amd64 Packages [7,908 B]
Get:33 http://jp.archive.ubuntu.com/ubuntu bionic-security/multiverse Translation-en [2,816 B]
Reading package lists... Done
W: GPG error: http://ddebs.ubuntu.com bionic Release: The following signatures couldn't be verified because the public key is not available: NO_PUBKEY C8CAB6595FDFF622
E: The repository 'http://ddebs.ubuntu.com bionic Release' is not signed.
N: Updating from such a repository can't be done securely, and is therefore disabled by default.
N: See apt-secure(8) manpage for repository creation and user configuration details.
root@server:~# apt update
Hit:1 http://jp.archive.ubuntu.com/ubuntu bionic InRelease
Hit:2 http://jp.archive.ubuntu.com/ubuntu bionic-updates InRelease
Hit:3 http://jp.archive.ubuntu.com/ubuntu bionic-backports InRelease
Hit:4 http://jp.archive.ubuntu.com/ubuntu bionic-security InRelease
Ign:5 http://ddebs.ubuntu.com bionic InRelease
Get:6 http://ddebs.ubuntu.com bionic Release [34.7 kB]
Get:7 http://ddebs.ubuntu.com bionic Release.gpg [819 B]
Ign:7 http://ddebs.ubuntu.com bionic Release.gpg
Reading package lists... Done
W: GPG error: http://ddebs.ubuntu.com bionic Release: The following signatures couldn't be verified because the public key is not available: NO_PUBKEY C8CAB6595FDFF622
E: The repository 'http://ddebs.ubuntu.com bionic Release' is not signed.
N: Updating from such a repository can't be done securely, and is therefore disabled by default.
N: See apt-secure(8) manpage for repository creation and user configuration details.
root@server:/etc/apt# diff -Nur sources.list.save sources.list
--- sources.list.save   2020-07-23 23:29:21.179149367 +0000
+++ sources.list        2020-07-23 23:29:21.211152935 +0000
@@ -46,4 +46,6 @@
 deb http://jp.archive.ubuntu.com/ubuntu bionic-security universe
 # deb-src http://jp.archive.ubuntu.com/ubuntu bionic-security universe
 deb http://jp.archive.ubuntu.com/ubuntu bionic-security multiverse
+deb http://ddebs.ubuntu.com bionic main
+# deb-src http://ddebs.ubuntu.com bionic main
 # deb-src http://jp.archive.ubuntu.com/ubuntu bionic-security multiverse
8 aptによるパッケージ管理
aptは、RedHat系のyumに相当するコマンドです。
8.1 パッケージを検索する方法(search)
apache2パッケージを検索してみます。
root@server:~# apt search apache2
Sorting... Done
Full Text Search... Done
apache2/bionic-updates,bionic-security 2.4.29-1ubuntu4.11 amd64
  Apache HTTP Server
-snip-
8.2 パッケージをインストールする方法(install)
chronyパッケージをインストールしてみます。
root@server:~# apt install chrony
Reading package lists... Done
Building dependency tree
Reading state information... Done
The following packages were automatically installed and are no longer required:
  python3-attr python3-automat python3-click python3-colorama python3-constantly python3-hyperlink python3-incremental python3-pam python3-pyasn1
  python3-pyasn1-modules python3-service-identity python3-twisted python3-twisted-bin python3-zope.interface
-snip-
8.3 パッケージの情報を表示する方法(show)
chronyパッケージの情報を表示してみます。
root@server:~# apt show chrony
Package: chrony
Version: 3.2-4ubuntu4.4
Priority: extra
-snip-
8.4 パッケージを削除する方法(remove)
chronyパッケージを削除してみます。
root@server:~# apt remove chrony
Reading package lists... Done
Building dependency tree
Reading state information... Done
The following packages were automati
-snip-
設定ファイルを確認してみます。
removeの場合、設定ファイルは削除されません。
設定ファイルも削除する場合、次のpurgeを使います。
root@server:~# ls /etc/chrony/chrony.conf
/etc/chrony/chrony.conf
8.5 設定ファイルを削除する方法(purge)
chronyの設定ファイルも含め、パッケージを削除してみます。
まず、chronyの設定ファイルを確認します。
root@server:~# ls /etc/chrony/chrony.conf
/etc/chrony/chrony.conf
chronyパッケージを削除します。
root@server:~# apt purge chrony
Reading package lists... Done
Building dependency tree
Reading state information... Done
-snip-
chronyの設定ファイルを確認します。設定ファイルが削除されたことがわかります。
root@server:~# ls /etc/chrony/chrony.conf
ls: cannot access '/etc/chrony/chrony.conf': No such file or directory
8.6 ソースをダウンロードする方法(source)
8.6.1 事前準備
root@server:~# cp /etc/apt/sources.list /etc/apt/sources.list.org
リポジトリの編集します。
deb-src行の行頭から#を削除します。
root@server:~# vi /etc/apt/sources.list
リポジトリファイルの変更内容は、以下のとおりです。
root@server:~# diff -Nur /etc/apt/sources.list.org /etc/apt/sources.list
--- /etc/apt/sources.list.org   2020-07-23 23:40:07.170106152 +0000
+++ /etc/apt/sources.list       2020-07-23 23:40:51.322878215 +0000
@@ -1,20 +1,20 @@
 # See http://help.ubuntu.com/community/UpgradeNotes for how to upgrade to
 # newer versions of the distribution.
 deb http://jp.archive.ubuntu.com/ubuntu bionic main restricted
-# deb-src http://jp.archive.ubuntu.com/ubuntu bionic main restricted
+deb-src http://jp.archive.ubuntu.com/ubuntu bionic main restricted

 ## Major bug fix updates produced after the final release of the
 ## distribution.
 deb http://jp.archive.ubuntu.com/ubuntu bionic-updates main restricted
-# deb-src http://jp.archive.ubuntu.com/ubuntu bionic-updates main restricted
+deb-src http://jp.archive.ubuntu.com/ubuntu bionic-updates main restricted

 ## N.B. software from this repository is ENTIRELY UNSUPPORTED by the Ubuntu
 ## team. Also, please note that software in universe WILL NOT receive any
 ## review or updates from the Ubuntu security team.
 deb http://jp.archive.ubuntu.com/ubuntu bionic universe
-# deb-src http://jp.archive.ubuntu.com/ubuntu bionic universe
+deb-src http://jp.archive.ubuntu.com/ubuntu bionic universe
 deb http://jp.archive.ubuntu.com/ubuntu bionic-updates universe
-# deb-src http://jp.archive.ubuntu.com/ubuntu bionic-updates universe
+deb-src http://jp.archive.ubuntu.com/ubuntu bionic-updates universe

 ## N.B. software from this repository is ENTIRELY UNSUPPORTED by the Ubuntu
 ## team, and may not be under a free licence. Please satisfy yourself as to
@@ -22,9 +22,9 @@
 ## multiverse WILL NOT receive any review or updates from the Ubuntu
 ## security team.
 deb http://jp.archive.ubuntu.com/ubuntu bionic multiverse
-# deb-src http://jp.archive.ubuntu.com/ubuntu bionic multiverse
+deb-src http://jp.archive.ubuntu.com/ubuntu bionic multiverse
 deb http://jp.archive.ubuntu.com/ubuntu bionic-updates multiverse
-# deb-src http://jp.archive.ubuntu.com/ubuntu bionic-updates multiverse
+deb-src http://jp.archive.ubuntu.com/ubuntu bionic-updates multiverse

 ## N.B. software from this repository may not have been tested as
 ## extensively as that contained in the main release, although it includes
@@ -32,7 +32,7 @@
 ## Also, please note that software in backports WILL NOT receive any review
 ## or updates from the Ubuntu security team.
 deb http://jp.archive.ubuntu.com/ubuntu bionic-backports main restricted universe multiverse
-# deb-src http://jp.archive.ubuntu.com/ubuntu bionic-backports main restricted universe multiverse
+deb-src http://jp.archive.ubuntu.com/ubuntu bionic-backports main restricted universe multiverse

 ## Uncomment the following two lines to add software from Canonical's
 ## 'partner' repository.
@@ -42,10 +42,10 @@
 # deb-src http://archive.canonical.com/ubuntu bionic partner

 deb http://jp.archive.ubuntu.com/ubuntu bionic-security main restricted
-# deb-src http://jp.archive.ubuntu.com/ubuntu bionic-security main restricted
+deb-src http://jp.archive.ubuntu.com/ubuntu bionic-security main restricted
 deb http://jp.archive.ubuntu.com/ubuntu bionic-security universe
-# deb-src http://jp.archive.ubuntu.com/ubuntu bionic-security universe
+deb-src http://jp.archive.ubuntu.com/ubuntu bionic-security universe
 deb http://jp.archive.ubuntu.com/ubuntu bionic-security multiverse
 deb http://ddebs.ubuntu.com bionic main
-# deb-src http://ddebs.ubuntu.com bionic main
-# deb-src http://jp.archive.ubuntu.com/ubuntu bionic-security multiverse
+deb-src http://ddebs.ubuntu.com bionic main
+deb-src http://jp.archive.ubuntu.com/ubuntu bionic-security multiverse
リポジトリのアップデートを行います。
root@server:~# apt -y update
Ign:1 http://ddebs.ubuntu.com bionic InRelease
Get:2 http://ddebs.ubuntu.com bionic Release [34.7 kB]
Hit:3 http://jp.archive.ubuntu.com/ubuntu bionic InRelease
Hit:4 http://jp.archive.ubuntu.com/ubuntu bionic-updates InRelease
Hit:5 http://jp.archive.ubuntu.com/ubuntu bionic-backports InRelease
Hit:6 http://jp.archive.ubuntu.com/ubuntu bionic-security InRelease
Get:7 http://jp.archive.ubuntu.com/ubuntu bionic/universe Sources [9,051 kB]
Get:8 http://ddebs.ubuntu.com bionic Release.gpg [819 B]
Ign:8 http://ddebs.ubuntu.com bionic Release.gpg
Get:9 http://jp.archive.ubuntu.com/ubuntu bionic/restricted Sources [5,324 B]
Get:10 http://jp.archive.ubuntu.com/ubuntu bionic/multiverse Sources [181 kB]
Get:11 http://jp.archive.ubuntu.com/ubuntu bionic/main Sources [829 kB]
Get:12 http://jp.archive.ubuntu.com/ubuntu bionic-updates/restricted Sources [9,396 B]
Get:13 http://jp.archive.ubuntu.com/ubuntu bionic-updates/universe Sources [286 kB]
Get:14 http://jp.archive.ubuntu.com/ubuntu bionic-updates/main Sources [327 kB]
Get:15 http://jp.archive.ubuntu.com/ubuntu bionic-updates/multiverse Sources [5,844 B]
Get:16 http://jp.archive.ubuntu.com/ubuntu bionic-backports/universe Sources [3,844 B]
Get:17 http://jp.archive.ubuntu.com/ubuntu bionic-backports/main Sources [4,136 B]
Get:18 http://jp.archive.ubuntu.com/ubuntu bionic-security/universe Sources [171 kB]
Get:19 http://jp.archive.ubuntu.com/ubuntu bionic-security/restricted Sources [7,480 B]
Get:20 http://jp.archive.ubuntu.com/ubuntu bionic-security/main Sources [161 kB]
Get:21 http://jp.archive.ubuntu.com/ubuntu bionic-security/multiverse Sources [3,180 B]
Reading package lists... Done
W: GPG error: http://ddebs.ubuntu.com bionic Release: The following signatures couldn't be verified because the public key is not available: NO_PUBKEY C8CAB6595FDFF622
E: The repository 'http://ddebs.ubuntu.com bionic Release' is not signed.
N: Updating from such a repository can't be done securely, and is therefore disabled by default.
N: See apt-secure(8) manpage for repository creation and user configuration details.
dpkg-devパッケージをインストールします。
root@server:~# apt -y install dpkg-dev
Reading package lists... Done
Building dependency tree
Reading state information... Done
-snip-
8.6.2 ソースのダウンロード
rootでソースをダウンロードすると以下のワーニングが発生します。
ワーニングが発生しても、ファイルはダウンロードできているようです。
W: Download is performed unsandboxed as root as file 'chrony_3.2-4ubuntu4.4.dsc' couldn't be accessed by user '_apt'. - pkgAcquire::Run (13: Permission denied)
ここでは、一般ユーザ(hana_shin)でソースをダウンロードしてみました。
root@server:~# mkdir test
root@server:~# cd test/
bcのソースをダウンロードします。
hana_shin@server:~/test$ apt source bc
Reading package lists... Done
NOTICE: 'bc' packaging is maintained in the 'Git' version control system at:
https://salsa.debian.org/debian/bc.git
Please use:
git clone https://salsa.debian.org/debian/bc.git
to retrieve the latest (possibly unreleased) updates to the package.
Need to get 446 kB of source archives.
Get:1 http://jp.archive.ubuntu.com/ubuntu bionic/main bc 1.07.1-2 (dsc) [2,912 B]
Get:2 http://jp.archive.ubuntu.com/ubuntu bionic/main bc 1.07.1-2 (tar) [420 kB]
Get:3 http://jp.archive.ubuntu.com/ubuntu bionic/main bc 1.07.1-2 (diff) [23.2 kB]
Fetched 446 kB in 1s (602 kB/s)
dpkg-source: info: extracting bc in bc-1.07.1
dpkg-source: info: unpacking bc_1.07.1.orig.tar.gz
dpkg-source: info: unpacking bc_1.07.1-2.debian.tar.xz
dpkg-source: info: applying 01_typo_in_bc.diff
dpkg-source: info: applying 02_hyphens_as_minus_in_man.diff
dpkg-source: info: applying 04_info_dircategory.diff
dpkg-source: info: applying 05_notice_read_write_errors.diff
dpkg-source: info: applying 06_read_dcrc.diff
dpkg-source: info: applying 07_bc_man.diff
dpkg-source: info: applying 08_no-make-circular-dependencies.diff
9 カーネルdbgsymパッケージのインストール方法
カーネルのdbgsymパッケージをインストールしてみます。
https://wiki.ubuntu.com/Kernel/Systemtap
root@server:~# apt-key adv --keyserver keyserver.ubuntu.com --recv-keys C8CAB6595FDFF622
Executing: /tmp/apt-key-gpghome.qrY4MCXjBg/gpg.1.sh --keyserver keyserver.ubuntu.com --recv-keys C8CAB6595FDFF622
gpg: key C8CAB6595FDFF622: 5 signatures not checked due to missing keys
gpg: key C8CAB6595FDFF622: "Ubuntu Debug Symbol Archive Automatic Signing Key (2016) <ubuntu-archive@lists.ubuntu.com>" 4 new signatures
gpg: Total number processed: 1
gpg:         new signatures: 4
root@server:~# codename=$(lsb_release -c | awk '{print $2}')
root@server:~# tee /etc/apt/sources.list.d/ddebs.list << EOF
> deb http://ddebs.ubuntu.com/ ${codename} main restricted universe multiverse
> deb http://ddebs.ubuntu.com/ ${codename}-security main restricted universe multiverse
> deb http://ddebs.ubuntu.com/ ${codename}-updates  main restricted universe multiverse
> deb http://ddebs.ubuntu.com/ ${codename}-proposed main restricted universe multiverse
> EOF
deb http://ddebs.ubuntu.com/ bionic main restricted universe multiverse
deb http://ddebs.ubuntu.com/ bionic-security main restricted universe multiverse
deb http://ddebs.ubuntu.com/ bionic-updates  main restricted universe multiverse
deb http://ddebs.ubuntu.com/ bionic-proposed main restricted universe multiverse
アップデートを実行する。
root@server:~# apt -y update
カーネルのdbgsymパッケージをインストールします。
root@server:~# apt install linux-image-$(uname -r)-dbgsym
Reading package lists... Done
Building dependency tree
Reading state information... Done
The following packages were automatically installed and are no longer required:
  apache2-bin apache2-data apache2-utils libapr1 libaprutil1 libaprutil1-dbd-sqlite3 libaprutil1-ldap liblua5.2-0 libnspr4 libnss3 python3-attr python3-automat
  python3-click python3-colorama python3-constantly python3-hyperlink python3-incremental python3-pam python3-pyasn1 python3-pyasn1-modules python3-service-identity
  python3-twisted python3-twisted-bin python3-zope.interface ssl-cert
-snip-
カーネルのdbgsymパッケージがインストールされたことがわかります。
root@server:~# dpkg -l |grep linux-image-$(uname -r)
ii  linux-image-4.15.0-76-generic                 4.15.0-76.86                                    amd64        Signed kernel image generic
ii  linux-image-4.15.0-76-generic-dbgsym          4.15.0-76.86                                    amd64        Signed kernel image generic
10 タイムゾーンの変更方法
私の環境では、タイムゾーンがUTCになっていました。
これをJSTに変更してみます。
root@server:~# timedatectl
                      Local time: Thu 2020-07-23 04:27:23 UTC
                  Universal time: Thu 2020-07-23 04:27:23 UTC
                        RTC time: Thu 2020-07-23 04:27:22
                       Time zone: Etc/UTC (UTC, +0000)
       System clock synchronized: yes
systemd-timesyncd.service active: yes
                 RTC in local TZ: no
タイムゾーンをAsia/Tokyoに変更します。
root@server:~# timedatectl set-timezone Asia/Tokyo
タイムゾーンを確認します。
タイムゾーンをAsia/Tokyoに変更されたことがわかります。
root@server:~# timedatectl
                      Local time: Thu 2020-07-23 13:28:11 JST
                  Universal time: Thu 2020-07-23 04:28:11 UTC
                        RTC time: Thu 2020-07-23 04:28:11
                       Time zone: Asia/Tokyo (JST, +0900)
       System clock synchronized: yes
systemd-timesyncd.service active: yes
                 RTC in local TZ: no
11 時刻同期の方法
NTPサーバと時刻同期をするため、chronyをインストールします。
root@server:~# apt install chrony
chronyを起動します。
root@server:~# systemctl start chrony
chronyが時刻同期をするNTPサーバについての情報を表示します。
chronyは、ntp-a2.nict.go.jpと時刻同期をしていることがわかります。
なお、chronycコマンドの実行結果は、ここを参考にしました。
root@server:~# chronyc sources
210 Number of sources = 8
MS Name/IP address         Stratum Poll Reach LastRx Last sample
===============================================================================
^- golem.canonical.com           2   6   377    44    +12ms[  +12ms] +/-  158ms
^- pugot.canonical.com           2   6   377    43  -1634us[-1634us] +/-  154ms
^- alphyn.canonical.com          2   6   377    49  +5526us[+5526us] +/-  134ms
^- chilipepper.canonical.com     2   6   377    49  +4561us[+4561us] +/-  154ms
^- kuroa.me                      2   6   377    50  -1581us[-1581us] +/-   62ms
^* ntp-a2.nict.go.jp             1   6   377   117   -313us[ -516us] +/-   13ms
^- time.cloudflare.com           3   6   377    52  +5920us[+5920us] +/-   72ms
^- y.ns.gin.ntt.net              2   6   377    52  +2658us[+2658us] +/-  120ms
12 ファイアーウォールの使い方
ファイアーウォールの設定に、CentOSではfirewall-cmdを使いますが、ubuntuではufwを使います。
ubuntu16.04では、ufwコマンドの使い方という記事を作成しました。
12.1 ufwの有効化
ubuntuのインストール直後は、以下のようにinactive状態になっています。
root@server:~# ufw status verbose
Status: inactive
ufwを有効にします。
root@server:~# ufw enable
Command may disrupt existing ssh connections. Proceed with operation (y|n)? y
Firewall is active and enabled on system startup
ufwの状態を確認します。
ufwの状態が、activeになったことがわかります。
root@server:~# ufw status verbose
Status: active
Logging: on (low)
Default: deny (incoming), allow (outgoing), disabled (routed)
New profiles: skip
12.2 sshポート番号を開放する方法
デフォルトでは、sshポート番号へのアクセスが禁止されています。
root@server:~# ufw status verbose
Status: active
Logging: on (low)
Default: deny (incoming), allow (outgoing), disabled (routed)
New profiles: skip
sshポート番号へのアクセスを許可します。
root@server:~# ufw allow 22/tcp
Rule added
Rule added (v6)
sshポート番号へのアクセスが許可されたことがわかります。
root@server:~# ufw status verbose
Status: active
Logging: on (low)
Default: deny (incoming), allow (outgoing), disabled (routed)
New profiles: skip

To                         Action      From
--                         ------      ----
22/tcp                     ALLOW IN    Anywhere
22/tcp (v6)                ALLOW IN    Anywhere (v6)
13 セキュリティ機能の使い方
セキュリティ機能として、CentOSではSELinuxを使いますが、ubuntuではAppArmorを使います。
13.1 事前準備
aa-enforce等のコマンドを使うため、事前にapparmor-utilsをインストールします。
root@server:~# apt install apparmor-utils
13.2 起動、停止方法
root@server:~# systemctl start apparmor.service
root@server:~# systemctl status apparmor.service
root@server:~# systemctl stop apparmor.service
13.3 プロファイルの確認方法
プロファイルとは、アクセス制御をするためのルールの集合です。
プロファイルは、/etc/apparmor.d配下に保存されます。
プロファイルのファイル名は、プログラムのパス名の/を.に置き換えた名前になります。
たとえば、dhclientの場合、プログラムのパス名は/sbin/dhclientなので、
プロファイルのファイル名は、/etc/apparmor.d/sbin.dhclientになります。
aa-statusコマンドを実行してプロファイルを確認します。
プロファイルには、下記2つのモードがあります。
| モード | 意味 |
|---|---|
| enforce | プログラムがルール違反をしたら、そのプログラムを停止する |
| complain(学習モード) | プログラムがルール違反をしても、プログラムを停止しない。ルール違反があった旨のログに残すだけ。 |
root@server:~# aa-status
apparmor module is loaded.
20 profiles are loaded.
20 profiles are in enforce mode.
   /sbin/dhclient
   /snap/core/8268/usr/lib/snapd/snap-confine
   /snap/core/8268/usr/lib/snapd/snap-confine//mount-namespace-capture-helper
   /usr/bin/lxc-start
   /usr/bin/man
   /usr/lib/NetworkManager/nm-dhcp-client.action
   /usr/lib/NetworkManager/nm-dhcp-helper
   /usr/lib/connman/scripts/dhclient-script
   /usr/lib/snapd/snap-confine
   /usr/lib/snapd/snap-confine//mount-namespace-capture-helper
   /usr/sbin/chronyd
   /usr/sbin/tcpdump
   lxc-container-default
   lxc-container-default-cgns
   lxc-container-default-with-mounting
   lxc-container-default-with-nesting
   man_filter
   man_groff
   snap-update-ns.core
   snap.core.hook.configure
0 profiles are in complain mode.
1 processes have profiles defined.
1 processes are in enforce mode.
   /usr/sbin/chronyd (1398)
0 processes are in complain mode.
0 processes are unconfined but have a profile defined.
13.4 プロファイルの変更方法
dhclientのプロファイルを変更してみます。
まず、dhclientの状態を確認します。enforceモードであることがわかります。
root@server:~# aa-status
apparmor module is loaded.
20 profiles are loaded.
20 profiles are in enforce mode.
   /sbin/dhclient
-snip-
complainモードに変更してみます。
root@server:~# aa-complain /sbin/dhclient
Setting /sbin/dhclient to complain mode.
dhclientの状態を確認します。
complainモードに変更されたことがわかります。
root@server:~# aa-status
apparmor module is loaded.
-snip-
1 profiles are in complain mode.
   /sbin/dhclient
-snip-
enforceモードに変更してみます。
root@server:~# aa-enforce /sbin/dhclient
Setting /sbin/dhclient to enforce mode.
dhclientの状態を確認します。
enforceモードに変更されたことがわかります。
root@server:~# aa-status
apparmor module is loaded.
20 profiles are loaded.
20 profiles are in enforce mode.
   /sbin/dhclient
-snip-
14 systemtapの使い方
systemtapは、gccを使うので、systemtapパッケージと一緒にgccパッケージをインストールします。
root@server:~# apt install -y systemtap gcc
systemtapのスクリプトを作成します。
スクリプトの内容は次のとおりです。
・pingを実行したら、その時の時刻と関数名(ip_output)を表示する。
root@server:~# vi ping.stp
root@server:~# cat ping.stp
# !/usr/bin/stap

probe kernel.function("ip_output@net/ipv4/ip_output.c")
{
  if(execname() == "ping"){
    printf("time=%s,pp=%s\n",  tz_ctime(gettimeofday_s()),pp())
  }
}
作成したスクリプトを実行します。
root@server:~# stap -v ping.stp
Pass 1: parsed user script and 465 library scripts using 114480virt/49096res/6728shr/42800data kb, in 160usr/60sys/218real ms.
Pass 2: analyzed script: 1 probe, 8 functions, 4 embeds, 0 globals using 237416virt/170412res/8164shr/165736data kb, in 820usr/420sys/1252real ms.
Pass 3: using cached /root/.systemtap/cache/85/stap_85209ee464f496a4e1c4641781457433_6701.c
Pass 4: using cached /root/.systemtap/cache/85/stap_85209ee464f496a4e1c4641781457433_6701.ko
Pass 5: starting run.
もう1つターミナルをオープンします。
オープンしたターミナルで、pingを実行します。
ここでは、pingの宛先は、デフォルトGWを指定しました。
root@server:~# ping 192.168.3.1
pingを実行すると、systemtapが以下の実行結果を出力します。
root@server:~# stap -v ping.stp
-snip-
time=Thu Jul 23 15:14:17 2020 JST,pp=kernel.function("ip_output@/build/linux-xWiSio/linux-4.15.0/net/ipv4/ip_output.c:396")
time=Thu Jul 23 15:14:18 2020 JST,pp=kernel.function("ip_output@/build/linux-xWiSio/linux-4.15.0/net/ipv4/ip_output.c:396")
time=Thu Jul 23 15:14:19 2020 JST,pp=kernel.function("ip_output@/build/linux-xWiSio/linux-4.15.0/net/ipv4/ip_output.c:396")
systemtapの使い方は、以下を参照ください。
・SystemTapの使い方
・SystemTapの使い方(その2)
・SystemTapの使い方(グルモード編)
・SystemTapの使い方(tapset編)
・SystemTapの使い方(User-Space Probing)
15 カーネルダンプの採取方法
カーネルダンプを採取してみます。
何度か下記手順で実施してみたのですが、ダンプ採取できる場合と
できない場合があるように思います。
なにか設定が不足している???
それとも、バグなのかな???
15.1 パッケージのインストール
root@server:~# apt install kdump-tools
root@server:~# apt install linux-crashdump
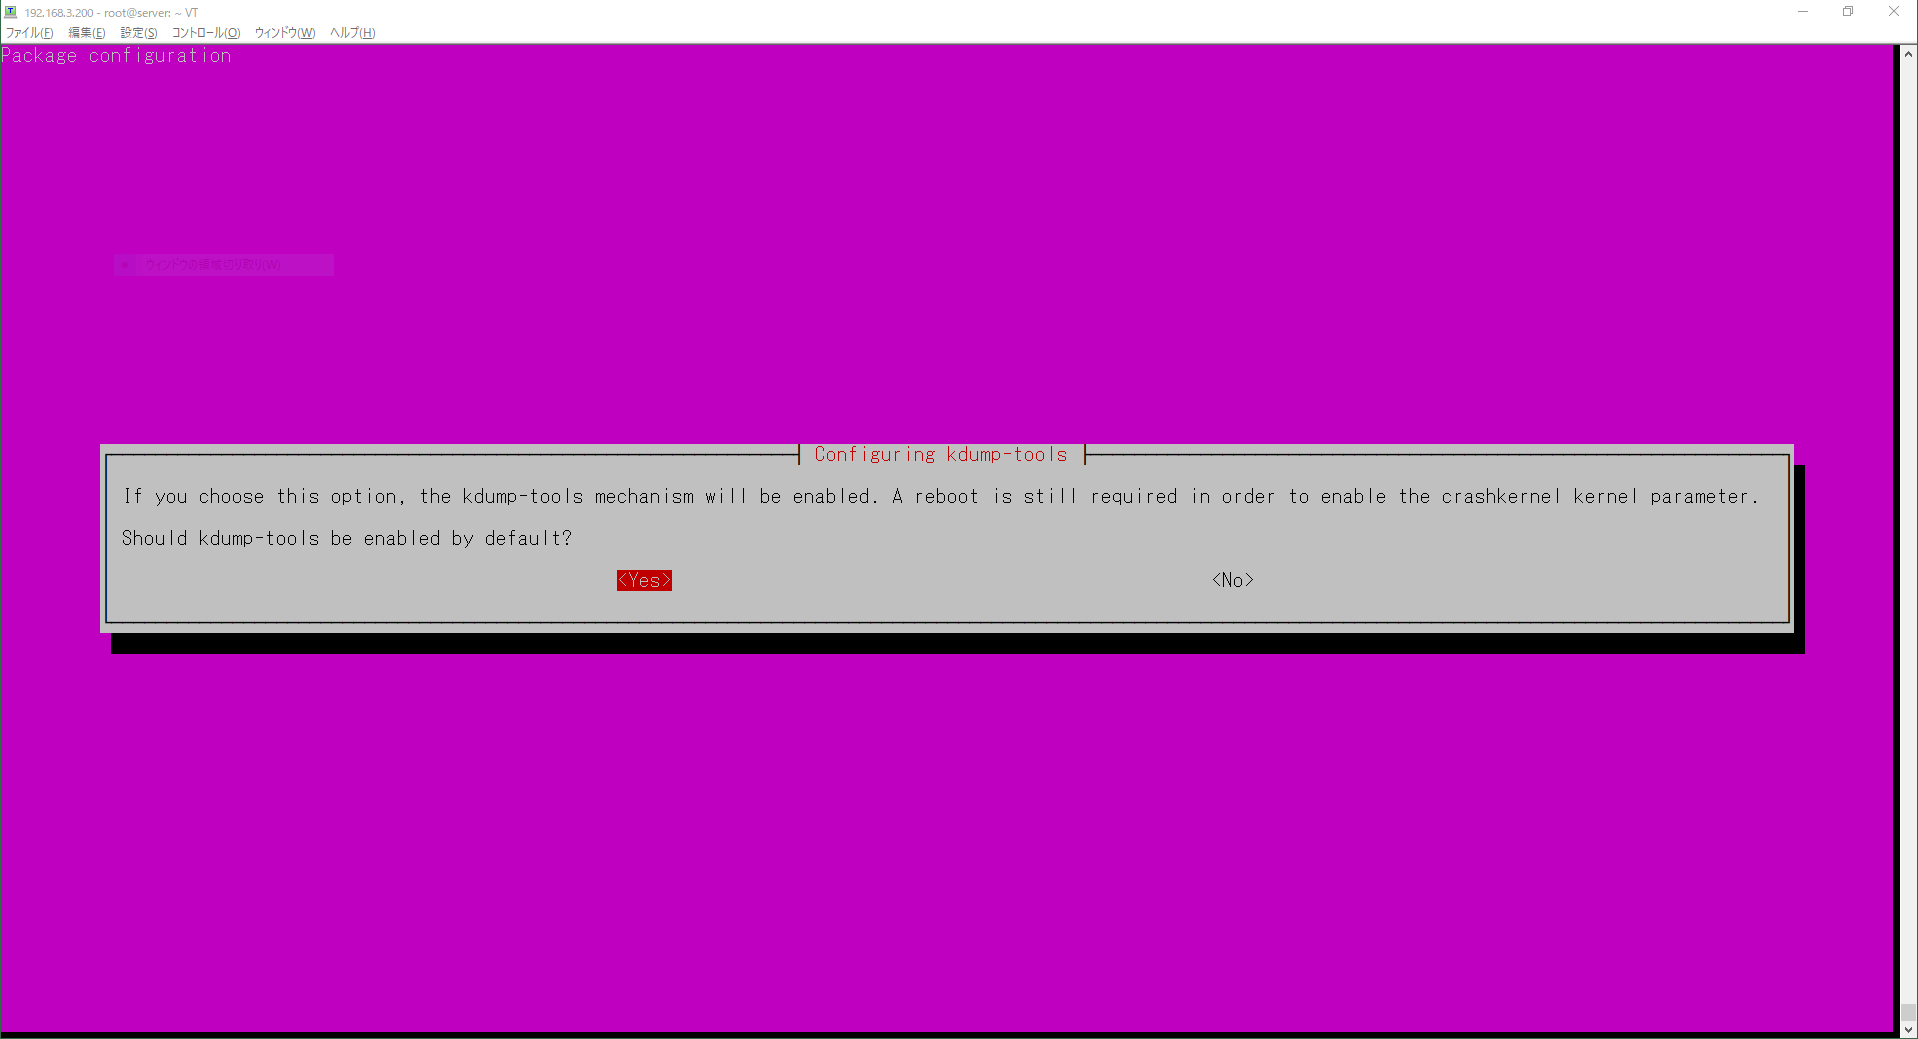
パッケージのインストールを実行すると、以下の画面が表示されます。
kudmpを有効にするため、yesを選択します。
kdumpの状態を確認します。
Not ready to kdumpと表示されているので、この時点では、設定が不足しています。
root@server:~# kdump-config show
 * no crashkernel= parameter in the kernel cmdline
DUMP_MODE:        kdump
USE_KDUMP:        1
KDUMP_SYSCTL:     kernel.panic_on_oops=1
KDUMP_COREDIR:    /var/crash
crashkernel addr:
   /var/lib/kdump/vmlinuz
kdump initrd:
   /var/lib/kdump/initrd.img
current state:    Not ready to kdump

kexec command:
  no kexec command recorded
root@server:~# cat /proc/cmdline
BOOT_IMAGE=/vmlinuz-4.15.0-76-generic root=UUID=edc0c8a0-227d-42e4-a8c6-de0a33fc1f66 ro maybe-ubiquity
15.2 kdumpの設定
crashkernelパラメータを追加します。
私の環境では、GRUB_CMDLINE_LINUX_DEFAULT行に、crashkernel=256Mを追加しました。
root@server:~# cp /etc/default/grub /etc/default/grub.org
root@server:~# vi /etc/default/grub
root@server:~# diff -Nur /etc/default/grub.org /etc/default/grub
--- /etc/default/grub.org       2020-07-23 19:41:38.563625995 +0900
+++ /etc/default/grub   2020-07-23 19:41:54.179738378 +0900
@@ -7,7 +7,7 @@
 GRUB_TIMEOUT_STYLE=hidden
 GRUB_TIMEOUT=0
 GRUB_DISTRIBUTOR=`lsb_release -i -s 2> /dev/null || echo Debian`
-GRUB_CMDLINE_LINUX_DEFAULT="maybe-ubiquity"
+GRUB_CMDLINE_LINUX_DEFAULT="maybe-ubiquity crashkernel=256M"
 GRUB_CMDLINE_LINUX=""

 # Uncomment to enable BadRAM filtering, modify to suit your needs
grub-mkconfigコマンドを実行して、crashkernelをカーネルパラメータに反映します。
crashkernelは、カーネルを再起動すると反映されます。
root@server:~# grub-mkconfig -o /boot/grub/grub.cfg
カーネルを再起動します。
root@server:~# shutdown -r now
カーネルパラメータを確認します。
カーネルパラメータにcrashkernelが追加されたことがわかります。
root@server:~# cat /proc/cmdline
BOOT_IMAGE=/vmlinuz-4.15.0-76-generic root=UUID=edc0c8a0-227d-42e4-a8c6-de0a33fc1f66 ro maybe-ubiquity crashkernel=256M crashkernel=512M-:192M
kdumpの状態を確認します。
current stateがready to kdumpになったので、カーネルダンプの採取が可能な状態です。
root@server:~# kdump-config show
DUMP_MODE:        kdump
USE_KDUMP:        1
KDUMP_SYSCTL:     kernel.panic_on_oops=1
KDUMP_COREDIR:    /var/crash
crashkernel addr: 0x25000000
   /var/lib/kdump/vmlinuz: symbolic link to /boot/vmlinuz-4.15.0-76-generic
kdump initrd:
   /var/lib/kdump/initrd.img: symbolic link to /var/lib/kdump/initrd.img-4.15.0-76-generic
current state:    ready to kdump

kexec command:
  /sbin/kexec -p --command-line="BOOT_IMAGE=/vmlinuz-4.15.0-76-generic root=UUID=edc0c8a0-227d-42e4-a8c6-de0a33fc1f66 ro maybe-ubiquity reset_devices systemd.unit=kdump-tools-dump.service nr_cpus=1 irqpoll nousb ata_piix.prefer_ms_hyperv=0" --initrd=/var/lib/kdump/initrd.img /var/lib/kdump/vmlinuz
kernel.sysrqに1を設定します。
root@server:~# sysctl -w kernel.sysrq=1
kernel.sysrq = 1
カーネルをクラッシュさせます。
root@server:~# echo c > /proc/sysrq-trigger
15.3 カーネルダンプの確認方法
カーネルが再起動したら、/var/crash配下を確認します。
/var/crash配下にカーネルダンプを格納したディレクトリが作成されます。
以下の例では、202007231947です。
root@server:~# ls -l /var/crash/202007231947/
total 47384
-rw------- 1 root root   115186 Jul 23 19:47 dmesg.202007231947
-rw------- 1 root root 48398586 Jul 23 19:47 dump.202007231947
crashコマンドを実行して、カーネルダンプを確認します。
root@server:~# crash -S /usr/lib/debug/boot/vmlinux-4.15.0-76-generic /var/crash/202007231947/dump.202007231947
crash: cannot open /boot/System.map

crash 7.2.8
Copyright (C) 2002-2020  Red Hat, Inc.
Copyright (C) 2004, 2005, 2006, 2010  IBM Corporation
Copyright (C) 1999-2006  Hewlett-Packard Co
Copyright (C) 2005, 2006, 2011, 2012  Fujitsu Limited
Copyright (C) 2006, 2007  VA Linux Systems Japan K.K.
Copyright (C) 2005, 2011  NEC Corporation
Copyright (C) 1999, 2002, 2007  Silicon Graphics, Inc.
Copyright (C) 1999, 2000, 2001, 2002  Mission Critical Linux, Inc.
This program is free software, covered by the GNU General Public License,
and you are welcome to change it and/or distribute copies of it under
certain conditions.  Enter "help copying" to see the conditions.
This program has absolutely no warranty.  Enter "help warranty" for details.
-snip-
sysサブコマンドを実行してみます。
crash> sys
      KERNEL: /usr/lib/debug/boot/vmlinux-4.15.0-76-generic
    DUMPFILE: /var/crash/202007231947/dump.202007231947  [PARTIAL DUMP]
        CPUS: 4
        DATE: Thu Jul 23 19:47:15 2020
      UPTIME: 00:04:50
LOAD AVERAGE: 0.02, 0.05, 0.02
       TASKS: 247
    NODENAME: server
     RELEASE: 4.15.0-76-generic
     VERSION: #86-Ubuntu SMP Fri Jan 17 17:24:28 UTC 2020
     MACHINE: x86_64  (2808 Mhz)
      MEMORY: 4 GB
       PANIC: "sysrq: SysRq : Trigger a crash"
次に、psサブコマンドを実行してみます。
crash> ps
   PID    PPID  CPU       TASK        ST  %MEM     VSZ    RSS  COMM
>     0      0   0  ffffffff98613480  RU   0.0       0      0  [swapper/0]
      0      0   1  ffff8e77f86d5d00  RU   0.0       0      0  [swapper/1]
>     0      0   2  ffff8e77f86d0000  RU   0.0       0      0  [swapper/2]
>     0      0   3  ffff8e77f86d45c0  RU   0.0       0      0  [swapper/3]
      1      0   2  ffff8e77f8669740  IN   0.2   77996   8988  systemd
-snip-
16 coreファイルの採取方法
ここでは、apache2のcoreファイル採取、gdbによるcoreファイル参照を試してみます。
16.1 事前準備
root@server:~# apt -y install systemd-coredump gdb
apache2のdbgsymパッケージをインストールします。
root@server:~# apt install apache2-dbg
coreファイルの格納用ディレクトリを作成します。
root@server:~# mkdir /var/lib/coredumps
coreファイルの格納先ディレクトリを設定します。
root@server:~# sysctl -w kernel.core_pattern="/var/lib/coredumps/core.%e.%p"
kernel.core_pattern = /var/lib/coredumps/core.%e.%p
設定した内容を確認します。
root@server:~# sysctl -n kernel.core_pattern
/var/lib/coredumps/core.%e.%p
root@server:~# sysctl -w fs.suid_dumpable=2
fs.suid_dumpable = 2
設定した内容を確認します。
root@server:~# sysctl -n fs.suid_dumpable
2
ユニット定義ファイルをデフォルトのディレクトリから
カスタマイズ用ディレクトリにコピーします。
root@server:~# cp /lib/systemd/system/apache2.service /etc/systemd/system/
カスタマイズ用ディレクトリにコピーしたユニット定義ファイルを変更します。
root@server:~# vi /etc/systemd/system/apache2.service
変更箇所を以下にしめします。LimitCORE=infinityという行を追加しました。
root@server:~# diff -Nur /lib/systemd/system/apache2.service /etc/systemd/system/apache2.service
--- /lib/systemd/system/apache2.service 2020-07-24 21:43:41.551357382 +0900
+++ /etc/systemd/system/apache2.service 2020-07-24 21:44:19.034361016 +0900
@@ -10,6 +10,7 @@
 ExecReload=/usr/sbin/apachectl graceful
 PrivateTmp=true
 Restart=on-abort
+LimitCORE=infinity

 [Install]
 WantedBy=multi-user.target
ユニット定義ファイルの変更内容をシステムに通知します。
root@server:~# systemctl daemon-reload
apache2を再起動します。
root@server:~# systemctl restart apache2
16.2 coreファイルの採取
chronydが動作していることを確認します。
root@server:~# ps -C apache2
   PID TTY          TIME CMD
  3974 ?        00:00:00 apache2
  3975 ?        00:00:00 apache2
  3977 ?        00:00:00 apache2
apache2にSIGSEGVを送信して、coreファイルを出力させてみます。
root@server:~# pkill -SIGSEGV apache2
採取されたcoreファイルを確認します。
3つのプロセスに対してそれぞれcoreファイルが採取されたことがわかります。
root@server:~# ls -la /var/lib/coredumps/core.apache2.397*
-rw------- 1 root root       1892352 Jul 24 21:46 /var/lib/coredumps/core.apache2.3974
-rw------- 1 root www-data 232337408 Jul 24 21:46 /var/lib/coredumps/core.apache2.3975
-rw------- 1 root www-data 232337408 Jul 24 21:46 /var/lib/coredumps/core.apache2.3977
16.3 gdbによるcoreファイルの確認
PID=3974のapache2が出力したcoreファイルをgdbで確認してみます。
root@server:~# gdb /usr/sbin/apache2 /var/lib/coredumps/core.apache2.3974
GNU gdb (Ubuntu 8.1-0ubuntu3.2) 8.1.0.20180409-git
Copyright (C) 2018 Free Software Foundation, Inc.
License GPLv3+: GNU GPL version 3 or later <http://gnu.org/licenses/gpl.html>
This is free software: you are free to change and redistribute it.
-snip-
btサブコマンドでバックトレースを確認してみます。
apache2 はselectシステムコール実行中、coreファイルを出力したことがわかります。
(gdb) bt
# 0  0x00007f01288b20f7 in __GI___select (nfds=0, readfds=0x0, writefds=0x0, exceptfds=0x0, timeout=0x7ffc067a85a0)
    at ../sysdeps/unix/sysv/linux/select.c:41
# 1  0x00007f0128dd3ac5 in apr_sleep () from /usr/lib/x86_64-linux-gnu/libapr-1.so.0
# 2  0x00005594ed026c91 in ap_wait_or_timeout (status=status@entry=0x7ffc067a8668,
    exitcode=exitcode@entry=0x7ffc067a866c, ret=ret@entry=0x7ffc067a8670, p=<optimized out>, s=<optimized out>)
    at mpm_common.c:199
# 3  0x00007f0125ebd62a in server_main_loop (num_buckets=1, remaining_children_to_start=0) at event.c:2804
# 4  event_run (_pconf=<optimized out>, plog=<optimized out>, s=<optimized out>) at event.c:2982
# 5  0x00005594ed0262be in ap_run_mpm (pconf=0x7f0129695028, plog=0x7f0129669028, s=0x7f012966e4a0) at mpm_common.c:94
# 6  0x00005594ed01eb5b in main (argc=<optimized out>, argv=<optimized out>) at main.c:818
17 トラブルシュートの時に使うコマンド
私がよく使うコマンドを追加でインストールしました。
以下のパッケージは、デフォルトではインストールされていなかったものです。
17.1 ネットワーク
root@server:~# apt -y install tshark
root@server:~# apt -y install arping
root@server:~# apt -y install iftop
root@server:~# apt -y install conntrack
root@server:~# apt -y install hping3
root@server:~# apt -y install iperf3
以下は、CentOS用に書いた記事です。ご参考まで。
・ネットワークトラブルの時に使うコマンド
17.2 その他
root@server:~# apt -y install stress
root@server:~# apt -y install stress-ng
root@server:~# apt -y install sysstat
以下は、CentOS用に書いた記事です。ご参考まで。
・stressコマンドの使い方
・stress-ngコマンドの使い方
・sarコマンドの使い方
18 ファイルの格納場所
18.1 ユニット定義ファイル
UbuntuとCentOSでは、
ユニット定義ファイルがデフォルトでインストールされる場所が異なるようです。
| OS名 | デフォルト | カスタマイズ |
|---|---|---|
| CentOS7.6 | /usr/lib/systemd/system | /etc/systemd/system |
| Ubuntu18.04 | /lib/systemd/system | /etc/systemd/system |
18.2 カーネルメッセージ
・CentOS7.6:/var/log/messages
・Ubuntu18.04:/var/log/syslog
Z 参考情報
Linux教科書 LPICレベル2 スピードマスター問題集 Version4.5対応
Linux教科書 LPICレベル2 Version 4.5対応 (日本語)
初期設定 : root ユーザーを利用する
「apt-get」はもう古い?新しい「apt」コマンドを使ったUbuntuのパッケージ管理
Ubuntu 18.10: デバッグシンボルでパッケージをデバッグする
How To Add Apt Repository In Ubuntu
Ubuntu 18.04: AppArmorで強制アクセス制御
Ubuntu(16.04)
10.4. COREDUMPCTL を使用したコアダンプの作成およびアクセス
Ubuntu 18.04: 忘れたパスワードを再設定する