ごあいさつ
NewsPicks iOSエンジニアはぐっです!
この記事は NewsPicks アドベントカレンダー 2023 の22日目の記事です。
昨日はVP of Mobile Engineerの石井さんによる『NewsPicksアプリのGoogle Playでの評価が1年で爆上がりした話』でした!
評価をしてくれている方の声が開発者に届くようにする仕組みづくりは、お互いにとって良いことだなと思いますね!
はじめに
突然ですがみなさん
カードアニメーション作りたくない?
僕にはそう思ったきっかけがありました。
あれはある晴れた日のなんてことない瞬間のこと
ふとなんかいろいろ売ってるところに足を運ぶと、そこにはカードゲーム、ボードゲーム、様々なパーティーゲームが売られていました。
表紙だけではもちろんなんのゲームかわからないものばかりだったので説明を見ようと手にとって呼吸を止めて1秒・・・
これはおもろそう!!
となったのがそう、『トマトマト』 というカードゲームでした。
『トマトマト』とは
ルールはざっくり
- カードの種類はほぼ4種類
- トマトの絵が描かれた「トマト」
- 的の絵が描かれた「マト」
- 扉の絵が描かれた「ト」
- 悪魔の絵が描かれた「マ」
- これを一列に並べて、噛まずに止まらずに読むだけ
- 読むのを失敗したら、失敗したプレイヤー以外の人が、並んでいるカードの中から1枚を指す
- 被らなかったら、それぞれがそのカードをゲット
- 被ったら、そのカードをゲームから除外
- 最終的にゲットしたカードで作れた「トマト」の数がそのプレイヤーの得点となる
こんな感じです。
ちなみにカードは全部で45枚で、上記の4種類が11枚ずつと、1枚だけポテトのカードが入っています。
ゲーム終了時、最終的に作れた「トマト」の数が同じの場合、ポテトを持っているプレイヤーが勝利となります。
そして、なんかオリジナリティ出せやって声が聞こえたので、なんとなくおばあさんの絵が描かれた「トマ」も追加してます。
他にもちょっとあるんですが、本題から離れすぎたので一旦この辺で基礎知識は○
これを見つけて思い立つ
・・・
スマホにあれば、気軽にできて最高じゃね?
となったわけですねぇ、ええ。
ってなわけで。
成果物
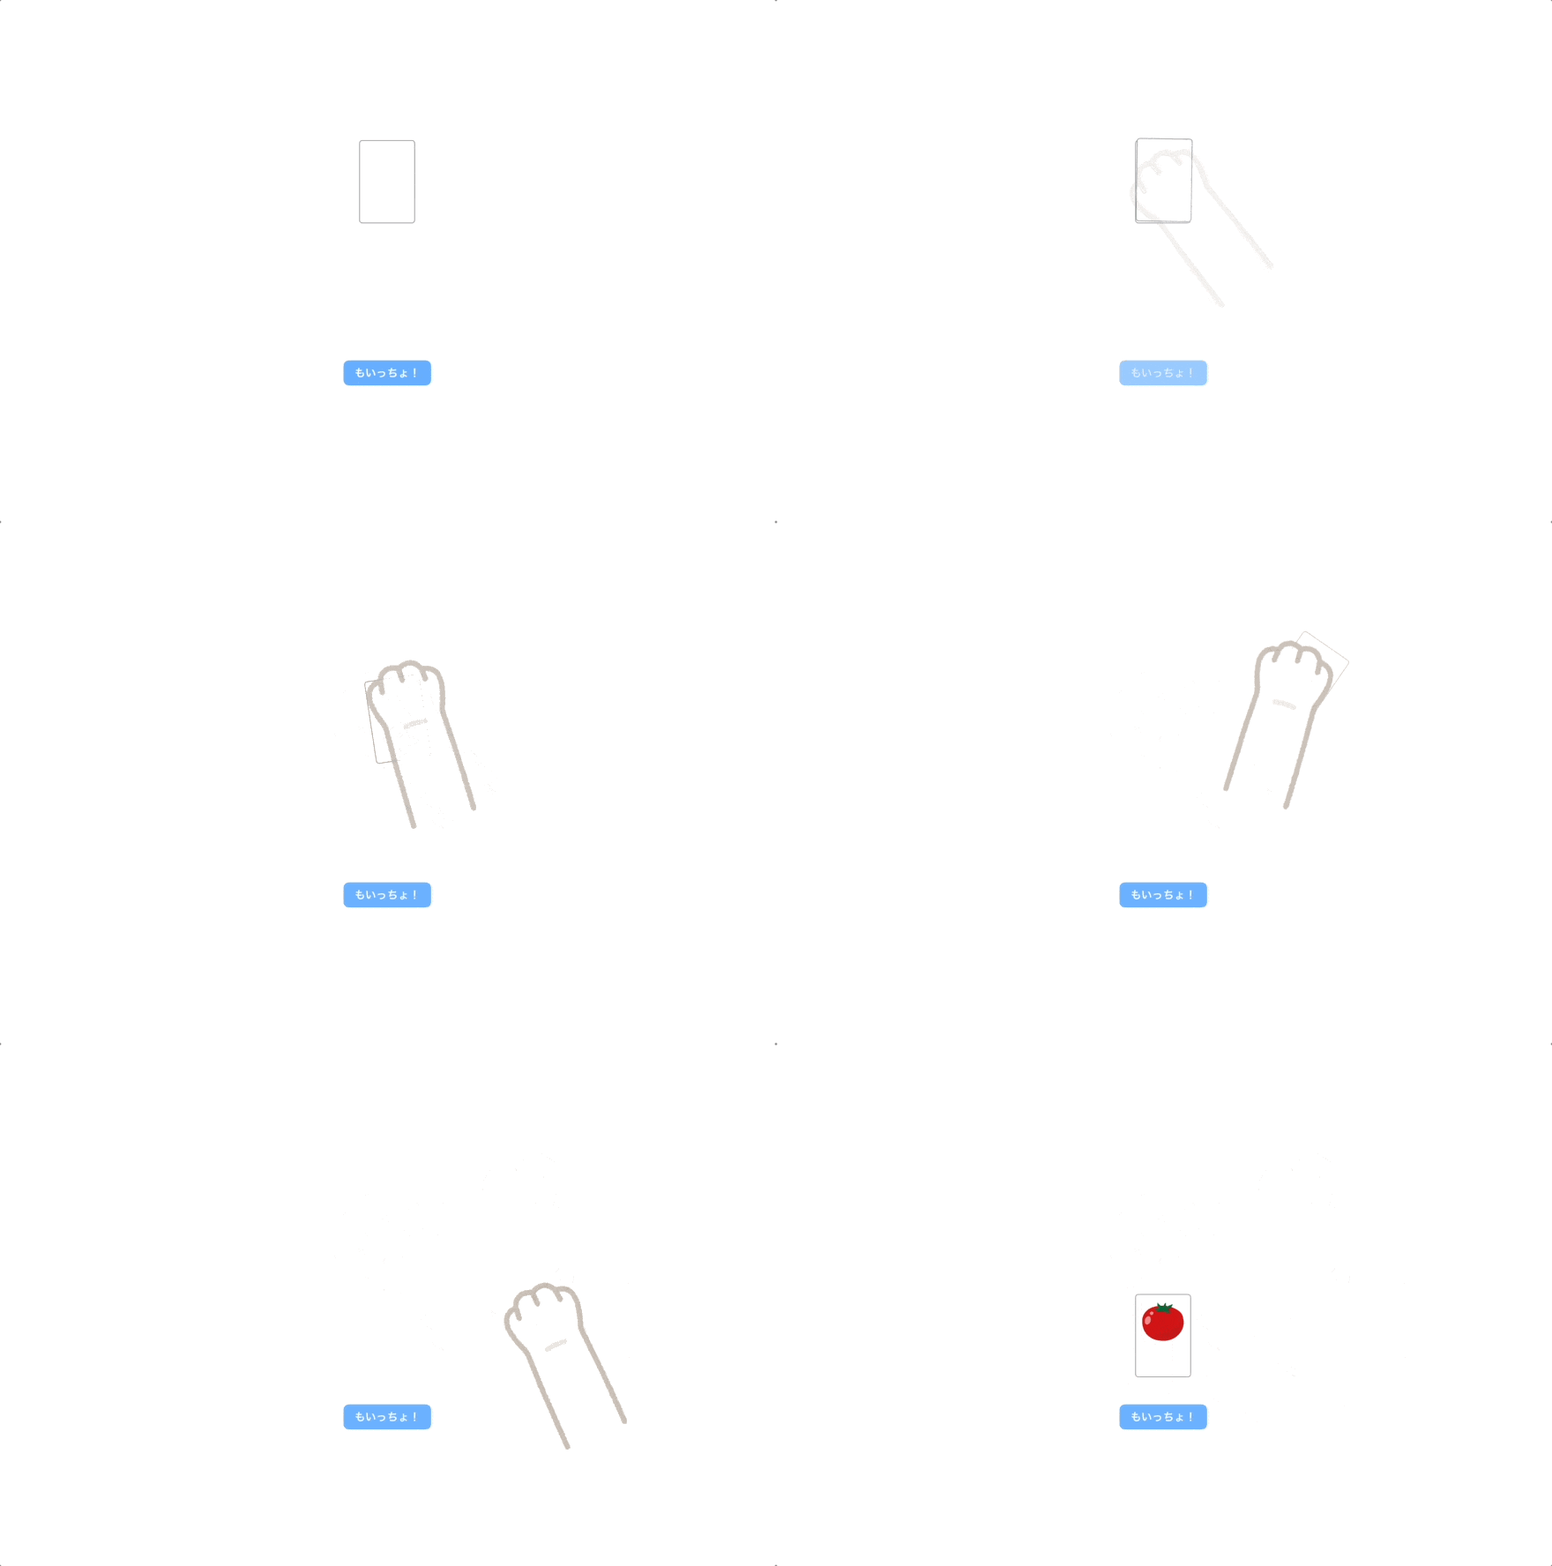
まずは成果物を見せます!
どーん!
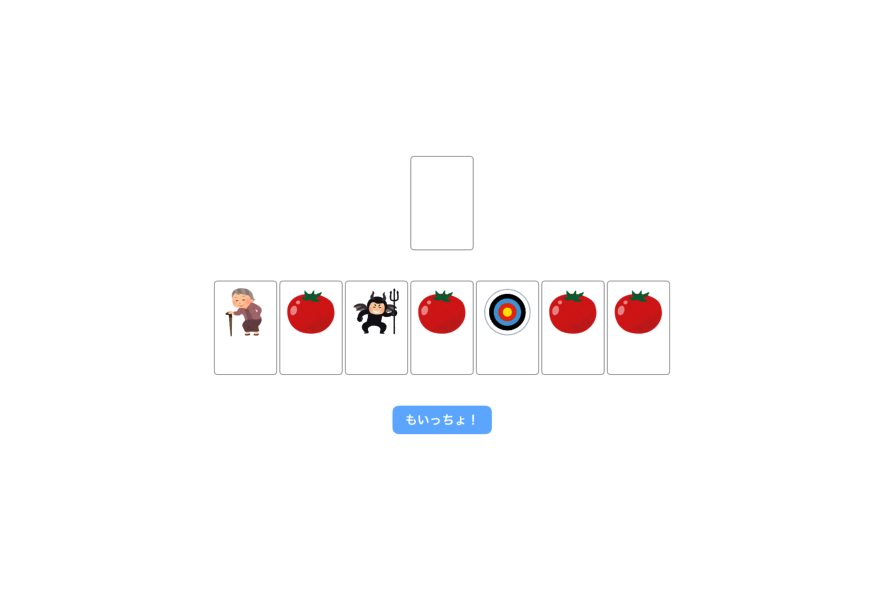
会社にいる方や、今声を出せない方以外は、一度この並んでいるやつを読んでみてください!
まとまとまととまままとと
意外にむずいよっ!
そして、荒ぶれた猫がかわいいという声も聞こえてきたね!
(画像は全てみんな大好きいらすとやからお借りしています)
実装
さぁ、ここからは実装です。
といっても、横にカードを並べるとかはもう語ることも特に無いので、アニメーションの部分の話になります。
NewsPicksのアプリで使用しているので、 TCA(The Composable Architecture) を採用していて、アニメーションに関してはiOS17から使用できる KeyframeAnimator を使っています。
実装は、フェーズで分けて
- まずはいろいろ準備
- カードを山札から引く
- カードをフィールドに出す
の3章でお送りします。
0章 - まずはいろいろ準備 -
このゲームに必要な、カードのenum
今回は端折ったのですが、本来このゲームにはトマト、マト等のカードにリバースマークがついたものがあり、それを引いたターンは逆から読むというルールがあります。
この先完成させていくことを考えて、tomatoReverseなるカードもできるなーとか考えたら、この形がいいかなと落ち着きました。
ので、今今は冗長に見えますが、まぁスルーしてください。
enum Card: Hashable {
    case tomato
    case mato
    case to
    case ma
    case toma
    case potato

    var title: String {
        switch self {
        case .tomato: return "tomato"
        case .mato: return "mato"
        case .to: return "to"
        case .ma: return "ma"
        case .toma: return "toma"
        case .potato: return "potato"
        }
    }

    var imageName: String {
        switch self {
        case .tomato: return "tomato"
        case .mato: return "mato"
        case .to: return "to"
        case .ma: return "ma"
        case .toma: return "toma"
        case .potato: return "potato"
        }
    }
}
で、そのカードを表示するView
import SwiftUI

struct CardView: View {
    let card: Card

    init(card: Card) {
        self.card = card
    }

    var body: some View {
        VStack(spacing: 0) {
            Image(card.imageName)
                .resizable()
                .frame(width: 64, height: 64)
            Spacer(minLength: 0)
            Text(card.title)
                .foregroundStyle(Color.gray)
        }
        .padding(.all, 8)
        .frame(width: 80, height: 120)
        .overlay(Color.gray, in: RoundedRectangle(cornerRadius: 4).stroke(lineWidth: 1))
    }
}
で、ゲーム画面のReducer
今回は簡易版なので、諸々マジックナンバー等持っちゃっていますが、本題ではないということでスルーよろみです。
import ComposableArchitecture
import Dependencies

struct GameReducer: Reducer {
    // MARK: - State
    struct State: Equatable {
        var deckCards: [CardItem] = []
        var fieldCards: [CardItem] = []
        var drawCount: Int = 0
        var setCount: Int = 0
        var existsDeckCard: Bool = false

        init() {
            @Dependency(\.uuid) var uuid
            // 山札を作る
            for index in 0..<56 {
                let card: Card = switch index {
                case 0..<11: .tomato
                case 11..<22: .mato
                case 22..<33: .to
                case 33..<44: .ma
                case 44..<55: .toma
                default: .potato
                }
                deckCards.append(.init(id: uuid(), card: card))
            }
            existsDeckCard = true
            // 山札をシャッフル
            deckCards.shuffle()
        }
    }

    // MARK: - Action
    enum Action: Equatable {
        case view(ViewAction)
        case _internal(InternalAction)

        // ユーザの操作によるActionはこちら
        enum ViewAction: Equatable {
            case tapDrawCard
        }

        // 内部処理で使用するActionはこちら
        enum InternalAction: Equatable {
            case checkDeck
            case animatedDraw
            case animatedSet
        }
    }

    // MARK: - Dependencies
    @Dependency(\.mainQueue) var mainQueue

    // MARK: - Reducer
    func reduce(into state: inout State, action: Action) -> Effect<Action> {
        switch action {
        case .view(.tapDrawCard):
            if state.deckCards.isEmpty {
                return .none
            }
            state.drawCount += 1
            return .merge(
                .run { send in
                    try await mainQueue.sleep(for: .seconds(0.2))
                    await send(._internal(.checkDeck))
                },
                .run { send in
                    try await mainQueue.sleep(for: .seconds(1.25))
                    await send(._internal(.animatedDraw))
                }
            )
        case ._internal(.checkDeck):
            if state.deckCards.count == 1 {
                state.existsDeckCard = false
            }
            return .none
        case ._internal(.animatedDraw):
            guard let card = state.deckCards.first else {
                return .none
            }
            state.fieldCards.append(card)
            state.deckCards.removeFirst()
            return .run { send in
                try await mainQueue.sleep(for: .seconds(0))
                await send(._internal(.animatedSet))
            }
        case ._internal(.animatedSet):
            state.setCount += 1
            return .none
        }
    }
}
ちなみにViewも合わせて見てもらえるとわかるのですが、CardをForEachで並べたく、Identifiableに準拠させるため、idとcard情報を持ったCardItemを作っています。
import Foundation

struct CardItem: Identifiable, Equatable {
    let id: UUID
    let card: Card

    init(id: UUID, card: Card) {
        self.id = id
        self.card = card
    }
}
最初に山札を作り、シャッフルしてセットする。
で、山札を引くボタンがタップされたら、各種アニメーションが走っていく。
詳細はそれぞれの章で話すとして、ここではActionを中で分類しているところが一つポイントですね!
ViewAction,InternalActionという風に分けていて、ユーザのアクションによるものと内部処理のためのものとを分けておくことで、Actionがすっきりし認知不可も減ります。
今回は必要なかったのですが、DelegateActionというものも入れて、こちらは処理を親に移譲するActionを分類するものとすれば、そういった処理が増えたときも複雑になりません。
続いて、ゲーム画面のView
全てを貼っておきますが、一気に見てもしんどいので飛ばしちゃっても良いです。
コード
import SwiftUI
import ComposableArchitecture

struct GameView: View {
    let store: StoreOf<GameReducer>
    @ObservedObject private var viewStore: ViewStore<ViewState, GameReducer.Action>

    init(store: StoreOf<GameReducer>) {
        self.store = store
        self.viewStore = ViewStore(store, observe: ViewState.init(state:))
    }

    struct ViewState: Equatable {
        let fieldCards: [CardItem]
        let drawCount: Int
        let setCount: Int
        let existsDeckCard: Bool

        init(state: GameReducer.State) {
            self.fieldCards = state.fieldCards
            self.drawCount = state.drawCount
            self.setCount = state.setCount
            self.existsDeckCard = state.existsDeckCard
        }
    }

    struct DrawCardAnimationValues {
        var horizontalTranslation = 0.0
        var verticalTranslation = 0.0
        var angle = Angle.zero
        var opacity = 1.0
    }

    struct DrawHandAnimationValues {
        var horizontalTranslation = 50.0
        var verticalTranslation = 60.0
        var angle = Angle.degrees(-30)
        var opacity = 0.0
    }

    struct SetCardAnimationValues {
        var horizontalTranslation = 300.0
        var widthScale = 1.0
        var heightScale = 1.0
        var opacity = 0.0
    }

    struct SetHandAnimationValues {
        var horizontalTranslation = 300.0
        var verticalTranslation = 0.0
        var angle = Angle.zero
        var opacity = 0.0
    }

    var body: some View {
        VStack(spacing: 40) {
            ZStack {
                Color.white
                    .frame(width: 80, height: 120)
                if viewStore.existsDeckCard {
                    emptyCardView
                }
            }
            .overlay {
                animateDrawCardView
                animateDrawHandView
            }
            fieldView
            playNextButton
        }
        .frame(maxWidth: .infinity)
    }

    @ViewBuilder
    private var deckView: some View {
        if viewStore.existsDeckCard {
            emptyCardView
        } else {
            Color.red
                .frame(width: 80, height: 120)
        }
    }

    private var fieldView: some View {
        HStack(spacing: 4) {
            ForEach(viewStore.fieldCards) { card in
                if card == viewStore.fieldCards.last {
                    CardView(card: card.card)
                        .keyframeAnimator(initialValue: SetCardAnimationValues(), trigger: viewStore.setCount) { content, value in
                            content
                                .offset(x: value.horizontalTranslation)
                                .scaleEffect(.init(width: value.widthScale, height: value.heightScale))
                                .opacity(value.opacity)
                        } keyframes: { _ in
                            KeyframeTrack(\.horizontalTranslation) {
                                CubicKeyframe(300, duration: 0.2)
                                CubicKeyframe(0, duration: 0.1)
                                CubicKeyframe(0, duration: 0.2)
                            }

                            KeyframeTrack(\.widthScale) {
                                CubicKeyframe(1, duration: 0.2)
                                CubicKeyframe(1, duration: 0.1)
                                CubicKeyframe(0.5, duration: 0.1)
                                CubicKeyframe(1, duration: 0.1)
                            }

                            KeyframeTrack(\.heightScale) {
                                CubicKeyframe(1, duration: 0.2)
                                CubicKeyframe(1, duration: 0.1)
                                CubicKeyframe(1.5, duration: 0.1)
                                CubicKeyframe(1, duration: 0.1)
                            }

                            KeyframeTrack(\.opacity) {
                                CubicKeyframe(0, duration: 0.2)
                                CubicKeyframe(1, duration: 0.1)
                                CubicKeyframe(1, duration: 0.2)
                            }
                        }
                        .overlay {
                            animateSetHandView
                        }
                } else {
                    CardView(card: card.card)
                }
            }
        }
        .frame(height: 120)
    }

    private var playNextButton: some View {
        Button(action: {
            viewStore.send(.view(.tapDrawCard))
        }, label: {
            Text("もいっちょ!")
                .foregroundStyle(Color.white)
                .bold()
                .padding(.vertical, 8)
                .padding(.horizontal, 16)
                .background(Color.blue.opacity(0.6))
                .clipShape(RoundedRectangle(cornerRadius: 8))
        })
    }

    private var animateDrawCardView: some View {
        emptyCardView
            .keyframeAnimator(initialValue: DrawCardAnimationValues(), trigger: viewStore.drawCount) { content, value in
                content
                    .rotationEffect(value.angle)
                    .offset(x: value.horizontalTranslation, y: value.verticalTranslation)
                    .opacity(value.opacity)
            } keyframes: { _ in
                KeyframeTrack(\.angle) {
                    CubicKeyframe(.zero, duration: 0.2)
                    CubicKeyframe(.degrees(-30), duration: 0.3)
                    CubicKeyframe(.degrees(30), duration: 0.25)
                    CubicKeyframe(.degrees(30), duration: 0.5)
                }

                KeyframeTrack(\.horizontalTranslation) {
                    CubicKeyframe(0, duration: 0.25)
                    CubicKeyframe(-20, duration: 0.25)
                    CubicKeyframe(200, duration: 0.5)
                    CubicKeyframe(200, duration: 0.25)
                }

                KeyframeTrack(\.verticalTranslation) {
                    CubicKeyframe(0, duration: 0.25)
                    CubicKeyframe(30, duration: 0.25)
                    CubicKeyframe(-50, duration: 0.75)
                }

                KeyframeTrack(\.opacity) {
                    CubicKeyframe(1, duration: 0.8)
                    CubicKeyframe(0, duration: 0.45)
                }
            }
    }

    private var animateDrawHandView: some View {
        Image("hand")
            .resizable()
            .frame(width: 145, height: 242)
            .keyframeAnimator(initialValue: DrawHandAnimationValues(), trigger: viewStore.drawCount) { content, value in
                content
                    .rotationEffect(value.angle)
                    .offset(x: value.horizontalTranslation, y: value.verticalTranslation)
                    .opacity(value.opacity)
            } keyframes: { _ in
                KeyframeTrack(\.angle) {
                    CubicKeyframe(.degrees(-45), duration: 0.5)
                    CubicKeyframe(.degrees(30), duration: 0.25)
                    CubicKeyframe(.zero, duration: 0.5)
                }

                KeyframeTrack(\.horizontalTranslation) {
                    CubicKeyframe(50, duration: 0.25)
                    CubicKeyframe(30, duration: 0.25)
                    CubicKeyframe(200, duration: 0.75)
                }

                KeyframeTrack(\.verticalTranslation) {
                    CubicKeyframe(60, duration: 0.5)
                    CubicKeyframe(20, duration: 0.75)
                }

                KeyframeTrack(\.opacity) {
                    CubicKeyframe(0, duration: 0.025)
                    CubicKeyframe(1, duration: 0.9)
                    CubicKeyframe(0, duration: 0.325)
                }
            }
    }

    private var animateSetHandView: some View {
        Image("hand")
            .resizable()
            .frame(width: 145, height: 242)
            .keyframeAnimator(initialValue: DrawHandAnimationValues(), trigger: viewStore.setCount) { content, value in
                content
                    .rotationEffect(value.angle)
                    .offset(x: value.horizontalTranslation, y: value.verticalTranslation)
                    .opacity(value.opacity)
            } keyframes: { _ in
                KeyframeTrack(\.angle) {
                    CubicKeyframe(.degrees(0), duration: 0.1)
                    CubicKeyframe(.degrees(-60), duration: 0.25)
                }

                KeyframeTrack(\.horizontalTranslation) {
                    CubicKeyframe(300, duration: 0.1)
                    CubicKeyframe(150, duration: 0.25)
                }

                KeyframeTrack(\.verticalTranslation) {
                    CubicKeyframe(0, duration: 0.1)
                    CubicKeyframe(100, duration: 0.25)
                }

                KeyframeTrack(\.opacity) {
                    CubicKeyframe(0, duration: 0.05)
                    CubicKeyframe(1, duration: 0.1)
                    CubicKeyframe(0, duration: 0.2)
                }
            }
    }

    private var emptyCardView: some View {
        Color.white
            .frame(width: 80, height: 120)
            .overlay(Color.gray, in: RoundedRectangle(cornerRadius: 4).stroke(lineWidth: 1))
    }
}
1章 - カードを山札から引く -
さ、ここからがアニメーションの話です。
まずはボタンがタップされる
ここはただのボタンなので特に言うこともないですね。
private var playNextButton: some View {
    Button(action: {
        viewStore.send(.view(.tapDrawCard))
    }, label: {
        Text("もいっちょ!")
            .foregroundStyle(Color.white)
            .bold()
            .padding(.vertical, 8)
            .padding(.horizontal, 16)
            .background(Color.blue.opacity(0.6))
            .clipShape(RoundedRectangle(cornerRadius: 8))
    })
}
タップすると、.view(.tapDrawCard)のActionが発行されると。
case .view(.tapDrawCard):
    if state.deckCards.isEmpty {
        return .none
    }
    state.drawCount += 1
    return .merge(
        .run { send in
            try await mainQueue.sleep(for: .seconds(0.2))
            await send(._internal(.checkDeck))
        },
        .run { send in
            try await mainQueue.sleep(for: .seconds(1.25))
            await send(._internal(.animatedDraw))
        }
    )
山札が空になった(最後のカードを引いた)後は、もう引けないので一旦何も起こさないとしています。
本来なら、空になったらゲーム終了のフローに入っていくのですが、その辺りは今回は省いています。
で、drawCountという、山札からカードを引くアニメーションのtriggerとなる値をインクリメントします。
すると、山札からカードを引くアニメーションが走り出します。
ZStack {
    Color.white
        .frame(width: 80, height: 120)
    if viewStore.existsDeckCard {
        emptyCardView
    }
}
.overlay {
    animateDrawCardView
    animateDrawHandView
}
大元のViewはこういう構造で、山札にoverlayでカードを引くアニメーション用のViewが乗っています。
- animateDrawCardViewがカードの動き
- animateDrawHandViewが猫の手の動き
カードの動きを見る
struct DrawCardAnimationValues {
    var horizontalTranslation = 0.0
    var verticalTranslation = 0.0
    var angle = Angle.zero
    var opacity = 1.0
}

private var emptyCardView: some View {
    Color.white
        .frame(width: 80, height: 120)
        .overlay(Color.gray, in: RoundedRectangle(cornerRadius: 4).stroke(lineWidth: 1))
}

private var animateDrawCardView: some View {
    emptyCardView
        .keyframeAnimator(initialValue: DrawCardAnimationValues(), trigger: viewStore.drawCount) { content, value in
            content
                .rotationEffect(value.angle)
                .offset(x: value.horizontalTranslation, y: value.verticalTranslation)
                .opacity(value.opacity)
        } keyframes: { _ in
            KeyframeTrack(\.angle) {
                CubicKeyframe(.zero, duration: 0.2)
                CubicKeyframe(.degrees(-30), duration: 0.3)
                CubicKeyframe(.degrees(30), duration: 0.25)
                CubicKeyframe(.degrees(30), duration: 0.5)
            }

            KeyframeTrack(\.horizontalTranslation) {
                CubicKeyframe(0, duration: 0.25)
                CubicKeyframe(-20, duration: 0.25)
                CubicKeyframe(200, duration: 0.5)
                CubicKeyframe(200, duration: 0.25)
            }

            KeyframeTrack(\.verticalTranslation) {
                CubicKeyframe(0, duration: 0.25)
                CubicKeyframe(30, duration: 0.25)
                CubicKeyframe(-50, duration: 0.75)
            }

            KeyframeTrack(\.opacity) {
                CubicKeyframe(1, duration: 0.8)
                CubicKeyframe(0, duration: 0.45)
            }
        }
}
DrawCardAnimationValuesは初期値ですね、keyframeAnimatorに渡すinitialValueです。
ここに入っている値が動く対象となります。
今回でいうと
- horizontalTranslation: 横方向の動き
- verticalTranslation: 縦方向の動き
- angle: 角度
- opacity: 透明度
これらを動かすアニメーションだよということですね。
で、実際の記述の方で、それぞれの値に対してKeyframeTrack(一連の流れ)を作っていきます。
KeyframeTrack(\.angle) {
    CubicKeyframe(.zero, duration: 0.2)
    CubicKeyframe(.degrees(-30), duration: 0.3)
    CubicKeyframe(.degrees(30), duration: 0.25)
    CubicKeyframe(.degrees(30), duration: 0.5)
}
こんな感じに。
角度をこういう感じで変えていくよ、という流れが作られたわけです。
ちなみに、今回はCubicKeyframeという値間をなめらかに補間してくれるものを使用していますが、他にもLinearKeyframe,MoveKeyframe,SpringKeyframeといったものもあり、作りたい動きに応じて使い分けることとなります。
このKeyframeTrackをそれぞれの値について作ると、並行して全ての値が動くので、単一な動きとはまたちょっと違ったさまざまな動きが再現できる、というのがKeyframeAnimationの醍醐味ですね!
あとは、triggerに指定されたdrawCountの値が変わればアニメーションが走る、ということになります。
猫の手の動きを見る
こちらも記述はほぼ同じで、初期値とKeyframeTrackを作っていきます。
struct DrawHandAnimationValues {
    var horizontalTranslation = 50.0
    var verticalTranslation = 60.0
    var angle = Angle.degrees(-30)
    var opacity = 0.0
}

private var animateDrawHandView: some View {
    Image("hand")
        .resizable()
        .frame(width: 145, height: 242)
        .keyframeAnimator(initialValue: DrawHandAnimationValues(), trigger: viewStore.drawCount) { content, value in
            content
                .rotationEffect(value.angle)
                .offset(x: value.horizontalTranslation, y: value.verticalTranslation)
                .opacity(value.opacity)
        } keyframes: { _ in
            KeyframeTrack(\.angle) {
                CubicKeyframe(.degrees(-45), duration: 0.5)
                CubicKeyframe(.degrees(30), duration: 0.25)
                CubicKeyframe(.zero, duration: 0.5)
            }

            KeyframeTrack(\.horizontalTranslation) {
                CubicKeyframe(50, duration: 0.25)
                CubicKeyframe(30, duration: 0.25)
                CubicKeyframe(200, duration: 0.75)
            }

            KeyframeTrack(\.verticalTranslation) {
                CubicKeyframe(60, duration: 0.5)
                CubicKeyframe(20, duration: 0.75)
            }

            KeyframeTrack(\.opacity) {
                CubicKeyframe(0, duration: 0.025)
                CubicKeyframe(1, duration: 0.9)
                CubicKeyframe(0, duration: 0.325)
            }
        }
}
うん、もうなんかいうことなくなってきましたね、一緒です←
一言でいうと一緒なのですが、アニメーションは細部に心地よさや愛着が生まれるので、作ってる時は結構時間かけてチューニングします。
(この辺からは良い感じにやりたかったけど一旦)
return .merge(
    .run { send in
        try await mainQueue.sleep(for: .seconds(0.2))
        await send(._internal(.checkDeck))
    },
    .run { send in
        try await mainQueue.sleep(for: .seconds(1.25))
        await send(._internal(.animatedDraw))
    }
)
次なる動きへ・・・!
0.2秒後は猫がカードを引く瞬間ぐらいのタイミングですね、ここでcheckDeckというActionが発行されて、引いた上でまだ山札がある状態かを確認しています。確認して、もう引いたらなくなる状態だったら、山札を非表示にします。
アニメーション中になくなる感じにしたいので、別でチェックタイミングを設けている形です。
1.25秒後は猫がカードを引き終わったタイミングですね。ここでanimatedDrawというActionが発行されて、次のアニメーションを走らせます。
ここからは次の章へ
2章 - カードをフィールドに出す -
次は、カードをフィールドに出す、ですが、動きとしては
- 猫がカードをバチッとフィールド向けて投げる
- カードが勢いよくフィールドにセットされる
といった構造になっています。
先ほどのanimatedDrawのActionが発行されると、次はここに入ってきます。
case ._internal(.animatedDraw):
    guard let card = state.deckCards.first else {
        return .none
    }
    state.fieldCards.append(card)
    state.deckCards.removeFirst()
    return .run { send in
        try await mainQueue.sleep(for: .seconds(0))
        await send(._internal(.animatedSet))
    }
case ._internal(.animatedSet):
    state.setCount += 1
    return .none
まず、山札の一番上を取り出します。
そしてそれをfieldCards(フィールドのカード)に加え、山札から消します。
ここはアニメーションというよりゲームの進行ロジックですね。
で、すぐにanimatedSetを呼ぶのですが、ここは進行ロジックとアニメーションを走らせる間に一度stateの変化をViewに反映させたくてこうしています。
View側は1章で話したことと変わらないので合わせて話しますが、
struct SetCardAnimationValues {
    var horizontalTranslation = 300.0
    var widthScale = 1.0
    var heightScale = 1.0
    var opacity = 0.0
}

struct SetHandAnimationValues {
    var horizontalTranslation = 300.0
    var verticalTranslation = 0.0
    var angle = Angle.zero
    var opacity = 0.0
}

private var fieldView: some View {
    HStack(spacing: 4) {
        ForEach(viewStore.fieldCards) { card in
            if card == viewStore.fieldCards.last {
                CardView(card: card.card)
                    .keyframeAnimator(initialValue: SetCardAnimationValues(), trigger: viewStore.setCount) { content, value in
                        content
                            .offset(x: value.horizontalTranslation)
                            .scaleEffect(.init(width: value.widthScale, height: value.heightScale))
                            .opacity(value.opacity)
                    } keyframes: { _ in
                        KeyframeTrack(\.horizontalTranslation) {
                            CubicKeyframe(300, duration: 0.2)
                            CubicKeyframe(0, duration: 0.1)
                            CubicKeyframe(0, duration: 0.2)
                        }

                        KeyframeTrack(\.widthScale) {
                            CubicKeyframe(1, duration: 0.2)
                            CubicKeyframe(1, duration: 0.1)
                            CubicKeyframe(0.5, duration: 0.1)
                            CubicKeyframe(1, duration: 0.1)
                        }

                        KeyframeTrack(\.heightScale) {
                            CubicKeyframe(1, duration: 0.2)
                            CubicKeyframe(1, duration: 0.1)
                            CubicKeyframe(1.5, duration: 0.1)
                            CubicKeyframe(1, duration: 0.1)
                        }

                        KeyframeTrack(\.opacity) {
                            CubicKeyframe(0, duration: 0.2)
                            CubicKeyframe(1, duration: 0.1)
                            CubicKeyframe(1, duration: 0.2)
                        }
                    }
                    .overlay {
                        animateSetHandView
                    }
            } else {
                CardView(card: card.card)
            }
        }
    }
    .frame(height: 120)
}

private var animateSetHandView: some View {
    Image("hand")
        .resizable()
        .frame(width: 145, height: 242)
        .keyframeAnimator(initialValue: DrawHandAnimationValues(), trigger: viewStore.setCount) { content, value in
            content
                .rotationEffect(value.angle)
                .offset(x: value.horizontalTranslation, y: value.verticalTranslation)
                .opacity(value.opacity)
        } keyframes: { _ in
            KeyframeTrack(\.angle) {
                CubicKeyframe(.degrees(0), duration: 0.1)
                CubicKeyframe(.degrees(-60), duration: 0.25)
            }

            KeyframeTrack(\.horizontalTranslation) {
                CubicKeyframe(300, duration: 0.1)
                CubicKeyframe(150, duration: 0.25)
            }

            KeyframeTrack(\.verticalTranslation) {
                CubicKeyframe(0, duration: 0.1)
                CubicKeyframe(100, duration: 0.25)
            }

            KeyframeTrack(\.opacity) {
                CubicKeyframe(0, duration: 0.05)
                CubicKeyframe(1, duration: 0.1)
                CubicKeyframe(0, duration: 0.2)
            }
        }
}
山札から引いたカードを猫がぶん投げるので、fieldCardsのlastだけアニメーションが走るようになっています。
カードが勢いよくフィールドにセットされる、の勢いを表現するため、縦・横のscaleを一時的に変えたりしています。
ここももうちょいこだわりたかったんですが、ひとまず及第点ということで・・・!
成果物の動画を見てもらえると、猫の動きもカードの動きも様々ありますが、実装上はほぼ同じ構造になっていることがわかるかと思います。
おわりに
今回は、主にKeyframeAnimationを使ったアニメーションの話をしました。
いろんな値を並行して変化させるKeyframeAnimationを使うと、表現の幅が広がるかと思うのでぜひお試しください。
iOS17からしか使えないので、まだプロダクトには入れづらいですが、未来に期待ということで!
トマトマトを題材にした割には、途中からトマトマトの話なかったけど??
ってなった方に向けて、最後に一つだけ。
成果物の動画には、下に「tomato」とか「mato」とか文字が書かれていたと思いますが、このようにイラストだけにすると一気に難しくなるので読んでみてください!


