本記事は、FOLIOアドベントカレンダーの7日目の記事になります。
UIViewPropertyAnimatorとは
UIViewPropertyAnimatorはユーザーの操作とアニメーションを連動させたり、アニメーションの開始・停止・反転などのコントロールを可能にするAPIです。
なので、UIViewPropertyAnimatorを使うとインタラクティブなアニメーションを簡単につくることができます。(お馴染みのUIView.animateだけでは出来なかったことですし、LayerやCoreAnimationを使えば可能ではありましたが個人的に複雑な実装になる印象があります。)
また、iOS10から導入されたAPIなのでUIViewPropertyAnimatorをご存知の方は多いのではないでしょうか。
なぜ今UIViewPropertyAnimatorなのか
まず、iOS10で導入されたAPIであることから運用しているアプリのサポートOSとの兼ね合いを考えても、このAPIを使えるアプリも昨今では多くなっているのではないかと思います。
そして、WWDC2018でDesigning Fluid Interfacesが注目されました。
このFluid Interfacesを実現するための一要素として、インタラクティブアニメーションの理解は必要だと思い、UIViewPropertyAnimatorにフォーカスをあてました。
UIViewPropertyAnimatorを使った簡単なサンプル
分かりやすい例として、UIViewPropertyAnimatorを使うと下記のようにユーザーのジェスチャ操作と連動してViewの伸縮やblurをかけるようなアニメーションが簡単に作れます。
まずはUIViewPropertyAnimatorのざっくりした使い方を見てもらうため、このサンプルコードの全容を下記に載せます。
アニメーション操作の箇所にはコメントをつけています。
class ViewController: UIViewController {

    enum ImageViewState: Int {
        case open
        case close

        var opposite: ImageViewState {
            switch self {
            case .open:
                return .close
            case .close:
                return .open
            }
        }
    }

    private lazy var imageView: UIImageView = {
        let imageView = UIImageView()
        imageView.image = #imageLiteral(resourceName: "background")
        imageView.isUserInteractionEnabled = true
        return imageView
    }()

    private let blurView: UIVisualEffectView = {
        let blurView = UIVisualEffectView()
        blurView.isUserInteractionEnabled = false
        return blurView
    }()
    private var imageViewTopConstraint = NSLayoutConstraint()
    private var offset: CGFloat {
        return view.frame.maxY - 80
    }

    // UIViewPropertyAnimatorの生成
    private var animator = UIViewPropertyAnimator(duration: 3.0, curve: .easeInOut)
    private var animationProgress: CGFloat = 0.0

    private var imageViewState: ImageViewState = .close

    override func viewDidLoad() {
        super.viewDidLoad()
        imageView.translatesAutoresizingMaskIntoConstraints = false
        imageViewTopConstraint = imageView.topAnchor.constraint(equalTo: view.topAnchor)
        view.addSubview(imageView)

        NSLayoutConstraint.activate(
            [
                imageViewTopConstraint,
                imageView.leftAnchor.constraint(equalTo: view.leftAnchor),
                imageView.rightAnchor.constraint(equalTo: view.rightAnchor),
                imageView.heightAnchor.constraint(equalTo: view.heightAnchor)
            ]
        )

        blurView.translatesAutoresizingMaskIntoConstraints = false
        imageView.addSubview(blurView)
        NSLayoutConstraint.activate(
            [
                blurView.topAnchor.constraint(equalTo: imageView.topAnchor),
                blurView.leftAnchor.constraint(equalTo: imageView.leftAnchor),
                blurView.rightAnchor.constraint(equalTo: imageView.rightAnchor),
                blurView.bottomAnchor.constraint(equalTo: imageView.bottomAnchor)
            ]
        )

        let recognizer = UIPanGestureRecognizer()
        recognizer.addTarget(self, action: #selector(self.imageViewPanned(recognizer:)))
        imageView.addGestureRecognizer(recognizer)
    }

    private func setupAnimator(state: ImageViewState) {
        // 逆再生をoff
        animator.isReversed = false

        // アニメーション実行中の場合はアニメーションを設定しない
        if animator.isRunning {
            return
        }
        // アニメーションの追加
        animator.addAnimations {
            switch state {
            case .close:
                self.imageViewTopConstraint.constant = -self.offset
            case .open:
                self.imageViewTopConstraint.constant = 0
            }
            self.view.layoutIfNeeded()
        }
        // アニメーションの追加
        animator.addAnimations {
            switch state {
            case .close:
                self.blurView.effect = UIBlurEffect(style: .light)
            case .open:
                self.blurView.effect = nil
            }
        }
       // アニメーション完了時の処理
        animator.addCompletion { position in
            switch position {
            case .start:
                self.imageViewState = state
            case .end:
                self.imageViewState = state.opposite
            case .current: ()
            }

            switch self.imageViewState {
            case .close:
                self.imageViewTopConstraint.constant = 0.0
            case .open:
                self.imageViewTopConstraint.constant = -self.offset
            }
        }
    }

    @objc private func imageViewPanned(recognizer: UIPanGestureRecognizer) {
        switch recognizer.state {
        case .began:
            // Animatorの設定
            setupAnimator(state: imageViewState)
            // アニメーションの一時停止
            animator.pauseAnimation()
            // アニメーションの進捗率を保持
            animationProgress = animator.fractionComplete
        case .changed:
            let translation = recognizer.translation(in: imageView)
            var fraction = -translation.y / offset
            if imageViewState == .open { fraction *= -1 }
            // ユーザー操作とアニメーションの進捗率を連動させインタラクティブアニメーションを実現するキーポイント
            animator.fractionComplete = fraction + animationProgress

        case .ended:
            let yVelocity = recognizer.velocity(in: imageView).y
            if yVelocity == 0 {
                // アニメーション再開
                animator.continueAnimation(withTimingParameters: nil, durationFactor: 0)
            }

            switch imageViewState {
            case .close:
                if yVelocity > 0 {
                    // 逆再生モードON
                    animator.isReversed = true
                }
            case .open:
                if yVelocity < 0 {
                    // 逆再生モードON
                    animator.isReversed = true
                }
            }
            // アニメーション再開
            animator.continueAnimation(withTimingParameters: nil, durationFactor: 0)

        default: ()
        }
    }

}
各プロパティやメソッドは後ほど説明していきますが、何をやっているのか簡易な説明をすると
- UIViewPropertyAnimatorのインスタンス生成(以後Animatorと記載)
- Animatorにアニメーションや終了時の処理を設定
- アニメーションの開始・一時停止
- ユーザーのジェスチャ操作とアニメーションの連動
といったことをしています。
手っ取り早くUIViewPropertyAnimatorでインタラクティブアニメーションのやり方を見たい方はアニメーションの進捗率を操作する(インタラクティブアニメーション) を先に見ると良いと思います。
それでは、UIViewPropertyAnimatorの説明と使ってみて得た知見を順番に紹介していこうと思います。
UIViewPropertyAnimatorを紐解く
UIViewPropertyAnimatorの状態
UIViewPropertyAnimatorを使う上で、状態を理解することはとても重要になります。
UIViewAnimatingState
UIViewPropertyAnimatorは3つの状態を持ちます。
その状態と遷移図が下記になります。
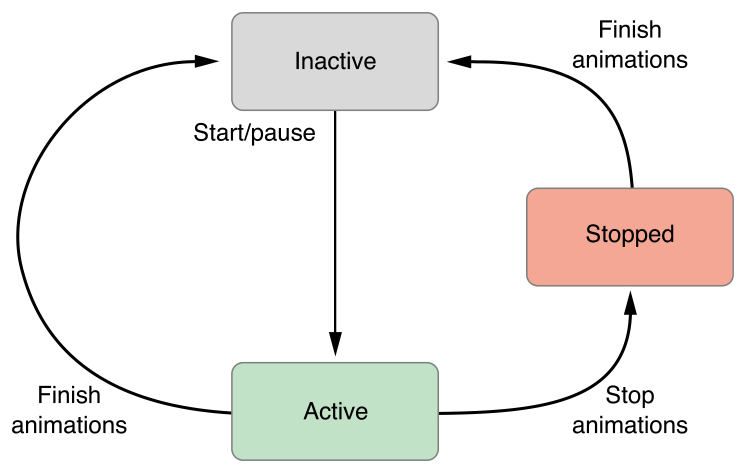
この状態は、コード上でUIViewAnimatingStateというenumで定義されています。
public enum UIViewAnimatingState : Int {


    case inactive // The animation is not executing.

    case active // The animation is executing.

    case stopped // The animation has been stopped and has not transitioned to inactive.
}
| 状態 | 説明 |
|---|---|
| Inactive | アニメーションが実行されていない状態(Animatorの初期状態) |
| Active | アニメーションが実行中もしくは一時停止の状態 |
| Stopped | アニメーションが停止している状態 |
Animatorの状態遷移は
-
inactive状態のAnimatorに、アニメーション開始もしくはアニメーション一時停止の操作でactiveに遷移します。 -
active状態のAnimatorのアニメーションが正常に完了するとinactiveに遷移します。 -
active状態のAnimatorに、アニメーション停止の操作でstopped状態に遷移します。 -
stopped状態のAnimatorに終了の操作でinactive状態に遷移します。
になります。
現在の状態から図の矢印が出ている方向にしか状態は遷移できません。
イレギュラーな状態遷移をした場合はエラーとなりアプリがクラッシュします。
今後の説明でもAnimatorの状態はよく出てきますので覚えておくと捗ります。
UIViewPropertyAnimatorのインスタンスを生成する
UIViewPropertyAnimatorのイニシャライザを紹介します。
イニシャライザで生成されたAnimatorの状態は全てinactiveです。
init(duration:curve:animations:)
public convenience init(duration: TimeInterval, curve: UIView.AnimationCurve, animations: (() -> Void)? = nil)
| 引数 | 説明 |
|---|---|
| duration | アニメーションの時間を指定 |
| curve | アニメーションカーブ(easeInOut, easeIn, easeOut, linear)を指定 |
| animations | アニメーションブロック |
アニメーションの時間、アニメーションカーブ(easeInOut, easeIn, easeOut, linear)、アニメーションブロックを書いてAnimatorを生成します。
let animator = UIViewPropertyAnimator(duration: 1.0, curve: .easeIn) {
    //アニメーションコード
    self.targetView.center.x += 100
}
init(duration:controlPoint1:controlPoint2:animations:)
public convenience init(duration: TimeInterval, controlPoint1 point1: CGPoint, controlPoint2 point2: CGPoint, animations: (() -> Void)? = nil)
| 引数 | 説明 |
|---|---|
| duration | アニメーションの時間を指定 |
| point1 | ベジェ曲線の最初の制御点を指定 |
| point2 | ベジェ曲線の2つ目の制御点を指定 |
| animations | アニメーションブロック |
ベジェ曲線を指定して独自のアニメーションカーブを持つAnimatorを生成します。
ベジェ曲線の調整はcubic-bezier.comを使うと捗ります。
let animator = UIViewPropertyAnimator(duration: 1.0, controlPoint1: CGPoint(x: 0.58, y: 0.11), controlPoint2: CGPoint(x: 0.98, y: 0.54)) {
    //アニメーションコード
    self.targetView.center.x += 100
}
init(duration:dampingRatio:animations:)
public convenience init(duration: TimeInterval, dampingRatio ratio: CGFloat, animations: (() -> Void)? = nil)
| 引数 | 説明 |
|---|---|
| duration | アニメーションの時間を指定 |
| ratio | バネ効果の調整 (0.0 〜 1.0) |
| animations | アニメーションブロック |
バネ効果を持つAnimatorを生成します。
let animator = UIViewPropertyAnimator(duration: 1.0, dampingRatio: 0.7) {
    //アニメーションコード
    self.targetView.center.x += 100
}
init(duration:timingParameters:)
public init(duration: TimeInterval, timingParameters parameters: UITimingCurveProvider)
| 引数 | 説明 |
|---|---|
| duration | アニメーションの時間を指定 |
| parameters | UITimingCurveProviderプロトコルに準拠したオブジェクトを指定 |
バネ効果の詳細な設定もしくは、アニメーショカーブの詳細な設定を持つAnimatorを生成します。
-
UITimingCurveProviderプロトコルに準拠しているクラスは、- バネ効果の詳細な設定ができる
UISpringTimingParametersクラス - アニメーショカーブの詳細な設定ができる
UICubicTimingParametersクラス
- バネ効果の詳細な設定ができる
があります。
Animatorの状態を調べる
stateプロパティ
public var state: UIViewAnimatingState { get }
先の図で説明したAnimatorの状態はstateプロパティで確認することができます。
let animator = UIViewPropertyAnimator(duration: 1.0, curve: .easeIn) {
    //アニメーションコード
    self.targetView.center.x += 100
}
animator.state // .inactive
アニメーションを開始する
UIViewPropertyAnimatorはイニシャライザでAnimatorを生成しただけではアニメーションは実行されません。
Animatorに設定されたアニメーションを現在地から開始するためのメソッドを紹介します。
また、inactive状態のAnimatorのアニメーションを開始するとAnimatorの状態はactiveに遷移します。
startAnimation()メソッド
public func startAnimation()
アニメーションが開始されます。
let animator = UIViewPropertyAnimator(duration: 3, curve: .easeIn) {
    self.blueView.center.x += 200
}
// startAnimation() を呼ぶことで発火する
animator.startAnimation()
startAnimation(afterDelay:)メソッド
public func startAnimation(afterDelay delay: TimeInterval)
| 引数 | 説明 |
|---|---|
| delay | アニメーションを何秒後に開始するか指定 |
delayで指定した値秒後にアニメーションを開始させます。
runningPropertyAnimator(withDuration:delay:options:animations:completion:)クラスメソッド
open class func runningPropertyAnimator(withDuration duration: TimeInterval, delay: TimeInterval, options: UIView.AnimationOptions = [], animations: @escaping () -> Void, completion: ((UIViewAnimatingPosition) -> Void)? = nil) -> Self
| 引数 | 説明 |
|---|---|
| duration | アニメーションの時間を指定 |
| delay | アニメーションを何秒後に開始するか指定 |
| options | AnimationOptionsを指定 |
| animations | アニメーションブロック |
| completion | アニメーション終了ブロック |
お馴染みのUIView.animateのようにスグにアニメーションを発火させたい場合は、このクラスメソッドを使うことで実現できます。
optionsにはUIView.AnimationOptionsを複数指定できますが、アニメーションの方向やトランジション系のOptionは無視されます。(repeat, autoreverse,transitionXXXなど)
余談ですが、transitionXXX系の効果を使いたい場合は、animationsブロックに従来のUIView.transitionを記述することで可能になります。
completionブロックにはアニメーション終了後の処理を書きます。
詳しくはaddCompletion(_:)メソッドで説明しているので参照してください。
UIViewPropertyAnimator.runningPropertyAnimator(withDuration: 3.0, delay: 0.0, options: [.curveEaseIn], animations: {
    self.blueView.center.x += 200
}) { positon in
    // アニメーション終了後の処理
    switch position {
    case .end: ()
    case .start: ()
    case .current: ()
    }
}
また、返り値としてUIViewPropertyAnimatorのインスタンスが返ってきます。
もちろん、返り値から取得したAnimatorは状態を持っているので、既に実行されているアニメーションに様々な操作をすることが可能です。
これがUIView.animateのようにアニメーションを実行したら終了するまで関与できないものとは大きく違うところです。
アニメーションが実行中か調べる
isRunningプロパティ
public var isRunning: Bool { get }
アニメーションが実行中かを返します。
let animator = UIViewPropertyAnimator(duration: 3, curve: .easeIn) {
    self.blueView.center.x += 200
}
animator.startAnimation()
animator.isRunning // true
アニメーションを追加する
Animatorにアニメーションを追加することができます。
アニメーションの追加はAnimatorがinactiveでもactive状態でも可能です。
Animatorがstopped状態の時にアニメーションを追加しようとするとクラッシュします。
アニメーションの追加は複数可能です。
addAnimations(_:)メソッド
optional public func addAnimations(_ animation: @escaping () -> Void)
| 引数 | 説明 |
|---|---|
| animation | 追加するアニメーションブロック |
let animator = UIViewPropertyAnimator(duration: 3, curve: .easeIn) {
    self.blueView.center.x += 200
}
// アニメーションの追加
animator.addAnimations {
    self.blueView.alpha = 0.0
}
animator.startAnimation()
active状態で実行中のアニメーションのAnimatorに新たにアニメーションを追加した場合は即時、追加したアニメーションが実行されます。
addAnimations(_:delayFactor:)メソッド
open func addAnimations(_ animation: @escaping () -> Void, delayFactor: CGFloat)
| 引数 | 説明 |
|---|---|
| animation | 追加するアニメーションブロック |
| delayFactor | アニメーションの残りの時間に対する割合(0.0〜1.0)の間で指定 |
-
delayFactorは0.0〜1.0の間で入力します。これはアニメーションの残り時間に対して、そのアニメーションの開始をどれだけ遅延させるかという割合を指定します。-
例えば
3.0秒のアニメーションに対して、delayFactorを0.5で指定した場合、そのアニメーションの開始タイミングは残り時間 × delayFactorで求められます。 -
すなわち
3.0 * 0.5で1.5秒後にaddAnimations(_:delayFactor:)メソッドのアニメーションブロックが実行されます。
-
下記のアニメーションのように1.5秒後にblueViewのcornerRadiusが変化し始めることが分かります。
let animator = UIViewPropertyAnimator(duration: 3, curve: .easeIn) {
    self.blueView.center.x += 200
}
// 残り時間に対して0.5の割合後に角丸にするアニメーション
animator.addAnimations({
    self.blueView.layer.cornerRadius = 50.0
}, delayFactor: 0.5)
animator.startAnimation()
delayFactorはアニメーションの残り時間に対して割合を指定することから、既に実行中のアニメーションを持つAnimatorに対してもdelayFactorを指定したアニメーションを追加できます。
let animator = UIViewPropertyAnimator.runningPropertyAnimator(withDuration: 3.0, delay: 0.0, options: [.curveEaseIn], animations: {
    self.blueView.center.x += 200
})
DispatchQueue.main.asyncAfter(deadline: .now() + 1.0) {
    animator.addAnimations({
        self.blueView.layer.cornerRadius = 50.0
    }, delayFactor: 0.5)
}

アニメーション終了後の処理を追加する
アニメーションが終了した時に実行する処理をAnimatorに追加することができます。
Animatorに対して複数追加することができます。
addCompletion(_:)メソッド
open func addCompletion(_ completion: @escaping (UIViewAnimatingPosition) -> Void)
| 引数 | 説明 |
|---|---|
| completion | アニメーション終了後の実行ブロック。 引数として UIViewAnimatingPositionが渡される |
引数としてUIViewAnimatingPositionが渡ってきます。
UIViewAnimatingPositionはアニメーションの位置を示すenumでend,start,currentの列挙子で構成されています。
public enum UIViewAnimatingPosition : Int {


    case end

    case start

    case current
}
この値に応じてアニメーション終了後の処理を書くことができます。
endの場合はAnimatorに設定されているアニメーションが最後の位置で終了したという意味であり、アニメーションブロックに記述した更新対象のプロパティの値は、アニメーションブロックで指定した値となっています。
下記はアニメーション終了時にalphaを0.0にする処理を持つAnimatorの挙動です。
let animator = UIViewPropertyAnimator(duration: 3, curve: .easeIn) {
    self.blueView.center.x += 200
}
animator.addAnimations({
    self.blueView.layer.cornerRadius = 50.0
}, delayFactor: 0.5)

animator.addCompletion { position in
    switch position {
    case .start:
        // startなのでcenter.xとcornerRadiusはアニメーション開始前の値が入っている
        ()
    case .current:
        // 途中で終わったのでその時の値がcenter.xとcornerRadiusに反映されている
        ()
    case .end:
        // endなのでcenter.xは=200された値でありcornerRadiusは`50.0`になっている
        self.blueView.alpha = 0.0
    }
}
animator.startAnimation()
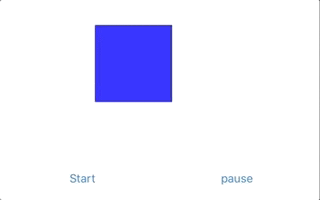
アニメーションを一時停止させる
Animatorの実行中のアニメーションを一時停止します。
pauseAnimation()メソッド
public func pauseAnimation()
pauseAnimation()メソッドを使うと実行中のアニメーションを一時停止することができます。
inactive状態のAnimatorにpauseAnimation()を使うとactiveに状態遷移します。
startAnimation()によってアニメーション実行中かつactive状態のAniamtorになりますが、そのAnimatorにpauseAnimation()した場合、アニメーションは一時停止しますが、状態はactiveのままです。
このことから、active状態のAnimatorのアニメーションが実行中なのか一時停止中なのかはisRunningプロパティで判定します。
アニメーションが一時停止中であればisRunningの値はfalseです。
また、アニメーションが一時停止中のAnimatorに対してstartAnimation()すると再びアニメーションが動き出します。
この時、isRunningはtrueになります。
animator = UIViewPropertyAnimator(duration: 3, curve: .easeIn) {
    self.blueView.center.x += 200
}
animator.startAnimation()

@IBAction func tappedPauseButton(_ sender: Any) {
    animator.pauseAnimation()
}

@IBAction func tappedStartButton(_ sender: Any) {
    animator.startAnimation()
}
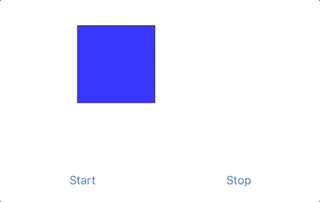
アニメーションを逆再生する
isReversedプロパティ
public var isReversed: Bool { get set }
アニメーションが逆再生されているかどうか判定するプロパティです。
このプロパティを変更することでアニメーションの再生方向を反転することができます。
animator = UIViewPropertyAnimator(duration: 2.0, curve: .easeInOut) {
    self.blueView.center.x += 250
}

@IBAction func tappedStartButton(_ sender: Any) {
    animator.startAnimation()
}

@IBAction func tappedPauseButton(_ sender: Any) {
    animator.pauseAnimation()
}

@IBAction func tappedContinueButton(_ sender: Any) {
    animator.isReversed.toggle()
}
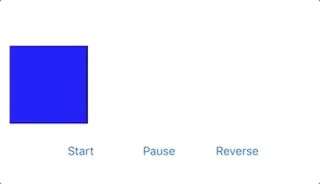
なお、isReversedがtrueでアニメーションが実行され、そのまま終了した場合、completionブロックに渡されるposition引数の値はstartが渡されます。
これは、アニメーションが開始されたスタートの位置でアニメーションが終了したことを表しています。
positionについて
アニメーションを終了・破棄する
active状態のAnimatorに設定されているアニメーションを破棄します。
アニメーションを破棄した際にアニメーションの終了処理であるcompletionブロックを呼び出したいか否かで呼び出し方が変わります。
inactive状態でアニメーションが設定されているAnimatorに対して終了・破棄を呼んでもアニメーションは破棄されません。
stopAnimation(_:)
public func stopAnimation(_ withoutFinishing: Bool)
| 引数 | 説明 |
|---|---|
| withoutFinishing | アニメーションを終了・破棄させた時に状態をstoppedにするかinactive状態にするか指定 |
stopAnimation(_ withoutFinishing: Bool)メソッドを使うとAnimatorの実行中のアニメーションを終了・破棄させることができます。
-
withoutFinishingにtrueを指定した場合は、アニメーションが停止した時のAnimatorの状態がinactiveになります。- この場合、アニメーションが終了した時の処理である
completionが設定されているAnimatorでもcompletionブロックは呼ばれません。
- この場合、アニメーションが終了した時の処理である
animator = UIViewPropertyAnimator(duration: 3, curve: .easeIn) {
    self.blueView.center.x += 200
}
animator.addCompletion { (position) in
    //そもそも呼ばれない
    self.blueView.layer.cornerRadius = 50
}

@IBAction func tappedStartButton(_ sender: Any) {
    animator.startAnimation()
}


@IBAction func tappedStopButton(_ sender: Any) {
    animator.stopAnimation(true)
    print(animator.state) // inactive
}
-
withoutFinishingにfalseを指定した場合は、アニメーションが停止した時のAnimatorの状態はstoppedになります。-
stopped状態からinactive状態にするにはfinishAnimation(at:)メソッドを呼ぶ必要があります。 -
finishAnimation(at:)には引数にaddCompletion(_:)メソッドで説明したUIViewAnimatingPositionを指定します。 - これを指定することによって、アニメーションの終了位置を操作することができ、その終了位置を引数にした
completionブロックが呼び出され、Animatorの状態がinactiveに遷移します。 -
finishAnimation(at:)はAnimatorをstoppedからinactiveに遷移させる時にのみ使うメソッドなので、stopAnimation(_:)をfalseで呼び出した時以外で使うとクラッシュします。
-
animator = UIViewPropertyAnimator(duration: 3, curve: .easeIn) {
    self.blueView.center.x += 200
}
animator.addCompletion { (position) in
    switch position {
    case .start:
        self.blueView.layer.cornerRadius = 10
    case .current:
        self.blueView.alpha = 0.0
    case .end:
        // ここが呼ばれる
        self.blueView.backgroundColor = .red
    }
}

@IBAction func tappedStopButton(_ sender: Any) {
    animator.stopAnimation(false)
    print(animator.state) // stopped
    animator.finishAnimation(at: .end) // アニメーションの終了位置を指定
    print(animator.state) // inactive
}

このようにfinishAnimation(at:)でendを指定するとblueViewの位置が設定したアニメーションの終了位置であるcenter.x + 200になります。
また、stopAnimation(_:)を通してinactive状態になったAnimatorは、アニメーションが全て破棄されていますので、そのままAnimatorに対してstartAnimation()をしても開始するアニメーションが設定されていないので何も起きません。
しかし、Animatorの状態はactiveに遷移します。
stopAnimation(_:)を通してinactive状態になったAnimatorには、addAnimationsメソッドでアニメーションを新たに設定してからstartAnimation()をすることでアニメーションが動くようになります。
let animator = UIViewPropertyAnimator(duration: 3, curve: .easeIn) {
    self.blueView.center.x += 200
}
animator.startAnimation()
animator.stopAnimation(true)
// animator.startAnimation() 動かない

animator.addAnimations {
    self.blueView.center.x += 200
}
// これは動く
animator.startAnimation()
速度や時間などの設定を変更してアニメーションを再開する
一時停止中のアニメーションを持つAnimatorの時間や速度を変更してアニメーションを再開します。
これを使う時のAnimatorの状態はactiveかつアニメーションが一時停止中(isRunning == false)の場合でないとエラーになりアプリがクラッシュします。
continueAnimation(withTimingParameters:durationFactor:)メソッド
open func continueAnimation(withTimingParameters parameters: UITimingCurveProvider?, durationFactor: CGFloat)
| 引数 | 説明 |
|---|---|
| parameters | UITimingCurveProviderプロトコルに準拠したオブジェクトを指定 |
| durationFactor | アニメーションの残り時間に掛ける倍率の指定 |
このメソッドを使うと、既にAnimatorに設定されている時間や速度や効果を変更することができます。
挙動を確認してみましょう。
animator = UIViewPropertyAnimator(duration: 2.0, curve: .easeInOut) {
    self.blueView.center.x += 250
}

@IBAction func tappedStartButton(_ sender: Any) {
    animator.startAnimation()
}

@IBAction func tappedPauseButton(_ sender: Any) {
    animator.pauseAnimation()
}

@IBAction func tappedContinueButton(_ sender: Any) {
    animator.continueAnimation(withTimingParameters: nil, durationFactor: 3)
}
まず、Startボタンをタップして自然にアニメーションが終了するまでの時間はAnimatorに設定した通り2.0秒です。
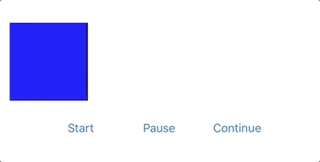
次にアニメーションを開始して、一時停止させ、アニメーションを再開させた時の挙動が下記になります。

本来、2.0秒のアニメーションのはずが、Continueボタンをタップした後に実行されたアニメーションの時間が明らかに2.0秒よりも長くなっているのが分かります。
これは、continueAnimation(withTimingParameters:durationFactor:)メソッドが呼ばれた時に、Animatorの残り時間と、指定したdurationFactorの値を乗算した値がアニメーション時間になるからです。
(Animatorの残り時間 × durationFactor = continueAnimationで実行したアニメーションの時間)
また、parameters引数の方に、バネ効果の詳細な設定ができるUISpringTimingParametersクラスやアニメーショカーブの詳細な設定ができるUICubicTimingParametersクラスのオブジェクトを指定することで、元々そういった効果などを設定していなかったAnimatorにも効果を反映することができます。
let parameters = UICubicTimingParameters(controlPoint1: CGPoint(x: 0.11, y: 0.98), controlPoint2: CGPoint(x: 0.97, y: 0.03))
animator.continueAnimation(withTimingParameters: parameters, durationFactor: 3)
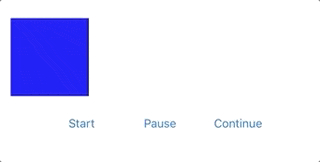
しかしアニメーションカーブなどの設定によってdurationFactorで指定した倍率通りのアニメーション時間になっていないかも・・? ![]()
上記の動画の挙動を確認してみると怪しい気がする。。
continueAnimation(withTimingParameters:durationFactor:)メソッドの使い所としては、ユーザーのジェスチャ操作のvelocityの値を反映した加速度や時間に変更することができるのです。
なお、continueAnimation(withTimingParameters:durationFactor:)によってアニメーションが完了してinactiveになったAnimatorは、continueAnimation(withTimingParameters:durationFactor:)で変更した速度などは引き継がれません。
あくまでもアニメーション再開時のみの一時的な効果です。
再開したアニメーションが終了するとAnimatorに元々設定されていたアニメーション時間やバネ・アニメーション効果に戻ります。
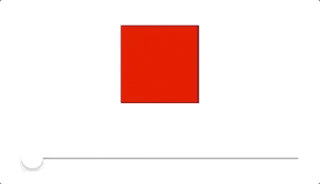
アニメーションの進捗率を操作する(インタラクティブアニメーション)
アニメーションの進捗率を操作することができます。
ユーザーの操作とアニメーションの進捗率を連動させることでインタラクティブなアニメーションになります。
UIViewPropertyAnimatorのキモとなる機能です。
fractionCompleteプロパティ
public var fractionComplete: CGFloat { get set }
アニメーションの進捗率の値で、0.0〜1.0の間で定義されます。
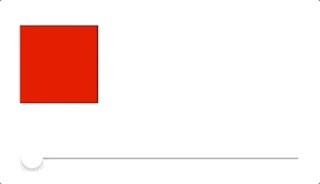
まず、fractionCompleteの挙動を把握するために、minimumValue = 0.0, maximumValue = 1.0の設定がされているUISliderの値と連動させたシンプルなアニメーションコードを見てみましょう。
animator = UIViewPropertyAnimator(duration: 3.0, curve: .easeInOut) {
    self.redView.center.x = self.view.frame.width
    self.redView.transform = CGAffineTransform(rotationAngle: CGFloat.pi).scaledBy(x: 0.001, y: 0.001)
}

func sliderValueChange(_ sender: UISlider) {
    // sliderは、slider.minimumValue = 0.0, slider.maximumValue = 1.0
    // sliderの値 = アニメーションの進捗値として連動させて使う
    animator.fractionComplete = CGFloat(sender.value)
}
このコードは、Sliderの動きに連動してアニメーションの進捗率を変えています。
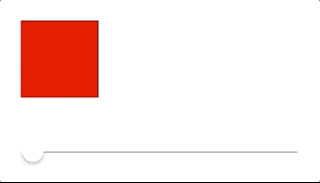
このように、正にユーザーの操作に連動してアニメーションの進捗率を変えることができるのです。
また、Animatorの状態として、inactiveなAnimatorにfractionCompleteを設定するとactiveに状態遷移します。
この時isRuningはfalseでありアニメーションは実行されません。
fractionCompleteでアニメーションの進捗率を操作したAnimatorに対してstartAnimation()をすると、現在の進捗率の位置からアニメーションが実行されます。
animator = UIViewPropertyAnimator(duration: 3.0, curve: .easeInOut) {
    self.redView.center.x = self.view.frame.width
    self.redView.transform = CGAffineTransform(rotationAngle: CGFloat.pi).scaledBy(x: 0.001, y: 0.001)
}

func sliderValueChange(_ sender: UISlider) {
    animator.fractionComplete = CGFloat(sender.value)
}

func tappedStartButton(_ sender: Any) {
    animator.startAnimation()
}

startAnimation()が実行された時のアニメーション完了までの時間は、アニメーションの進捗率であるfractionCompleteにより変わります。
アニメーション自体の時間が3.0秒に設定されていて、fractionCompleteが0.5の時にstartAnimation()でアニメーションを開始すると1.5秒で残り(0.5の行程)のアニメーションを完了させます。
余談ですが、UIViewPropertyAnimatorのアニメーションをUIView.transitionメソッドと組み合わせてfractionCompleteと連動させるのも面白いです。
animator = UIViewPropertyAnimator(duration: 1.0, curve: .easeInOut) {
    UIView.transition(with: self.redView, duration: 1.0, options: .transitionFlipFromTop, animations: nil, completion: nil)
}

@IBAction func sliderValueChange(_ sender: UISlider) {
    animator.fractionComplete = CGFloat(sender.value)
}
今度はUISliderの組み合わせではなく、ユーザーのジェスチャ操作とアニメーションを連動させてみます。
ここでは、UIViewPropertyAnimatorを使った簡単なサンプルとは違う複数のAnimatorを使ってみたいと思います。
まずはコードの全容です。
class ViewController: UIViewController {

    private lazy var whiteView: UIView = {
        let view = UIView()
        view.backgroundColor = .white
        view.layer.maskedCorners = [.layerMinXMinYCorner, .layerMaxXMinYCorner]
        return view
    }()
    private var whiteViewTopConstraint = NSLayoutConstraint()

    private lazy var imageView: UIImageView = {
        let imageView = UIImageView()
        imageView.image = #imageLiteral(resourceName: "img")
        return imageView
    }()
    private var blurView = UIVisualEffectView()

    private var offset: CGFloat {
        return view.frame.maxY - 80
    }
    private let whiteViewFinalConstantPoint: CGFloat = 64

    private var whiteViewAnimator = UIViewPropertyAnimator(duration: 3.0, curve: .easeInOut)
    private var blurViewAnimator = UIViewPropertyAnimator(duration: 3.0, curve: .easeInOut)
    private var animators = [UIViewPropertyAnimator]()

    override func viewDidLoad() {
        super.viewDidLoad()

        imageView.translatesAutoresizingMaskIntoConstraints = false
        view.addSubview(imageView)
        NSLayoutConstraint.activate(
            [
                imageView.topAnchor.constraint(equalTo: view.topAnchor),
                imageView.leftAnchor.constraint(equalTo: view.leftAnchor),
                imageView.rightAnchor.constraint(equalTo: view.rightAnchor),
                imageView.bottomAnchor.constraint(equalTo: view.bottomAnchor)
            ]
        )
        blurView.translatesAutoresizingMaskIntoConstraints = false
        imageView.addSubview(blurView)
        NSLayoutConstraint.activate(
            [
                blurView.topAnchor.constraint(equalTo: imageView.topAnchor),
                blurView.leftAnchor.constraint(equalTo: imageView.leftAnchor),
                blurView.rightAnchor.constraint(equalTo: imageView.rightAnchor),
                blurView.bottomAnchor.constraint(equalTo: imageView.bottomAnchor)
            ]
        )

        whiteView.translatesAutoresizingMaskIntoConstraints = false
        view.addSubview(whiteView)
        whiteViewTopConstraint = whiteView.topAnchor.constraint(equalTo: view.topAnchor, constant: offset)
        NSLayoutConstraint.activate(
            [
                whiteViewTopConstraint,
                whiteView.leftAnchor.constraint(equalTo: view.leftAnchor),
                whiteView.rightAnchor.constraint(equalTo: view.rightAnchor),
                whiteView.bottomAnchor.constraint(equalTo: view.bottomAnchor)
            ]
        )

        let recognizer = UIPanGestureRecognizer()
        recognizer.addTarget(self, action: #selector(self.whiteViewPanned(recognizer:)))
        whiteView.addGestureRecognizer(recognizer)
    }

    private func setupAnimator() {
        guard animators.isEmpty else {
            return
        }
        whiteViewAnimator.addAnimations {
            self.whiteViewTopConstraint.constant = self.whiteViewFinalConstantPoint
            self.whiteView.layer.cornerRadius = 200
            self.view.layoutIfNeeded()
        }
        blurViewAnimator.addAnimations {
            self.blurView.effect = UIBlurEffect(style: .light)
        }
        animators.append(contentsOf: [whiteViewAnimator, blurViewAnimator])
    }

    @objc private func whiteViewPanned(recognizer: UIPanGestureRecognizer) {
        switch recognizer.state {
        case .began:
            setupAnimator()
        case .changed:
            let translation = recognizer.translation(in: whiteView)
            animators.forEach { $0.fractionComplete = -translation.y / (offset - whiteViewFinalConstantPoint) }
        case .ended:
            animators.forEach { $0.continueAnimation(withTimingParameters: nil, durationFactor: 0) }
        default: ()
        }
    }

}
これを実行すると下記のような挙動になります。
(なお、下記サンプルはfractionCompleteの挙動把握のサンプルなので一方行で終わりのサンプルです。)
このように白いViewを上部にパンしていくにつれ、白いViewが伸びていきながら左上・右上が角丸、背景にぼかし処理がかかっていく様子が見て取れると思います。
白いViewを下方向にパンしていくと、その逆の事象になります。(元の状態に戻ろうとする)
そして指を離すと、その位置からアニメーションが実行されます。
では、ポイントとなる箇所を説明していきます。
まず、今回は下記2つのAnimatorを使っています。
-
whiteView操作のAnimator -
blurView操作のAnimator
また、2つのAnimatorをまとめて使えるようにanimatorsというUIViewPropertyAnimatorの配列を用意しています。
それぞれにアニメーションを設定している箇所が下記になります。
private func setupAnimator() {
    guard animators.isEmpty else {
        return
    }
    whiteViewAnimator.addAnimations {
        self.whiteViewTopConstraint.constant = self.whiteViewFinalConstantPoint
        self.whiteView.layer.cornerRadius = 200
        self.view.layoutIfNeeded()
    }
    blurViewAnimator.addAnimations {
        self.blurView.effect = UIBlurEffect(style: .light)
    }
    animators.append(contentsOf: [whiteViewAnimator, blurViewAnimator])
}
このアニメーションの内容は
-
whiteViewAnimator
-
whiteViewのTopAnchorの位置を現在の位置からViewController.viewのTopAnchor+64の位置にする -
whiteViewのcornerRadiusを0から200にする
-
-
blurViewAnimator
-
imageViewの上に引いているblurViewにlightのblurをかける((style: nil)to(style: .dark))
-
というアニメーションを設定して配列animatorsに格納しています。
次にユーザーのジェスチャ操作とアニメーションを連動させている箇所です。
@objc private func whiteViewPanned(recognizer: UIPanGestureRecognizer) {
    switch recognizer.state {
    case .began:
        setupAnimator()
    case .changed:
        let translation = recognizer.translation(in: whiteView)
        animators.forEach { $0.fractionComplete = -translation.y / (offset - whiteViewFinalConstantPoint) }
    case .ended:
        animators.forEach { $0.continueAnimation(withTimingParameters: nil, durationFactor: 0) }
    default: ()
    }
}
ユーザーが指を動かした時に、その指の位置は最終的に行きたい位置のどれくらいの割合の位置なのかを取得して、その値をそのまま各AnimatorのfractionCompleteに代入しています。
fractionCompleteが代入されたAnimatorは状態がactiveになり、自身に設定されているアニメーションが進捗率の位置にそれぞれ動きます。
このようにユーザーの操作に連動して複数のAnimatorのアニメーションを進めたり、戻したりすることができます。
そして、ユーザーが指を離した時に、AnimatorにcontinueAnimationメソッドを呼ぶことで、現在の進捗率の位置からアニメーションが開始されます。
Tips
fractionCompleteを使うときに、Animatorの状態がactiveかつアニメーション一時停止中(isRunning == false)の場合は、fractionCompleteに0.0 もしくは 1.0を代入してもアニメーションが完了・破棄されません。
しかし、Animatorの状態がactiveかつアニメーション実行中(isRunning == true)の場合では、fractionCompleteに0.0 もしくは 1.0が代入された瞬間にアニメーションが完了したと見なされアニメーションが破棄されてしまうので、それ以降fractionCompleteに進捗率を代入してもアニメーションは動きません。(厳密にはfractionCompleteに値を代入しても全て0.0になります。)
なので、アニメーション実行中(isRunning == true)でfractionCompleteを使いたい場合は、0.01〜0.99までの範囲内の値を入れるようにすることでアニメーションの完了・破棄を阻止できます。
もしくはpausesOnCompletionプロパティを使います。
Animatorの割り込み操作を無効にする
isInterruptibleプロパティ
Animatorが割り込み可能なオブジェクトかを表します。
(pauseAnimation()やstopAnimation(_:)を使ってAnimatorの状態変更を許可するかどうか。)
デフォルトではtrueです。
このプロパティをfalseにするとstartAnimation()でアニメーションが実行されてから完了するまで、Animatorに対する変更を受け付けません。
isInterruptibleがfalseの時にAnimatorを操作するメソッドを呼び出すとクラッシュします。
また、Animatorの状態がinactiveの時にだけisInterruptibleの値を変更できます。
inactive以外の状態でisInterruptibleに変更を加えるとクラッシュします。
インタラクティブなアニメーションを実現するには当然trueで使います。
アニメーションが終了してもアニメーションを破棄しない
- 正常にアニメーションが完了したらアニメーションを破棄せずに
active状態を保ち続けることができます。
(ここでいうアニメーションが正常に完了とはstopAnimation(:)メソッドなどで明示的にアニメーションを終了させたのでなく、実行中のアニメーションが最後まで完了したことをさします)
pausesOnCompletionプロパティ
iOS11から追加されたプロパティです。
trueにすると設定したアニメーションが正常に完了してもAnimatorの状態はactiveをキープします。
この時、アニメーション終了後の処理であるcompletionブロックは呼ばれません。
active状態がキープされるということは、アニメーションが完了してもAnimatorに設定されているアニメーションは破棄されません。
なので、アニメーションが完了したAnimatorにそのままisReverse = trueを指定して、startAnimation()することで、再びアニメーションが実行されます。
下記で確認できます。
animator = UIViewPropertyAnimator(duration: 2.0, curve: .easeIn) {
    self.blueView.center.x += 200
}
animator.pausesOnCompletion = true

// pausesOnCompletionがtrueなので、ここは呼ばれない
animator.addCompletion { _ in
    self.blueView.alpha = 0.0
}

@IBAction func tappedReverseStartButton(_ sender: Any) {
    if animator.isRunning { return }
    animator.isReversed = true
    animator.startAnimation()
}

@IBAction func tappedStartButton(_ sender: Any) {
    animator.isReversed = false
    animator.startAnimation()
}
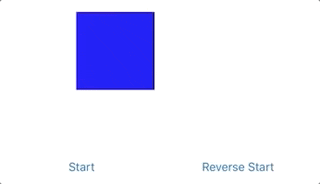
このようにAnimatorがactive状態をキープするので、アニメーション完了後にアニメーションの再設定が不要になります。
completionブロックが呼ばれないので、アニメーションが完了したかどうかはisRunningプロパティで判断します。
アニメーションが完了している場合はactive状態でisRunningがfalseのAnimatorになります。
このプロパティをtrueで使うことでUIViewPropertyAnimatorを使った簡単なサンプルで記述したコードをより簡潔にすることができます。
まず、Animatorの設定をviewDidLoadで定義するように変更します。
そして、setupAnimatorメソッドとImageViewStateは使わないので削除してしまいます。
//viewDidLoad()に追加
animator = UIViewPropertyAnimator(duration: 1, curve: .easeInOut) {
    self.blurView.effect = UIBlurEffect(style: .light)
    self.imageViewTopConstraint.constant = -self.offset
    self.view.layoutIfNeeded()
}
animator.pausesOnCompletion = true
そして、 imageViewPanned(recognizer:)メソッドを下記のように書き換えます。
@objc private func imageViewPanned(recognizer: UIPanGestureRecognizer) {
    switch recognizer.state {
    case .began:
        animator.pauseAnimation()
        animationProgress = animator.fractionComplete
    case .changed:
        let translation = recognizer.translation(in: imageView)
        var fraction = -translation.y / offset
        if animator.isReversed { fraction *= -1 }
        animator.fractionComplete = fraction + animationProgress

    case .ended:
        let yVelocity = recognizer.velocity(in: imageView).y
        if yVelocity == 0 {
            animator.continueAnimation(withTimingParameters: nil, durationFactor: 0)
            return
        }
        animator.isReversed = (yVelocity > 0)
        animator.continueAnimation(withTimingParameters: nil, durationFactor: 0)

    default: ()
    }
}
これでアプリケーションを実行すると、UIViewPropertyAnimatorを使った簡単なサンプルと同じ挙動になると思います。
修正前は現在の値がcloseなのかopenなのかを判定して、毎度Animatorに適切なアニメーションを追加していましたが、ここではpausesOnCompletionを使って単方向のアニメーションを1回のみ設定し、逆方向への実行はisReverseプロパティを使うようにしています。
pausesOnCompletionをtrueで使う場合には、isRunningとisReverseプロパティの組み合わせで状態を把握することが大事です。
なお、pausesOnCompletionがtrueであっても、AnimatorにstopAnimation(_:)をするとAnimatorの状態はinactiveや`stopped`に遷移します。
この場合はAnimatorのアニメーションは破棄されます。
あくまでも自然にアニメーションが完了した場合にactive状態をキープするためのプロパティです。
インタラクティブアニメーションでもアニメーションカーブを適用する
scrubsLinearlyプロパティ
iOS11から追加されたプロパティで、このプロパティはfractionCompleteを使ってアニメーションの進捗率を変えて操作する際に、そのアニメーションに適用されるアニメーションカーブを直線的なlinearにするかどうかです。
デフォルトはtrueで、fractionCompleteでのアニメーションカーブはlinearが適用されます。
これをfalseにすることでAnimatorに設定されたアニメーションカーブが反映されます。
下記で挙動を把握してみましょう。
animator = UIViewPropertyAnimator(duration: 3.0, controlPoint1: CGPoint(x: 0.11, y: 0.98), controlPoint2: CGPoint(x: 0.97, y: 0.03)) {
    self.redView.center.x = self.view.frame.width
    self.redView.transform = CGAffineTransform(rotationAngle: CGFloat.pi).scaledBy(x: 0.001, y: 0.001)
}
animator.scrubsLinearly = false // true or false

@IBAction func sliderValueChange(_ sender: UISlider) {
    animator.fractionComplete = CGFloat(sender.value)
}
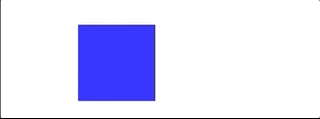
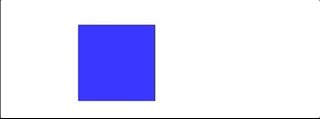
| scrubsLinearly == true | scrubsLinearly == false |
|---|---|
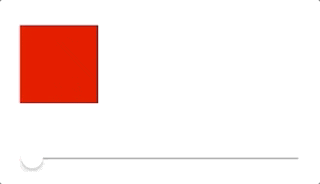 |
 |
このようにscrubsLinearlyをfalseに設定することでAnimatorに設定されているアニメーションカーブが適用されます。
UIViewPropertyAnimatorを駆使して作ったもの
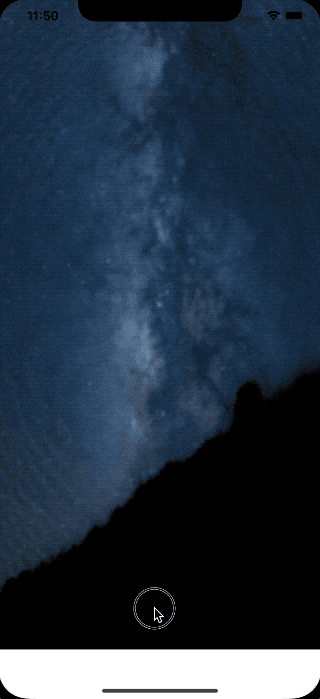
HalfModal
UIViewPropertyAnimatorを組み合わせたら、もしや巷で話題のショートカットアプリなどで使われているセミモーダルみたいな挙動も簡単につくれるのでは?![]() と思い簡易なサンプルを作ってみました。
と思い簡易なサンプルを作ってみました。
まだ、やっつけ感のあるコードですが、UIViewPropertyAnimatorの状態や機能を組み合わせて実現しています。
(実際には全然簡単には出来ず無茶苦茶ハマりました・・。その知見が本記事に繋がっています。)
UIViewPropertyAnimatorの制御を色々やっているので、もし良ければコードも覗いてみてください。
終わりに
いかがだったでしょうか。
今回は例に出していませんが、画面遷移とUIViewPropertyAnimatorを組み合わせる事でインタラクティブな画面遷移が作れたり、面白いことが色々できます。
この記事を通じてUIViewPropertyAnimatorを使ってみようとか、試してみようとか思ってもらえたら嬉しいです。
明日は @ken5scal さんです。
参考文献
https://developer.apple.com/documentation/uikit/uiviewpropertyanimator
https://medium.com/@nathangitter/building-fluid-interfaces-ios-swift-9732bb934bf5
http://www.swiftkickmobile.com/building-better-app-animations-swift-uiviewpropertyanimator/