FNCT創造工学演習、予備実験向けにハンズオンを作成しました。
(2020/5/18 更新)
こちらは、WindowsでFirebase CloudFunctionsを使ってみるの続編記事です。
前記事をひととおりやってみたうえで、続きを試してみてください。
Firebaseを準備する
前回の記事で作成したFirebaseのプロジェクトに、RealtimeDatabaseを追加する。
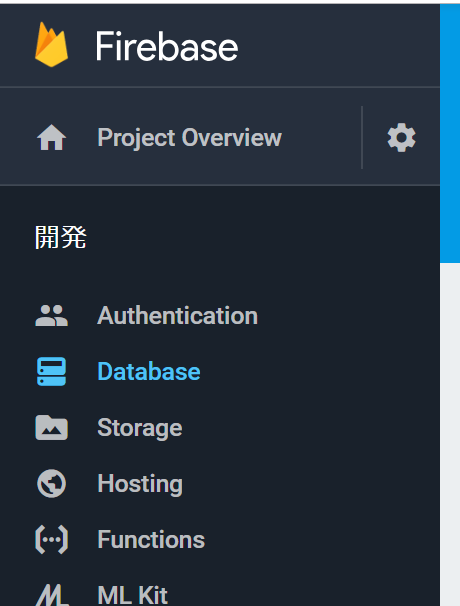
FirebaseのデータベースにはCloud Firestoreという最新バージョンが用意されているがまだベータ版なので、今はこなれているRaltimeDatabaseを使用していくことにしよう。

テストモードということで、アクセス制限がかかっていないほうを選択しておく。
今後開発が進んでくると、適切なアクセス制限を設定するのを忘れないように。

そして、最初のデータを作成しておこう。
name: hoge と。ひとまず入力しておく。

アクセス権限
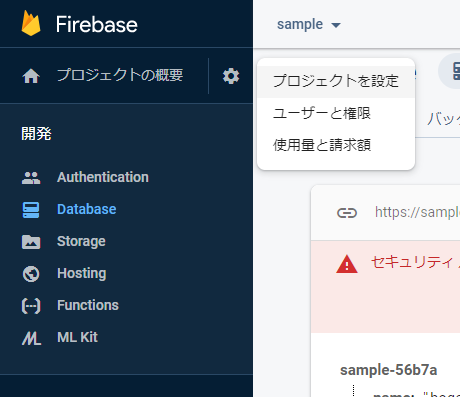
ローカル環境で実行しデータベースにアクセスするためには、権限設定が必要なので、ここで取得しておく。
「プロジェクトの概要」の右側にある歯車マークから「プロジェクトを設定」に移動し、
「サービスアカウント」タブで「新しい秘密鍵の生成」→「キーを生成」ボタンを順にクリックする。


そうするとjsonファイルがダウンロードされるので、functionsフォルダ(index.jsと同じフォルダ)にコピーしておこう。
ファイル名が長いので、適当にリネームしておくのも良い。 firebase-adminsdk.json にリネームしたので、functionsフォルダは下記のようになっている。
- node_modules
firebase-adminsdk.json
index.js
package.json
package-lock.json
ここで用意した権限情報を読み込むために、前回作成していたindex.jsの末尾に下記のコードを追加する。
var serviceAccount = require("./firebase-adminsdk.json");

admin.initializeApp({
  credential: admin.credential.cert(serviceAccount),
  databaseURL: "https://sample-56b7a.firebaseio.com"
});
FunctionからDatabaseにアクセスする
データを取得
データを読み込むためのコードを記述していこう。index.jsの末尾に、さらに下記のコードを追加する。
exports.get_data = functions.https.onRequest((request, response) => {
  const ref = admin.database().ref("name");

  ref.once("value", function (data) {
    response.send(data);
  });
});
これでローカル実行しブラウザからファンクションにアクセスしてみると、下記のようにレスポンスがあるはずだ。
新しい関数 get_data を追加したので、アドレスの末尾も get_data に書きかえてアクセスしよう。
"hoge"
データを追加登録
データを読み出すことはできたので、今度は新しいデータを1件追加してみよう。
上までのコードの末尾に、下記をさらに追加してみる。
exports.add_data = functions.https.onRequest((request, response) => {
  const ref = admin.database().ref("times");

  const now = new Date();
  const time =
    now.getFullYear() + "/" +
    (now.getMonth() + 1) + "/" +
    now.getDate() + " " +
    now.getHours() + ":" +
    now.getMinutes() + ":" +
    now.getSeconds();

  ref.push({
    time: time,
  }).then(data => {
    return response.status(200).send("added");
  }).catch(error => {
    response.status(400).send(error);
  });
});
Firebase Consoleで確認してみよう。
自動で作成されたIDとともに、アクセスした時刻が保存されていれば成功だ。

データの変更
最後に、すでに登録してあるデータの内容を書き換えてみる。
この例ではIDを直接コード上に記載しているが、実行するたびに変わってくるので、ここは適宜書き換えてほしい。
タイムスタンプが書き換わっていれば成功だ。
Console上で確認してみよう。
ここでいうIDとはデータ追加のときにFirebaseが自動で作成してくれていた、赤枠のところの文字列だ。ハイフンも含めた -LcVtWNn-ao0TuuwcVJh までを指定する。

exports.update_data = functions.https.onRequest((request, response) => {
  const ref = admin.database().ref("times");

  const now = new Date();
  const time =
    now.getFullYear() + "/" +
    (now.getMonth() + 1) + "/" +
    now.getDate() + " " +
    now.getHours() + ":" +
    now.getMinutes() + ":" +
    now.getSeconds();

  const updates = {};
  updates["-LcVtWNn-ao0TuuwcVJh"] = {
    time: time,
  };

  ref.update(updates);
  return response.status(200).send("updated");
});
特定のデータを取得する
何度か add_data を実行したあとに試してもらいたいのがこちら。
IDを指定して特定のデータ1件を取得する。さらに関数を追加してみよう。IDを適宜書きかえるのを忘れずに。
exports.query_data = functions.https.onRequest((request, response) => {
  const ref = admin.database().ref("times/-LcVtWNn-ao0TuuwcVJh");

  ref.once("value", function (data) {
    response.send(data);
  });
});
以上で、Realtime Databaseをひととおり操作してみた。
とりあえずデータの保存・読み込みを行ってみただけだが、Realtime Databaseの真髄はその名のとおりリアルタイム性。データが更新されたときに、多数のクライアントに即座に反映される。ぜひその機能も体感してみてほしい。