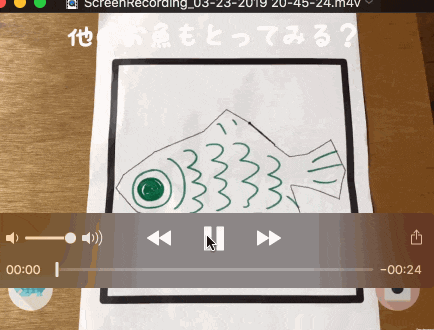
前々から作りたかった塗り絵AR、ついにUnityで開発できました!初の自作Unityアプリになります。2ヶ月ほどかかりましたが、何とか完成できて感無量…!!
塗り絵ARはすでに色々な企業でやられていますが、技術的な話は少なく、参考になるソースもあまりなくて、険しい道のりでした。。
ここでは自身の備忘録、また塗り絵ARに興味がある方に向けて、仕組み、実装のプロセスを記したいと思います!
塗り絵ARの仕組み
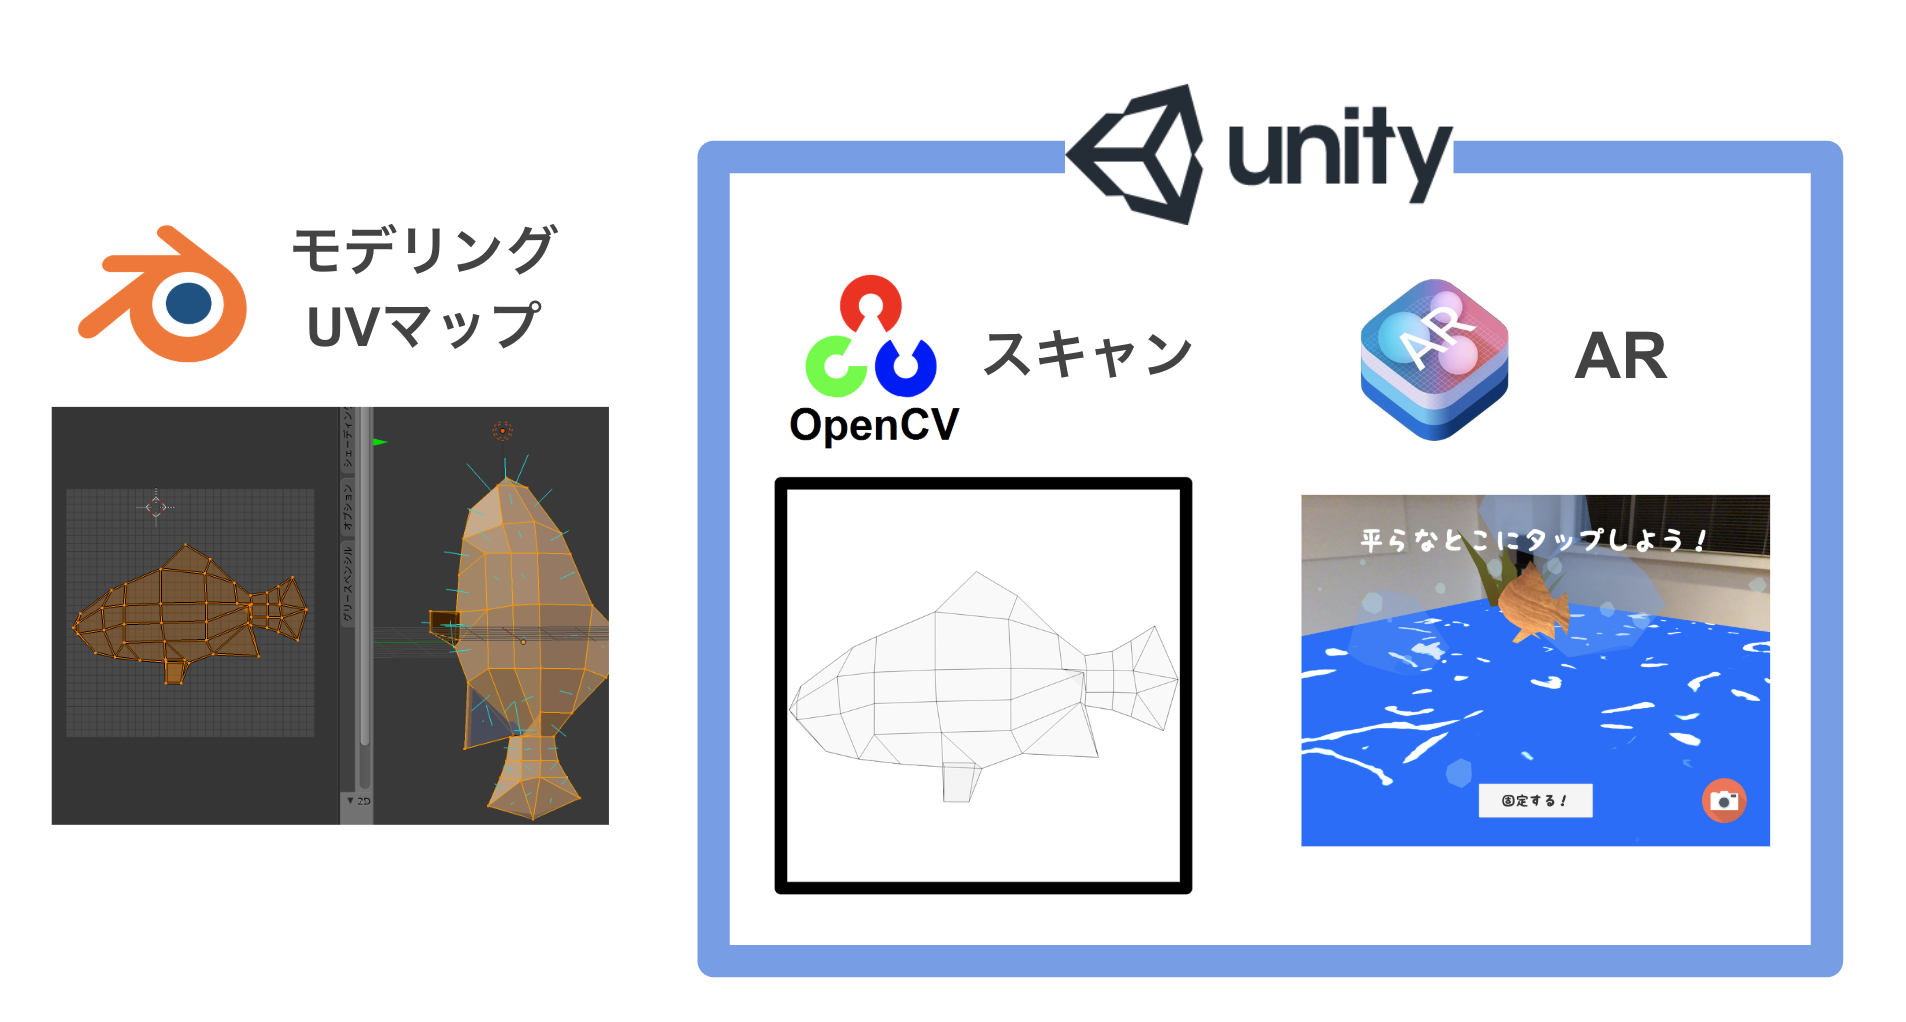
塗り絵ARの概略をシンプルにまとめてみました。
- openCVでカメラからスキャン
- スキャンしたUVマップをモデルにラッピング
- ARkitでモデルを召喚!
勘所やポイント、詰まりやすいところ
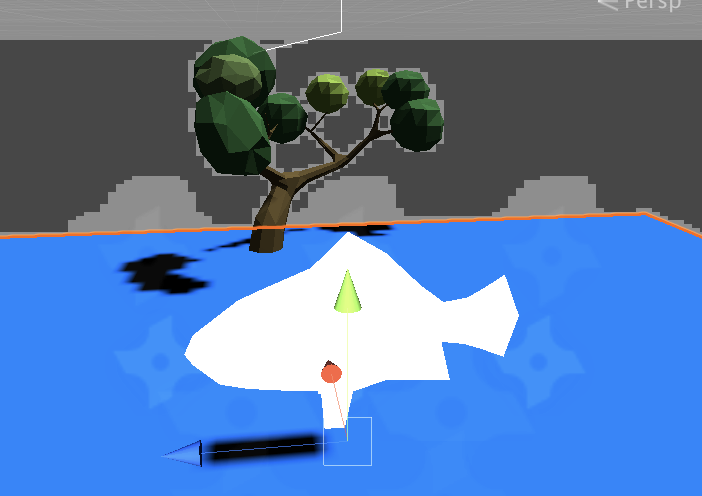
モデリングについて
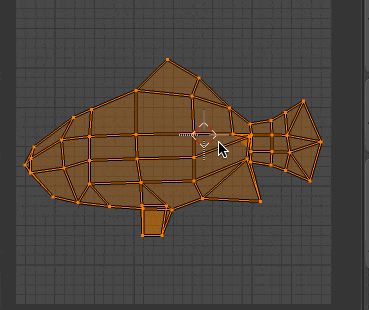
モデルに貼りつけるテクスチャ(ここでは塗り絵の下地)の型をそれっぽくする(今回は魚)よう設定するために、自分でモデリングする必要があります。
ソフトはフリーのblenderを使用しました!
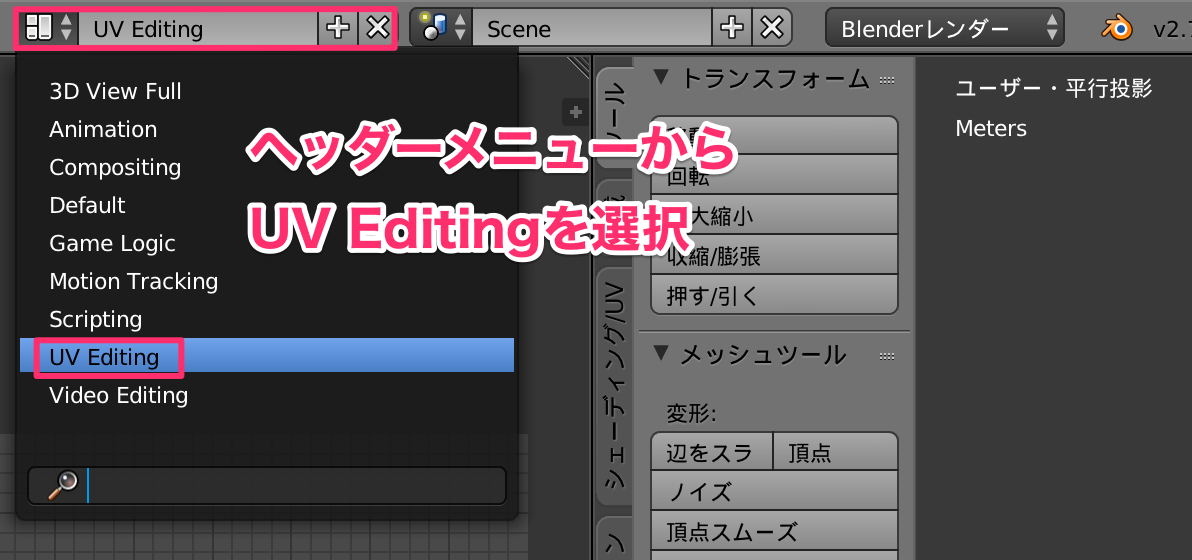
Blenderのお話をすると長くなるので、ここでは塗り絵ARに特化して、勘所だけ紹介させて頂きます。ポイントはUV展開です。Blender限定ですが、操作はこちらになります!

・参考リンク:【Blender】テンキーでの視点変更【カメラ,フロント,ライト,トップ等】
ここまできたら、好きなように動かしたり回転させたら、ひとまず完了です!!!
・参考リンク:【Blender】キーボードでオブジェクトを移動・回転・拡大・縮小する方法(1/2)
openCVについて
次にopenCV(画像処理)を使って、塗られた絵をスキャンする必要があります。
(正確にスキャンするならプリンター一択ですが、手軽さに欠けるので、今回はカメラからスキャンします)
Asset StoreにOpenCV for Unityというプラグインがありますが、**有料**です(号泣
わりとお高いので、お試しするには少し不安だったので、つい前に無料になったOpenCV plus Unityを使いました(2019/3/23現在)
情報はそこまで落ちていないですが、Demoを解読しながら使えば、使えなくはなかったです。
ただしプラグインをインポートする時、Unsafeコードをチェックする必要があります。こちらの記事を参考にすればOKですので、ご興味ある方はぜひお試しください!
File>BuildSettings>PlayerSettingsを開いてOtherSettingsの"Allow 'unsafe' Code"の部分にチェックを入れます。
ARKitのカメラ情報について
そもそもOpenCVでスキャンするには、webカメラで写した画像を渡す必要があります。ここで、もしARKitを使うとなると、Unityが用意しているクラス”WebCamTexture”が使えません。
そのかわり、ARKit Pluginで用いたカメラ画像を使うことになります。
流れとして、ARKit Pluginが最終的に映し出すマテリアル”YUVMaterial”のテクスチャを取得すればOK。UnityARVideo.csにGetWebCamTexture関数を追加。
流れはこんな感じです!
- マテリアルの内容をRenderTextureに書出
- Texture2Dにコピー
全ソースは下記の通り。ぜひ参考にしてみてください
using System;
using System.Runtime.InteropServices;
using UnityEngine;
using UnityEngine.UI;
using UnityEngine.Rendering;

namespace UnityEngine.XR.iOS
{

    public class UnityARVideo : MonoBehaviour
    {
        public Material m_ClearMaterial;
        private CommandBuffer m_VideoCommandBuffer;
        private Texture2D _videoTextureY;
        private Texture2D _videoTextureCbCr;
		private Matrix4x4 _displayTransform;

		private bool bCommandBufferInitialized;

		public void Start()
		{
			UnityARSessionNativeInterface.ARFrameUpdatedEvent += UpdateFrame;
			bCommandBufferInitialized = false;
		}

		void UpdateFrame(UnityARCamera cam)
		{
			_displayTransform = new Matrix4x4();
			_displayTransform.SetColumn(0, cam.displayTransform.column0);
			_displayTransform.SetColumn(1, cam.displayTransform.column1);
			_displayTransform.SetColumn(2, cam.displayTransform.column2);
			_displayTransform.SetColumn(3, cam.displayTransform.column3);
		}

		void InitializeCommandBuffer()
		{
			m_VideoCommandBuffer = new CommandBuffer();
			m_VideoCommandBuffer.Blit(null, BuiltinRenderTextureType.CurrentActive, m_ClearMaterial);
			GetComponent<Camera>().AddCommandBuffer(CameraEvent.BeforeForwardOpaque, m_VideoCommandBuffer);
			bCommandBufferInitialized = true;

		}

		void OnDestroy()
		{
			if (m_VideoCommandBuffer != null) {
				GetComponent<Camera>().RemoveCommandBuffer(CameraEvent.BeforeForwardOpaque, m_VideoCommandBuffer);
			}
			UnityARSessionNativeInterface.ARFrameUpdatedEvent -= UpdateFrame;
			bCommandBufferInitialized = false;
		}

# if !UNITY_EDITOR && UNITY_IOS

        public void OnPreRender()
        {
			ARTextureHandles handles = UnityARSessionNativeInterface.GetARSessionNativeInterface().GetARVideoTextureHandles();
            if (handles.IsNull())
            {
                return;
            }

            if (!bCommandBufferInitialized) {
                InitializeCommandBuffer ();
            }

            Resolution currentResolution = Screen.currentResolution;

            // Texture Y
            if (_videoTextureY == null) {
              _videoTextureY = Texture2D.CreateExternalTexture(currentResolution.width, currentResolution.height,
                  TextureFormat.R8, false, false, (System.IntPtr)handles.TextureY);
              _videoTextureY.filterMode = FilterMode.Bilinear;
              _videoTextureY.wrapMode = TextureWrapMode.Repeat;
              m_ClearMaterial.SetTexture("_textureY", _videoTextureY);
            }

            // Texture CbCr
            if (_videoTextureCbCr == null) {
              _videoTextureCbCr = Texture2D.CreateExternalTexture(currentResolution.width, currentResolution.height,
                  TextureFormat.RG16, false, false, (System.IntPtr)handles.TextureCbCr);
              _videoTextureCbCr.filterMode = FilterMode.Bilinear;
              _videoTextureCbCr.wrapMode = TextureWrapMode.Repeat;
              m_ClearMaterial.SetTexture("_textureCbCr", _videoTextureCbCr);
            }

            _videoTextureY.UpdateExternalTexture(handles.TextureY);
            _videoTextureCbCr.UpdateExternalTexture(handles.TextureCbCr);

			m_ClearMaterial.SetMatrix("_DisplayTransform", _displayTransform);
        }

# else

        public void SetYTexure(Texture2D YTex)
		{
			_videoTextureY = YTex;
        }

		public void SetUVTexure(Texture2D UVTex)
		{
			_videoTextureCbCr = UVTex;
		}

		public void OnPreRender()
		{

			if (!bCommandBufferInitialized) {
				InitializeCommandBuffer ();
			}

			m_ClearMaterial.SetTexture("_textureY", _videoTextureY);
			m_ClearMaterial.SetTexture("_textureCbCr", _videoTextureCbCr);

			m_ClearMaterial.SetMatrix("_DisplayTransform", _displayTransform);
		}

# endif
//追加した関数
        public Texture2D GetWebCamTexture()
        {
            RenderTexture _arTexture = new RenderTexture(Screen.width, Screen.height, 0);
            Texture2D _arTexture2D = new Texture2D(_arTexture.width, _arTexture.height, TextureFormat.ARGB32, false);

            if (_videoTextureY != null && _videoTextureCbCr != null)
            {
                Graphics.Blit(null, _arTexture, m_ClearMaterial);

                RenderTexture back = RenderTexture.active;
                RenderTexture.active = _arTexture;
                _arTexture2D.ReadPixels(new Rect(0, 0, _arTexture.width, _arTexture.height), 0, 0);
                _arTexture2D.Apply();
                RenderTexture.active = back;
            }

            return _arTexture2D;
        }

    }
}
・参考リンク
Shaderについて
ここでは、魅せ方のお話です。細かい内容なので、ご興味ある方のみご覧いただければと思います。
ARでより現実と調和させるには、影が必要不可欠です。一方で、塗り絵ARはライティングせず、ハッキリと表示させたい…という我儘な考えがありました。
この場合、UnlitでShaderを作成し、UsePassを通せば完成できます。
UsePass "Legacy Shaders/VertexLit/SHADOWCASTER"
公式ページでサンプルもありますので、是非チェックしてみてください!
・参考URL:公式:頂点シェーダーとフラグメントシェーダーの例
次に新たな問題があります。海面に影を映し出さなくてはなりません。この時、シェーダーを少し改造する必要があり、影を実装する方法は以下の手順を踏むことになります。
- Tagsの中に"LightMode"="ForwardBase"(※1)を入れる
- CGPROGRAMの下に#pragmaを追加。(#pragma multi_compile_fwdbase)
- CGPROGRAM内でファイルをincludeする。(#include "UnityCG.cginc"、#include "AutoLight.cginc")
- vertex shaderからfragment shaderに渡す構造体の定義の中にLIGHTING_COORDS(idx1, idx2)を入れる(※2)
- vertex shader内でTRANSFER_VERTEX_TO_FRAGMENT(o);(マクロ)を記述する。
(o)は出力される構造体名
- fragment shader内でLIGHT_ATTENUATION(i)マクロを使って影の度合いを得る
(i)は入力される構造体名
こちら参考に作ったShader(サンプル)がこちらです!
Shader "Unlit/ToonSeaShader"
{
    Properties
    {
        _Color ("Color", Color) = (1, 1, 1, 1)
    }
    SubShader
    {
        Tags { "RenderType"="Opaque"}
        LOD 100

        Pass
        {
            CGPROGRAM
            #pragma vertex vert
            #pragma fragment frag
            #pragma multi_compile_fwdbase
            #include "UnityCG.cginc"
            #include "AutoLight.cginc"

            struct appdata
            {
                float4 vertex : POSITION;
                float2 uv : TEXCOORD0;
            };

            struct v2f
            {
                float2 uv : TEXCOORD0;
                float4 pos : SV_POSITION;
                LIGHTING_COORDS(0,1)
            };

            fixed4 _Color;

            v2f vert (appdata v)
            {
                v2f o;
                o.pos = UnityObjectToClipPos(v.vertex);
                o.uv = v.uv;
                TRANSFER_VERTEX_TO_FRAGMENT(o);
                return o;
            }

            fixed4 frag (v2f i) : SV_Target
            {
                fixed4 col = _Color;
                float attenuation = LIGHT_ATTENUATION(i);
                return col* attenuation;
            }
            ENDCG
        }
    }
    Fallback "Diffuse"
}
今回、手順1にある"LightMode"="ForwardBase"は必要なかった(ライティングに関わらず、あえて単調にしたかった)ので、入れていません。
これが大まかな影付きのでShader作成の処理の流れになるので、フラグメントシェーダーの内部処理を変えれば、影がつけれるようになります!
ちなみに単純にただ影だけ出したい場合は、ARKit Pluginに用意されているMobileARShadowシェーダを使えば解決できます!
・参考リンク:Unityで始めるARKit入門 影の表示編
最後に
塗り絵ARを作ってみて、Unityだけではなくモデリングやシェーダー、OpenCVなど総合的にスキルアップできました!(嬉しい)
折角ここまで頑張ったので、もっとブラッシュアップしたり種類を増やして、ストアに出そうかな…なんて思っています。
これから塗り絵ARを作ろう!と思っている方の参考にもなれば幸いです。
ここまでご覧いただき、ありがとうございましたm(_ _)m