POLアドベントカレンダー22日目担当、4度目のゲバラです。
21日目のまーさんの記事も是非お読みください!
使うもの
- Amplify Storage
- react-image-crop
Amplify Storageの準備
Amplify上で画像を管理したいのでAmplify Storageを使ってみます。
前提としてAmplify環境を準備してください。
以下のコマンドでStorageを準備します。
$ amplify add storage
主な使い方はこちら
https://docs.amplify.aws/cli/storage/overview
react-image-crop
Reactでトリミングをしたかったのでreact-image-cropを使ってみました
https://github.com/DominicTobias/react-image-crop
以下を叩いておけば準備完了です。
$ npm i react-image-crop --save
いざ実装
画像読み込み
画像を選択した際の処理です。FileReaderでファイルをデータURL形式で読み込みます。Typescriptで書いているので型チェックも入れてます。
    const onSelectFile = (event: React.ChangeEvent<HTMLInputElement>) => {
        if (event.target.files !== null) {
            const reader = new FileReader();
            reader.addEventListener("load", () =>{
                if (typeof reader.result === 'string'){
                    setSrc(reader.result);
                }
            });
            reader.readAsDataURL(event.target.files[0]);
        }
    };
トリミングする
次に読み込んだファイルをトリミングする処理です。読み込んだファイルをcanvas上に描画し、cropと呼ばれるトリミングするための情報を元に画像をトリミングします。cropはUI上でトリミングする範囲を指定することでsetStateしています。その後、canvasからデータURL形式に変換しています。最後にはcropのxとy座標を初期化しています。初期化しないとUI表示が正常に表示されなくなります。
    const imgTrim = () => {
        if(imageRef && crop.width && crop.height){
            const canvas:HTMLCanvasElement = document.createElement("canvas")
            const scaleX = imageRef.naturalWidth / imageRef.width;
            const scaleY = imageRef.naturalHeight / imageRef.height;
            canvas.width = crop.width
            canvas.height = crop.height
            const ctx = canvas.getContext("2d")
            if (ctx !== null) {
                ctx.drawImage(
                    imageRef,
                    (crop.x ? crop.x : 1) * scaleX,
                    (crop.y ? crop.y : 1) * scaleY,
                    crop.width * scaleX,
                    crop.height * scaleY,
                    0,
                    0,
                    crop.width,
                    crop.height
                )
            }
            if(src){
                const contentType = src.split(';')[0].split(':')[1];
                const trimmedSrc = canvas.toDataURL(contentType);
                setSrc(trimmedSrc)
                crop.x = 0
                crop.y = 0
                setCrop(crop)
            }
        }
    };
データURLからファイル形式に変換
データURL形式のままだと画像をアップロードしても意味がないのでファイル形式に変換します。特別なことは特にしてません。データURLからBlobに変換しファイルにしています。ファイル名はStorageにアップロードする際に命名するので空文字にしています。
const imgSrcToBlobUpload = () =>{
        if(src){
            const arr = src.split(',')
            const contentType = src.split(';')[0].split(':')[1]
            const bstr = atob(arr[1])
            let n = bstr.length
            let u8arr = new Uint8Array(n)
            while(n--){
                u8arr[n] = bstr.charCodeAt(n);
            }
            const blob =  new Blob([u8arr], {type:contentType});
            if(blob){
                const uploadImg = new File([blob], "", {
                type: 'image/*',
                lastModified: Date.now()
                });
                uploadImage(uploadImg, contentType)
            }
        }
    }
画像アップロードする
画像アップロードにはAmplifyで用意されているライブラリStorage.putを使用します。
以下のコマンドでAmplifyのライブラリをインストール
npm install -S aws-amplify
importはこんな感じ
import Amplify, { Storage } from 'aws-amplify';
import awsconfig from './aws-exports';
Amplify.configure(awsconfig);
Amplify Storageにアップロードするファイルにはファイルアクセスレベルが存在します今回は画像を全公開にするためlevelをpublicにします。publicにする場合特にoptionの指定が必要ありません。
ファイルアクセスレベルに関して詳しくはこちら
https://docs.amplify.aws/lib/storage/configureaccess/q/platform/js
先ほど空文字にしていたファイル名はここで命名することになります。適宜ロジックに合わせて変更しましょう。
const uploadImage = (file: File, contentType: string) => {
        Storage.put('file.png', file,{
           contentType: contentType,
        })
        .then (result => {
           handleClose()
           alert('アップロードに成功しました')
        })
        .catch(err => alert('アップロードに失敗しました'));
    }
使い方はこちら
https://docs.amplify.aws/lib/storage/upload/q/platform/js
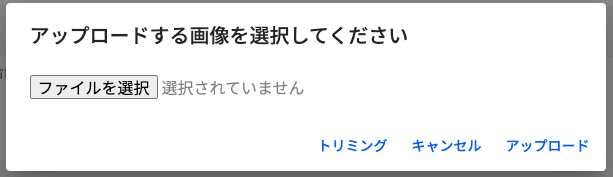
画面上の表示
Material UIのDialog使いました。
  return (
    <>
        <Dialog open={isOpen} onClose={() => setIsOpen(false)} maxWidth={'sm'} fullWidth={true}>
            <DialogTitle>{'アップロードする画像を選択してください'}</DialogTitle>
            <DialogContent>
                <DialogContentText>
                <input type="file" accept="image/*" onChange={onSelectFile} />
                {src && (
                    <ReactCrop
                        src={src}
                        crop={crop}
                        ruleOfThirds
                        onImageLoaded={onImageLoaded}
                        onChange={onCropChange}
                    />
                )}
                </DialogContentText>
            </DialogContent>
            <DialogActions>
                <Button onClick={imgTrim} color="primary">
                    {'トリミング'}
                </Button>
                <Button onClick={() => setIsOpen(false)} color="primary">
                    {'キャンセル'}
                </Button>
                <Button onClick={imgSrcToBlobUpload} color="primary">
                    {'アップロード'}
                </Button>
            </DialogActions>
        </Dialog>
    </>
  )
表示するとこんな感じ
ファイル選択してトリミングするとき

そのほか
上記のコードで使っていたuseStateやちょっとしたメソッドです。
cropでaspectを指定することでトリミングする画像の比率を固定できます。
    const [isOpen, setIsOpen] = useState<boolean>(false);
    const [src, setSrc] = useState<string | undefined>();
    const [crop, setCrop] = useState<Crop>({
        aspect: 16/9,
        width: 320,
        x: 0,
        y: 0
    });
    const [imageRef, setImageRef] = useState<HTMLImageElement | null>(null);
    const onImageLoaded = (image: HTMLImageElement) => {
        setImageRef(image);
    };
    const onCropChange = (crop: Crop) => {
        setCrop(crop);
    };
こんな感じでトリミングした画像をアップロードできるようになりました。
23日目は@NibutaniAさんです!