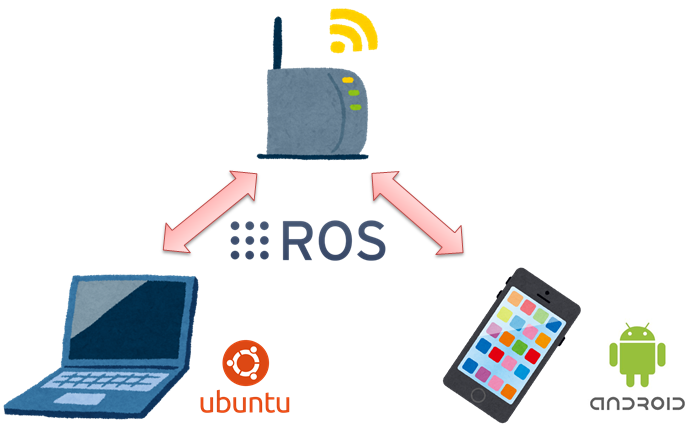
本記事の内容
AndroidでROS(Robot Operating System)のPub-Sub通信をするチュートリアルアプリについて解説します。
AndroidのROSアプリはrosjavaで開発するのですが、roscppやrospyよりも日本語の情報量が少ない or 古いため記事を作成しました。
なお、基本的にROS.orgのチュートリアル http://wiki.ros.org/android を参考にしています。
前提知識
- Androidアプリ開発の一般的な知識
- ROS開発の一般的な知識
チュートリアルの内容
ここではROS PCにROS Masterが起動されている前提で、スマートフォンのPublishしたメッセージをROS PC(+スマートフォン自体)でSubscribeするという動作を確認します。
動作確認環境
-
スマートフォン
- Nexus 5X
- Android 6.0.1
-
アプリ開発PC
Androidアプリ開発に使用します。- Windows 7 Professional
- Android Studio 3.2.1
-
ROS PC
端末間のPub-Sub通信の確認に使用します。スマホ単体でも動作確認はできます。- Ubuntu 16.04
- ROS Kinetic
準備
各項目の詳細な手順は他のサイト等で紹介されているので省略します。
-
アプリ開発PC
以前はアプリ開発PCにROS環境を構築する必要があったようですが、現在はAndroid Studioだけで開発ができます。- Android Studioをインストール
- Nexus5XのUSBドライバをインストール
- API 15以上のSDKをインストール
-
ROS PC
- ROS Kineticをインストール
-
ネットワーク
スマートフォンとROS PCを同一のネットワークに接続してください。私の環境ではIPアドレスが以下のようになっています。- スマートフォン:192.168.0.14
- ROS PC:192.168.0.15
アプリ開発手順
-
Android StudioにてNew -> New Projectでアプリを作成
- "Target Android Devices"は"Phone and Tablet"でAPI 15以降を選択
- "Add an Activity to Mobile"は"Empty Activity"を選択
- それ以外はデフォルトでOK
-
build.gradle (Topレベル)を編集
// Top-level build file where you can add configuration options common to all sub-projects/modules.

buildscript {
    repositories {
        google()
        jcenter()
    }
    dependencies {
        classpath 'com.android.tools.build:gradle:3.2.1'

        // NOTE: Do not place your application dependencies here; they belong
        // in the individual module build.gradle files
    }
}

buildscript {
    apply from: "https://github.com/rosjava/android_core/raw/kinetic/buildscript.gradle"
}

subprojects {
    apply plugin: 'ros-android'

    afterEvaluate { project ->
        android {
            // Exclude a few files that are duplicated across our dependencies and
            // prevent packaging Android applications.
            packagingOptions {
                exclude "META-INF/LICENSE.txt"
                exclude "META-INF/NOTICE.txt"
            }
        }
    }
}

allprojects {
    repositories {
        google()
        jcenter()
    }
}

task clean(type: Delete) {
    delete rootProject.buildDir
}
ここで、本家のチュートリアルでは
Edit the top-level build.gradle file and replace this part:
"1つ目のbuildscript"
with this:
"2つ目のbuildscript"
とある(replaceの強調は私が追加した)のですが、私の環境では1つ目のbuildscriptを削除するとエラーが出たためそのままにしました。
- build.gradle (app)を編集
apply plugin: 'com.android.application'

android {
    compileSdkVersion 28
    defaultConfig {
        applicationId "goodclues.example.myrosapplication"
        minSdkVersion 15
        targetSdkVersion 28
        versionCode 1
        versionName "1.0"
        testInstrumentationRunner "android.support.test.runner.AndroidJUnitRunner"
    }
    buildTypes {
        release {
            minifyEnabled false
            proguardFiles getDefaultProguardFile('proguard-android.txt'), 'proguard-rules.pro'
        }
    }
}

dependencies {
    implementation fileTree(dir: 'libs', include: ['*.jar'])
    implementation 'com.android.support.constraint:constraint-layout:1.1.3'
    testImplementation 'junit:junit:4.12'
    androidTestImplementation 'com.android.support.test.espresso:espresso-core:3.0.2'
    implementation 'org.ros.android_core:android_15:[0.3,0.4)'
}
最後の"implementation"は本家では"compile"となっているのですが、現在では非推奨のようです。また、"android_15"の15の数字はAPIレベルに合わせて変更しましょう。(←コメントでご指摘いただき数字とAPIレベルは関係なさそうです。また、現在では記載方法が変更されたようなので最新情報はチュートリアルをご確認ください。)
- AndroidManifest.xmlにパーミッションを追加
<uses-permission android:name="android.permission.INTERNET" />
ネットワークを利用するためのパーミッションです。
- AndroidManifest.xmlにアクティビティを追加
<activity android:name="org.ros.android.MasterChooser" />
Master ChooserはROS MasterのURIを指定するためのアクティビティです。これを記述しておくとアプリ起動時に自動的に設定画面に遷移します。
また、Master URIはハードコーディングも可能ですが、方法は本家チュートリアルを参照してください。
- AndroidManifest.xmlに以下を追加
<application xmlns:tools="http://schemas.android.com/tools"
        tools:replace="android:icon"
        ...(以下続く)
理由はよくわかりませんが、これがないとエラーが出てしまうようです。
最終的にマニフェストファイルは以下のようになります。
<?xml version="1.0" encoding="utf-8"?>
<manifest xmlns:android="http://schemas.android.com/apk/res/android"
    package="goodclues.example.myrosapplication">

    <uses-permission android:name="android.permission.INTERNET" />

    <application xmlns:tools="http://schemas.android.com/tools"
        android:allowBackup="true"
        android:icon="@mipmap/ic_launcher"
        android:label="@string/app_name"
        android:roundIcon="@mipmap/ic_launcher_round"
        android:supportsRtl="true"
        android:theme="@style/AppTheme"
        tools:replace="android:icon">
        <activity android:name=".MainActivity">
            <intent-filter>
                <action android:name="android.intent.action.MAIN" />
                <category android:name="android.intent.category.LAUNCHER" />
            </intent-filter>
        </activity>

        <activity android:name="org.ros.android.MasterChooser" />
    </application>
-
activity_main.xmlのテキストを変更する
- デフォルトでTextViewになっているビューをorg.ros.android.view.RosTextViewに変更
- id="@+id/text"を追加
<?xml version="1.0" encoding="utf-8"?>
<android.support.constraint.ConstraintLayout xmlns:android="http://schemas.android.com/apk/res/android"
    xmlns:app="http://schemas.android.com/apk/res-auto"
    xmlns:tools="http://schemas.android.com/tools"
    android:layout_width="match_parent"
    android:layout_height="match_parent"
    tools:context=".MainActivity">

    <org.ros.android.view.RosTextView
        android:layout_width="wrap_content"
        android:layout_height="wrap_content"
        android:text="Hello World!"
        android:id="@+id/text"
        app:layout_constraintBottom_toBottomOf="parent"
        app:layout_constraintLeft_toLeftOf="parent"
        app:layout_constraintRight_toRightOf="parent"
        app:layout_constraintTop_toTopOf="parent" />

</android.support.constraint.ConstraintLayout>
- MainActivityを編集
ROSを使うにはRosActivityをextendsしたActivityを作成します。
以下のサンプルはTalkerという/chatterメッセージをPublishするクラスと、RosTextViewというchatterトピックをSubscribeするビューがあります。
Talkerクラスは内部で1秒毎にインクリメントされる番号をPublishしています。
/*
 * Copyright (C) 2011 Google Inc.
 *
 * Licensed under the Apache License, Version 2.0 (the "License"); you may not
 * use this file except in compliance with the License. You may obtain a copy of
 * the License at
 *
 * http://www.apache.org/licenses/LICENSE-2.0
 *
 * Unless required by applicable law or agreed to in writing, software
 * distributed under the License is distributed on an "AS IS" BASIS, WITHOUT
 * WARRANTIES OR CONDITIONS OF ANY KIND, either express or implied. See the
 * License for the specific language governing permissions and limitations under
 * the License.
 */
package goodclues.example.myrosapplication;

import android.os.Bundle;
import org.ros.android.MessageCallable;
import org.ros.android.RosActivity;
import org.ros.android.view.RosTextView;
import org.ros.node.NodeConfiguration;
import org.ros.node.NodeMainExecutor;

/**
 * @author damonkohler@google.com (Damon Kohler)
 */
public class MainActivity extends RosActivity {

    private RosTextView<std_msgs.String> rosTextView;
    private Talker talker;

    public MainActivity() {
        // The RosActivity constructor configures the notification title and ticker
        // messages.
        super("Pubsub Tutorial", "Pubsub Tutorial");
    }

    @SuppressWarnings("unchecked")
    @Override
    public void onCreate(Bundle savedInstanceState) {
        super.onCreate(savedInstanceState);
        setContentView(R.layout.activity_main);

        rosTextView = (RosTextView<std_msgs.String>) findViewById(R.id.text);
        rosTextView.setTopicName("chatter");
        rosTextView.setMessageType(std_msgs.String._TYPE);
        rosTextView.setMessageToStringCallable(new MessageCallable<String, std_msgs.String>() {
            @Override
            public String call(std_msgs.String message) {
                return message.getData();
            }
        });
    }

    @Override
    protected void init(NodeMainExecutor nodeMainExecutor) {
        talker = new Talker();

        // At this point, the user has already been prompted to either enter the URI
        // of a master to use or to start a master locally.

        // The user can easily use the selected ROS Hostname in the master chooser
        // activity.
        NodeConfiguration nodeConfiguration = NodeConfiguration.newPublic(getRosHostname());
        nodeConfiguration.setMasterUri(getMasterUri());
        nodeMainExecutor.execute(talker, nodeConfiguration);
        // The RosTextView is also a NodeMain that must be executed in order to
        // start displaying incoming messages.
        nodeMainExecutor.execute(rosTextView, nodeConfiguration);
    }
}
サンプルをほぼそのまま拝借しています。ただし、本家では
import org.ros.rosjava_tutorial_pubsub.Talker;
としているのですが、私の環境ではエラーが出たため以下のソースをコピーして自分のプロジェクトにTalkerクラスを作成しています。
http://docs.ros.org/hydro/api/rosjava_core/html/Talker_8java_source.html
動作確認
ROS PCでroscoreを起動しておきます。
$ roscore
次にアプリを起動すると以下のようなROS Masterの接続設定画面が表示されます。
(Show advanced optionsをチェックすると、細かいネットワークの設定やスマホ自体をROS Masterにするボタンが表示されますが、ここでは不要なため割愛します)

"Master URI"にROS MasterのURIを入力します。
"localhost"となっているところを上で設定した"192.168.0.15"とすればOKです。
次にCONNECTをタップして接続が成功するとMainActivityに遷移します。
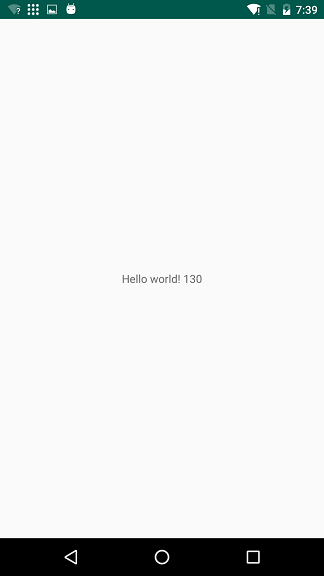
Hello world!の右に表示されている数字が(自分でPublishしたものを) Subscribe しているメッセージです。
さて、ROS PCでもSubscribeできているか確認してみましょう。ターミナルで
$ rostopic echo /chatter
とすると
data: "Hello world! X"
のように一定間隔でメッセージが出力されていれば成功です。(Xは数字)
おわりに
簡単なPub-Sub通信を実現するAndroidアプリ開発の手順をROS.orgのチュートリアルに沿って説明しました。これでロボットとスマホカメラ等との連携が簡単にできるようになりますので、ぜひお試しください。

