はじめに
はじめまして、@glassmonkey と申します。
趣味でFlutterを書き始めた初心者です。
隔週でFlutterのもくもく会とかもやってたりするので、もしご興味ある方はご参加ください。
今回は以前の勉強会でFlutterにおけるユニットテストについて話題があがったので、少しまとめてみました。
また、その題材には以前から興味はあったものの手を出せていなかったStateNotifierを扱いました。
おまけでFlutterのmatrix buildなGitHub Actionsも置いておきます。
リリースはこれからチャレンジなので、テストまでとなります。
扱う題材について
この記事で扱うコードはflutter_state_notifer_sampleにあげているので、もし興味や評価していただけたらスターなどよろしくお願いします😂
今回はflutterプロジェクトを作ったときに生成させるカウンターアプリベースな感じです。
ただし、テストを書く意味を出すために、9の次は0に戻る感じのロジックにしました。
コードの解説
今回扱うケースでは、設計パターン的にはMVVMになるとのことです。参考: state_notifier と freezed を使って、Flutterのカウンターアプリをつくるよ
また、MVVMについては深くは触れませんがこちらの記事が参考になると思います。
今回のケースでは下記にわかれます
-
Model
ロジックを担保。(今回のケースだと9カウントの次は0に戻す) -
ViewModel
Viewから受け取ったイベントをModelに通知する -
View
現在の状態を表示する。(カウント値の表示)
ユーザーから入力(イベント)を受け取る。(ボタンタップでイベントを発行する)
それぞれテストとセットで解説をします。
Model
Modelのアプリケーションコード
import 'package:equatable/equatable.dart';

//実際はfreezedとか使った方がよい
class CounterModel extends Equatable {
  const CounterModel({this.count = 0});

  CounterModel increment() {
    final int nextCount = count + 1;
    if (nextCount > 9) {
      return const CounterModel(count: 0);
    }
    return CounterModel(count: nextCount);
  }

  final int count;
  @override
  bool get stringify => true;
  @override
  List<Object> get props => <Object>[count];
}
今回はEquatableの、countの値でのみ同一性が担保されるようにしています。
List<Object> get props => <Object>[count];
実務ではfreezedで書いたほうが色々便利ですが多機能で今回の趣旨から外れると考えたので採用していません。
カウントのロジックに関してはイミュータブルな感じにしました。
一番の理由としては、内部の状態変化を気にせずに済むので、テストがしやすい点です。
incrementが呼ばれると新しいCounterModelを生成するようにしています。
その際に9カウントの次は0に戻すをここで行っています。
  CounterModel increment() {
    final int nextCount = count + 1;
    if (nextCount > 9) {
      return const CounterModel(count: 0);
    }
    return CounterModel(count: nextCount);
  }
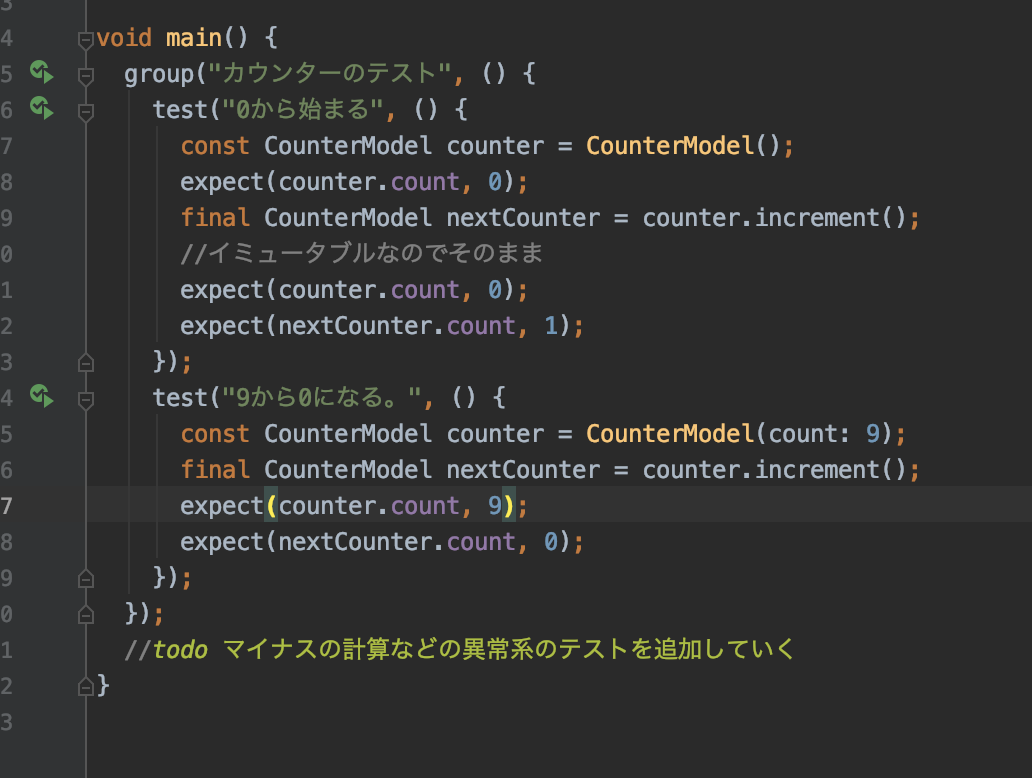
Modelのテストコード
import 'package:flutter_test/flutter_test.dart';
import 'package:fluttertestcountapp/counter_model.dart';

void main() {
  group("カウンターのテスト", () {
    test("0から始まる", () {
      const CounterModel counter = CounterModel();
      expect(counter.count, 0);
      final CounterModel nextCounter = counter.increment();
      //イミュータブルなのでそのまま
      expect(counter.count, 0);
      expect(nextCounter.count, 1);
    });
    test("9から0になる。", () {
      const CounterModel counter = CounterModel(count: 9);
      final CounterModel nextCounter = counter.increment();
      expect(counter.count, 9);
      expect(nextCounter.count, 0);
    });
  });
  //todo マイナスの計算などの異常系のテストを追加していく
}
テストの観点ではもう異常系を考慮するなど色々あるでしょうが、
入門用として下記の2点を確かめるロジックを追加しました。それぞれの状態をexpectで等しいかテストしています。
- 初期状態が0で加算すると1になる
- 9を加算にすると0に戻る。
ちなみにAndroid Studioだと、group > test で下記のように処理を囲むと左の行番号のところに再生ボタン![]() が表示されるので、これをクリックするとテストごとに実行できたりできるので大変便利です。(groupの場合は内部のtest全てが実行されます。)
が表示されるので、これをクリックするとテストごとに実行できたりできるので大変便利です。(groupの場合は内部のtest全てが実行されます。)

ViewModel
ViewModelのアプリケーションコード
import 'package:fluttertestcountapp/counter_model.dart';
import 'package:state_notifier/state_notifier.dart';

class CountNotifier extends StateNotifier<CounterModel> {
  CountNotifier() : super(const CounterModel());

  void next() {
    state = state.increment();
  }
}
ViewModelは変更手段を公開するイメージかなと思います。
StateNotifier の仕様で現在の状態がstateに格納されているので、それを更新させるnextメソッドを公開しています。
ViewModelのテストコード
import 'package:flutter_test/flutter_test.dart';
import 'package:fluttertestcountapp/counter_model.dart';
import 'package:fluttertestcountapp/counter_notifer.dart';

void main() {
  group("Count notifierのテスト", () {
    test("カウント結果が変動する", () {
      final CountNotifier countNotifier = CountNotifier();
      expect(countNotifier.debugState, const CounterModel(count: 0));
      countNotifier.next();
      expect(countNotifier.debugState, const CounterModel(count: 1));
    });
  });
}
今回テストコードはnextが呼ばれたらmodelが変更された程度のテストしか書いていません。
理由としてはViewModelとして作成したCountNotifierの責務はそれだけだからです。
カウント値が0~9までといった知識はモデルである CountModel が知っていることなので、CountNotifier は通知だけしているのです。
この責務の分離が重要で、もしこのCountNotifierに0~9まで担保するテストを書いてしまうと、もしカウントが0~100までに変更になったときにCountModelだけでなく、CountNotifier のテストまで修正しないといけなくなり面倒、もとい修正範囲が広がってしまいます。
View
Viewのアプリケーションコード
class MyHomePage extends StatelessWidget {
  @override
  Widget build(BuildContext context) {
    final int count =
        context.select<CounterModel, int>((CounterModel state) => state.count);
    return Scaffold(
      appBar: AppBar(
        title: const Text("カウンターサンプル"),
      ),
      body: Center(
        child: Column(
          mainAxisAlignment: MainAxisAlignment.center,
          children: <Widget>[
            const Text(
              'You have pushed the button this many times:',
            ),
            Text(
              count.toString(),
              style: Theme.of(context).textTheme.headline4,
            ),
          ],
        ),
      ),
      floatingActionButton: FloatingActionButton(
        onPressed: () => context.read<CountNotifier>().next(),
        tooltip: 'Increment',
        child: Icon(Icons.add),
      ), // This trailing comma makes auto-formatting nicer for build methods.
    );
  }
}
カウンターアプリとしての機能はViewModelであるCountNotifierのnextを呼んでいます。
onPressed: () => context.read<CountNotifier>().next(),
CountNotifierの状態を表示しているだけです。
final int count =
        context.select<CounterModel, int>((CounterModel state) => state.count)
context.select はproviderの 4.1 から使えるようになった機能で状態が変化するとリビルドしたいときに、contest.readはリビルドする必要の無い処理で使いわけるといい感じです。
Viewのテストコード
Viewに関してはユニットテストの観点ではあまり必要でない認識です。
ロジック部分はModelやViewModelで担保されているはずなので、
必要でない限りは作成する労力に見合わないと思われます。
(もし意見などあればコメントお願いします)
FirebaseのTest Labのサポートの拡充に個人的には期待したいですね
サンプルのままなので説明は割愛します。
ユニットテストの意義
ユニットテストは面倒なもの?
ざっくりアプリケーションコードとテストコードを対応させて説明しましたが、テストコードが面倒や意義を感じないケースはあると思われます。
その考えに対してですが、個人的にはテストコードを 「後から追加するもの」ではなく、「動かすためのエントリーポイント」 と考えると多少はマシになるのかなと考えています。
その作成したエントリーポイントが後で品質に寄与するなら一石二鳥でお得に感じませんか?
面倒な気持もわかる。
ユニットテストはエントリーポイント
ModelやViewModelが初学者に難しく感じさせる要因の一つに
実行までが遠い点だと考えています。
実際ModelやViewModelをアプリとしてViewから呼び出そうと思うと色々準備が必要で大変ですよね。
実際にこのサンプルだけでも以下の転を乗り越えないといけないわけです。
Provider? Model? な最初の状態でこれを乗り越えるのは非常に難しいと思われます。
- ViewからViewModelを呼び出すロジックが必要
- ViewModelからModelを呼び出すロジックが必要
- ProviderでViewModelを配布する
…etc
そこでユニットテストの場合だとViewModelを呼び出す場合はどうでしょうか?
これで終わりです。
 final CountNotifier countNotifier = CountNotifier();
      expect(countNotifier.debugState, const CounterModel(count: 0));
最初はprint関数で返り値をチェックしてもいいでしょう。
 final CountNotifier countNotifier = CountNotifier();
 print(countNotifier.debugState) //0が表示される
ユニットテストをエントリーポイントとして実行することを最初にゴールに置くことで、
より難易度の低くなるのでとっつきやすくなると思います。
また、同時にModelやViewModelの責務も考えるきっかけになると思います。
なので、できる限り一緒に書き始めることをおすすめします。
ただし、ネイティブ依存するPluginが存在するとユニットテストでは動かせないので、
その場合はMockする必要があり、テスト先行でやりずらい点も多々あるので、
テストファーストにはそこまでこだわる必要は無いのかなとも思ってはいます。
おまけ
GitHub ActionsでFlutter用のCIのサンプルも載せてるのでこちらももしよかったらご活用ください。
iOSとAndroidをそれぞれビルドしてtestとbuildを検証しています。
# Name of your workflow.
name: dev channel test
# Trigger the workflow on push or pull request.
on: [pull_request]
# A workflow run is made up of one or more jobs.
jobs:
  prepare:
    runs-on: ubuntu-latest
    if: "! contains(github.event.head_commit.message, '[ci skip]')"
    steps:
      - run: echo "${{ github.event.head_commit.message }}"
  test:
    strategy:
      matrix:
        config:
          - {name: ios-test, os: macOS-latest, build_options: "ios --release --no-codesign"}
          - {name: android-test, os: ubuntu-latest, build_options: "apk"}
    needs: prepare
    name: ${{ matrix.config.name }}
    runs-on: ${{ matrix.config.os }}
    steps:
      - uses: actions/checkout@v2
      - uses: actions/setup-java@v1
        with:
          java-version: '12.x'
      - uses: subosito/flutter-action@v1
        with:
          flutter-version: '1.17.x' # you can use 1.17
          channel: 'stable' # optional, default to: 'stable'
      - run: flutter doctor
      - run: flutter pub get
      - run: bin/lint.sh
      - run: flutter test
      - run: flutter build ${{ matrix.config.build_options }}
おわりに
Flutterの状態管理の1つであるStateNotifierを扱ったサンプルにテストコードと合わせた解説を書いてみました。
Flutterに限った話ではないですが、テストコードを書き始めて後の仕様変更のミスに気づけたり、モジュールの責務に関して考えるようになったので、この記事がテストと仲良くなるきっかけになったのなら嬉しいです。面倒ですけどねw
最後に宣伝です。
twitterではたまにFlutter関係をたまにつぶやいているので@glassmonekeyをフォローしてくれると嬉しいです。
来週の日曜日にもくもく会@Zoomも企画してるのでこちらも、良ければご参加ください。
