はじめに
前回に引き続いて、今回はArduino化したAE-TYBLE16で、BLE通信をしてみます。
参考にした記事
・https://qiita.com/nanbuwks/items/33c97adbde990161c098
・https://qiita.com/nanbuwks/items/d26447c0bfa28b1d05df
・https://qiita.com/MypaceEngine/items/cc7ccbd799801735112b
用意するもの
・マイコン:AE-TYBLE16
http://akizukidenshi.com/catalog/g/gK-12339/
・書き込み装置:J-link EDU mini
https://www.embitek.co.jp/product/jlink-edu-mini.html
・3.3V電源:ArduinoUnoなど何でも良いです。今回は以下のFTDIシリアル変換器(3.3V版)を使いました。
https://www.sengoku.co.jp/mod/sgk_cart/detail.php?code=EEHD-04FM)
主な手順
1.環境構築
後述するBLEのArduino用ライブラリを使用するために、マイコンのクロック書き換えが必要になります。
そのために以下の環境構築を行います。(今回はMacでの環境構築の方法です)
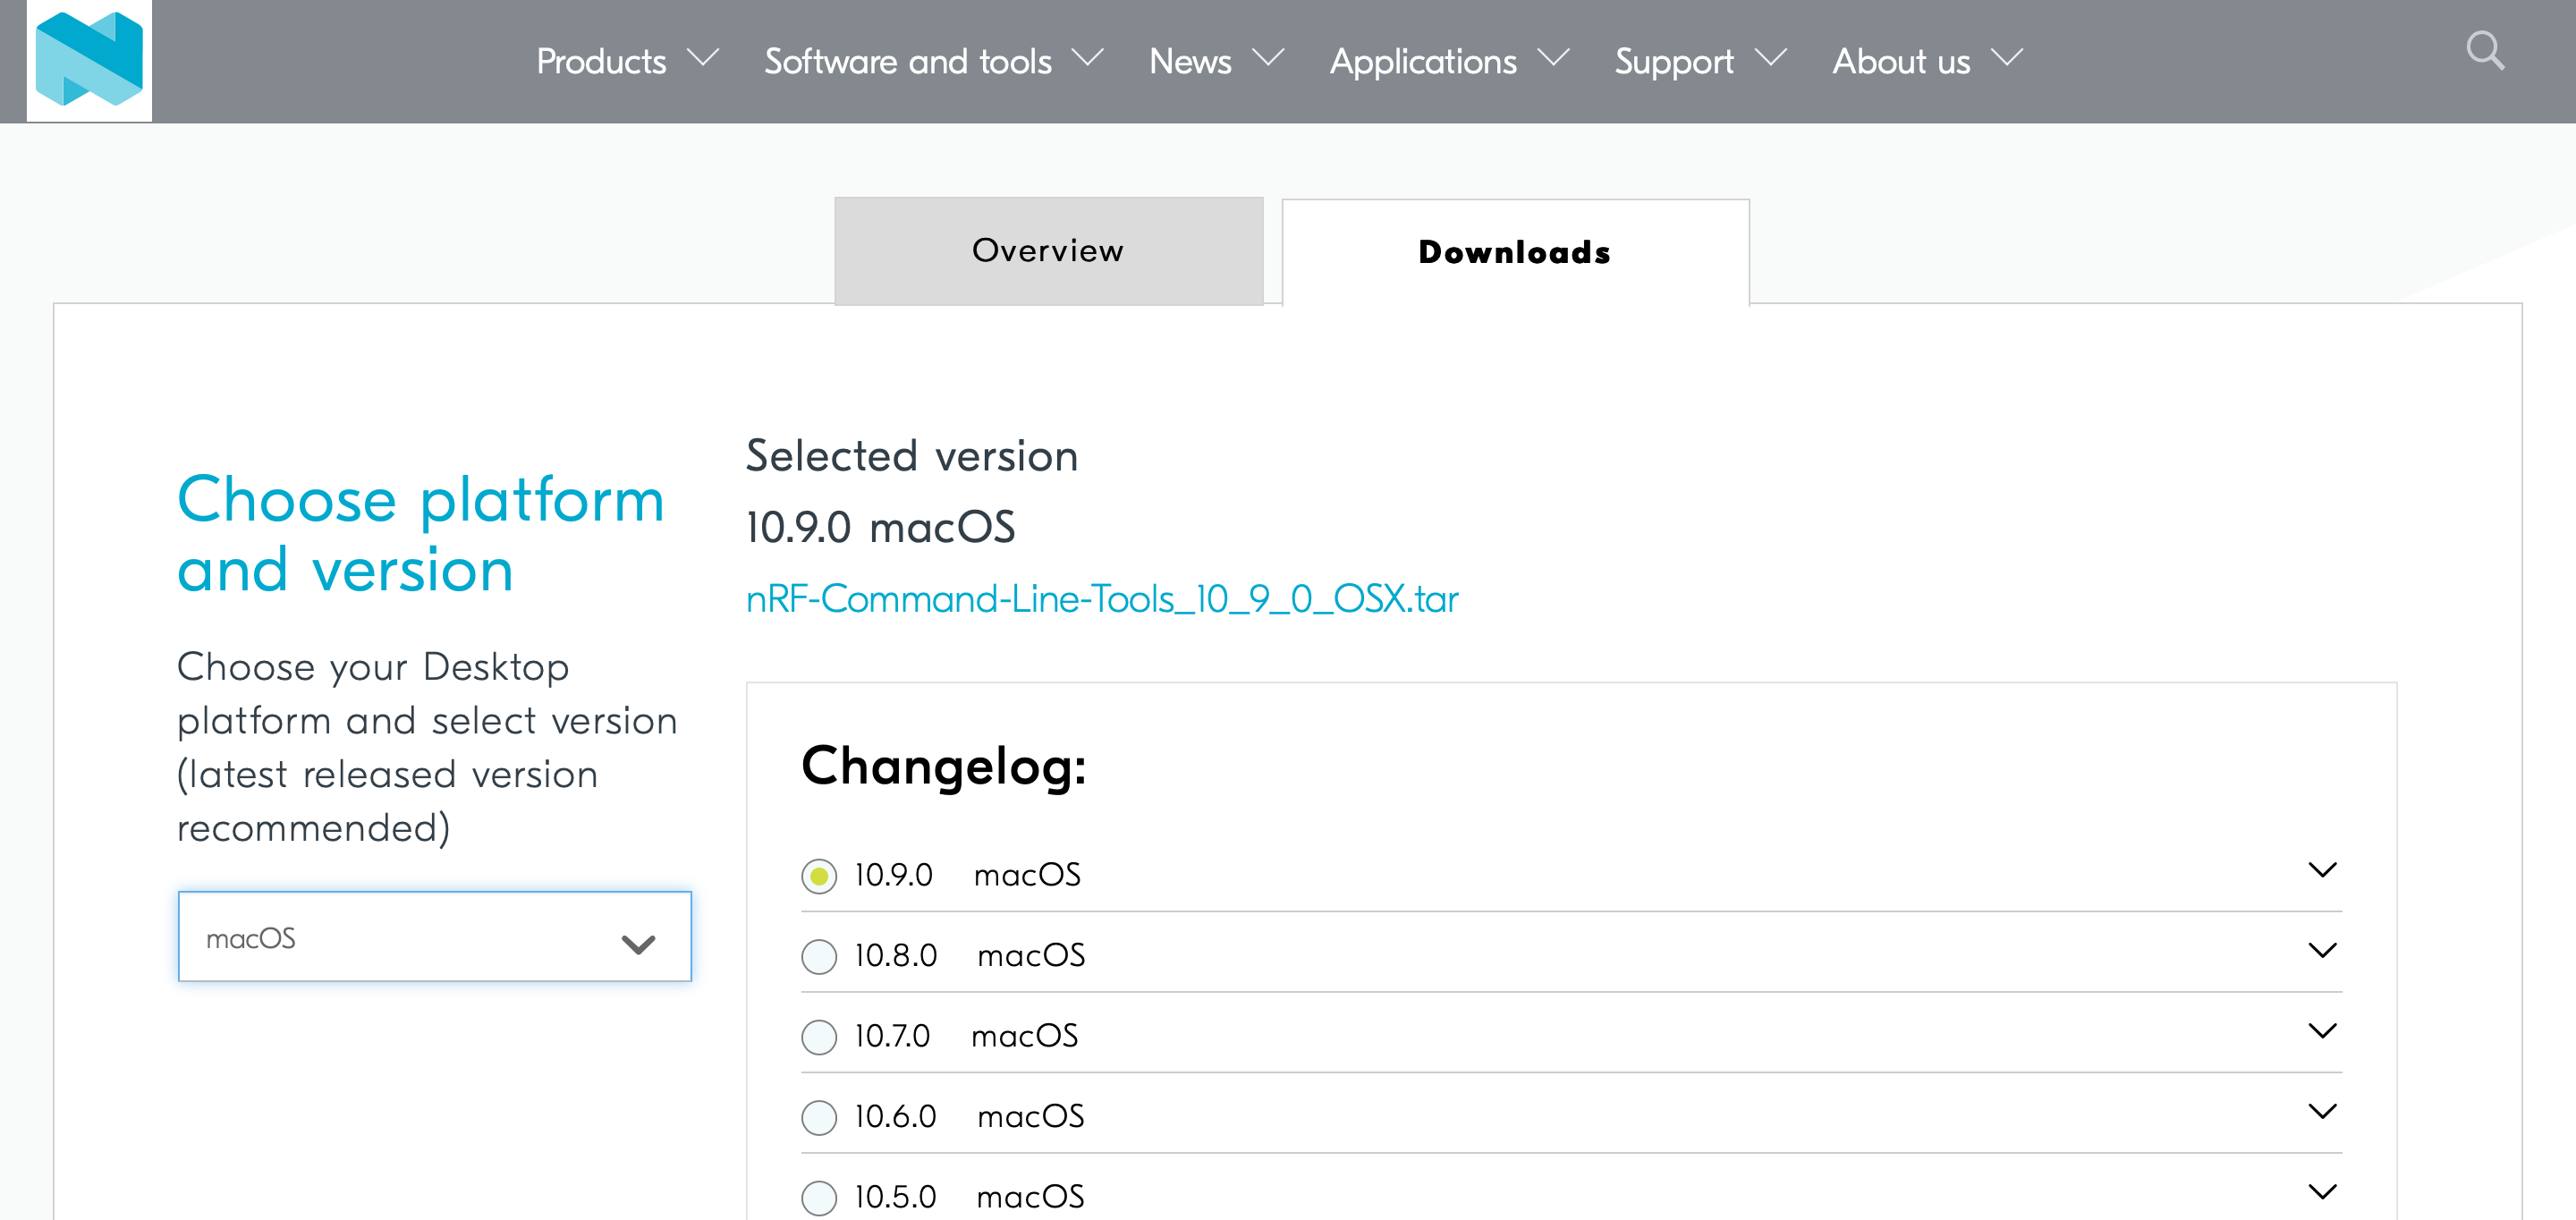
まず、こちらからマイコンのクロック設定書き換えのために使用するためのコマンドラインツールをダウンロード。
自分の使うPCに合わせてプラットフォームを選択し、最新版をダウンロードします。
https://www.nordicsemi.com/Software-and-tools/Development-Tools/nRF-Command-Line-Tools/Download
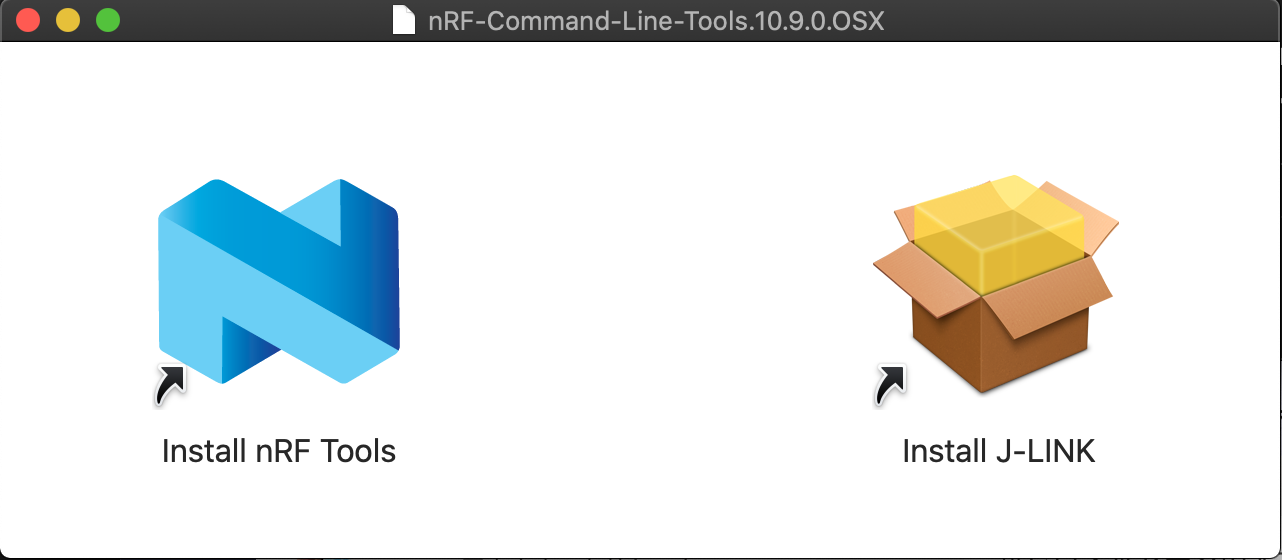
ダウンロードができたらパッケージを展開して、中にあるdmgファイルを開きます。
この中に2つのアプリケーションが入っているので、それぞれダブルクリックして2つともインストールします。
2.マイコンのクロック書き換え
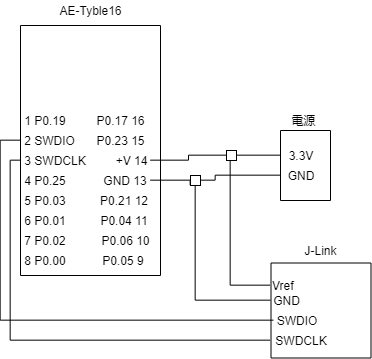
インストールが完了したら、J-Link EDU MiniにPCとマイコンを接続します。
配線は前回の通り。
配線が完了したら、ターミナルを立ち上げて以下を実行し、接続しているJ-Link EDU Miniのシリアル番号を取得します。
nrfjprog -i
これで取得できたシリアル番号を使って、さらに続けて以下を実行しましょう。
nrfjprog --snr <serial_number> --memwr 0x10001008 --val 0xFFFFFF00
これでマイコン側のクロック設定の書き換えが完了します。
3.ソフトウェアの準備
IDEで「ツール」メニューから「ライブラリを管理」を開き、「BLEPeripheral」のライブラリを検索して
インストールしましょう。

インストールが完了したら、BLE Peripheralのサンプルスケッチの中の「starter」を開き、前回同様のボード設定を施して、通常通り書き込みを実行します。
// Copyright (c) Sandeep Mistry. All rights reserved.
// Licensed under the MIT license. See LICENSE file in the project root for full license information.

// Import libraries (BLEPeripheral depends on SPI)
# include <SPI.h>
# include <BLEPeripheral.h>

// define pins (varies per shield/board)
# define BLE_REQ   10
# define BLE_RDY   2
# define BLE_RST   9

// create peripheral instance, see pinouts above
BLEPeripheral blePeripheral = BLEPeripheral(BLE_REQ, BLE_RDY, BLE_RST);

// uuid's can be:
//   16-bit: "ffff"
//  128-bit: "19b10010e8f2537e4f6cd104768a1214" (dashed format also supported)

// create one or more services
BLEService service = BLEService("fff0");

// create one or more characteristics
BLECharCharacteristic characteristic = BLECharCharacteristic("fff1", BLERead | BLEWrite);

// create one or more descriptors (optional)
BLEDescriptor descriptor = BLEDescriptor("2901", "value");

void setup() {
  Serial.begin(115200);
# if defined (__AVR_ATmega32U4__)
  delay(5000);  //5 seconds delay for enabling to see the start up comments on the serial board
# endif

  blePeripheral.setLocalName("local-name"); // optional
  blePeripheral.setAdvertisedServiceUuid(service.uuid()); // optional

  // add attributes (services, characteristics, descriptors) to peripheral
  blePeripheral.addAttribute(service);
  blePeripheral.addAttribute(characteristic);
  blePeripheral.addAttribute(descriptor);

  // set initial value
  characteristic.setValue(0);

  // begin initialization
  blePeripheral.begin();
}

void loop() {
  BLECentral central = blePeripheral.central();

  if (central) {
    // central connected to peripheral
    Serial.print(F("Connected to central: "));
    Serial.println(central.address());

    while (central.connected()) {
      // central still connected to peripheral
      if (characteristic.written()) {
        // central wrote new value to characteristic
        Serial.println(characteristic.value(), DEC);

        // set value on characteristic
        characteristic.setValue(5);
      }
    }

    // central disconnected
    Serial.print(F("Disconnected from central: "));
    Serial.println(central.address());
  }
}
動作チェック
iPhoneやAndroidのAppストアで「nRFConnect」を検索し、nRFConnectアプリをインストールします。
起動するとスキャンが開始されるので、「local-name」のデバイスを探してタップ。
Connectができれば、無事に接続できています!

