概要
この記事は、Realmを使ったTODOメモアプリの作成記録です。
CRUDとは何か簡単に説明できる人向けになるので、全くの初心者の方は「CRUD」の意味を調べてから臨むようにしてください🚗
開発環境
| 項目 | |
|---|---|
| PC | MacBook Air 2017 |
| IDE | Xcode Ver. 12.4 |
| 言語 | Swift 5 |
| データベース | Realm |
#目次
1.主な流れ
2.いざ開発!!
3.コードの全容
4.Storyboard
5.終わりに
💫何するのー?
■やること
Realmを使った簡単なアプリ作成
ちなみにRealm=レルムです👍
■What We Learn
- Realmの基本的な実装を理解できる
- NCMBよりもう一段階データベースを深く学べる
■Realmを使うメリット
- 保存したデータをローカル環境で可視化できる(userDefaultsとの違い)
- 世界中で使われているので参考ドキュメントが豊富(英語中心だけど😂)
■主な流れ
- プロジェクトの作成
- cocoapodでrealmを追加
- ストーリーボードの設定
- モデルクラスの作成
- セルクラスの作成
- ViewControllerの実装
- 完成!
🛠本編
◼️プロジェクトの作成
- iOS→Appを選択
- 今回のプロダクトネームは「RealmTodo」にしました
◼️cocoaPodsでRealmを追加
*cocoapodの導入方法はこちらを参照
https://qiita.com/pekocalypse/items/b80f6c343355a872dde6
1:cocoapodを入れるのは超簡単下記のコマンドを入れるだけ
<!-- cocoapodsをインストール -->
$ sudo gem install cocoapods

<!-- バージョンを確認 -->
$ pod --version
10.0.0
注意:Cocoapodsは最新Versionの10.0以上にアップデートしてください!
2:先ほどのRealmTodoプロジェクトフォルダに移動して、CocoaPodsを初期化しPodFileを作成しましょう
$ cd ~/RealmTodo
$ pod init
3:作成されたPodfileを編集しましょう
編集は、viで編集してもエディターで編集してもokです。
<!-- 初期状態 -->

# Uncomment the next line to define a global platform for your project
# platform :ios, '9.0'

target 'RealmTodo' do
  # Comment the next line if you're not using Swift and don't want to use dynamic frameworks
  use_frameworks!

  # Pods for RealmTodo

end

<!-- 編集してこんな感じにしましょう -->

target 'RealmTodo' do
  use_frameworks!
  pod 'RealmSwift'
end
4:Realmをインストールします
$ pod install
Analyzing dependencies
Downloading dependencies
Installing Realm (10.7.6)
Installing RealmSwift (10.7.6)
Generating Pods project
Integrating client project
すると、プロジェクトフォルダにがこのように変化します

5:xcodeでプロジェクトを開き直しましょう
realmを入れた後は、RealmTodo.xcodeprojではなく、RealmTodo.xcworkspaceからプロジェクトを開きましょう
%0A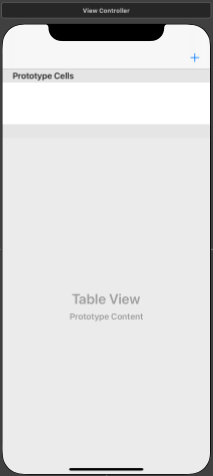%0A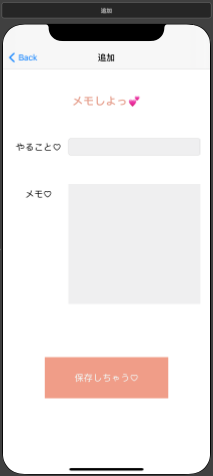%0A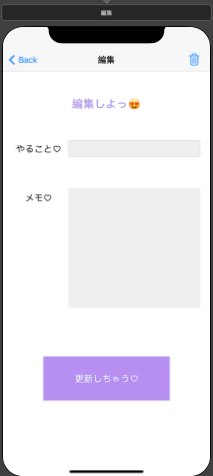%0Acd3c9ef-252e-1f8b-13ed-9844861dad3c.png)
◼️モデルクラスの作成
やること: Realmに保存したいデータの項目とデータ型を定義します
- まずはswiftファイル("subclass of"は"NSObjectを選択")を追加します
- 名前は
RealmData.swiftにしました - ファイルを作成後、下記のように内容を編集します
- 今回は、TODOの項目名(todo)、メモ内容(memo)を文字列で保存します
-
importが必要なので注意です! - 記入直後は、xcodeから赤い警告が出ますが、一度buildすると消えますのでご安心ください
RealmData.swift
import UIKit
import RealmSwift // 必須

class RealmData: Object { // ObjectはRealm固有のデータ型

    @objc dynamic var todo: String? = "" //データには必ず@objc dynamic varをつける
    @objc dynamic var memo: String? = ""

}
◼️AddViewController(メモ追加画面)の実装
AddViewController.swift
import UIKit
import RealmSwift

class AddViewController: UIViewController {

    @IBOutlet var todoTextField: UITextField!
    @IBOutlet var memoTextView: UITextView!
    @IBOutlet var saveButton: UIButton!

    override func viewDidLoad() {
        super.viewDidLoad()

        //ボタンを丸くする
        saveButton.layer.cornerRadius = saveButton.bounds.height/2
        saveButton.layer.masksToBounds = true

        // Realmの中身を確認するためのprint文
        print(Realm.Configuration.defaultConfiguration.fileURL!)
    }

    @IBAction func save(){

        // .realm拡張子のデータベースをローカルに作成
        let realm = try! Realm()

        // RealmDataクラスをインスタンス化(実体化)
        let realmData = RealmData()

        // インスタンス化したオブジェクトに値をセット
        realmData.todo = todoTextField.text!
        realmData.memo = memoTextView.text!

        // 保存のコード(データベースに書き込み)
        try! realm.write {
            realm.add(realmData)
        }

        navigationController?.popViewController(animated: true)

        // Realmの中身を確認するためのprint文
        print(Realm.Configuration.defaultConfiguration.fileURL!)

    } // これで保存(CRUDのC)はおしまい!

}
◼️ViewController(メモ表示画面)の実装
ViewController.swift
import UIKit
import RealmSwift

class ViewController: UIViewController, UITableViewDelegate, UITableViewDataSource{

    @IBOutlet var todoTableView: UITableView!

    // RealmData型の変数を用意(まだ空っぽの配列)
    var todoList: Results<RealmData>!

    override func viewDidLoad() {
        super.viewDidLoad()

        // TableViewの教材参照
        self.todoTableView.delegate = self
        self.todoTableView.dataSource = self
    }

    override func viewWillAppear(_ animated: Bool) {

        // Realm使う宣言!
        let realm = try! Realm()

        // Realmから受け取るデータをtodoList変数(配列)に突っ込む
        self.todoList = realm.objects(RealmData.self)

        // tableViewを更新
        todoTableView.reloadData()

        // Realmの中身を確認するためのprint文
        print(Realm.Configuration.defaultConfiguration.fileURL!)
    }


    func tableView(_ tableView: UITableView, numberOfRowsInSection section: Int) -> Int {

        // todoList変数(配列)に格納されてるデータ
        return todoList.count
    }

    func tableView(_ tableView: UITableView, cellForRowAt indexPath: IndexPath) -> UITableViewCell {

        // TableViewの教材参照
        let cell = tableView.dequeueReusableCell(withIdentifier: "cell", for: indexPath)

        // 取得したTodoリストのindexPath.row番目をeachData変数に代入
        let eachData = todoList[indexPath.row]

        // セルに反映
        cell.textLabel?.text = eachData.todo

        return cell
    }

    func tableView(_ tableView: UITableView, didSelectRowAt indexPath: IndexPath) {

        // 画面遷移先を指定
        performSegue(withIdentifier: "toEditVC", sender: nil)

        tableView.deselectRow(at: indexPath, animated: true)
    }

    override func prepare(for segue: UIStoryboardSegue, sender: Any?) {
        if segue.identifier == "toEditVC" {

            let indexPath = todoTableView.indexPathForSelectedRow!

            let destination = segue.destination as? EditViewController

            destination?.passedNumber = indexPath.row
        }
    }


}
◼️EditViewController(メモ編集・削除画面)の実装
EditViewController.swift
import UIKit
import RealmSwift

class EditViewController: UIViewController {

    // ViewControllerから渡されたindexPath.row
    var passedNumber = 0

    // RealmData型の変数を用意(まだ空っぽの配列)
    var todoList: Results<RealmData>!

    @IBOutlet var editTextField: UITextField!
    @IBOutlet var editTextView: UITextView!
    @IBOutlet var updateButton: UIButton!

    override func viewDidLoad() {
        super.viewDidLoad()

        // ボタンを丸くする
        updateButton.layer.cornerRadius = updateButton.bounds.height/2
        updateButton.layer.masksToBounds = true
    }

    override func viewWillAppear(_ animated: Bool) {

        // Realm使う宣言!
        let realm = try! Realm()

        // Realmから受け取るデータをtodoList変数(配列)に突っ込む
        self.todoList = realm.objects(RealmData.self)

        // 取得したTodoリストのPassedNumber番目をeditData変数に代入
        let editData = todoList[passedNumber]

        // TextFieldとTextViewに値をだいにゅ〜
        editTextField.text = editData.todo
        editTextView.text = editData.memo

        // Realmの中身を確認するためのprint文
        print(Realm.Configuration.defaultConfiguration.fileURL!)

    }


    @IBAction func update(){

        // Realm使う宣言!
        let realm = try! Realm()

        // 更新のコード(データベースに上書き)
        try! realm.write {
            self.todoList[passedNumber].todo = editTextField.text!
            self.todoList[passedNumber].memo = editTextView.text!
        }

        navigationController?.popViewController(animated: true)

        // Realmの中身を確認するためのprint文
        print(Realm.Configuration.defaultConfiguration.fileURL!)

    } //更新(CRUDのU)終わり!


    @IBAction func delete() {

        // Realm使う宣言!
        let realm = try! Realm()

        // 取得したTodoリストのPassedNumber番目をeditData変数に代入
        let editData = todoList[passedNumber]

        // 削除のコード(番号を指定)
        try! realm.write {
            realm.delete(editData)
        }

        navigationController?.popViewController(animated: true)
    } //削除(CRUDのD)終わり!

}
◼️ストーリーボードの設定
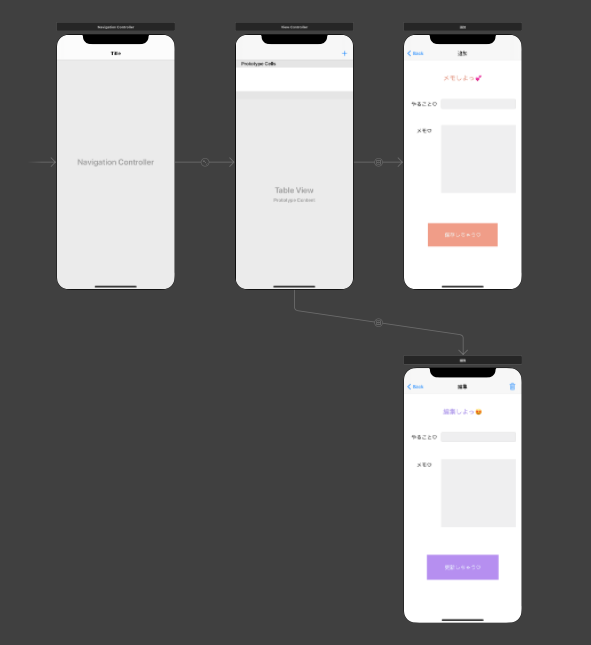
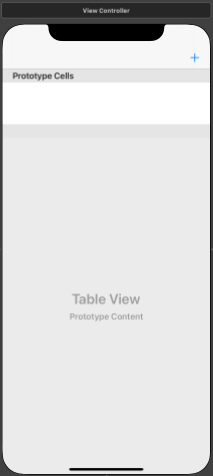
- ViewControllerにTableViewとTableViewCellを設定します。(identifilerは"Cell")
- AddViewController / EditViewControllerにTextFieldとTextViewを追加します。
- 追加・編集完了ボタンを追加します。
- 今回はこの3画面だけを使用します
全体
ViewController
AddViewController
EditViewController
*この辺の詳細はこちらの記事をご参照ください
👨💻SwiftでTableViewを使ってみよう
📱完成!
- 早速buildしてみましょう
- 項目を追加した後に、アプリを終了して、再起動してください
- 再起動時に、追加した項目が表示されていれば、データの永続化が出来ています!


