1. はじめに
Git Pagesとhexoという静的ページジェネレーターで、設置型ブログを無料で作ることができます。
1) Git Pages & 静的ページジェネレーターを使ったブログのメリット
- サーバーいらず、DBいらず、サーバーサイド開発いらず、それなりにちゃんとした自分のブログを持てる
- お金がかからず、無制限トラフィックで、ウェブページを提供できる
- カスタマイズが自由で、個性のあるブログを作れる(テーマ開発など)
- ブログの記事をファイルで作成するので、コード管理ができる
2) Git Pagesとは?
Githubで提供している、無料ウェブページホスティングサービスです。
html, css, jsなどの静的コンテンツのみですが、無料でウェブページをサービスできます。
3) Hexoとは?
node基盤の「静的ページゼネレーター」の一つです。
サーバーの動的処理なしに、リッチなウェブページやブログなどを生成してくれます。
4) 完成イメージ
以下のように、ブログを作り、一つの記事をポストします。

では、早速作って見ましょう。
2. Blogを作る手順
1) Hello World on Git Pages
Git Pages Manual
https://pages.github.com/
① ホスティング用のレポジトリ生成
{userid}.github.ioの名前でパブリック・レポジトリを生成します。
上記の規則で作成したレポジトリは、自動的にGit Pagesの機能により、ウェブホスティングされます。

② index.htmlをプッシュ
index.htmlを作り、{userid}.github.ioレポジトリにをプッシューします。
git clone https://github.com/{username}/{username}.github.io.git
cd {username}.github.io
touch index.html
git add index.html
git commit -m "first commit"
echo "Hello World" > index.html
git add index.html
git commit -m "second commit"
git push origin master
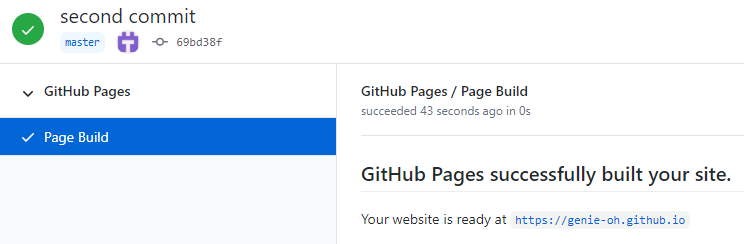
③ git page build結果確認
Github Actionを見ると、上げたindex.htmlがGit Pagesとしてビルドされていることを確認できます。
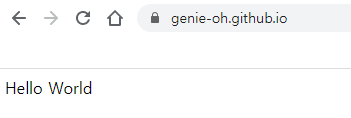
④ 確認
https://{username}.github.ioにアクセスすると、Hello Worldが確認できます。
これで、ウェブページのホスティングの準備ができました。
2) hexo 設置 & 設定 (静的ページゼネレーター)
Hexoを使うためには、まずnode&npmのインストールが必要です。
もし、インストールが必要な方は、以下の公式ページをご参考ください。
● nodejs with npm
https://nodejs.org/ja/
Hexoの公式 docs & Installationはこちらで参考できます。
https://hexo.io/docs/
① インストール
hexoをインストールします。
npm install -g hexo-cli
hexo init blog
cd blog
npm install
② hexo-deployer-git plugin インストール
One Commandで、githubにデプロイするためのプラグインを予めインストールします。
プラグインの詳細はこちらで確認できます。
npm install hexo-deployer-git --save
③ _config.yml 設定
基本的なconfig設定を行います。
- url
- Git PagesのURLを設定します。
- new_post_name
- Post記事の生成時のファイル名を設定します。ここは必須に変える必要は無いですが、datetimeをつけたほうが管理しやすいと思います。
- Deployment
- hexo-deployer-gitのpluginをインストールしたので、gitのデプロイ設定ができます。
- messageは、設定しないと基本メッセージとして、
Site updated: YYYY-MM-DD HH:mm:ssの形式でコミットメッセージが残ります。
diff --git a/_config.yml b/_config.yml

-url: http://yoursite.com
+url: https://{username}.github.io/

-new_post_name: :title.md # File name of new posts
+new_post_name: :year_:month_:day_:title.md # File name of new posts

 # Deployment
 ## Docs: https://hexo.io/docs/deployment.html
 deploy:
-  type: ''
+  type: git
+  repo: https://github.com/{username}/{username}.github.io
+  branch: master
これで、ブログの基本設定は終わりました。
3) 記事作成
記事を作成します。
① 記事のソース・マークダウン生成
hexo new {title}で、新しい記事が生成できます。
すると、以下のように新しいファイルが生成されます。
$ hexo new "first post"
INFO  Created: D:\Develop\_GitPages\blog\source\_posts\2020_07_04_first-post.md
② マークダウン・ファイル編集
生成された記事のマークダウンを開き、試しに以下のように変更します。
---
title: first post
date: 2020-07-04 18:52:00
tags:
    - hello world
category:
    - hello world
excerpt: welcome to my blog
---

Welcome to [Hexo](https://hexo.io/)! This is your very first post. Check [documentation](https://hexo.io/docs/) for more info. If you get any problems when using Hexo, you can find the answer in [troubleshooting](https://hexo.io/docs/troubleshooting.html) or you can ask me on [GitHub](https://github.com/hexojs/hexo/issues).

## Quick Start

### Create a new post

\`\`\` bash
$ hexo new "My New Post"
\`\`\`

More info: [Writing](https://hexo.io/docs/writing.html)

### Run server

\`\`\` bash
$ hexo server
\`\`\`

More info: [Server](https://hexo.io/docs/server.html)

### Generate static files

\`\`\` bash
$ hexo generate
\`\`\`

More info: [Generating](https://hexo.io/docs/generating.html)

### Deploy to remote sites

\`\`\` bash
$ hexo deploy
\`\`\`

More info: [Deployment](https://hexo.io/docs/one-command-deployment.html)
これで記事作成まで完了しました。
4) 確認・デプロイ
① Localでブログ確認
hexo serverコマンドを使うと、ウェブホスティングで公開する前に、ロケールで予めブログとコンテンツを確認できます。
$ hexo server
INFO  Start processing
INFO  Hexo is running at http://localhost:4000 . Press Ctrl+C to stop.
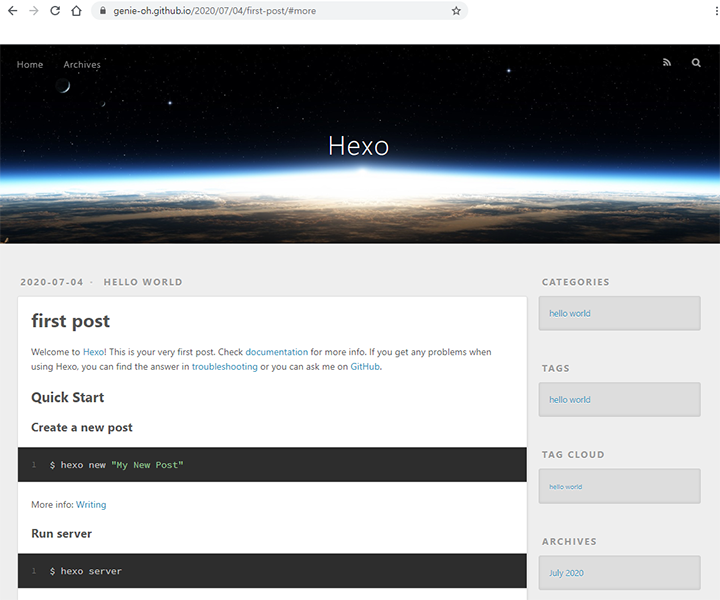
● localhost:4000
● localhost:4000/2020/07/04/first-post/#more
② Deploy to Git Pages
hexo deployコマンドを使うと、設定したGithubレポジトリに自動でプッシューしてくれます。
$ hexo deploy
INFO  Start processing
INFO  Files loaded in 101 ms
...
To https://github.com/{username}/{username}.github.io
 + 69bd38f...fa420ac HEAD -> master (forced update)
Branch 'master' set up to track remote branch 'master' from 'https://github.com/{username}/{username}.github.io'.
INFO  Deploy done: git
③ gitpagesのURLで確認
Git Pagesとして動作しているレポジトリのMasterブランチにプッシューしたので、Github Actionでビルドが完了していると、https://{username}.github.ioにアクセスすると、確認できます。
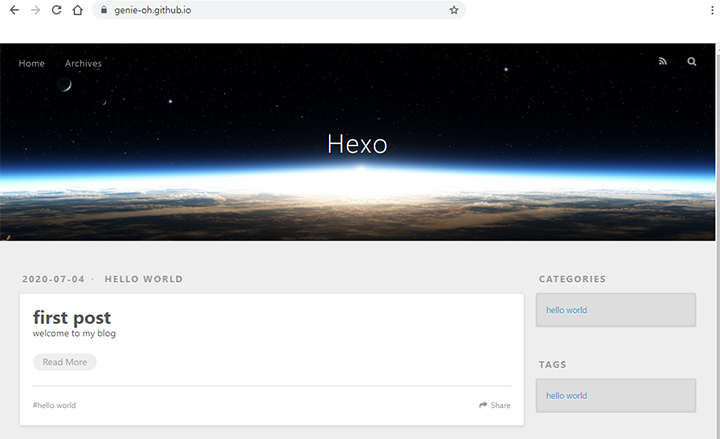

これで、自分のブログが出来上がりました。
Extra) テーマ変更
Hexoは、いろんなテーマから、いろんなデザインを適用できます。
● Hexo Theme
https://hexo.io/themes/
今回は、meilidu-hexoというテーマをダウンロードして、ブログのデザインを変えて見ます。
① テーマインストール
以下のレポジトリを参考し、テーマをインストールします。
https://github.com/HoverBaum/meilidu-hexo
git clone https://github.com/HoverBaum/meilidu-hexo.git themes/meilidu
② _config.ymlのtheme変更
テーマの設定を変更します。
diff --git a/_config.yml b/_config.yml

-theme: landscape
+theme: meilidu
③ deploy & GitPages 確認
hexo cleanで、既存のベルドされたソースを消し、hexo deployで、新しくでビルド・デプロイします。
Github Actionsで、Git Pagesビルドが完了すると、テーマが適用されたことを確認できます。
hexo clean
hexo deploy

後書き
今回は、Git Pagesとhexoで、簡単なブログを作って見ました。
公開されているテーマをすこしカスタマイズして使うことだけでも、それなりのデザインと機能を備えた設置型ブログを無料で構築&ホスティングできます。
Wordpressみたいな設置型ブログの機能には及ばずとも、完全に無料で設置型ブログを持つことが可能なのは、それなりに魅力的ではないでしょうか。
次は、Git Pagesと静的ページゼネレーターを利用して、簡単なウェブサービス的なものもチャレンジしてみたいですね。
皆様も、なにかGit Pagesと静的ページゼネレーターの良い活用事例があったら、ぜひ共有して頂けると嬉しいです。