前書き
開発環境には普段Windowsを使っていますが、本番環境はほぼLinuxです。
テスト環境(Linux)は全チーム共有のため、下記の制限があります。
- 個人専用が難しい
- 勝手な修正が不可
- 壊れたら、まずい
- 等々
そう考えれば、テスト環境を真似して、ローカルに環境構築すればいいんじゃないじゃないかと思います。
事前用意
- chocoがインストールされたこと。
- 管理者権限があるユーザを持ってる。
環境構築
コマンド一発で、構築できます。
cinst .\packages.config -y
※ packages.configの中身は下記のです。
各ソフトの説明には、ここで割愛します。
<?xml version="1.0" encoding="utf-8"?>
<packages>
    <!-- uncomment underline if you are using win7 -->
    <!-- <package id="powershell" /> -->
    <package id="virtualbox" packageParameters="/NoDesktopShortcut /NoQuickLaunch" />
    <package id="vagrant" />
    <package id="teraterm" />
    <package id="winscp" />
</packages>
注意:
- ネット環境によって、数分から数十分かかる可能性があります。(僕は3分かかりました。)
- インストール完了後に、再起動する必要があるかもしれません。
- vagrantがWindows7のデフォルト搭載するPowerShellをサポートしていないらしいです。Win7の方は、最新版のPowerShellをインストールしてください。
Linux環境へ
事前準備
Vagrantプラグインのインストール
vagrant plugin install vagrant-vbguest
vagrant plugin install vagrant-proxyconf
Linuxの起動(俺が大好きのCentos)
Vagrant定義ファイルを作成
ファイル名(Vagrantfile)で、作業フォルダに保存します。
# -*- mode: ruby -*-
# vi: set ft=ruby :

# All Vagrant configuration is done below. The "2" in Vagrant.configure
# configures the configuration version (we support older styles for
# backwards compatibility). Please don't change it unless you know what
# you're doing.
Vagrant.configure("2") do |config|

  # Every Vagrant development environment requires a box.
  config.vm.box = "centos/7"

  # Disable automatic box update checking.
  config.vm.box_check_update = true

  # Create a forwarded port mapping which allows access to a specific port
  # within the machine from a port on the host machine and only allow access
  # via 127.0.0.1 to disable public access
  config.vm.network "forwarded_port", guest: 80, host: 8080, host_ip: "127.0.0.1"
  config.vm.network "forwarded_port", guest: 22, host: 10022, host_ip: "127.0.0.1"

  # Create a private network, which allows host-only access to the machine
  # using a specific IP.
  config.vm.network "private_network", ip: "192.168.21.1"

  # Share an additional folder to the guest VM. The first argument is
  # the path on the host to the actual folder. The second argument is
  # the path on the guest to mount the folder. And the optional third
  # argument is a set of non-required options.
  config.vm.synced_folder ".", "/vagrant", type: "virtualbox"

  # Define the name of hostname
  config.vm.hostname = "myhost"

  config.vm.provider "virtualbox" do |vb|
    # Virtual box machine name
    vb.name = "centos7"

    # Define the groou of virtual box
    vb.customize [
      "modifyvm", :id,
      "--groups", "/centos"
    ]

    # Display the VirtualBox GUI when booting the machine
    vb.gui = false

    # Customize the amount of memory on the VM:
    vb.memory = "1024"
  end

  # Add the proxy config if you need.
  if Vagrant.has_plugin?("vagrant-proxyconf")
    # config.proxy.http     = "http://host:port/"
    # config.proxy.https    = "http://host:port/"
    # config.proxy.no_proxy = "localhost,127.0.0.1"
  end
end
※ centos以外のOSまたはCentosの他バージョンを欲しい方、Varant Cloudへ移動してください。
Linuxを起動
作業フォルダにCDして、下記のコマンドを実行します。
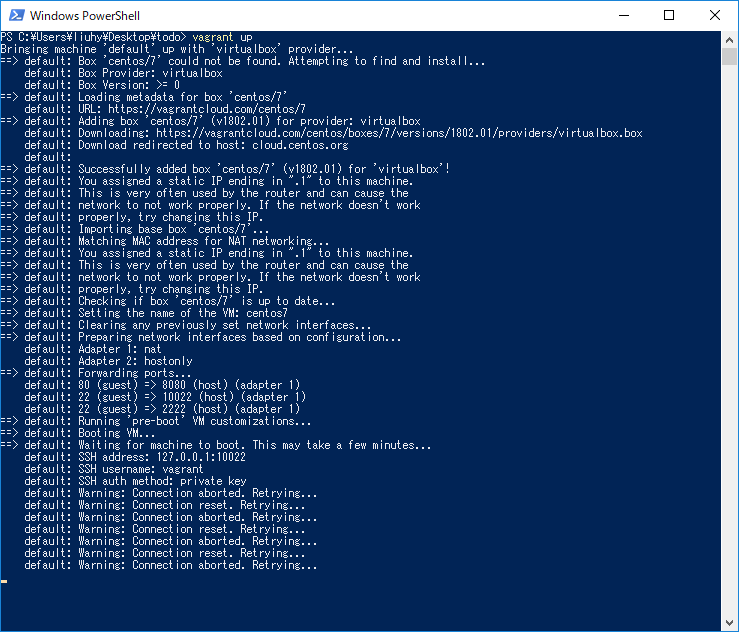
vagrant up
※ 初回目には、BOX(Vagrantのイメージファイル)をダウンロードするので、ネット環境によって、時間かかります。
※ 起動中のキャプチャ
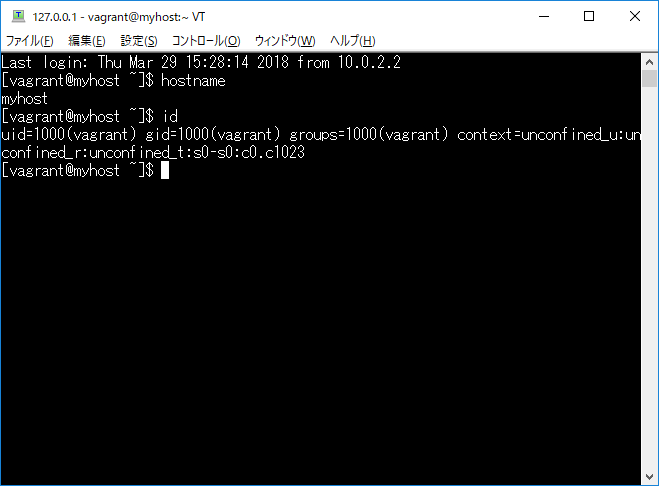
SSHからのアクセス
下記のTTLマクロを作業フォルダへ保存して、ttpmacro.exeで開いてください。
;=============================================
; Filename    : ssh_connect.ttl
; Description : SSH Auto login
; Author      : gekal
; Created     : 2018/03/30
; modified    :
;==============================================
;; 接続先ホスト/接続先ポート/ユーザ名/パスワード設定
HOSTADDR = '127.0.0.1'
HOSTPORT = '10022'
USERNAME = 'vagrant'
getdir KEYFILEPATH
strconcat KEYFILEPATH '\.vagrant\machines\default\virtualbox\private_key'
;==============================================
;; ①コマンド組立て
COMMAND = HOSTADDR
strconcat COMMAND ':'
strconcat COMMAND HOSTPORT
strconcat COMMAND ' /ssh /2 /auth=publickey /user='
strconcat COMMAND USERNAME
strconcat COMMAND ' /keyfile='
strconcat COMMAND KEYFILEPATH

;; ②接続
connect COMMAND

;; ③マクロ終了
end
アクセスしたら、この感じです。
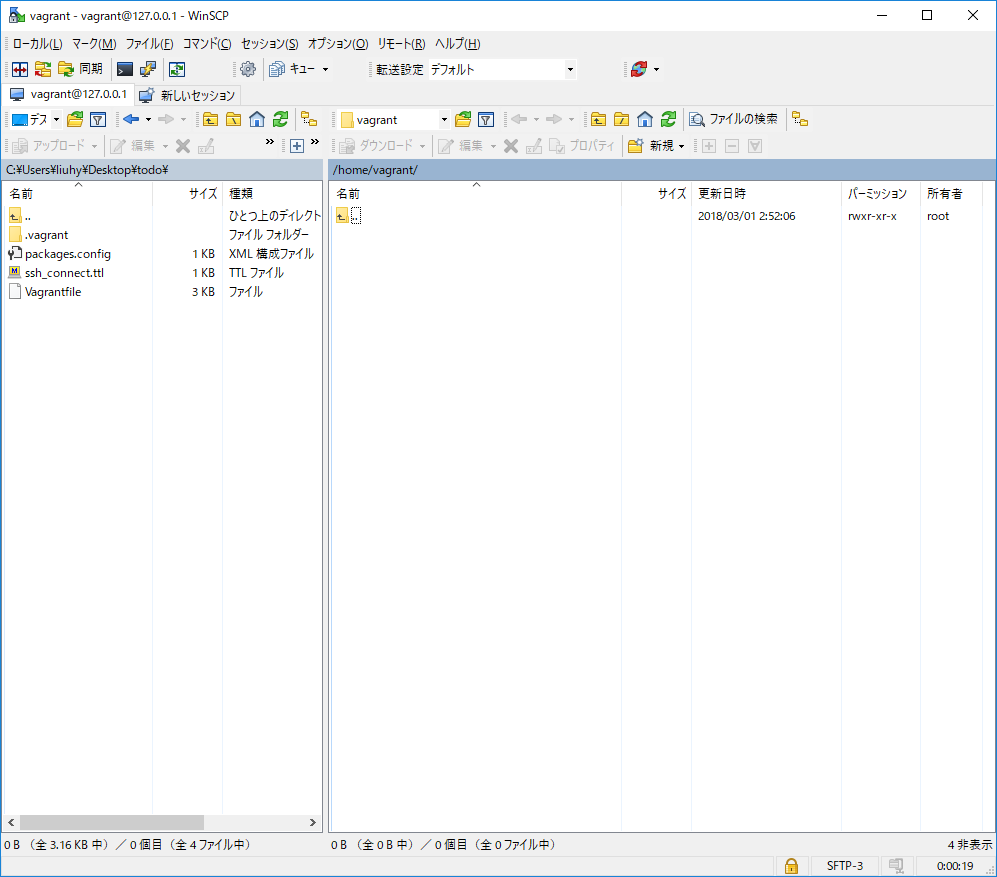
Winscpからのアクセス
接続情報
転送プロトコル:SFTP
ホスト名:127.0.0.1
ポート:10022
ユーザ:vagrant
認証鍵:..vagrant\machines\default\virtualbox\private_key
※ 接続中のイメージ
ダウンロード
上記のファイルが欲しいであれば、個人のGithubへ移動してください。
https://github.com/gekal/linux-vm-in-windows-over-vagrant
終わりに
便利なツールをして、環境構築も楽になれます。平常に、ツールに気を払って、少しずつ前に進めましょう。
技術的な記事を書けるつもりなんですが、やっぱり、環境がないと、何もできないでしょう。
手回りのツールを先に整理したほうがいいと思いながら、ツールの説明から書くことにしました。