はじめに
これはCTAPのお勉強をしたメモです。
WebAuthn(ウェブオースン)ではなく、CTAP(シータップ)であります。
本投稿は以下の投稿の続きです。
以下の資料を教科書にしてお勉強しています。
環境
- OS=Windows10 1803
- 開発環境=Visual Studio Pro 2017(15.8.5)
- Microsoft Visual C++ 2017
- Yubico セキュリティキー(青)

目次
1.概要
2.authenticatorClientPIN(0x06)コマンド
3.Response
4.先に知っておいたほうがいいこと
5.PINロックアウトのリトライ回数問い合わせ
6.初期PINを設定する
7.PINをYubikeyに送りつけて合っているかどうかチェックする
8.Yubikeyをリセットする
- 参考
1. 概要
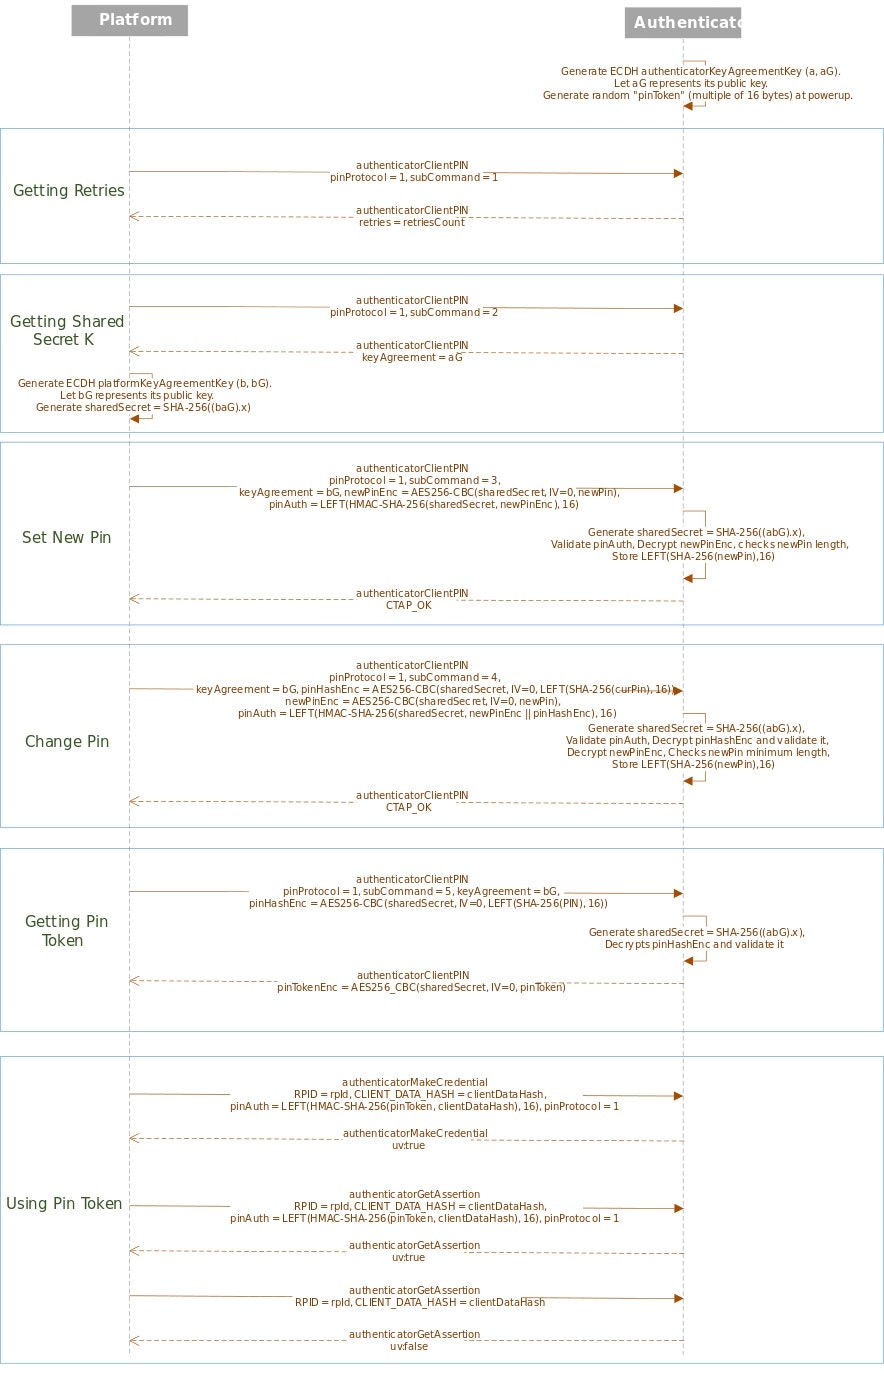
引用元5.5.8.3. Without pinToken in authenticatorGetAssertion
2. authenticatorClientPIN(0x06)コマンド
コマンドパラメータ
| Parameter Name | Key | 説明 |
|---|---|---|
| pinProtocol | 0x01 | 1固定。必須 |
| subCommand | 0x02 | 必須。subCommand Number。下表参照 |
| keyAgreement | 0x03 | 自身が生成したキーペアの公開鍵。setPIN、changePINで指定する。 |
| pinAuth | 0x04 | sharedSecretによって暗号化されたPIN。setPIN、changePINで指定する。 |
| newPinEnc | 0x05 | sharedSecretによって暗号化されたPIN。setPIN、changePINで指定する。 |
| pinHashEnc | 0x06 | sharedSecretによって暗号化されたPIN。getPINTokenで指定する。 |
| ※詳細 ⇒ 6.1. Commands |
subCommand Number
コマンドパラメータsubCommandには以下のいずれかのsubCommand Numberを指定します。
| subCommand Name | subCommand Number | 説明 |
|---|---|---|
| getRetries | 0x01 | PINロックアウトのリトライ回数を問い合わせる |
| getKeyAgreement | 0x02 | KeyAgreement を取得する |
| setPIN | 0x03 | PINを設定する |
| changePIN | 0x04 | PINを変更する |
| getPINToken | 0x05 | PINTokenを取得する |
| ※詳細 ⇒ 5.5. authenticatorClientPIN (0x06) |
3. Response
| Member Name | Key | 説明 |
|---|---|---|
| keyAgreement | 0x01 | getKeyAgreement応答 |
| pinToken | 0x02 | getPINToken応答 |
| retries | 0x03 | getRetries応答 |
4. 先に知っておいたほうがいいこと
PINコマンドのところではここでだけ登場するワードがあります。
先にまとめて書いておきます。
- authenticatorKeyAgreement
- pinToken
- sharedSecret
(authenticator)KeyAgreement(Key)とは
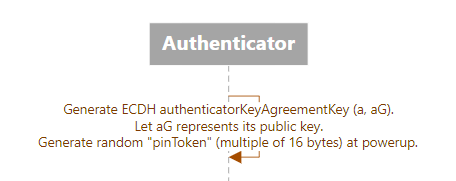
- Authenticatorに電源が投入されたときに内部で生成される鍵ペアのこと。
- 電源が投入されたとき、ということなので、Yubikeyを挿すたびに作り直される、ということなのだろう。
- ECDH P-256鍵ペアで、(a, aG)で表記されている。(a=秘密鍵、aG=公開鍵)
- この
aG(公開鍵)がPlatform(クライアント)に渡される。 - Platform(クライアント)は
aG(公開鍵)を使って sharedSecret を生成する。 - 仕様書 ⇒ 5.5.2. Authenticator Configuration Operations Upon Power Up
pinTokenとは
- KeyAgreementと同様にYubikeyに電源が投入されたときに生成されるもの。
- pinTokenはランダムな16byte値。
sharedSecretとは
sharedSecretとはPINを暗号する際の共通鍵です。
つまり、送信側(Platform-クライアント)と受信側(Authenticator-Yubikey)で同じ鍵を持ち、エンコードとデコードでは同じ鍵を使います。
CTAPではECDHの鍵共有プロトコルで共通鍵を生成し、これをsharedSecretとして、PINを暗号化して交換します。
要は、共通鍵のしくみだけれども、共通鍵自体の交換はしないのでセキュアである、ということのようです。
sharedSecretの作り方
仕様書では5.5.4. Getting sharedSecret from Authenticatorに書いてあります。
- Authenticator側:ECDH P-256 キーペアを生成します。(AuthenticatorKeyAgreementKey)
- Platform側:ECDH P-256 キーペアを生成します。(PlatformKeyAgreementKey)
- AuthenticatorKeyAgreementKeyの公開鍵
aGとPlatformKeyAgreementKeyの公開鍵bGを互いに交換します。(両者aG``bGを持つ) - Platform側:**SHA-256((baG).x)**してsharedSecretを生成します。
- Authenticator側:同様に**SHA-256((baG).x)**してsharedSecretを生成します。
- この方法により生成されたsharedSecretは不思議なことに同じ32byteデータとなり、このデータを共通鍵として以降利用します。
sharedSecretの使い方
- Set New Pin(初期PIN設定),Change PIN(PIN変更)コマンド:sharedSecretでPINを暗号化して指定する。
- Get PIN Tokenコマンド:PINのハッシュをsharedSecretで暗号化してAuthenticatorに送信してpinTokenを取得する。(取得したpinTokenはPIN認証した証拠です。makeCredential,GetAssertionコマンドにはPINではなくpinTokenを指定します)
5. PINロックアウトのリトライ回数問い合わせ
c:\work>retries.exe \\?\hid#vid_1050&pid_0120#6&1b5e4874&0&0000#{4d1e55b2-f16f-11cf-88cb-001111000030}
5 ← 5回、という意味
authenticatorClientPIN(0x06)コマンドでsubCommandにgetRetries(0x01)でPINロックのリトライ回数を得ることができます。
※PINの入力を間違うとカウンタが-1されて、0になるとAuthenticatorがロックされるやつです。PIN入力に成功するとカウンタはMAXまで回復ますが、いったんロックされるとリセットしないとダメです。
コマンドは以下の通り。
{
  // 0x01:pinProtocol = 1固定
  1: 1,
  // 0x02:subCommand = 0x01:getRetries
  2: 1
}
{
  // 0x03:retries = 5回
  3: 5
}
6. 初期PINを設定する
// PINが設定されていないAuthenticatorに対してPIN=1234にセットする
c:\work>setpin.exe 1234 \\?\hid#vid_1050&pid_0120#6&1b5e4874&0&0000#{4d1e55b2-f16f-11cf-88cb-001111000030}
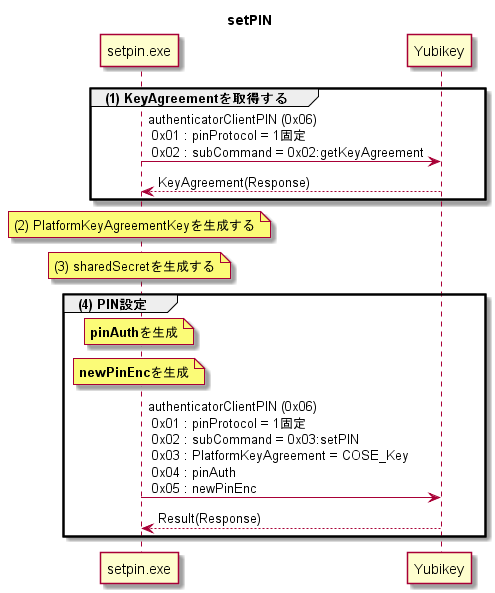
処理概要
(1) AuthenticatorKeyAgreementKeyを取得する
(2) PlatformKeyAgreementKeyを生成する
(3) sharedSecretを生成する
(4) PIN設定

(1)AuthenticatorKeyAgreementKeyを取得する
Authenticatorから公開鍵を取得します。
authenticatorClientPIN(0x06)コマンド、subCommandには0x02:getKeyAgreementを指定します。
{
  // 0x01:pinProtocol = 1固定
  1: 1,
  // 0x02:subCommand = 0x02:getKeyAgreement
  2: 2
}
{
  // 0x01 : keyAgreement (Authenticator public key in COSE_Key format. )
  1: {
      1: 2,
      3: -25,
      -1: 1,
      -2: h'73F9BE8101091A83CA35550D9E1BE509B43855F51E72B545137DCCFDEE6A4F98',
      -3: h'6B60E0BF603FA18D934B65F9D6D09390734BC55F3DB12DFB0FA8213E54738C7F'
    }
}
keyAgreementとして、COSEエンコードされた鍵情報が返ってきます。
これをデコードするとこうなります
{
  "kty":"EC",
  "alg": ECDH-ES + HKDF-256,
  "crv":"P-256",
  "x":"73F9BE8101091A83CA35550D9E1BE509B43855F51E72B545137DCCFDEE6A4F98"
  "y":"6B60E0BF603FA18D934B65F9D6D09390734BC55F3DB12DFB0FA8213E54738C7F"
}
- kty:EC ⇒ JWK
- alg:-25 ⇒ IANA-COSE-ALGS-REG
(2)PlatformKeyAgreementKeyを生成する
前述の方法で自分自身のKeyAgreement(キーペア)を生成します。
ここで生成したキーペアの公開鍵を次に送るauthenticatorClientPINコマンドの0x03:keyAgreementに設定します
(3)sharedSecretを生成する
前述の方法でsharedSecretを生成します。
(4)PIN設定
authenticatorClientPIN(0x06)コマンド、subCommandには0x03:setPINを指定します。
色々パラメータがあります。
{
  // 0x01:pinProtocol : 1固定
  1: 1,
  // 0x02:subCommand :  0x03:setPIN
  2: 3,
  // 0x03:keyAgreement : COSE_Key
  3: {
    1: 2,       // "kty":"EC",
    3: -7,      // "alg":"ES256",
    -1: 1,      // "crv":"P-256",
    -2: h'72F1CED77FE97771967B06E0D75E2D0FB82CC6F45E55C26DEA6A54C403826D77',
    -3: h'EF9A28BC5914B936FC7BA8E4E2DAC07ACFDB0E6970B278FC5975EB4C3033F004'
    },
  // 0x04:pinAuth
  4: h'E1938FC8AB5567C2A1D7AF14D327C1F9',
  // 0x05:newPinEnc
  5: h'B59D2E29072575DBD1AD433F1D99E0FA69EE7135C31B30AC1F693B2DD3EBA7EB10D6C03B168EC7239650921FDEB7C09D050A0BFF9AF435410F4C697F29DCFAAB'
}
00 ← データなし、ステータスコードのみで00であれば成功
パラメータ 0x03:keyAgreement
先ほど生成したPlatformKeyAgreementKeyの公開鍵を設定します。
パラメータ 0x04:pinAuth
LEFT(HMAC-SHA-256(sharedSecret, newPinEnc), 16)
newPinEnc: AES256-CBC(sharedSecret, IV=0, newPin)
だそうで...
訳すと
- newPinを暗号化する。
- pinは64byteになるように後ろに0x00を詰める(パティングする)
- sharedSecretで暗号化する
- 暗号化方式は
AES256 CBC - ブロックサイズは128ビット
- 初期化ベクタは0x00 × 16byte
- パディング無し
- sharedSecretと暗号されたPINのHMAC-SHA256を得る(32byte)
- このHMACの先頭16byteをpinAuthとする
パラメータ 0x05:newPinEnc
pinを暗号化したもの。
newPinEnc: Encrypted newPin using sharedSecret: AES256-CBC(sharedSecret, IV=0, newPin).
During encryption, newPin is padded with trailing 0x00 bytes and is of minimum 64 bytes length. This is to prevent leak of PIN length while communicating to the authenticator. There is no PKCS #7 padding used in this scheme.
訳すと
- pinは64byteになるように後ろに0x00を詰める(パティングする)
- sharedSecretで暗号化する
- 暗号化方式は
AES256 CBC - ブロックサイズは128ビット
- 初期化ベクタは0x00 × 16byte
- パディング無し
7. PINをYubikeyに送りつけて合っているかどうかチェックする
cred.exe -P 1111 -i C:\work\cred_out\creid.dat -k C:\work\cred_out\pubkey.pem \\?\hid#vid_1050&pid_0120#6&1b5e4874&0&0000#{4d1e55b2-f16f-11cf-88cb-001111000030}
処理概要
- KeyAgreementを取得する ⇒ 省略
- pinTokenを取得する
pinTokenを取得する
暗号化したPINを送りつけてpinTokenがGETできればPINがあっていたということになります。
{
  // 0x01:pinProtocol : 1固定
  1: 1,
  // 0x05:subCommand : 0x05 getPINToken
  2: 5,
  // 0x03:keyAgreement
  3: {
    1: 2,
    3: -7,
    -1: 1,
    -2: h'D74E96BB2DCC3AD363487B07FA0498F8C78A6D8E67B2C1E9D0D76A8C8CEF24C6',
    -3: h'A740AA0127727A3F453D4F7494D2EC4413CE5ADB577EC7C3586B1B1C87EA795C'
    },
  // 0x06 : pinHashEnc
  6: h'7C0D83AE025D2A7D9CEEFE5F132069F3'
}
{
  // 0x02 : pinToken
  2: h'BF856405F09C7931A2C8AC868421666D'
}
パラメータ 0x06 : pinHashEnc
PINを暗号した16byteのデータです。
AES256-CBC(sharedSecret, IV=0, LEFT(SHA-256(PIN),16))
ということなので、pinAuthとほぼ同じですね。
8. Yubikeyをリセットする
PINを設定したり、変更したりしてるとロックアウトされたり、初期化したい時があります。
初期化用のCTAPコマンドは 5.6. authenticatorReset (0x07) であり、サンプルreset.exeもあるのですが、私の持っている青いYubikeyには効きませんでした。
fido_reset: FIDO_ERR_NOT_ALLOWED (0x30)
途方に暮れてwebを彷徨っていると素晴らしい情報が
⇒まんぷくになった YubiKey を YubiKey Manager でリセットしたメモ
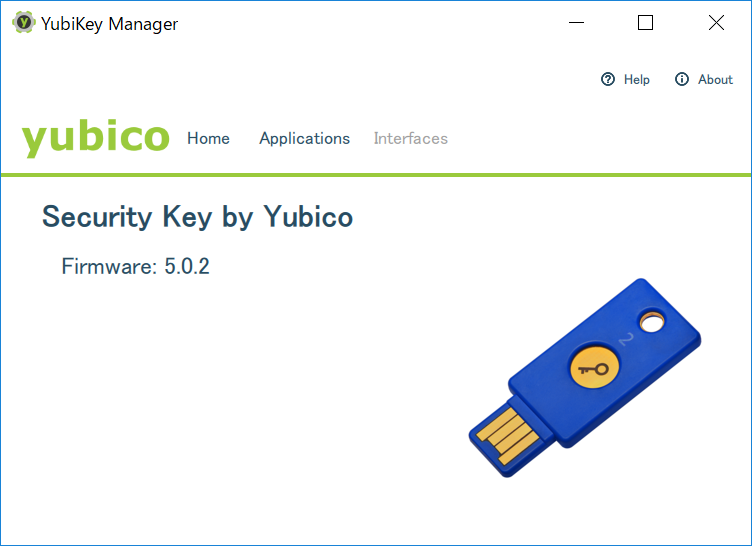
Yubikey Manager なる公式ツールでリセットすると初期化できました。

おつかれさまでした
shredSecretのところでかなりハマった・・・
参考
- Client to Authenticator Protocol (CTAP) Implementation Draft, February 27, 2018
- Yubico/libfido2
- CBOR playground
- Web Authentication: An API for accessing Public Key Credentials Level 1
W3C Candidate Recommendation, 7 August 2018 - SHA256ハッシュ生成ツール
- まんぷくになった YubiKey を YubiKey Manager でリセットしたメモ
- Yubikey Manager


