Material UI v5でのカスタマイズ法です。styledでのカスタマイズ法を書きます。
カスタマイズの仕方
TextFiledを例に使います。こんな感じです。
import { styled } from "@mui/system"
import { TextField } from '@mui/material'

const CustomTextFiled = styled(TextFiled)({
    backgroundColor: "black"
})
これで背景を黒色にすることができました。
次にアウトラインも黒にしてみましょう。Material UIのカスタマイズで躓くことがあるとすれば、ここですね。
上記にそのままborder: "none"といったように書いてもborderは消えません。なぜならTextFiled内のネスとしているコンポーネント内でスタイリングされているからです。
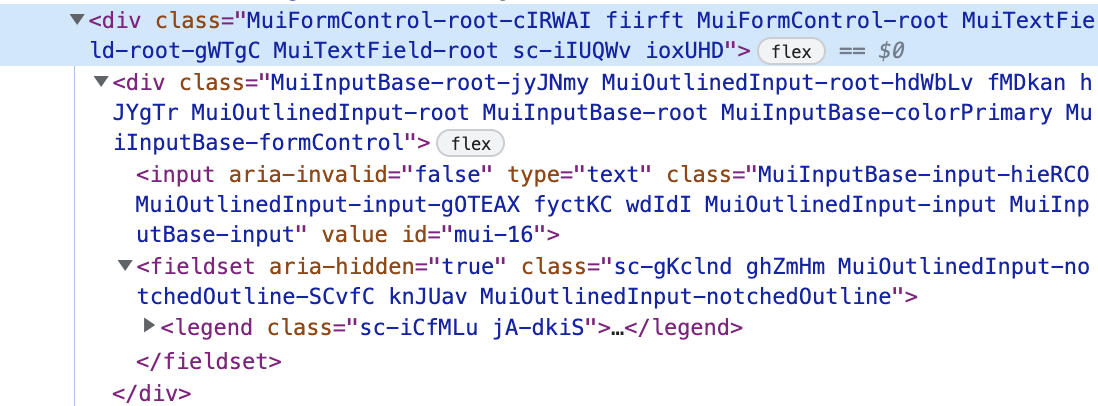
まず、開発者ツールから青いアウトラインのスタイリングをしている要素を探します。
filedsetにborder-colorがありました。どこでスタイリングされているか分かったのでコードに書きます。奥深い要素のスタイリングをするときはsxを使います。書き方はSCSSのような感じです。
import sx from "@mui/system/sx"

const CustomTextFiled = styled(TextFiled)(sx({
    backgroundColor: "black"
    "& .MuiOutlinedInput-root": {
        "&:not(:focus) fieldset": {
            border: "none",
        },
        "& fieldset": {
            borderColor: "none",
        },
        "&:hover fieldset": {
            borderColor: "none",
        },
    }
}))
これでTextFieldを真っ黒にすることができました。


