laravel11のアプリをrenderでデプロイしようとしたが詰まるところがかなり合ったためここに載せる
sailで構築したlaravelアプリケーションであってもデプロイできたため簡単にデプロイすることを目的とするならとてもおすすめです。
手順としては
Dockerfile作成->nginx.confファイル作成->renderの登録、database作成,webサービス作成->環境変数の設定
公式のファイルをフォークするやり方もあるがDockerfileとnginx.confファイルをコピーするだけで問題ない
手順1 Dockerfile作成
ルートディレクトリに以下dockerfileを作成
以下を引用しました。
https://github.com/render-examples/php-laravel-docker/commit/c4bc0ccc7b72554135fed30eb676c37e86a40e87#diff-3254677a7917c6c01f55212f86c57fbf
FROM richarvey/nginx-php-fpm:3.1.6

COPY . .

# Image config
ENV SKIP_COMPOSER 1
ENV WEBROOT /var/www/html/public
ENV PHP_ERRORS_STDERR 1
ENV RUN_SCRIPTS 1
ENV REAL_IP_HEADER 1

# Laravel config
ENV APP_ENV production
ENV APP_DEBUG false
ENV LOG_CHANNEL stderr

# Allow composer to run as root
ENV COMPOSER_ALLOW_SUPERUSER 1

CMD ["/start.sh"]
手順2 nginx.confファイルの作成
conf/nginx/nginx-site.confファイルを作成し以下をコピー
以下を参考にしました。
https://github.com/render-examples/php-laravel-docker/commit/c4bc0ccc7b72554135fed30eb676c37e86a40e87#diff-3254677a7917c6c01f55212f86c57fbf
server {
  # Render provisions and terminates SSL
  listen 80;

  # Make site accessible from http://localhost/
  server_name _;

  root /var/www/html/public;
  index index.html index.htm index.php;

  # Disable sendfile as per https://docs.vagrantup.com/v2/synced-folders/virtualbox.html
  sendfile off;

  # Add stdout logging
  error_log /dev/stdout info;
  access_log /dev/stdout;

  # block access to sensitive information about git
  location /.git {
    deny all;
    return 403;
  }

  add_header X-Frame-Options "SAMEORIGIN";
  add_header X-XSS-Protection "1; mode=block";
  add_header X-Content-Type-Options "nosniff";

  charset utf-8;

  location / {
      try_files $uri $uri/ /index.php?$query_string;
  }

  location = /favicon.ico { access_log off; log_not_found off; }
  location = /robots.txt  { access_log off; log_not_found off; }

  error_page 404 /index.php;

  location ~* \.(jpg|jpeg|gif|png|css|js|ico|webp|tiff|ttf|svg)$ {
    expires 5d;
  }

  location ~ \.php$ {
    fastcgi_split_path_info ^(.+\.php)(/.+)$;
    fastcgi_pass unix:/var/run/php-fpm.sock;
    fastcgi_index index.php;
    fastcgi_param SCRIPT_FILENAME $document_root$fastcgi_script_name;
    fastcgi_param SCRIPT_NAME $fastcgi_script_name;
    include fastcgi_params;
  }

  # deny access to . files
  location ~ /\. {
    log_not_found off;
    deny all;
  }

  location ~ /\.(?!well-known).* {
    deny all;
  }
}
手順3 scriptファイルを作成
scripts/00-laravel-deploy.shに以下をコピー
以下を引用しました
https://github.com/render-examples/php-laravel-docker/commit/c4bc0ccc7b72554135fed30eb676c37e86a40e87#diff-3254677a7917c6c01f55212f86c57fbf
#!/usr/bin/env bash
echo "Running composer"
composer install --no-dev --working-dir=/var/www/html

echo "Caching config..."
php artisan config:cache

echo "Caching routes..."
php artisan route:cache

echo "Running migrations..."
php artisan migrate --force
手順4 AppServiceProvider.phpを修正
AppServiceProvider.phpを以下のように修正
以下を引用しました
https://docs.render.com/deploy-php-laravel-docker
<?php

namespace App\Providers;

use Illuminate\Routing\UrlGenerator;
use Illuminate\Support\ServiceProvider;

class AppServiceProvider extends ServiceProvider
{
    /**
     * Register any application services.
     *
     * @return void
     */
    public function register()
    {
        //
    }

    /**
     * Bootstrap any application services.
     *
     * @param UrlGenerator $url
     * @return void
     */
    public function boot(UrlGenerator $url)
    {
        if (env('APP_ENV') == 'production') {
            $url->forceScheme('https');
        }
    }
}
以上でローカルでの作業は終わりです。
次からはrender内での作業になります。
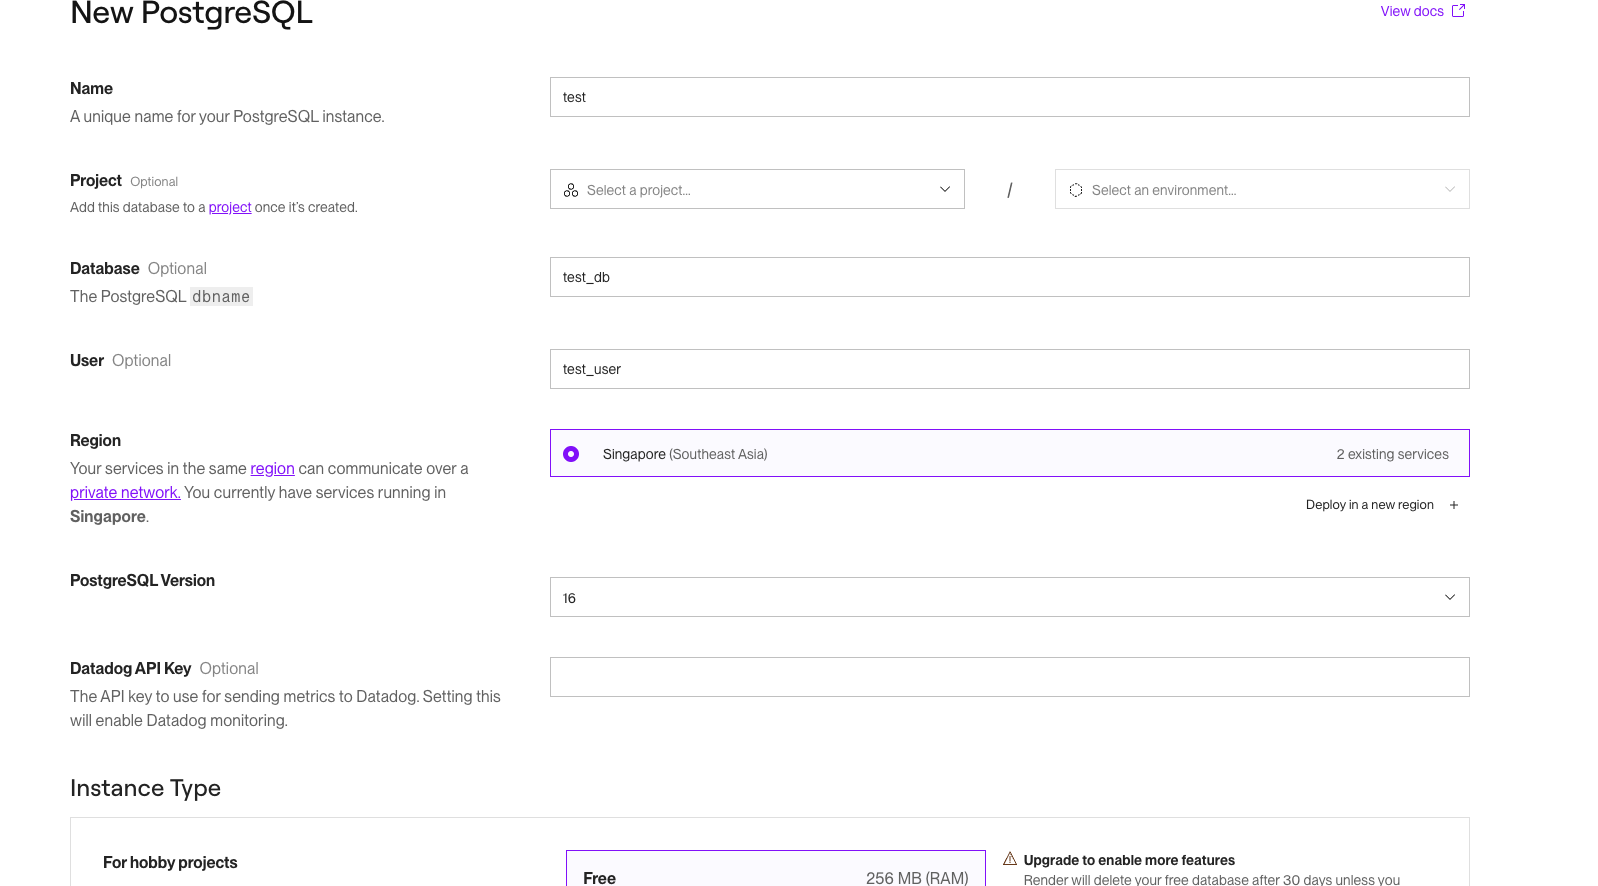
手順5 Renderに登録,New PostgreSQLからDATABASEを作成する
以下にアクセス後
https://dashboard.render.com/new/database

任意のdbnameなどを設定し、databaseを作成する。
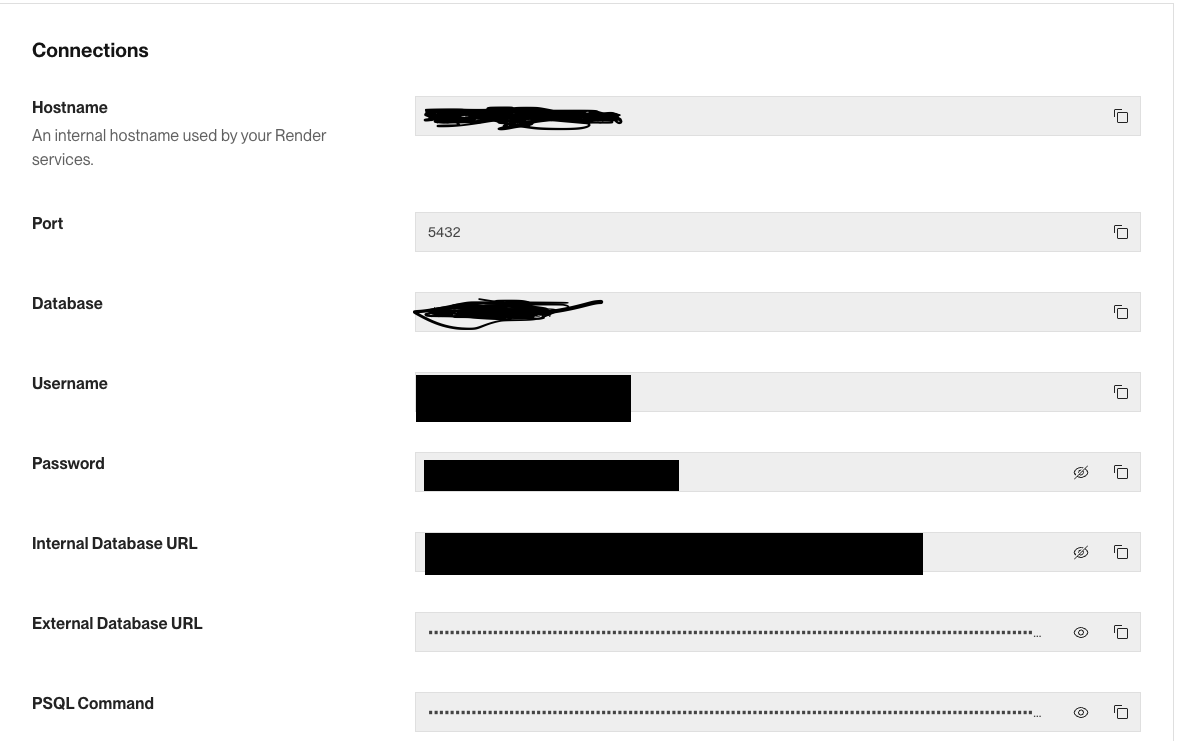
この時、DataBaseの設定は次の手順で必要になるため確認しておいてください。

ちなみにregionはsingapolが一番近いためおすすめです。
手順6 New->WebServiceから作成し、GitHubと連携して環境変数を設定してデプロイ
ここで一番詰まった。
公式のサンプルでは,
https://github.com/render-examples/php-laravel-docker
| Key | Value |
|---|---|
APP_KEY |
Copy the output of php artisan key:generate --show
|
DATABASE_URL |
The internal database url for the database you created above. |
DB_CONNECTION |
pgsql |
とあり,
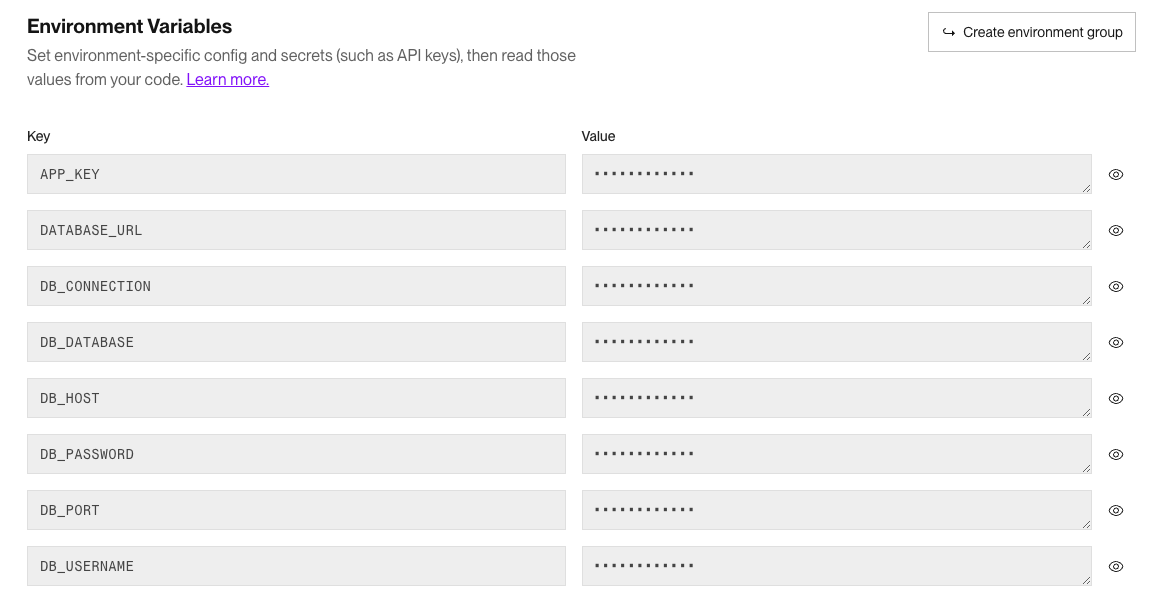
APP_KEY,DATABASE_URL,DB_CONNECTIONを設定することでデプロイできるとあったが、これだけだと500番のエラーでデプロイはできているがエラーが起きてしまっていることになった。
これを修正し回避するために、
前の手順で確認してもらったDBの設定を全て環境変数に設定する必要がある。

デプロイできた!
感想
こんなに簡単にデプロイできると思わなかった。また自動でmainブランチの変更をデプロイしてくれるためかなり楽だと思った。最初にデプロイしておくと後からデプロイするのが面倒ではなくなるため先にデプロイしておくのはかなり大事だと思った。
次はAWSでのデプロイにも挑戦したい。