概要
- Kerasを使ってネコの画像分類モデルを畳み込みニューラルネットワークで構築。(今回)
- Flaskを使って、htmlページからアップロードした画像を構築したモデルで推測する。
- AWSのEC2上に公開 →
ネコ画像分類App(停止中)
開発環境
Macbook air (Early 2015) メモリ 8GB
Python 3.5.5
Tensorflow 1.9.0
Keras 2.2.0
画像分類

KerasのCifar10をベースにCNN(畳み込みニューラルネットワーク)を構築。以下の記事を参考に、画像データはオックスフォード大学の提供している動物のデータを使用。
データ加工
画像データを224✕224それぞれの領域において平均のRGB値に変換。また、そのRGB値をnumpyのarray形式に変換し、train_test_splitをつかって訓練データとテストデータに分割。
data.py
from PIL import Image
import os, glob
import numpy as np
from sklearn import model_selection

classes = ['Abyssinian','Bengal', 'Birman', 'Bombay', 'British_Shorthair', 'Egypitan_Mau', 'Maine_coon', 'Persian',\
'Ragdoll', 'Russian_Blue', 'Siamese', 'Sphynx']
num_classes = len(classes)
image_size = 218

X_train = []
X_test = []
y_train = []
y_test = []

X = []
Y = []
for index, element in enumerate(classes):
    photos_dir = "/Volumes/SAMSUNG USB/images/" + element
    files = glob.glob(photos_dir + "/*.jpg")
    for i, file in enumerate(files):
        if i >= 200: break
        image = Image.open(file)
        image = image.convert("RGB")
        image = image.resize((image_size, image_size))
        data = np.asarray(image)
        X.append(data)
        Y.append(index)

X = np.array(X)
Y = np.array(Y)

X_train, X_test, y_train, y_test = model_selection.train_test_split(X, Y)

# X_train, X_test, y_train, y_test = model_selection.train_test_split(X, Y)
xy = (X_train, X_test, y_train, y_test)
np.save("/Volumes/SAMSUNG USB/flask.npy", xy)
学習モデルの構築

Macで実行するとものすごく時間かかるので、GPUを無料で使えるGoogle Colabolatoryにて実行。さきほど作成したflask.npyファイルをGoogle DriveにアップロードしてからGoogle Colabolatory上のローカルフォルダにおとす。
cifar10.ipynb
!pip install -U -q PyDrive

from pydrive.auth import GoogleAuth
from pydrive.drive import GoogleDrive
from google.colab import auth
from oauth2client.client import GoogleCredentials

auth.authenticate_user()
gauth = GoogleAuth()
gauth.credentials = GoogleCredentials.get_application_default()
drive = GoogleDrive(gauth)
id = 'xxxxxxxxxxxxxxxxxxxxx'
downloaded = drive.CreateFile({'id': id})
downloaded.GetContentFile('flask.npy')
cifar10.ipynb
from __future__ import print_function
import keras
from keras.datasets import cifar10
from keras.preprocessing.image import ImageDataGenerator
from keras.models import Sequential
from keras.layers import Dense, Dropout, Activation, Flatten, GlobalAveragePooling2D
from keras.layers import Conv2D, MaxPooling2D
from keras.utils import np_utils
import os
import numpy as np
from keras.models import Model
from resnet import ResNet50
from keras import optimizers

classes = ['Abyssinian','Bengal', 'Birman', 'Bombay', 'British_Shorthair', 'Egypitan_Mau', 'Maine_coon', 'Persian',\
'Ragdoll', 'Russian_Blue', 'Siamese', 'Sphynx']
batch_size = 64
num_classes = len(classes)
epochs = 25
data_augmentation = True
model_name = 'cat.h5'

# The data, split between train and test sets:
X_train, X_test, y_train, y_test = np.load("flask.npy")
X_train = X_train.astype("float") / 255
X_test = X_test.astype("float") / 255
# one-hot-vector
y_train = np_utils.to_categorical(y_train, num_classes)
y_test = np_utils.to_categorical(y_test, num_classes)

resnet = ResNet50(include_top=False, input_shape=(224, 224, 3), weights="imagenet")
h = Flatten()(resnet.output)
model_output = Dense(len(classes), activation="softmax")(h)
model = Model(resnet.input, model_output)

optimizer = optimizers.SGD(decay=1e-6, momentum=0.9, nesterov=True)

# compile the new model using a RMSProp optimizer
model.compile(optimizer = optimizer,
    loss = 'categorical_crossentropy',
    metrics = ['accuracy'])

X_train = X_train.astype('float32')
X_test = X_test.astype('float32')

if not data_augmentation:
    print('Not using data augmentation.')
    model.fit(X_train, y_train,
              batch_size=batch_size,
              epochs=epochs,
              validation_data=(X_test, y_test),
              shuffle=True)
else:
    print('Using real-time data augmentation.')
    # This will do preprocessing and realtime data augmentation:
    datagen_train = ImageDataGenerator(
        featurewise_center=False,  # set input mean to 0 over the dataset
        samplewise_center=False,  # set each sample mean to 0
        featurewise_std_normalization=False,  # divide inputs by std of the dataset
        samplewise_std_normalization=False,  # divide each input by its std
        zca_whitening=False,  # apply ZCA whitening
        zca_epsilon=1e-06,  # epsilon for ZCA whitening
        rotation_range=20,  # randomly rotate images in the range (degrees, 0 to 180)
        width_shift_range=0.,  # randomly shift images horizontally (fraction of total width)
        height_shift_range=0.,  # randomly shift images vertically (fraction of total height)
        shear_range=0.,  # set range for random shear
        zoom_range=0.2,  # set range for random zoom
        channel_shift_range=0.,  # set range for random channel shifts
        fill_mode='nearest',  # set mode for filling points outside the input boundaries
        cval=0.,  # value used for fill_mode = "constant"
        horizontal_flip=True,  # randomly flip images
        vertical_flip=True,  # randomly flip images
        rescale=None,  # set rescaling factor (applied before any other transformation)
        preprocessing_function=None,  # set function that will be applied on each input
        data_format=None,  # image data format, either "channels_first" or "channels_last"
        validation_split=0.0)  # fraction of images reserved for validation (strictly between 0 and 1)

    datagen_test = ImageDataGenerator(
        featurewise_center=False,  # set input mean to 0 over the dataset
        samplewise_center=False,  # set each sample mean to 0
        featurewise_std_normalization=False,  # divide inputs by std of the dataset
        samplewise_std_normalization=False,  # divide each input by its std
        zca_whitening=False,  # apply ZCA whitening
        zca_epsilon=1e-06,  # epsilon for ZCA whitening
        cval=0.,  # value used for fill_mode = "constant"
        horizontal_flip=False,  # randomly flip images
        vertical_flip=False,  # randomly flip images
        rescale=None,  # set rescaling factor (applied before any other transformation)
        preprocessing_function=None,  # set function that will be applied on each input
        data_format=None,  # image data format, either "channels_first" or "channels_last"
        validation_split=0.0)  # fraction of images reserved for validation (strictly between 0 and 1)


    # Compute quantities required for feature-wise normalization
    # (std, mean, and principal components if ZCA whitening is applied).
    datagen_train.fit(X_train)
    datagen_test.fit(X_test)

    # Fit the model on the batches generated by datagen.flow().
    model.fit_generator(datagen_train.flow(X_train, y_train,
                                     batch_size=batch_size),
                        epochs=epochs,
                        validation_data=(X_test, y_test),
                        workers=4)

# Save model and weights
model.save('cat.h5')

# Score trained model.
scores = model.evaluate(X_test, y_test, verbose=1)
print('Test loss:', scores[0])
print('Test accuracy:', scores[1])
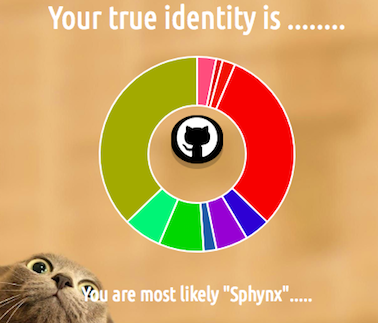
学習モデルの精度はこんな感じ
Test loss: 1.0349359902468596
Test accuracy: 0.7563636361468922
最後にcat.h5をGoogle Driveに保存して学習モデルの構築は終了
cifar10.ipynb
from pydrive.auth import GoogleAuth
from pydrive.drive import GoogleDrive
from google.colab import auth
from oauth2client.client import GoogleCredentials

auth.authenticate_user()
gauth = GoogleAuth()
gauth.credentials = GoogleCredentials.get_application_default()
drive = GoogleDrive(gauth)
upload_file = drive.CreateFile()
upload_file.SetContentFile("cat.h5")
upload_file.Upload()
長くなったので、FlaskとEC2に関しては、次の記事に投稿します!