記事の概要
「今日飲んだコーヒーをカウントするやつ」の制作記録です。
今回使ったのと同じ技術セットを使おうとする度に、すっかり忘れてググっているのに危機感を持ち、制作記録として記事にすることで、記憶の定着を図ります。
つくったものの概要
「今日飲んだコーヒーをカウントするやつ」です。
コーヒーを飲んだら(つくったら)Webページ上のボタンをぽちっとして、記録します。
それだけです。
技術
今回の制作物の裏側にある技術のキーワードは、Vue.js、Cloudflare Workers、Cloudflare D1、Wrangler、SQLite、TypeScriptです。
Cloudflare WorkersとPagesにデプロイすることを前提としたつくりにしていますが、今回はデプロイをせず、ローカルで動作を確認しました。
フロントエンド
わたしにとってはお馴染みのVue.jsを使いました。
フロントエンドで実現する機能は、
- Web APIでサーバーサイドからデータを取得し、今日のコーヒーの杯数を表示
- ボタンを押すとWeb APIでサーバーサイドへ新しいデータ(コーヒー飲んだよ!)を送信
シンプルなので、Vanilla JSでもいいですが、わたしがVanilla JSでの今回やりたいことの書き方を一切知らないため、課題を分割するためにVue.jsを安直に採用しました。
Vue.jsはCDNを利用しています。これもお手軽だからです。
サーバーサイド
Cloudflare Workersで構築します。
CLIであるWranglerで、Workersのアプリケーション作成、データベースのD1を作成します。
こちらは、Web APIを構築する部分となります。
- GETリクエストを受け取り、D1に保存されたコーヒーの記録データをフロントエンドへ渡す
- POSTリクエストを受け取り、コーヒーを飲んだ記録をD1へ保存
採用理由は、簡単に使用できる状況にあるCloudflare環境で完結するアプリにしたかったためです。
作り方
ディレクトリ作成
my-coffee-counterディレクトリを作成します。
ここに、backディレクトリとfrontディレクトリを作成し、ソースコードを管理しやすくします。
サーバーサイド
CLIでベースを導入
こちらに従って、Workersアプリのベースを導入します。
npm create cloudflare@latest -- back
実行結果(ご参考まで)
> npx
> create-cloudflare back


──────────────────────────────────────────────────────────────────────────────────────────────────────────
👋 Welcome to create-cloudflare v2.34.0!
🧡 Let's get started.
📊 Cloudflare collects telemetry about your usage of Create-Cloudflare.

Learn more at: https://github.com/cloudflare/workers-sdk/blob/main/packages/create-cloudflare/telemetry.md
──────────────────────────────────────────────────────────────────────────────────────────────────────────

╭ Create an application with Cloudflare Step 1 of 3
│
├ In which directory do you want to create your application?
│ dir ./back
│
├ What would you like to start with?
│ category Hello World example
│
├ Which template would you like to use?
│ type Hello World Worker
│
├ Which language do you want to use?
│ lang TypeScript
│
├ Copying template files
│ files copied to project directory
│
├ Updating name in `package.json`
│ updated `package.json`
│
├ Installing dependencies
│ installed via `npm install`
│
╰ Application created

╭ Configuring your application for Cloudflare Step 2 of 3
│
├ Installing @cloudflare/workers-types
│ installed via npm
│
├ Adding latest types to `tsconfig.json`
│ added @cloudflare/workers-types/2023-07-01
│
├ Retrieving current workerd compatibility date
│ compatibility date 2024-12-05
│
╰ Application configured

╭ Deploy with Cloudflare Step 3 of 3
│
├ Do you want to deploy your application?
│ no deploy via `npm run deploy`
│
╰ Done

────────────────────────────────────────────────────────────
🎉  SUCCESS  Application created successfully!

💻 Continue Developing
Change directories: cd back
Start dev server: npm run start
Deploy: npm run deploy

📖 Explore Documentation
https://developers.cloudflare.com/workers

🐛 Report an Issue
https://github.com/cloudflare/workers-sdk/issues/new/choose

💬 Join our Community
https://discord.cloudflare.com
────────────────────────────────────────────────────────────
アプリの動作確認
 npm run dev

> back@0.0.0 dev
> wrangler dev


 ⛅️ wrangler 3.95.0
-------------------

⎔ Starting local server...
[wrangler:inf] Ready on http://127.0.0.1:8787
[wrangler:inf] GET / 200 OK (9ms)
[wrangler:inf] GET /favicon.ico 200 OK (3ms)
╭──────────────────────────────────────────────────────────────────────────────────────────────────╮
│  [b] open a browser, [d] open devtools, [l] turn off local mode, [c] clear console, [x] to exit  │
╰──────────────────────────────────────────────────────────────────────────────────────────────────╯
これで、http://127.0.0.1:8787でHello World!が表示されます。
データベース作成
npx wrangler d1 create my-tools-db
実行結果(ご参考まで)
> npx wrangler d1 create my-tools-db
Need to install the following packages:
wrangler@3.95.0
Ok to proceed? (y) y


 ⛅️ wrangler 3.95.0
-------------------

✅ Successfully created DB 'my-tools-db' in region WNAM
Created your new D1 database.

[[d1_databases]]
binding = "DB"
database_name = "my-tools-db"
database_id = "abc123-xxxx-xxxx-xxxx-xxxxxxx"
表示されたデータベース情報をwrangler.tomlへ記載します。
データベースにテーブルを作成する
以下のSQL文を書いたファイルを実行して、作成したテーブルにデータを投入します。
DROP TABLE IF EXISTS CoffeeLogs;

CREATE TABLE IF NOT EXISTS CoffeeLogs (
	id INTEGER PRIMARY KEY AUTOINCREMENT,
	createdAt INTEGER NOT NULL,
	texts TEXT NOT NULL
);

INSERT INTO
	CoffeeLogs (id, createdAt, texts)
VALUES
	(
		1,
		strftime('%s', 'now') * 1000,
		'drinking a cup of coffee.'
	),
	(
		2,
		strftime('%s', 'now') * 1000,
		'drinking a cup of coffee.'
	),
	(
		3,
		strftime('%s', 'now') * 1000,
		'dropped the cup of coffee.'
	)
> npx wrangler d1 execute my-tools-db --local --file=./schema/schema.sql

 ⛅️ wrangler 3.95.0
-------------------

🌀 Executing on local database my-tools-db (abc123-xxxx-xxxx-xxxx-xxxxxxx) from .wrangler\state\v3\d1:
🌀 To execute on your remote database, add a --remote flag to your wrangler command.
🚣 3 commands executed successfully.
データの確認
今度はSQL文を直接実行して、投入したデータを確認します。
> npx wrangler d1 execute my-tools-db --local --command="SELECT * FROM CoffeeLogs"

 ⛅️ wrangler 3.95.0
-------------------

🌀 Executing on local database my-tools-db (abc123-xxxx-xxxx-xxxx-xxxxxxx) from .wrangler\state\v3\d1:
🌀 To execute on your remote database, add a --remote flag to your wrangler command.
🚣 1 command executed successfully.
┌────┬───────────────┬────────────────────────────┐
│ id │ createdAt     │ texts                      │
├────┼───────────────┼────────────────────────────┤
│ 1  │ 1734220301000 │ drinking a cup of coffee.  │
├────┼───────────────┼────────────────────────────┤
│ 2  │ 1734220301000 │ drinking a cup of coffee.  │
├────┼───────────────┼────────────────────────────┤
│ 3  │ 1734220301000 │ dropped the cup of coffee. │
└────┴───────────────┴────────────────────────────┘
API実装
チュートリアルの続きにしたがって、APIの実装を書いていきます。
export interface Env {
	DB: D1Database;
}

export default {
	async fetch(request, env, ctx): Promise<Response> {
		const { pathname } = new URL(request.url);

		if (pathname === "/api/coffee") {
			if (request.method === "POST") {
				// コーヒーを一杯飲みました
			}
			else { /* request.method === "GET" */
				// 今日のコーヒーを飲んだ記録をください
				const { results } = await env.DB.prepare(
					"SELECT * FROM CoffeeLogs",
				)
					.all();
				return Response.json(results);
			}
		}
		return new Response('Hello World!');
	},
} satisfies ExportedHandler<Env>;
ここまでで、http://127.0.0.1:8787/api/coffeeで以下のデータが取得できます。
[{"id":1,"createdAt":1734220301000,"texts":"drinking a cup of coffee."},{"id":2,"createdAt":1734220301000,"texts":"drinking a cup of coffee."},{"id":3,"createdAt":1734220301000,"texts":"dropped the cup of coffee."}]
ここでいったんフロントエンドへ行きます。
フロントエンド
ベースファイルを準備
frontディレクトリにindex.htmlを作成します。
VSCodeの!ショートカットで以下を準備します。
<!DOCTYPE html>
<html lang="en">
<head>
    <meta charset="UTF-8">
    <meta name="viewport" content="width=device-width, initial-scale=1.0">
    <title>Document</title>
</head>
<body>

</body>
</html>
Vue.jsのアプリ導入
ここを見ながら、ベースを追加します。
<script src="https://unpkg.com/vue@3/dist/vue.global.js"></script>

<div id="app">{{ message }}</div>

<script>
  const { createApp, ref } = Vue

  createApp({
    setup() {
      const message = ref('Hello vue!')
      return {
        message
      }
    }
  }).mount('#app')
</script>
VSCodeの拡張機能「Live Preview」を使って、リアルタイムでプレビューしながら書いていきます。
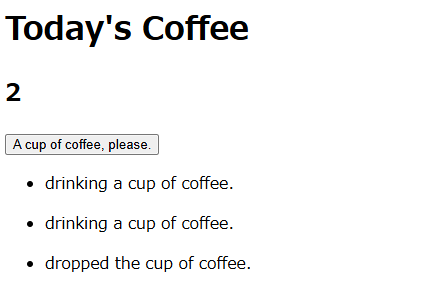
<div id="app">
    <h1>Today's Coffee</h1>
    <h2>{{ counter }}</h2>
    <button>A cup of coffee, please.</button>
    <ul>
        <li>log1</li>
        <li>log2</li>
    </ul>
</div>
表示側は適当に書きます。
見た目はほっぽり出します。
サーバーサイドからデータを取得
<script>
    const { createApp, ref, mounted, methods } = Vue;

    createApp({
        setup() {
            const message = ref('Hello vue!');
            const counter = ref(0);
            const logs = ref([]);
            return {
                message,
                counter,
                logs,
            }
        },
        mounted() {
            this.updateLogs();
        },
        methods: {
            async updateLogs() {
                const url = "http://127.0.0.1:8787/api/coffee";
                try {
                    const response = await fetch(url);
                    if (!response.ok) {
                        throw new Error(`レスポンスステータス: ${response.status}`);
                    }
                    const json = await response.json();
                    this.logs = json;
                    this.counter = this.logs.filter(log => log.texts === "drinking a cup of coffee.").length;
                }
                catch (error) {
                    console.error(error.message);
                }
            }
        }
    }).mount('#app')
</script>
こんな感じにして、表示側も実装しましたが、CORSポリシー違反があるため、サーバーサイドへ戻り、対応します。

サーバーサイド
CORSポリシー用のヘッダー追加
else { /* request.method === "GET" */
    // 今日のコーヒーを飲んだ記録をください
    const { results } = await env.DB.prepare(
        "SELECT * FROM CoffeeLogs",
    )
        .all();
    let response = Response.json(results);
    response.headers.set("Access-Control-Allow-Origin", "http://127.0.0.1:5500");
    return response;
}
それっぽく書きます。
これで、フロントエンドでコーヒー記録が表示されます。
フロントエンド
「コーヒーを飲んだよ!」処理を実装します。
サーバーサイドへPOSTする
JSON形式のデータを付属させて、POSTします。
POSTしたら、データを再取得して(GETして)、表示するコーヒーログを更新しました。
async drinkingCoffee() {
    const url = "http://127.0.0.1:8787/api/coffee";
    try {
        const response = await fetch(url, {
            method: "POST",
            body: JSON.stringify({texts: "drinking a cup of coffee."})
        });
        if (!response.ok) {
            throw new Error(`レスポンスステータス: ${response.status}`);
        }
        this.updateLogs();
    }
    catch (error) {
        console.error(error.message);
    }
},
サーバーサイド
POST処理を実装
普通にそれっぽく書き、動きました。
if (request.method === "POST") {
    // コーヒーを一杯飲みました
    const { texts } = await request.json();
    const { results } = await env.DB.prepare(
        "INSERT INTO CoffeeLogs (createdAt, texts) values (?, ?)",
    )
        .bind(new Date().getTime(), texts)
        .all();
    let response = Response.json(results);
    response.headers.set("Access-Control-Allow-Origin", "http://127.0.0.1:5500");
    return response;
}
ですが、以下で型関係のWarningが出ているので、型を宣言(?)しておきます(適切な表現を知らない)。

const { texts }: { texts: string } = await request.json();
どうやらこんな感じです。
フロントエンド
さらにPOST処理を追加
コーヒーカップをひっくり返して、コーヒーが飲めなかったときにカウンタを減らせるように、「コーヒーをこぼした」記録を追加する処理を書きます。
サーバー側のコメントは適宜書き換え、フロントエンドをどうにかします。
ボタンを追加します。
それぞれのボタンでWeb APIへリクエストを送る処理は一緒のため、関数を作り直します。
<button @click="doSomethingCoffee('drinking a cup of coffee.')">A cup of coffee, please.</button>
<button @click="doSomethingCoffee('dropped a cup of coffee.')">I dropped a cup of coffee.</button>
async doSomethingCoffee(something) {
    const url = "http://127.0.0.1:8787/api/coffee";
    const texts = something;
    try {
        const response = await fetch(url, {
            method: "POST",
            body: JSON.stringify({ texts })
        });
        if (!response.ok) {
            throw new Error(`レスポンスステータス: ${response.status}`);
        }
        this.updateLogs();
    }
    catch (error) {
        console.error(error.message);
    }
},
こんな感じでそれっぽくなります。
コーヒーをこぼした分をマイナス
this.counter = this.logs.filter(log => log.texts === "drinking a cup of coffee.").length - this.logs.filter(log => log.texts === "dropped a cup of coffee.").length;
日時表示の下準備
ついでに、日時も表示するようにします。
今日が何月何日かってことは何度教えられてもいいものです。
また、忘れていましたが、ログが今日のものだけになるようにフィルタリングします。
サーバーサイドであらかじめフィルタリングし、今までのリクエストだと、今日のデータだけを渡すようにします。
まずは、冒頭で使用したSQLファイルを書き換え、昨日分のデータもデータベースへ投入します。
INSERT INTO
	CoffeeLogs (id, createdAt, texts)
VALUES
	(
		1,
		strftime('%s', '2024-12-14') * 1000,
		'drinking a cup of coffee.'
	),
	(
		2,
		strftime('%s', 'now') * 1000,
		'drinking a cup of coffee.'
	),
	(
		3,
		strftime('%s', 'now') * 1000,
		'dropped the cup of coffee.'
	)
これを再度実行します。
npx wrangler d1 execute my-tools-db --local --file=./schema/schema.sql
日時でのフィルタリング
「今日」のデータのみを返すようにします。
else { /* request.method === "GET" */
    // 今日のコーヒーを飲んだ記録をください
    const startOfTimestamp = new Date().setUTCHours(0, 0, 0, 0);
    const endOfTimestamp = new Date().setUTCHours(23, 59, 59, 999);

    const { results } = await env.DB.prepare(
        "SELECT * FROM CoffeeLogs WHERE createdAt BETWEEN ? AND ?"
    )
        .bind(startOfTimestamp, endOfTimestamp)
        .all();
    let response = Response.json(results);
    response.headers.set("Access-Control-Allow-Origin", "http://127.0.0.1:5500");
    return response;
}
ここの「今日のデータ」の部分が適切な方法はよくわかりませんでした。
今回データベースには、エポックUnixタイムスタンプ(?)のUTCをミリ秒で保存しています。
つまり、1970-01-01からの経過ミリ秒数です。
setUTCHours()はUTC 1970-01-01 00:00:00からの経過ミリ秒を返すため、これで、ゼロ時時点と翌日ゼロ時未満時点を取得し、SQL文でBETWEENしています。
これが適切かはわかりませんが、ひとまずそれっぽく機能しました。
フロントエンド
日時表示
フロントエンド側でも日時表示をしましょう。
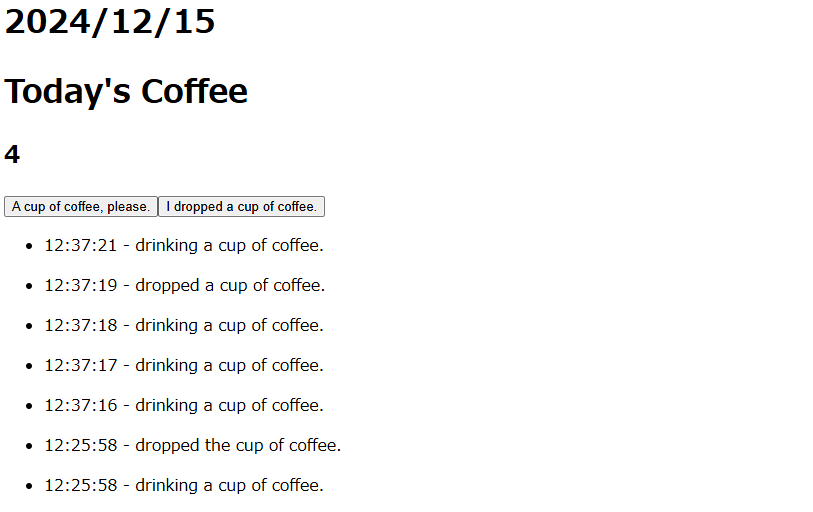
<div id="app">
    <h1>{{ today }}</h1>
    <h1>Today's Coffee</h1>
    <h2>{{ counter }}</h2>
    <button @click="doSomethingCoffee('drinking a cup of coffee.')">A cup of coffee, please.</button>
    <button @click="doSomethingCoffee('dropped a cup of coffee.')">I dropped a cup of coffee.</button>
    <ul v-for="log in logs">
        <li>{{ new Date(log.createdAt).toLocaleTimeString() }} - {{ log.texts }}</li>
    </ul>
</div>
ログの日時表示は、テンプレートでそのまま整形してしまいます。
冒頭に日付を表示したいので、日付用の変数も準備します。
const today = ref(new Date().toLocaleDateString();
ログの表示順を逆に
新しいログが最初に来るようにしましょう。
const json = await response.json();
this.logs = json.sort((a, b) => ((a.createdAt < b.createdAt) ? (1) : (-1)));
sortの書き方はいつも忘れますし、どっちが前で後かわかりませんので、ひとまず適当に不等号と1と-1を書きます。
そして、想定している表示になるよう、不等号をひっくり返すのがいつもです。
最終的に
最終的にこうなりました。
今日の成果
- Cloudflare Workersの導入の仕方がわかりました
- Cloudflare D1の導入の仕方がわかりました
- SQLite形式のSQL文での日時データから今日の日付のデータをすべて抽出することができました
- SQL文が少しわかりました
以上、ここまで読んでいただきありがとうございました。