はじめに
送信者や内容によって通知アイコンを変更したい、そんなときはCommunication Notifications を使用すれば良さそうです
本記事ではCommunication Notificationsの簡単な実装方法を記述していきます
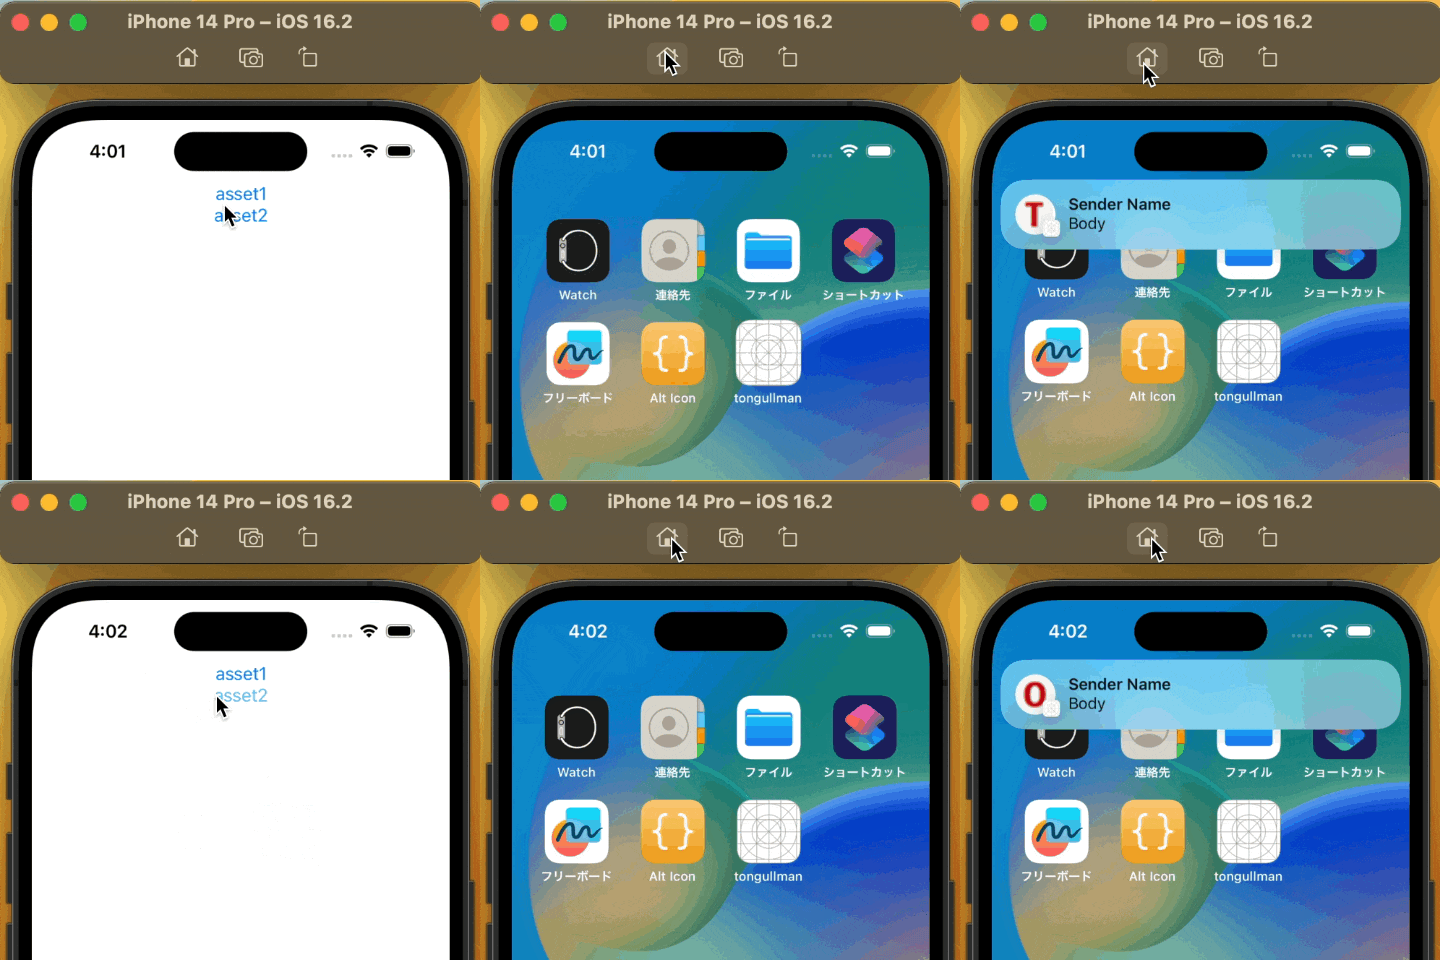
仕様はざっくりですが "通知アイコンが異なる2種類のローカル通知を送信できるアプリ" とします
実装方法
開発環境
- Xcode Version 14.2
- Swift Version 5.7.2
- macOS 13.0
- Apple M2
- iPhone 14 Pro iOS 16.2 (シミュレータ)
Capability追加
- プロジェクト設定画面 TARGETS から Communication Notification を利用するものを選択
- 上部タブメニュー "Signing & Capabilities" を選択
- "+ Capability" をクリック
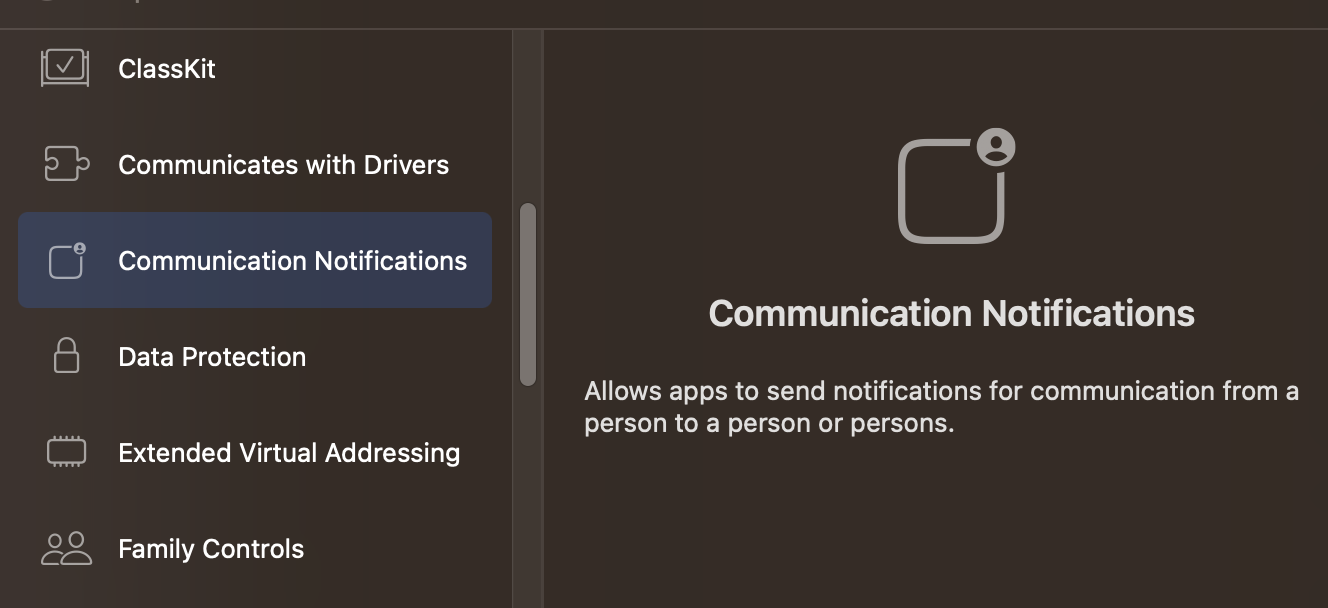
- Communication Notifications を選択


Communication Notifications が表示されるようになります

Target Properties更新
- プロジェクト設定画面 TARGETS から Communication Notification を利用するものを選択
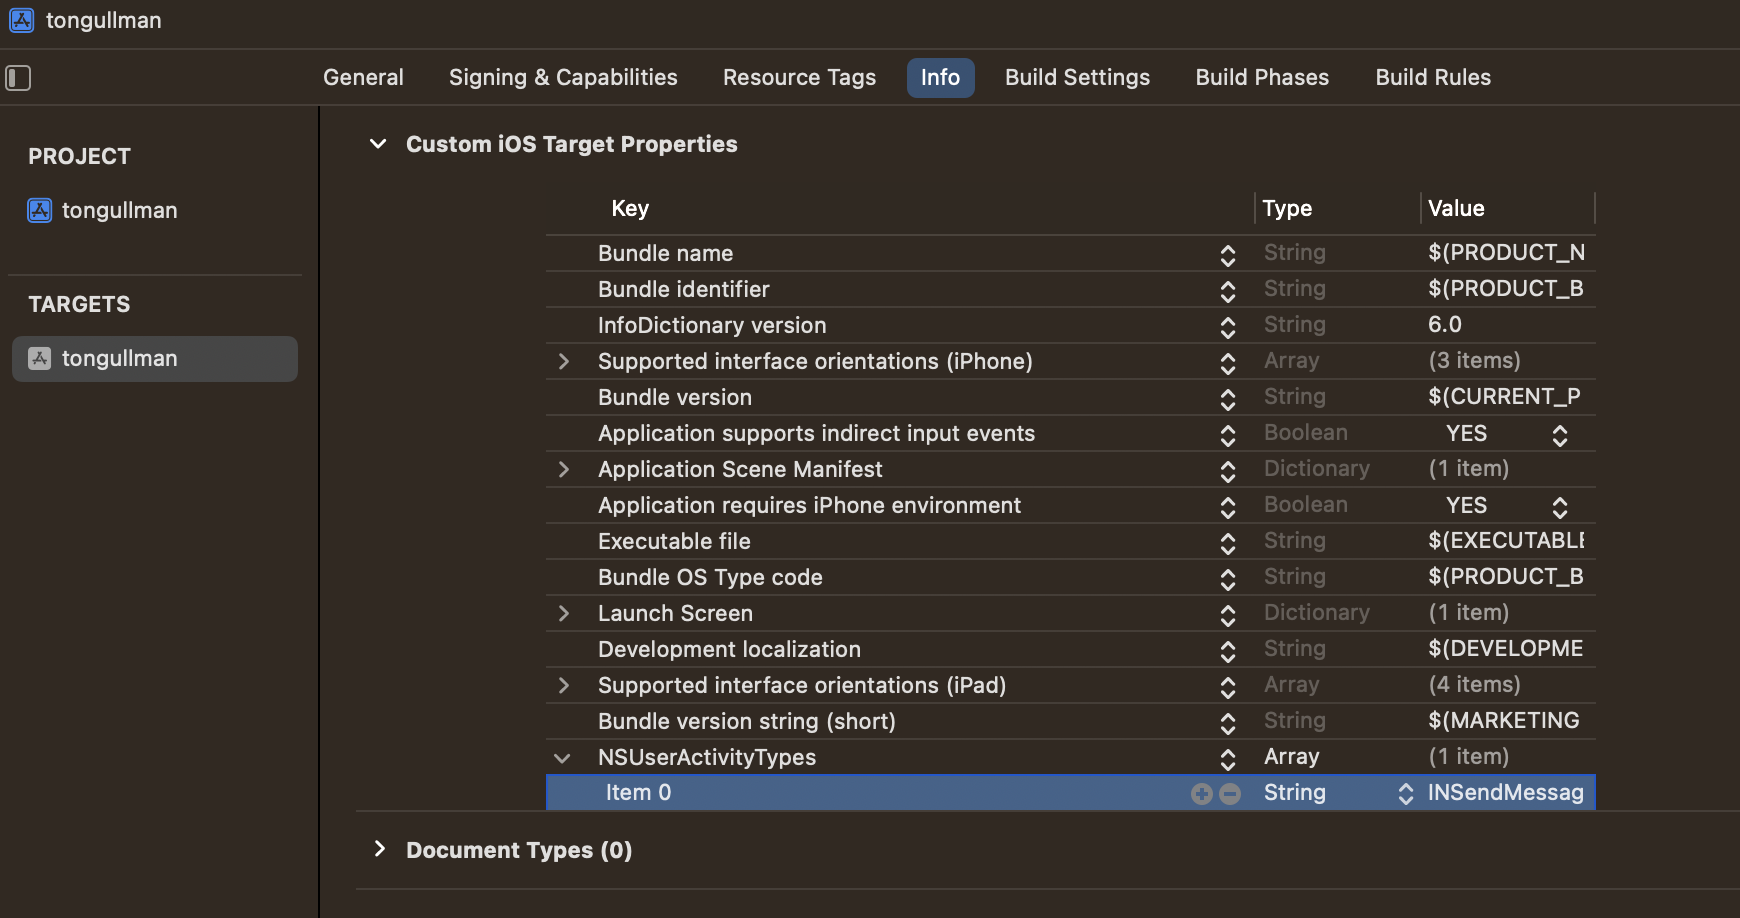
- 上部タブメニュー "Info" を選択
- Custom "" Target Properties に ArrayのNSUserActivityTypes を追加
- NSUserActivityTypes に使用する Intent を追加(今回はINSendMessageIntentのみ)
Intentを実装
コードを実装していきます
ここではよくある通知の実装に以下をします
- Import Intents
-
UNMutableNotificationContentをINSendMessageIntentでUpdating
以下、実装例です(本当に送信者Imageの変更のみなので諸々ご容赦ください)
import SwiftUI
import UserNotifications
import Intents

struct ContentView: View {
    init(){
        //通知許可取得用
        UNUserNotificationCenter.current().requestAuthorization(options: [.alert,.sound,.badge]) {(success, error) in
            if success{
                print("success")
            } else if let error = error {
                print(error.localizedDescription)
            }
        }
    }

    var body: some View {
        ScrollView {
            VStack{
                Button("asset1"){
                    SendNotification(imageName: "asset1")
                }
                Button("asset2"){
                    SendNotification(imageName: "asset2")
                }
            }
        }
    }
}

struct ContentView_Previews: PreviewProvider {
    static var previews: some View {
        ContentView()
    }
}

/**
 - Parameters:
    - imageName: Asset名
 */
func SendNotification(imageName: String){
    //通知内容を設定
    var content = UNMutableNotificationContent()
    content.title = "Title"
    content.body = "Body"
    content.sound = .default

    //送信者のアイコンを設定
    let avatar = INImage(imageData: UIImage(named: imageName)!.pngData()!)

    //送信者情報を登録
    var personNameComponents = PersonNameComponents()
    personNameComponents.nickname = "Sender Name"
    let senderPerson = INPerson(
        personHandle: INPersonHandle(value: "value", type: .unknown),
        nameComponents: personNameComponents,
        displayName: "Sender Name",
        image: avatar,
        contactIdentifier: nil,
        customIdentifier: nil,
        isMe: false,
        suggestionType: .none
    )

    //送信インテントを登録
    let intent = INSendMessageIntent(
        recipients: nil,
        outgoingMessageType: .outgoingMessageText,
        content: nil,
        speakableGroupName: INSpeakableString(spokenPhrase: "Group Name"),
        conversationIdentifier: "conversationId",
        serviceName: nil,
        sender: senderPerson,
        attachments: nil
    )

    //通知内容を更新
    do {
        content = try content.updating(from: intent) as! UNMutableNotificationContent
    } catch {
        print(error.localizedDescription)
    }

    let trigger = UNTimeIntervalNotificationTrigger(timeInterval: 3, repeats: false)
    let request = UNNotificationRequest(identifier: UUID().uuidString, content: content, trigger: trigger)
    UNUserNotificationCenter.current().add(request)
}
以上で通知アイコンが異なる2種類のローカル通知を送信することができました
INPersonやINSendMessageIntentを送信者や内容によって変更することが本来の使用方法だと思われます
また、INInteractionなどを使ってSiriとの連携ができるそうです
参考サイト
https://developer.apple.com/videos/play/wwdc2021/10091/
https://developer.apple.com/documentation/usernotifications/implementing_communication_notifications
https://qiita.com/mogmet/items/7d5c2d205acc37ded4d1
https://gist.github.com/Dexwell/dedef7389eae26c5b9db927dc5588905


