コンポーネント間の値の受け渡し
とりあえずサンプルを動かして覚えたい方向け。
詳しい解説はリンク先や読者のググり力に任せています。
Angularmaterialを使用していたりしますが、それについては割愛。
受け渡し方法
- Input,Outputを使う
- serviceを使う
- RxJSを使う
- urlに付与する
大体これらのどれかを使えば解決すると思う
Input,Outputを使う
渡すコンポーネントと受け取るコンポーネントが親子関係にある時に有効
親コンポーネントの中に子コンポーネントを埋め込んでるようなとき。
参考
Angularの@Input(), @Output()を理解する。
【Angular】コンポーネント間のデータの受け渡し方法
親コンポーネント
<div class="parent">
    <!-- app-parts-inputは子コンポーネント -->
    <app-parts-input
        [ctrName]="this.form" ph="名前を入力" la="名前"
    ></app-parts-input>
</div>
import { Component, OnInit } from '@angular/core';
import { FormControl } from "@angular/forms";

export class DataToSendComponent implements OnInit {
  form: FormControl;

  constructor() { }

  ngOnInit() {
    this.form = new FormControl("");
  }
}
子コンポーネント
<mat-form-field>
  <mat-label>{{ this.la }}</mat-label>
  <input
    matInput [placeholder]="ph" [formControl]="ctrName" (keyup)="output()"
  />
</mat-form-field>
import { Component, Input } from "@angular/core";
import { AbstractControl } from "@angular/forms";

export class InputPartsComponent {
  @Input() ctrName: AbstractControl;
  @Input() ph: string;
  @Input() la: string;

  constructor() { }

  output() {
    console.log(this.ctrName.value);
  }
}
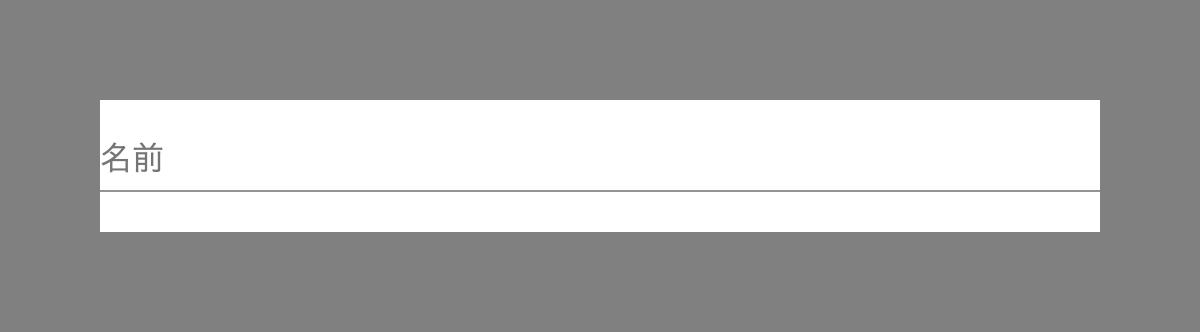
親コンポーネント(グレー)から子コンポーネント(白)へ、
・formControl
・placeholderの値
・labelの値
を渡して、子コンポーネントで使用しています。
次は、上記のコードに加えて、Outputで子コンポーネントから親コンポーネントへ値を渡してみます
親コンポーネント
<div class="parent">
    <app-parts-input [ctrName]="this.form" ph="名前を入力" la="名前" (childEvent)="getString($event)"></app-parts-input>
    <p>{{this.text}}</p>
</div>
import { Component, OnInit } from '@angular/core';
import { FormControl } from "@angular/forms";

export class DataToSendComponent implements OnInit {
  form: FormControl;
  text: string;
  constructor() { }

  ngOnInit() {
    this.form = new FormControl("");
  }

  getString(event: string) {
    console.log(event);
    this.text = event;
  }
}
子コンポーネント
html変更なし
import { Component, Input, Output, EventEmitter } from "@angular/core";
import { AbstractControl } from "@angular/forms";

export class InputPartsComponent {
  @Input() ctrName: AbstractControl;
  @Input() ph: string;
  @Input() la: string;
  @Output() childEvent = new EventEmitter<string>();
  constructor() { }

  output() {
    this.childEvent.emit(this.ctrName.value);//<-イベントを発火
  }
}
 子コンポーネントで打った文字が、親コンポーネントで表示されています。
受け渡しができましたね。
子コンポーネントで打った文字が、親コンポーネントで表示されています。
受け渡しができましたね。
serviceを使う
参考
Angular日本語ドキュメンテーション サービスの追加
[Angular] Angular CLI によるサービスの生成
サービス
//service
import { Injectable } from "@angular/core";

@Injectable({
  providedIn: "root"
})
export class CommonService {
  messege: string;

  constructor() {}

  setMessege(text: string) {
    this.messege = text;
  }
  getMessege() {
    return this.messege;
  }
}
親コンポーネント
<!-- html -->
<div class="parent">
  <h4>親コンポーネント</h4>
  <app-test></app-test>
</div>
//ts
import { Component } from "@angular/core";
import { CommonService } from "./common.service";

@Component({
  selector: "app-root",
  templateUrl: "./parent.component.html",
  styleUrls: ["./parent.component.scss"]
})
export class ParentComponent {
  parentMessege = "親からのメッセージ";

  constructor(private commonService: CommonService) {
    this.commonService.setMessege(this.parentMessege);//<-サービスにメッセージをセット
  }
}
子コンポーネント
<!-- html -->
<div class="child">
  <h4>子コンポーネント</h4>
  <button (click)="onClick()">メッセージを取得</button>
  <p>メッセージ:{{ messege }}</p>
</div>
import { Component, OnInit } from "@angular/core";
import { CommonService } from "../common.service";

@Component({
  selector: "app-child",
  templateUrl: "./child.component.html",
  styleUrls: ["./child.component.scss"]
})
export class ChildComponent implements OnInit {
  messege: string;
  constructor(private commonService: CommonService) {}
  ngOnInit() {}
  onClick() {
    this.messege = this.commonService.getMessege();//<-サービス上の値を取得する
  }
}
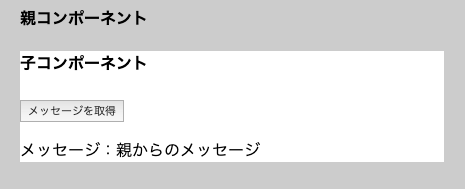
ボタンを押したタイミングで取得、
親コンポーネントで設定したメッセージを子コンポーネントで表示できました。
コンポーネントが親子関係に無くても受け渡しができます。
RxJSを使う
参考
RxJSの基本をまとめてみた
angularでObservable(ストリーム)のsubscribeを停止する方法
先ほどのサービスの例だと、受け渡し自体はできますが
値が入った瞬間に、コンポーネント間で値を受け渡して反映させる、という処理ができません。
サービスではボタンを押す、というアクションが必要でした。
値が入った瞬間に受け渡しを実現させるにはRxJSを利用すると可能です
インプットに入力した値を一文字入力する度に別コンポーネントへ送るサンプル
①インプットを表示するコンポーネント、②受け取った値を表示するコンポーネント、RxJSを利用するためのサービスを用意します
<!-- ①html -->
<div class="parent">
    <mat-form-field>
        <mat-label>名前</mat-label>
        <input matInput placeholder="名前" [formControl]="form" (keyup)="output()" />
    </mat-form-field>
    <app-child></app-child>
</div>
// ①ts
import { Component, OnInit } from '@angular/core';
import { FormControl } from "@angular/forms";
import {
   ObservableSampleService
 } from "../../service/observable-sample.service";

export class ObservableComponent implements OnInit {
  form: FormControl;
  constructor(private obss: ObservableSampleService) { }

  ngOnInit() {
    this.form = new FormControl("");
  }

  output() {
    this.obss.testSubject.next(this.form.value);
  }
}
<!-- ②html -->
<p>{{this.text}}</p>
//②ts
import { Component, OnInit, OnDestroy } from '@angular/core';
import { Observable, Subscription } from "rxjs";
import {
   ObservableSampleService
} from "../../../service/observable-sample.service";

export class ChildComponent implements OnInit, OnDestroy {

  Obs: Observable<string>;
  Subs: Subscription;
  text: string;
  constructor(private obss: ObservableSampleService) { }

  ngOnInit() {
    this.Obs = this.obss.testSubject$;
    this.Subs = this.Obs.subscribe(str => {
      this.text = str;
    });
  }

  ngOnDestroy() {
    if (this.Subs) {
      this.Subs.unsubscribe();
    }
  }
}
//service
import { Injectable } from '@angular/core';
import { Subject } from "rxjs";
@Injectable({
  providedIn: 'root'
})
export class ObservableSampleService {
  testSubject = new Subject<string>();
  constructor() { }

  get testSubject$() {
    return this.testSubject.asObservable();
  }
}

インプットに入力すると…

子コンポーネント(赤背景)に値が打った瞬間に表示されます。
urlに付与する
idごとのページを作りたいときなどに。
リンクをクリックしたら、リンクに指定したidに該当する情報を取得し、表示した場合のサンプル
リンクを表示するコンポーネント、ユーザー情報を表示するコンポーネント、データベースの情報を返却するサービスを用意します
//app.module.ts
import { BrowserModule } from "@angular/platform-browser";
import { NgModule } from "@angular/core";

import { AppComponent } from "./app.component";
import { UserInfoComponent } from "./user-info/user-info.component";
import { Routes, RouterModule } from "@angular/router";
import { DefaultComponent } from "./default/default.component";

const routes: Routes = [
  { path: "", component: DefaultComponent },
  { path: "user-info/:id", component: UserInfoComponent } // <-/:id 追加
];
@NgModule({
  declarations: [AppComponent, UserInfoComponent, DefaultComponent],
  imports: [BrowserModule, RouterModule.forRoot(routes)],
  providers: [],
  bootstrap: [AppComponent]
})
export class AppModule {}
<!-- app.component.html -->
<router-outlet></router-outlet>
//info.service
import { Injectable } from "@angular/core";

@Injectable({
  providedIn: "root"
})
export class InfoService {
  user = [
    { id: 1111, name: "花子" },
    { id: 1112, name: "太郎" }
  ];
  constructor() {}
  getUser(id: number) {//idが一致するユーザーの情報を返却する
    for (let i in this.user) {
      if (this.user[i].id === id) {
        return this.user[i];
      }
    }
  }
}
<!-- user-info.component.html -->
<p>私の名前は{{ userinfo.name }}です。</p>
//user-info.component.ts
import { Component, OnInit } from "@angular/core";
import { ActivatedRoute } from "@angular/router";
import { InfoService } from "src/app/service/info.service";
@Component({
  selector: "app-user-info",
  templateUrl: "./user-info.component.html",
  styleUrls: ["./user-info.component.scss"]
})
export class UserInfoComponent implements OnInit {
  userinfo;
  constructor(
    private infoservice: InfoService,
    private route: ActivatedRoute
  ) {}

  ngOnInit() {
    this.userinfo = this.getInfo();
  }

  /**
   * URLのidを元にデータを取得
   */
  getInfo() {
    const id = this.route.snapshot.paramMap.get("id");
    return this.infoservice.getUser(Number(id));
  }
}
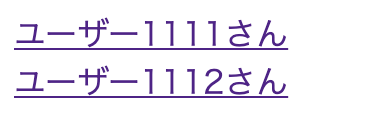 →リンクをクリックすると…
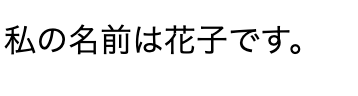 該当するuserIDの人の名前が表示されました。
以上、最低限の動作のサンプルでした。
皆さんの理解のきっかけになれば幸いです。