Phoenix Frameworkが公式サイトで公開しているPhoenix LiveViewについての動画をドキュメントにしてみました。
TimelineのCRUD機能をLiveViewで動かすところまで、実際にやってみます。
Phoenix Framework
https://www.phoenixframework.org/
Phoenix LiveViewについての動画
今回分は0:00 ~ 2:20に該当します。
https://www.youtube.com/watch?time_continue=203&v=MZvmYaFkNJI&feature=emb_logo
手順
1. phx.new
chirpと言う名前のプロジェクトを作成します。
mix phx.new chirp --live
途中で下記のように聞かれますのでyを入力してEnterを押します。
Fetch and install dependencies? [Yn] y
$ cd chirp
2. phx.gen.live
下記コマンドを実行する。
mix phx.gen.live Timeline Post posts username body likes_count:integer reposts_count:integer
chirp % mix phx.gen.live Timeline Post posts username body likes_count:integer reposts_count:integer
* creating lib/chirp_web/live/post_live/show.ex
* creating lib/chirp_web/live/post_live/index.ex
* creating lib/chirp_web/live/post_live/form_component.ex
* creating lib/chirp_web/live/post_live/form_component.html.leex
* creating lib/chirp_web/live/post_live/index.html.leex
* creating lib/chirp_web/live/post_live/show.html.leex
* creating test/chirp_web/live/post_live_test.exs
* creating lib/chirp_web/live/modal_component.ex
* creating lib/chirp_web/live/live_helpers.ex
* creating lib/chirp/timeline/post.ex
* creating priv/repo/migrations/20200912152556_create_posts.exs
* creating lib/chirp/timeline.ex
* injecting lib/chirp/timeline.ex
* creating test/chirp/timeline_test.exs
* injecting test/chirp/timeline_test.exs
* injecting lib/chirp_web.ex

Add the live routes to your browser scope in lib/chirp_web/router.ex:

    live "/posts", PostLive.Index, :index
    live "/posts/new", PostLive.Index, :new
    live "/posts/:id/edit", PostLive.Index, :edit

    live "/posts/:id", PostLive.Show, :show
    live "/posts/:id/show/edit", PostLive.Show, :edit


Remember to update your repository by running migrations:

    $ mix ecto.migrate
router.exを編集
  scope "/", ChirpWeb do
    pipe_through :browser

    live "/", PageLive, :index
  end
下記を追記して
    live "/posts", PostLive.Index, :index
    live "/posts/new", PostLive.Index, :new
    live "/posts/:id/edit", PostLive.Index, :edit

    live "/posts/:id", PostLive.Show, :show
    live "/posts/:id/show/edit", PostLive.Show, :edit
このようになる。
  scope "/", ChirpWeb do
    pipe_through :browser

    live "/posts", PostLive.Index, :index
    live "/posts/new", PostLive.Index, :new
    live "/posts/:id/edit", PostLive.Index, :edit

    live "/posts/:id", PostLive.Show, :show
    live "/posts/:id/show/edit", PostLive.Show, :edit
    live "/", PageLive, :index
  end
3. 起動
mix phx.server
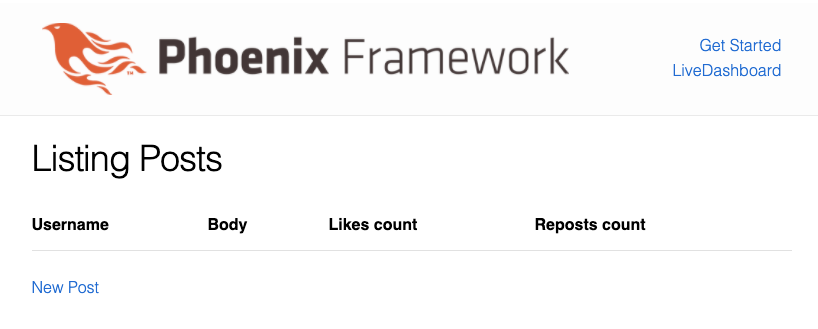
起動し、http://localhost:4000/posts にアクセスする。
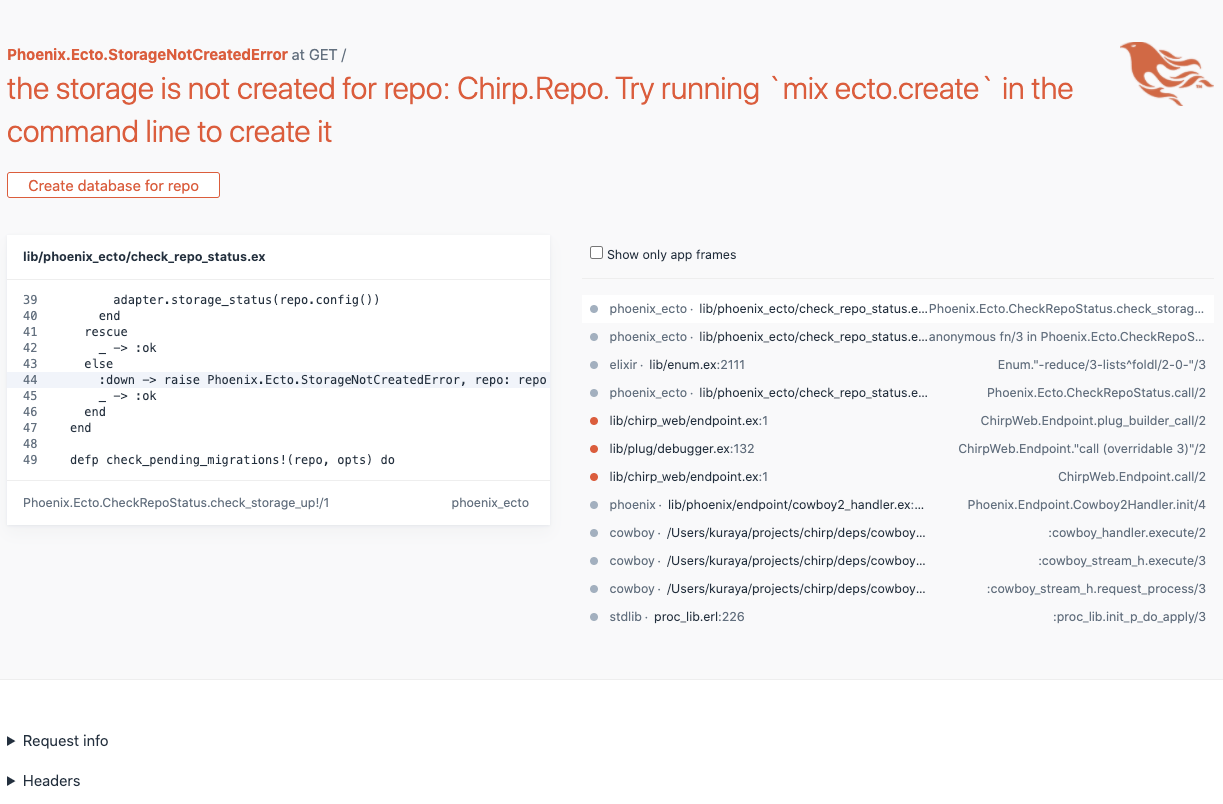
Create database for repoをクリックします。databaseが作られます。
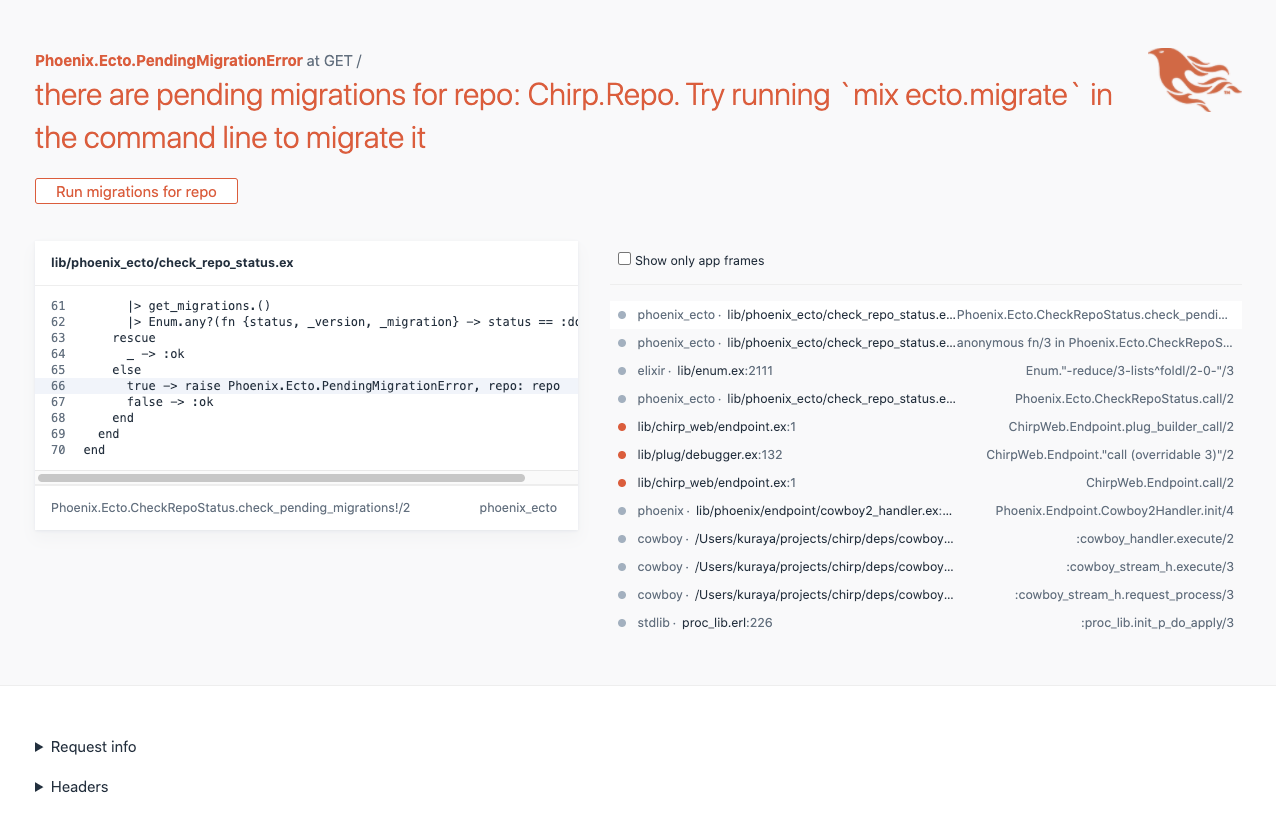
Run migrations for repoをクリックします。マイグレーションされます。
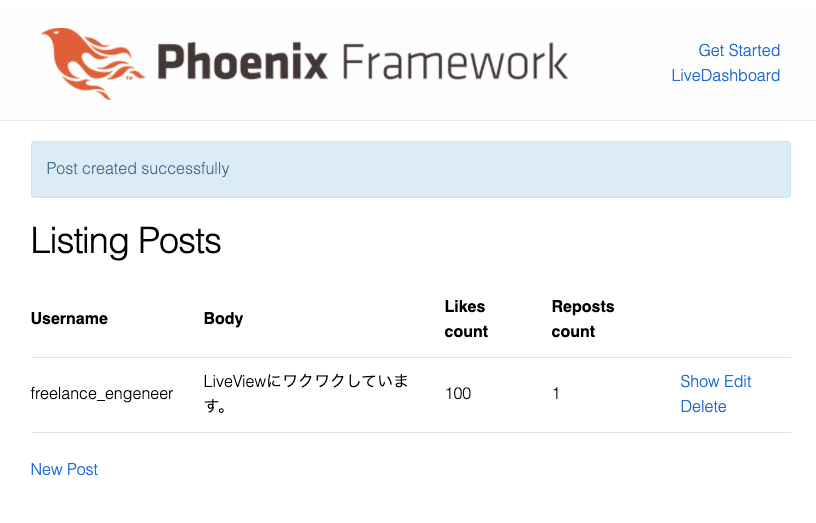
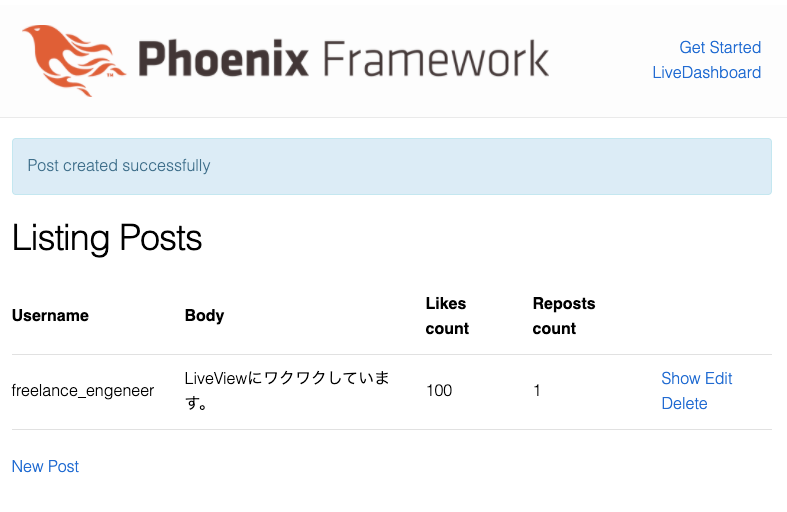
4. Timelineを1つ投稿してみましょう。
http://localhost:4000/posts にアクセスします。
このような画面になるはずです。
Timelineを1つ投稿してみましょう。
New Postをクリックします。
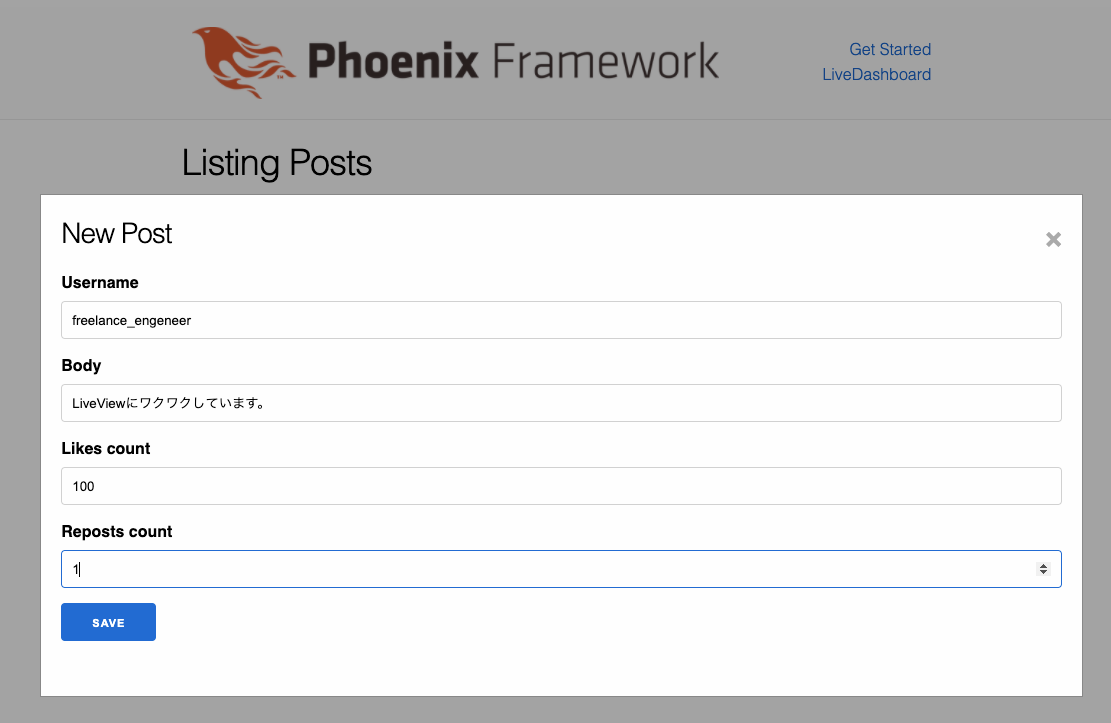
適当に入力し、SAVEを押下します。
補足:参考にしている動画(Build a real-time Twitter clone in 15 minutes with LiveView and Phoenix 1.5)にはNewPostをSAVEする動作はありません。
https://www.youtube.com/watch?time_continue=203&v=MZvmYaFkNJI&feature=emb_logo