SENSY Advent Calendar 2017 1日目は今年9月に入社した私、@flatfisher が担当します。これから趣味で触っているDialogflowについて紹介したいと思います。ちなみに、普段はチャットボット開発をしていますが、Dialogflowは使用していません。
社員呼び出しアシスタント
Google homeで社員呼び出しアシスタントを作ってみました。用事のある社員の名前を言うとSlackにメンション付きで通知します。
会話フロー
- お客さん「OK Google, Sensyにつないで」
- アシスタント「分かりました、どなたに用事がありますか?」
- お客さん「flatfisherさんに用事があります」
- アシスタント「かしこまりました、flatfisherさんですね。少々お待ち下さい」
この後、Slackに通知が飛びます。通知内容(@flatfisher お客さんが来ています)

Slack APIの準備
- こちらから新しいアプリの作成
- 作成が終わったらIncoming Webhooksをクリック
- Activate Incoming WebhooksをONにする
作成に成功するとサンプルソースが表示されます。ちゃんとSlackに通知されるかテストしてみましょう。
$ curl -X POST -H 'Content-type: application/json' --data '{"text":"Hello, World!"}' https://hooks.slack.com/services/
- メンションを作成するために、こちらからユーザーの id を取得する
- 取得したいSlack名を選択する
- Test Methodをクリック
- botを含めユーザー一覧が表示される
- idを控えておく
- "id": "U5JD537S9"みたいなやつ
メンション付きメッセージを送ってみる。こんな感じ(<@U5JD537S9> )に <@id> の形式にするとメンションを付けて通知を出すことが出来ます。
$ curl -X POST -H 'Content-type: application/json' --data '{"text":"<@U5JD537S9> Hello, World!"}' https://hooks.slack.com/services/
Dialogflow
Dialogflowでbotを作成します。Dialogflowが初めての方はこちらの記事を参考にしてください。
Agentを作成
今回のプロジェクトを作成します。
Entityを作成
- reference valueを、先ほど取得したslackのuser idにするとメンションが作りやすいです
- シノニムの中に "代表" や "CEO" などのポジションを入れてもいいかも

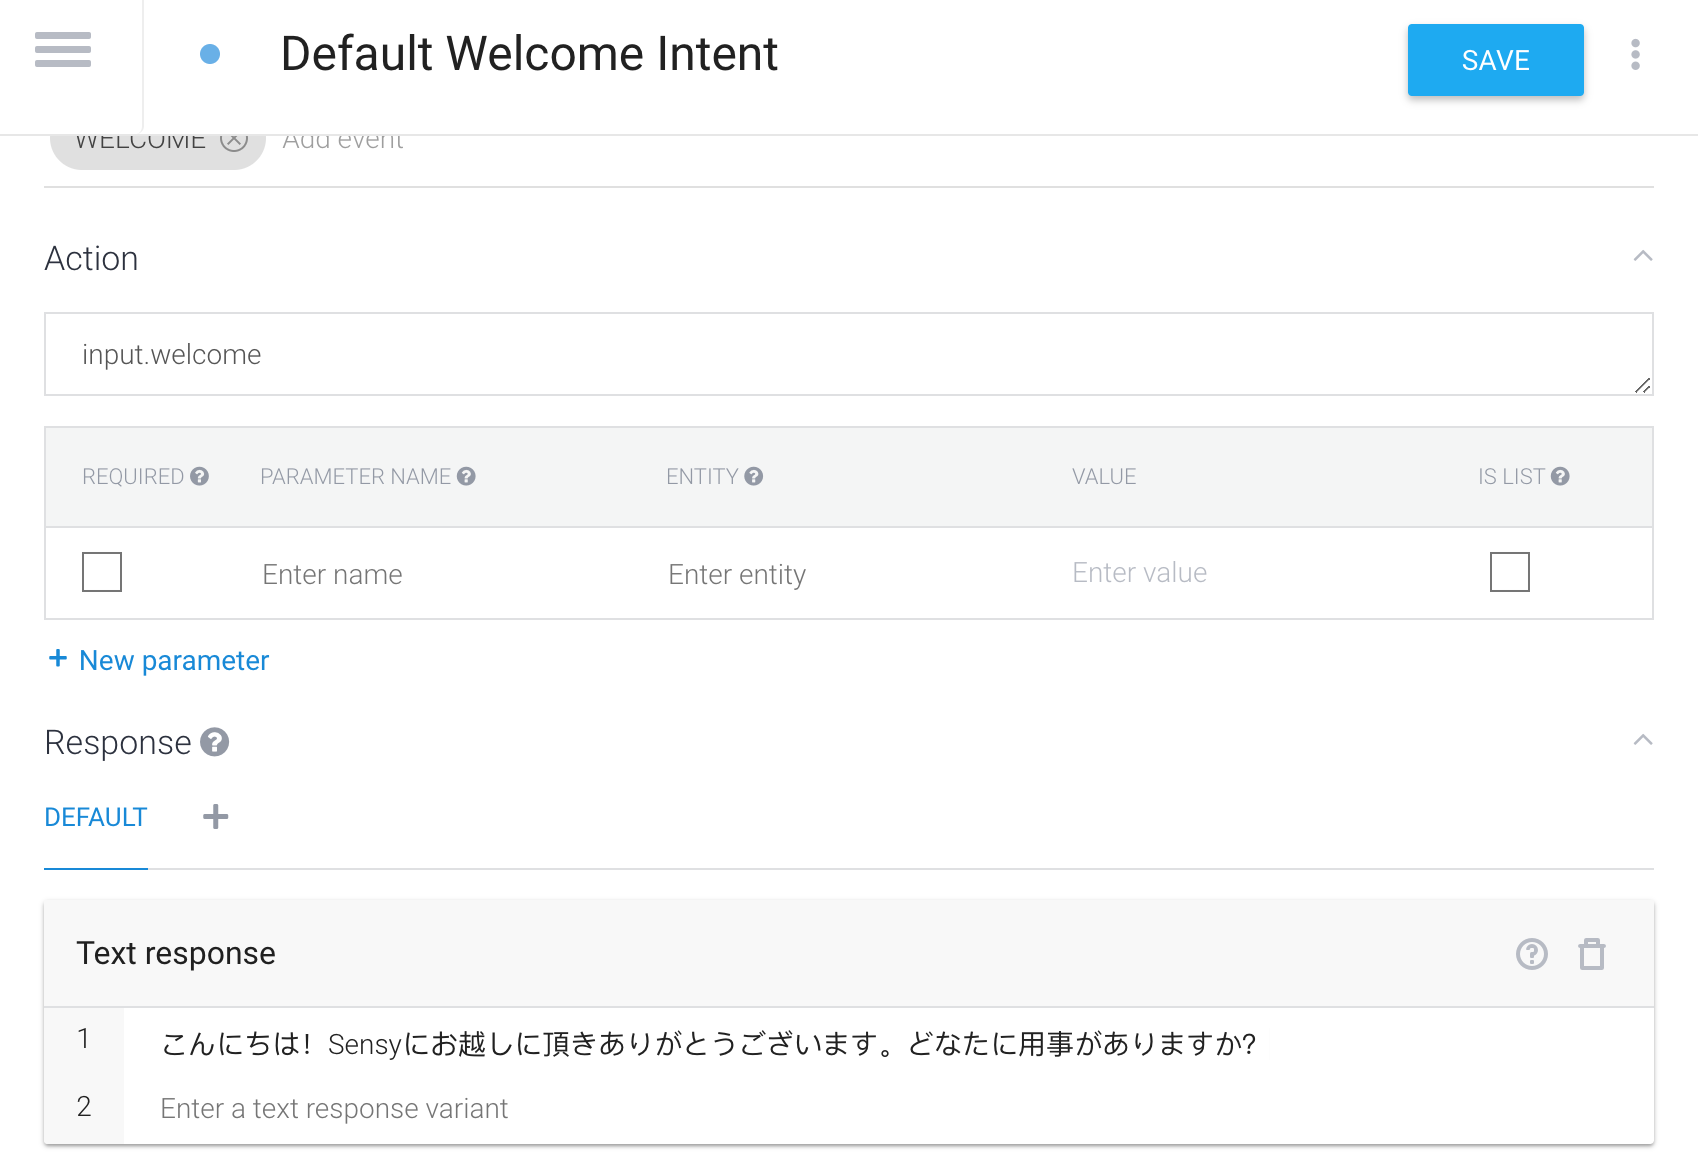
- Default Welcome Intentの作成
- アシスタントを立ち上げた時の挨拶文を入れる
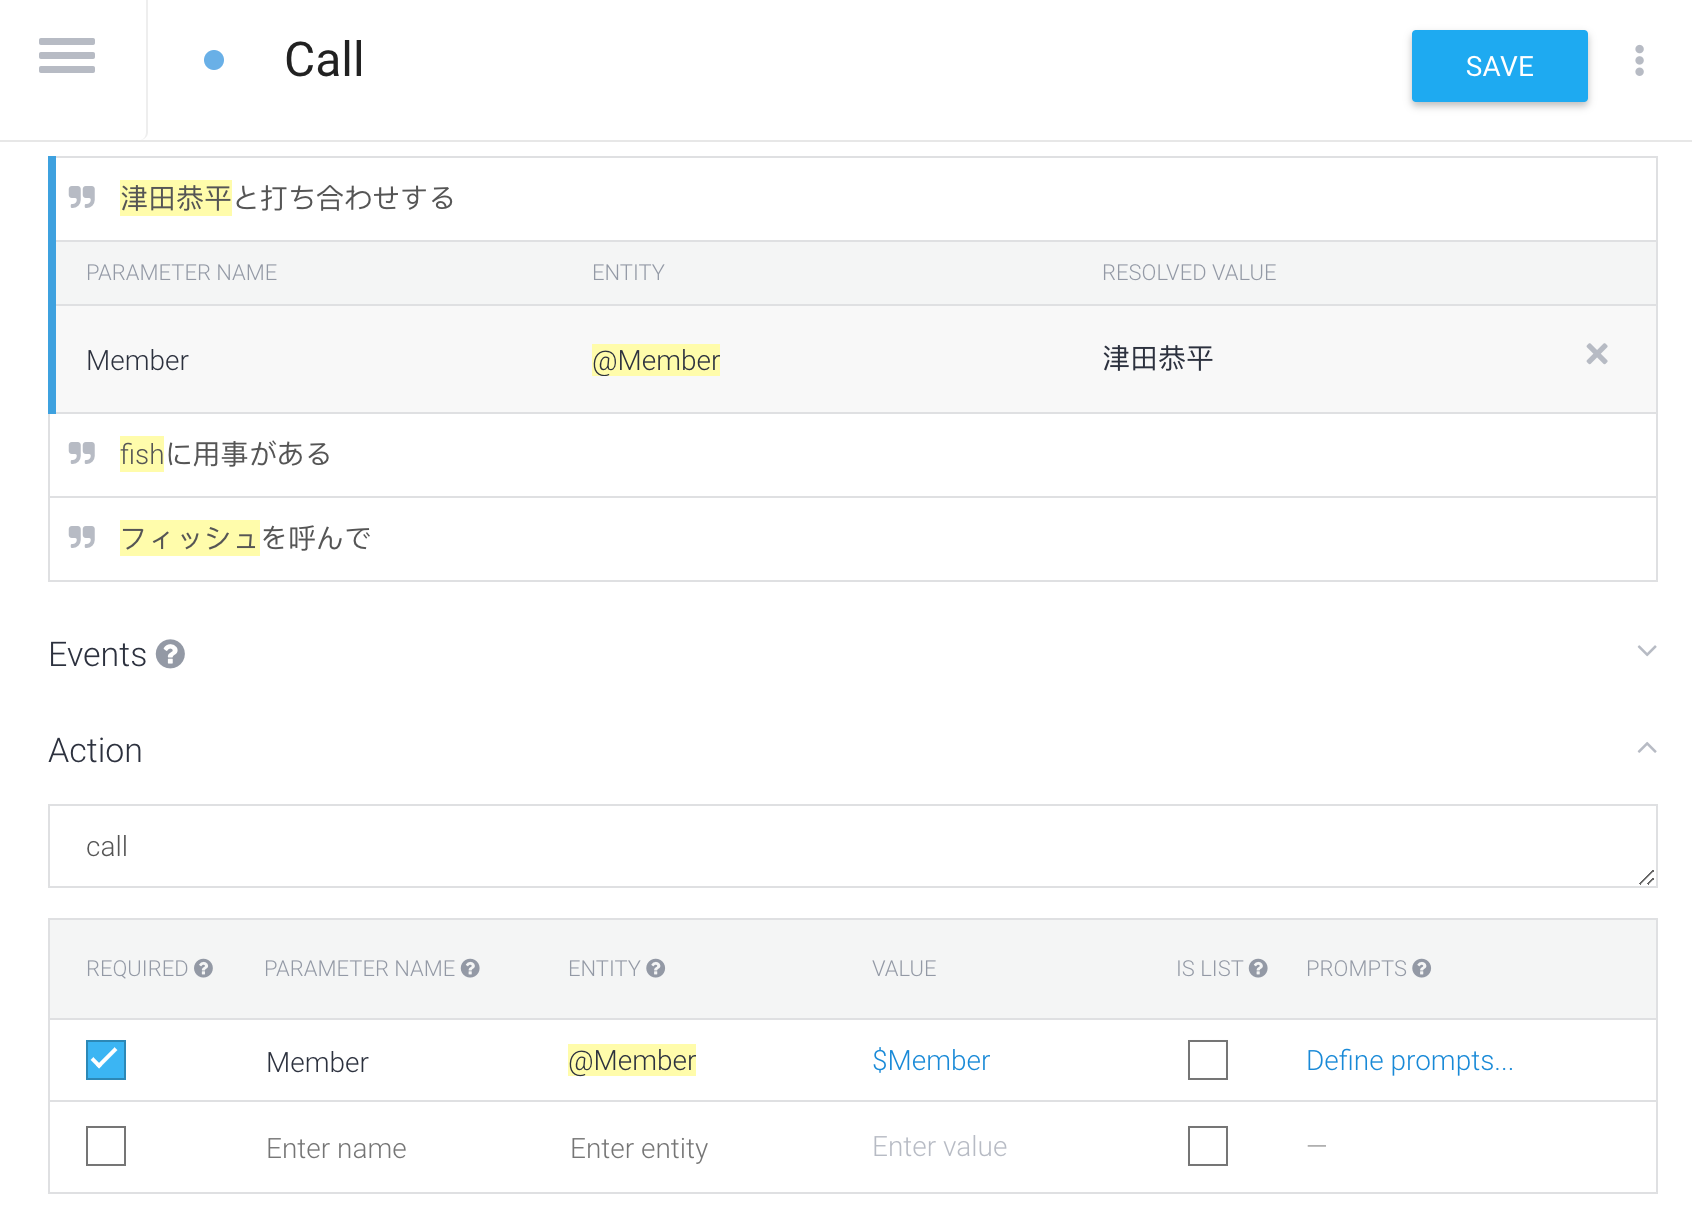
- 社員呼び出し用のIntentを作成
- Name: Call
- User Says:「フィッシュを呼んで」
- Action: call
- Memberには必ずREQUIREDを付ける

バックエンドの準備
Intentsが呼ばれたらSlackに通知を出したいのでバックエンドを用意します。バックエンドはCloud functionsを使用します。こちらのリポジトリを使うと便利です。
- index.js の準備
call intentのイベントを受け取ったら、entityに設定したslack idを取得し、Slackにメンション付きでメッセージを送ります。
'use strict';

process.env.DEBUG = 'actions-on-google:*';
const { DialogflowApp } = require('actions-on-google');
const functions = require('firebase-functions');
const slackRequest = require('request');

exports.officeNotify = functions.https.onRequest((request, response) => {
  const app = new DialogflowApp({ request, response });

  function callMember(app) {
    var name = request.body.result.parameters.Member;
    var msg = '<@'+ name + '> ' + 'お客さんが来ています'
    var options = {
      url: 'https://hooks.slack.com/services/',
      headers: {
        'Content-Type': 'application/json'
      },
      json: {
        'text': msg
      }
    };
    slackRequest.post(options, function (error, response, body) { });
    app.tell('かしこまりました、少々お待ち下さい');
  }

  const actionMap = new Map();
  actionMap.set('call', callMember);

  app.handleRequest(actionMap);
});
- Cloud functionsのプロジェクトを配置するGCSのバケットを用意
$ gsutil mb -p [PROJECT_ID] gs://[BUCKET_NAME]
- デプロイ
$ gcloud beta functions deploy officeNotify --stage-bucket [BUCKET_NAME] --trigger-http
デプロイが完了するとhttpsTrigger:のURLが取得できるので、そのURLをメモしておきます。
httpsTrigger:
  url: https://us-central1-... ←このURLをコピー
Fulfillmentの作成
- WebhookをONにする
- URLには先ほど取得したURLをいれます
- 入力が完了したらSAVEを押します

- Call IntentsのFulfillmentにチェックを入れる
- Callが呼ばれると先ほどのバックエンドにHTTPリクエストを投げてくれます

Integrations
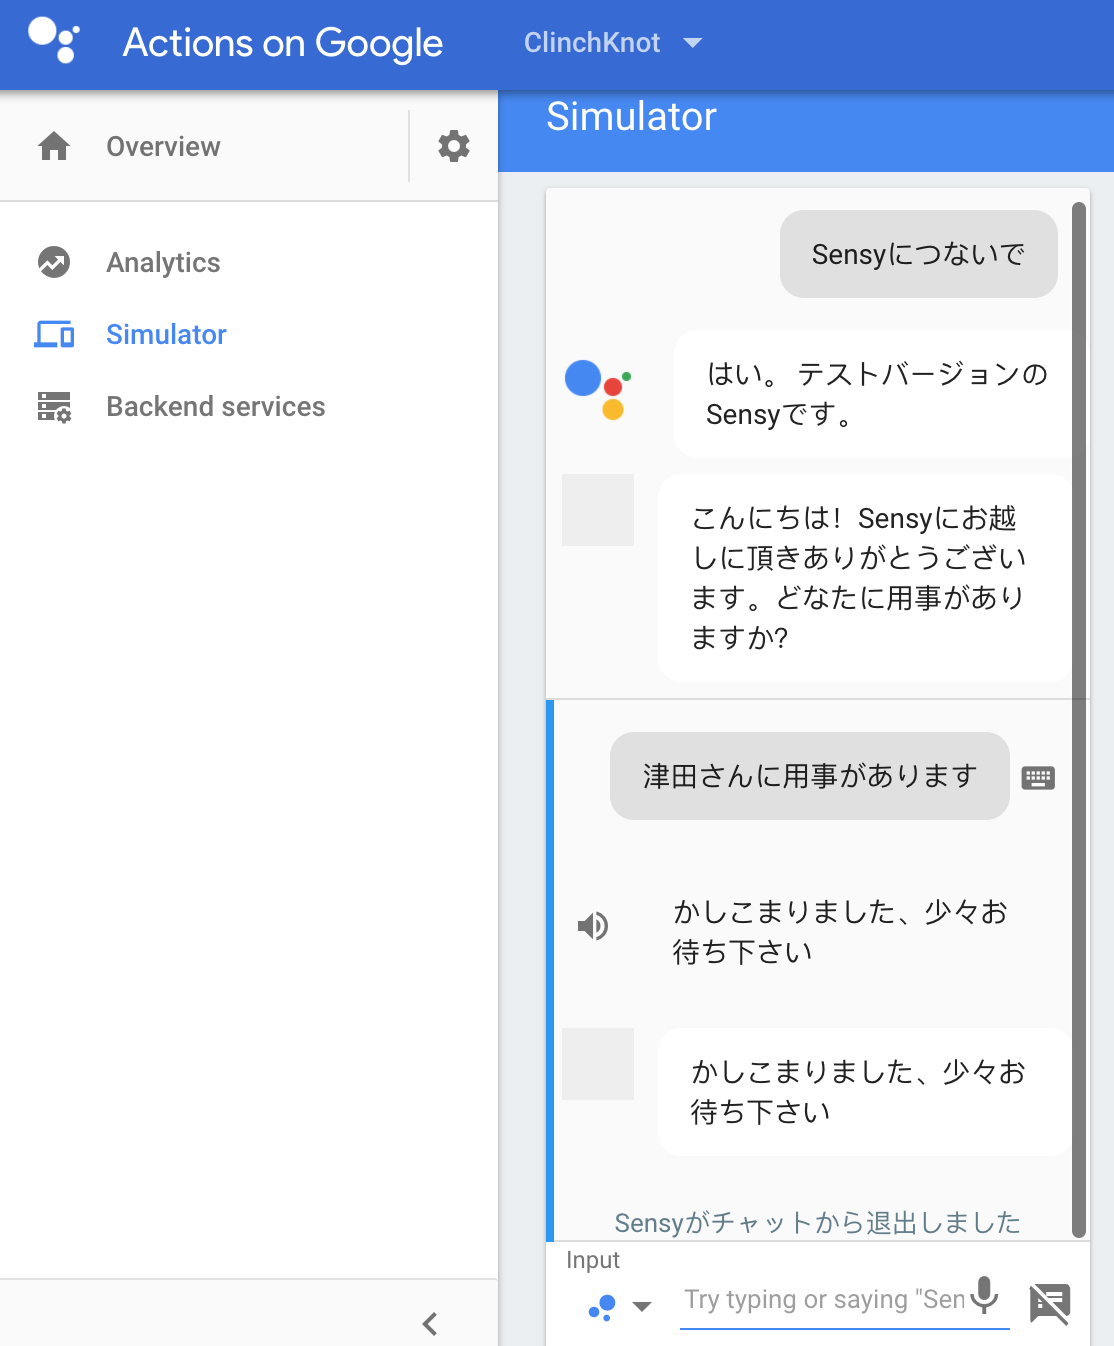
Google Assistantを選択肢シュミレーターを起動します

成功するとSlackに通知がいきます

Google homeで試す
同一のGoogleアカウントであればGoogle homeでも試せます

まとめ
- Dialogflowはさくっとアシスタントが作れて便利
- Slackを使っている方はぜひSlack APIを触って欲しい。通知出すだけでも面白い
- オフィスの玄関に置いておけば、来客の方に先進的な印象を与えることができるかも
- 「OK、Google」言うの恥ずかしい
- 小さいオフィスならピンポン押した方が早い
バトン
明日は @tsukukobaan によるAIxBlockchain関連のお話です。私も仮想通貨の取引をしているので楽しみです![]()


