概要
Google I/O 2018で発表された Google Sign-In for the Assistantを試してみたので、実装方法を紹介したいと思います。
注意
Google Sign-In for the Assistantは現在、プレビューバージョンです。 この機能を使用するアクションは作成できますが、現時点では公開することはできません。
Google Sign-In for the Assistant
これまでもAccount Linking (OAuth 2.0)を使ってアカウントを作成することができましたが、Google アカウントでのサインインをより簡易的に実装できるようになりました。Google Sign-In for the Assistantを使用すると主に3つの認証フローを実装することができます。詳しくはこちらご参照ください。私は既存の認証システムを持っていないので、Google Sign-In onlyのみを紹介したいと思います。
Google Sign-In only
- Googleのプロフィール(名前やメールアドレス)へのアクセスを許可するように求める
- この認証フローは以下のケースに推奨されている
- 既存の認証システムを持っていない場合
- Googleアカウント(@gmail.com)を利用した認証システムを使っている場合
Google Sign-In and OAuth 2.0 based account linking and creation
- Google IDトークンに含まれる情報を使用して新しいアカウントをシームレスに作成できる
- この認証フローは以下のケースに推奨されている
- 既存の認証システムを持っている場合
- アカウント作成時の負担を最小限に抑えたい
Google Sign-In and OAuth 2.0 based account linking
- ユーザーにGoogleプロフィールにアクセスへの同意を求める
- 次に、プロフィール内の情報を使用して、既存の認証システム内のユーザーを検索する
- ユーザーの一致が見つからない場合は、アカウント作成Webページにリダイレクトされて新しいアカウントが作成される
- この認証フローは以下のケースに推奨されている
- あなたは既存の認証システムを持っています
- アカウント作成プロセスを自由に作成したい
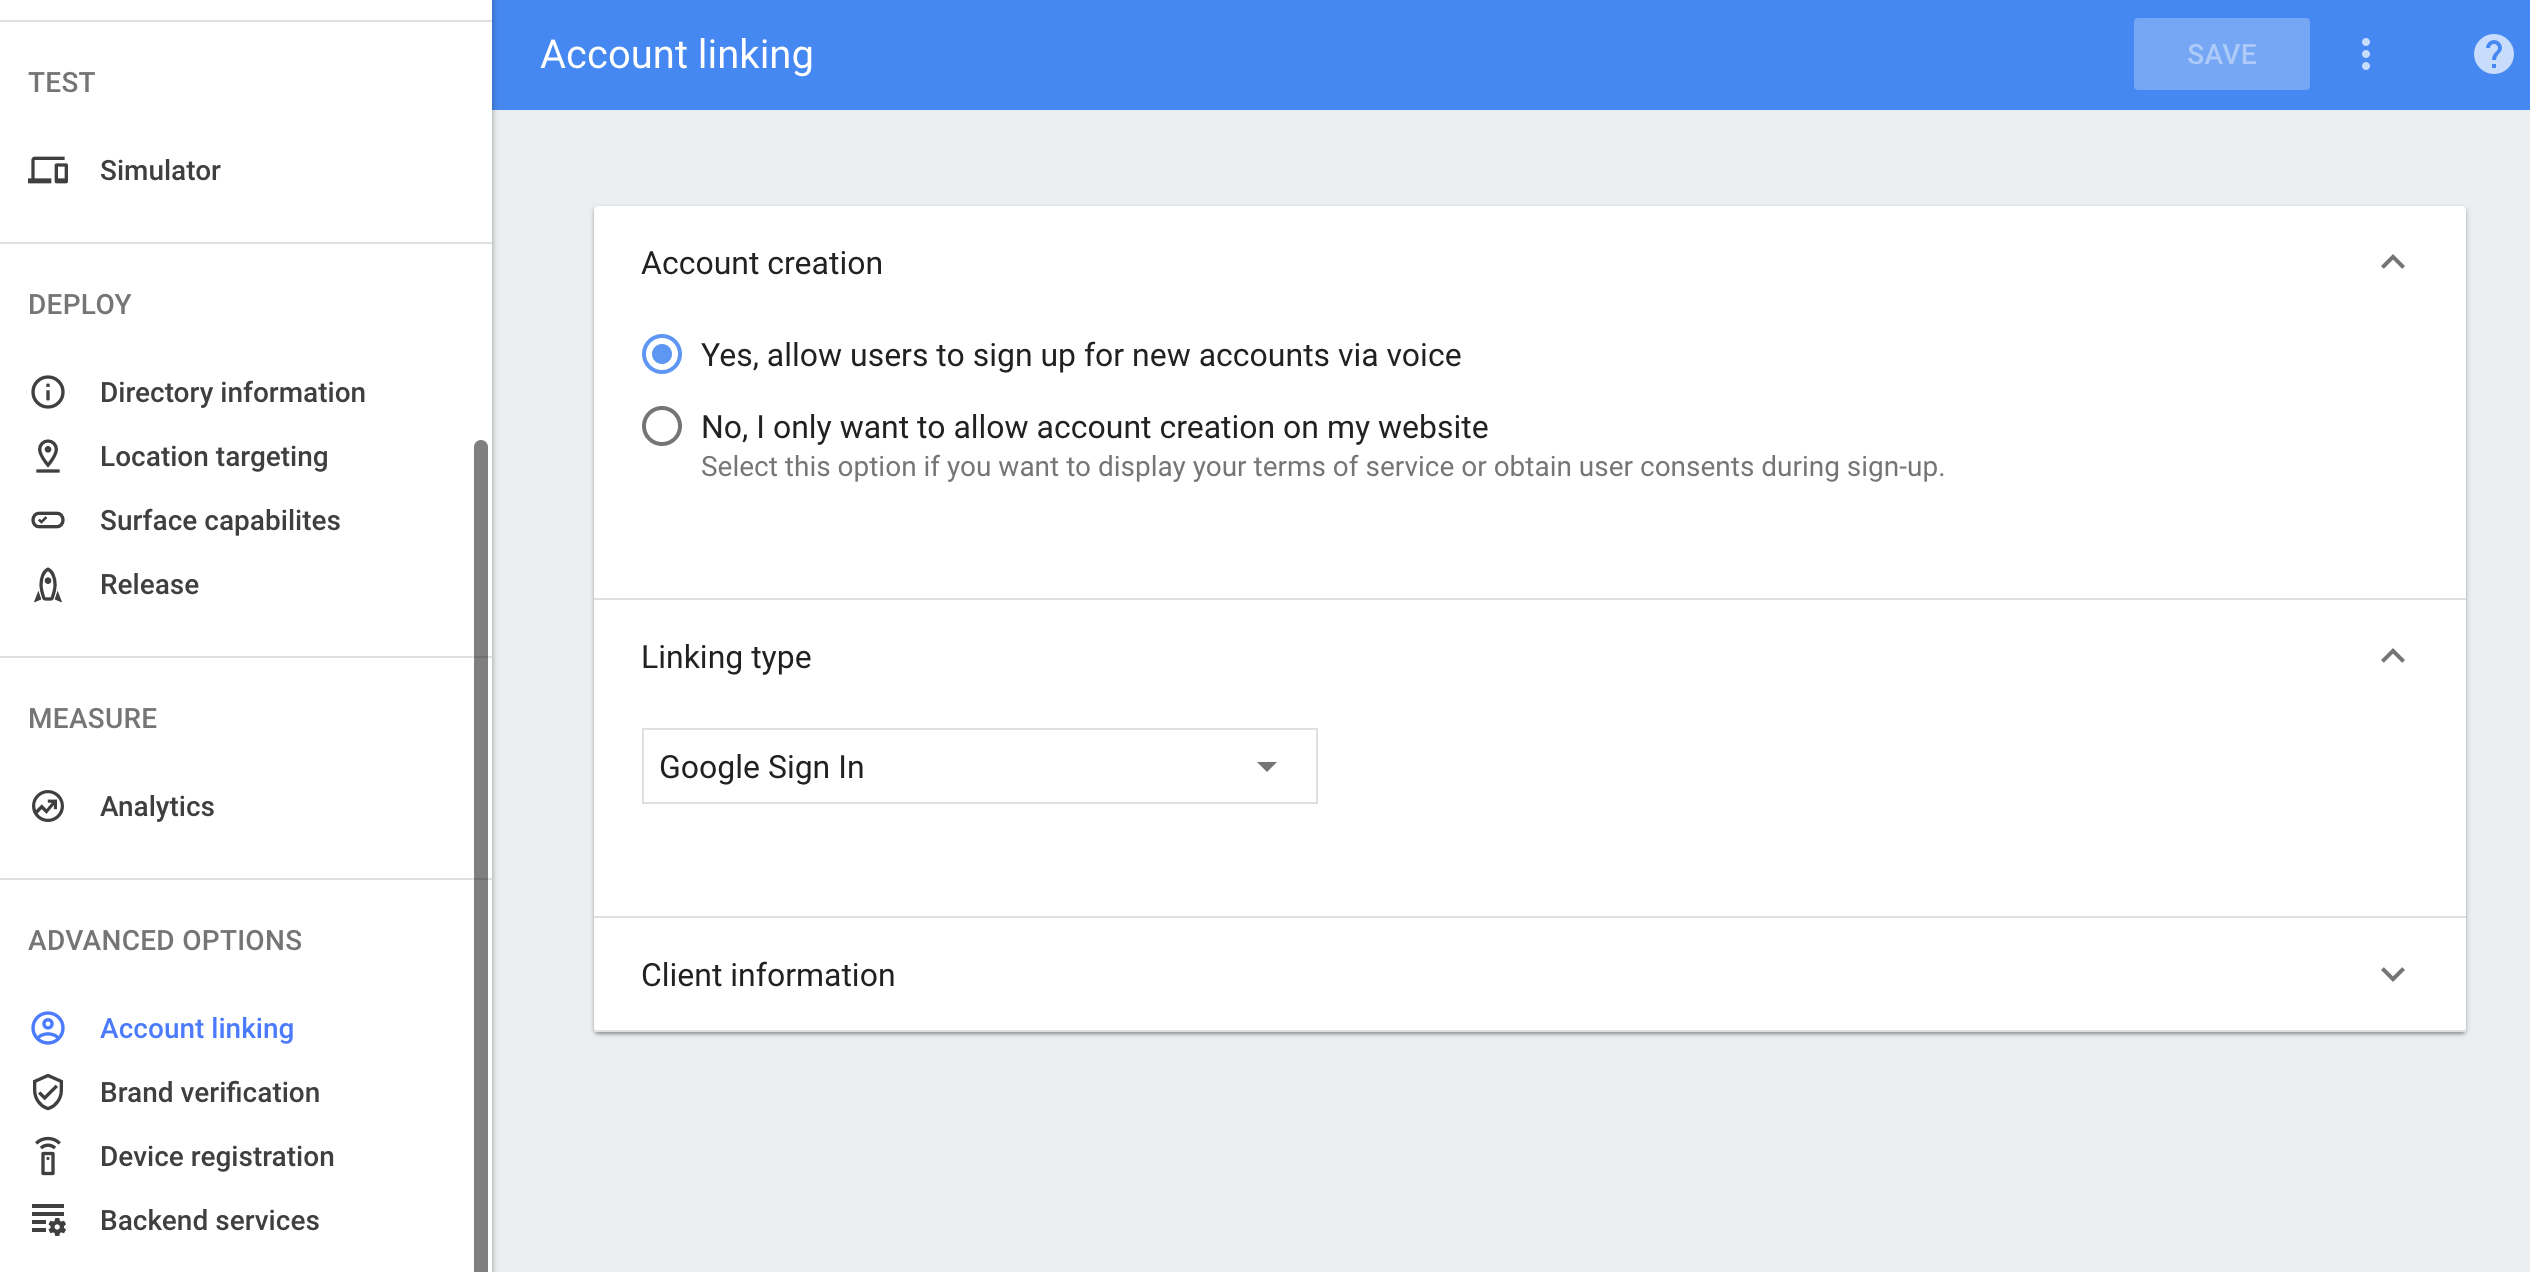
Actions ConsoleでAccount linkingを設定
Actions on Google のDeveloper Consoleを開き、Googleアカウントでサインインを実装したいアプリを選択します。左のメニューから Account linkingを選択し、以下の項目をセットします。
Account linking
- Account creation
- Yes, allow users to sign up for new accounts via voice
- Linking type
- Google Sign In
- Client information
- Client ID issued by Google to your Actions
- Ciient ID をコピーし保管しておく

Dialogflowで認証用のIntentを作成
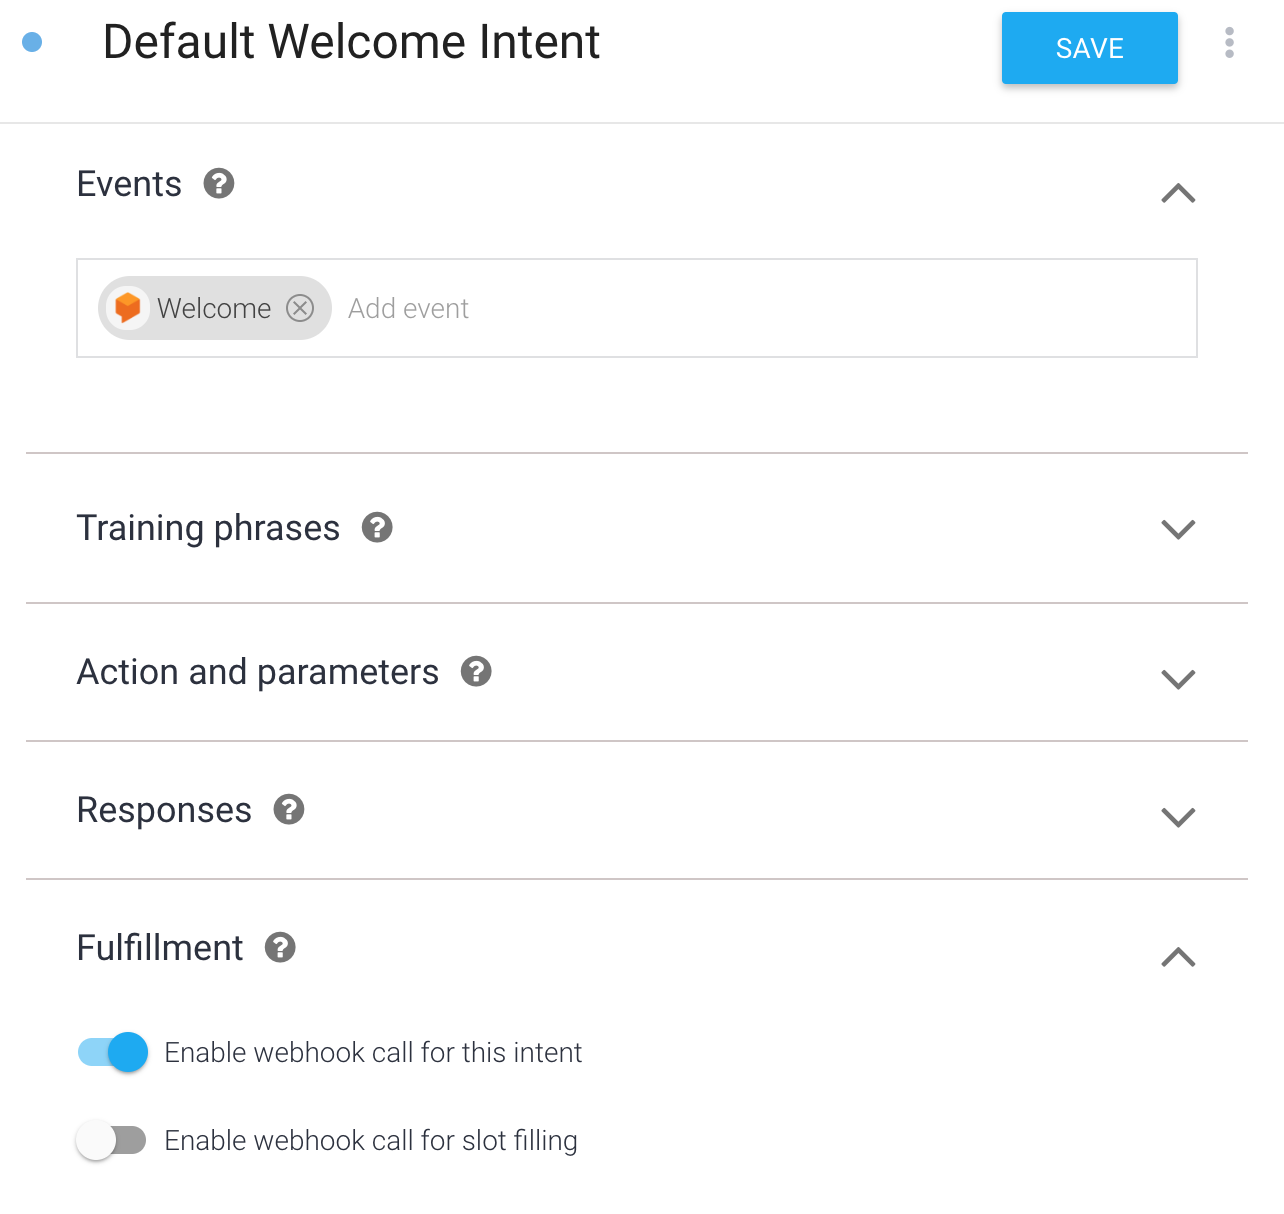
認証用のIntentを作成します。またアプリに入った時にログインを求めたいので、Default Welcome IntentのFulfillmentを有効にします。
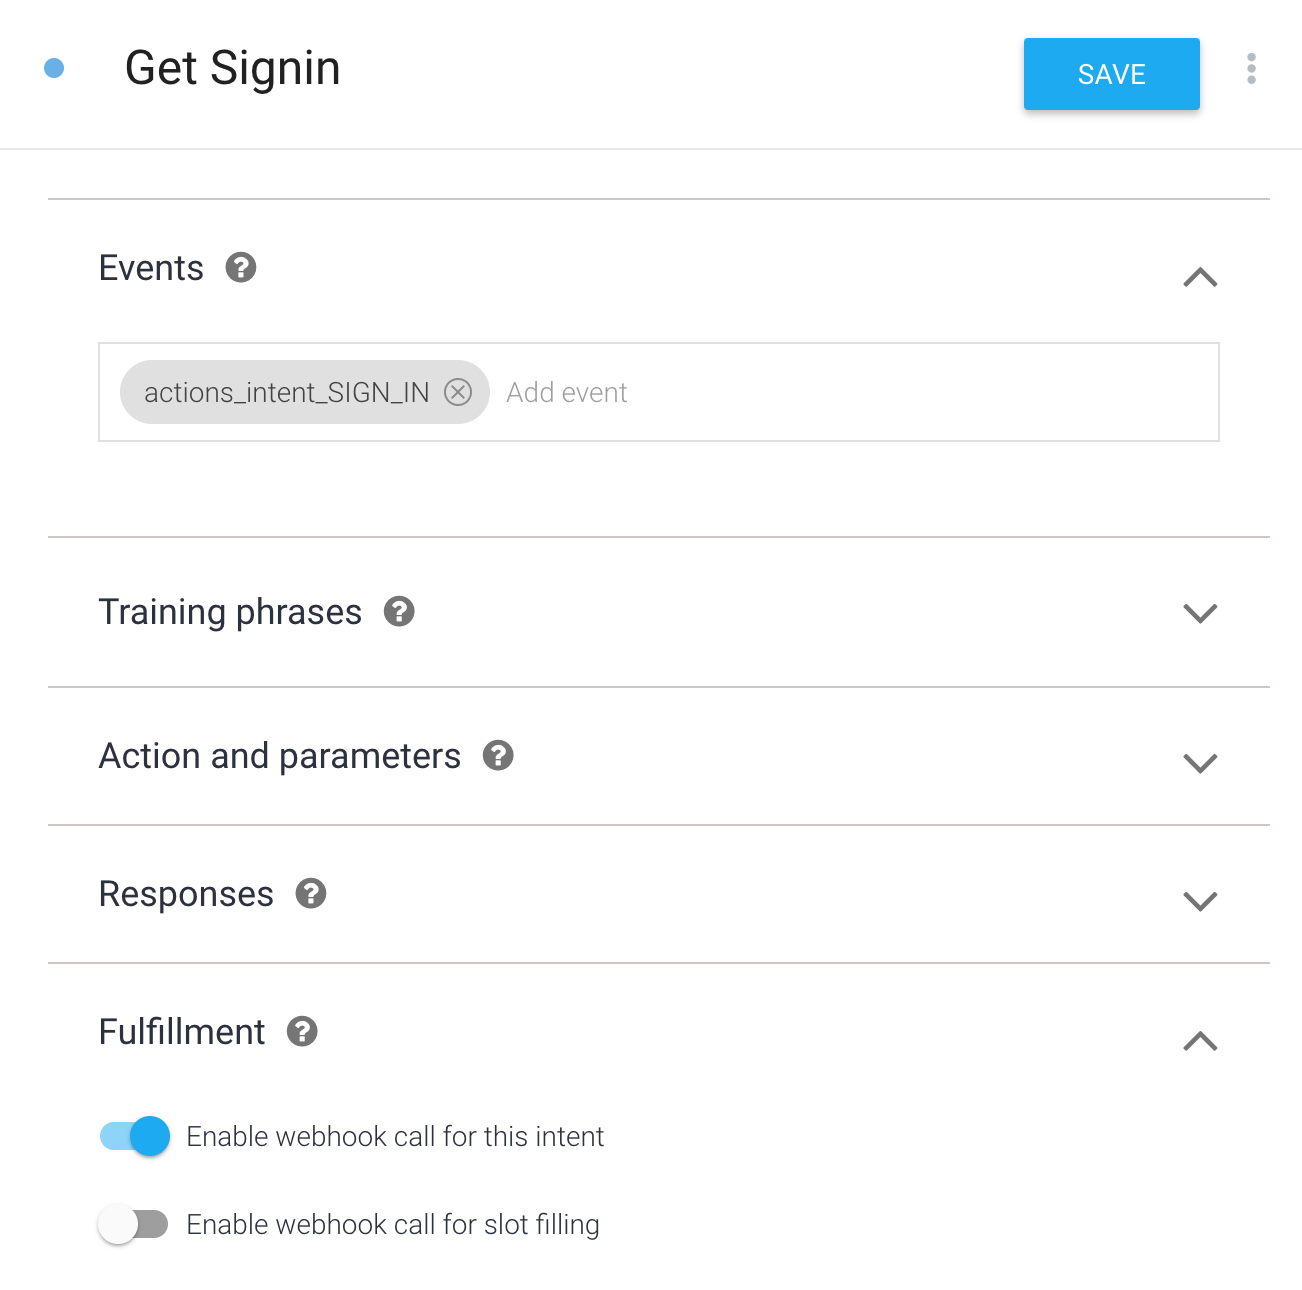
認証用のIntentの作成
- 名前
- Get Signin
- Events
- actions_intent_SIGN_IN
- Fulfillmentを有効にする

Default Welcome Intentの編集
- Fulfillmentを有効にする

Fulfillmentの実装
今回はFirebase functionsを使い実装します。Firebase functionsの使い方はこちらご参照ください。CLIENT_IDに上で取得したCLIENT_IDを入れます。
- プロジェクト準備
$ firebase init

? What language would you like to use to write Cloud Functions? JavaScript
? Do you want to use ESLint to catch probable bugs and enforce style? No
✔  Wrote functions/package.json
✔  Wrote functions/index.js
? Do you want to install dependencies with npm now? Yes
'use strict';

const { dialogflow, SignIn} = require('actions-on-google');
const functions = require('firebase-functions');

const CLIENT_ID = 'ここに上で取得したCLIENT_IDを入れる';

const app = dialogflow({
  clientId: CLIENT_ID,
});

app.intent('Default Welcome Intent', conv => {
  // サインインの目的は書いた方がベターです
  conv.ask(new SignIn('To get your name'))
});

app.intent('Get Signin', (conv, params, signin) => {
  if (signin.status === 'OK') {
    const payload = conv.user.profile.payload;
    conv.ask(`I got your account details, ${payload.name}. What do you want to do next?`);
  } else {
    conv.ask(`I won't be able to save your data, but what do you want to do next?`);
  }
});

exports.flatfishtest = functions.https.onRequest(app);
{
  "name": "functions",
  "description": "Cloud Functions for Firebase",
  "scripts": {
    "serve": "firebase serve --only functions",
    "shell": "firebase functions:shell",
    "start": "npm run shell",
    "deploy": "firebase deploy --only functions",
    "logs": "firebase functions:log"
  },
  "dependencies": {
    "actions-on-google": "^2.1.1",
    "firebase-admin": "~5.12.0",
    "firebase-functions": "^1.0.1"
  },
  "private": true
}
actions-on-googleのバージョンは必ず 2.1.1以上 にしてください。
- デプロイ
$ firebase deploy

Function URL: https://us-central1-flatfishtest.cloudfunctions.net/xxx
Dialogflowの操作
- Fulfillment Webhookを有効にし、Function URLをセット
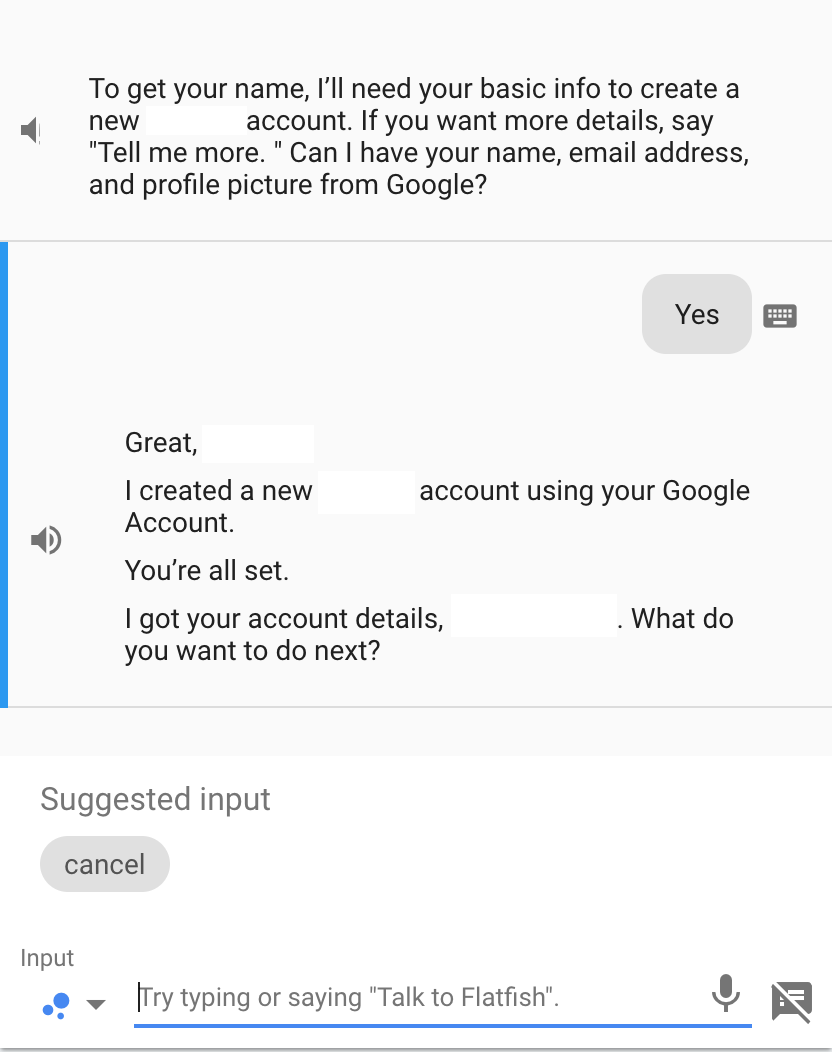
シミュレーターでテスト
Googleでサインインしていいか求められるのでYesと答えましょう

無事サインインすることができました!サインインすると以下のプロフィール情報にアクセスすることが出来ます。
{
    "aud": "",
    "sub": "",
    "email": "hogehoge@gmail.com",
    "email_verified": true,
    "exp": ,
    "iss": "https://accounts.google.com",
    "jti": "",
    "iat": ,
    "nbf": ,
    "name": "name family name",
    "picture": "https: //lh6.googleusercontent.com/hogehoge.jpg",
    "given_name": "name",
    "family_name": "family name"
}
const payload = conv.user.profile.payload;
const name = payload.name;
const email = payload.email;
const picture = payload.picture;
Column
認証フローではJWTを使用しています。actions-on-google ライブラリではJWTの検証とデコードをやってくれます(便利ですねぇ)。シミュレーターのREQUESTタブからは idToken を参照することができます。試しにデコードして中身を確認してはいかがでしょうか。上記のプロフィール情報を参照することが出来ると思います。JWTのデコードはこちらのページで簡単に試すことが出来ます。
サインインを外したい
サインインしたアプリはこちらで確認することができます。不要であればサインインを外しましよう。