はじめに
IBM Security Randoriは、攻撃領域管理(AttackSurfaceManagement)のSaaS製品です。
IBM Randoriの製品については、次の動画を参照ください。
今回は、ServiceNowとのチケット連携機能を試してみました。
1.レシピの説明
IBM Security Randoriでは、他システムと連携するためのシナリオを「レシピ」として表現しています。ServiceNow連携では、3種類のレシピが提供されています。
| No | レシピ名称 | 説明 |
|---|---|---|
| 1 | Randori → SNOW Create ServiceNow Incidents Create new SNOW Incident Tickets for any Target that is marked with as "Needs Investigation" in Randori | Randoriターゲットのステータスが「Needs Investigation」の場合に、ServiceNowのITSM、あるいは、SIRテーブルにインシデントを新規起票する。ITSM、SIRどちらに起票するかは設定可能。 |
| 2 | SNOW [ITSM] → Randori Update Target in Randori Updates the corresponding Randori Target to the completed SNOW ticket SNOW [SIR] → Randori Update Target in Randori Updates the corresponding Randori Target to the completed SNOW ticket |
ServiceNowでインシデントがクローズされたときにRandoriターゲットのステータスを「Needs Investigation」から「Needs Review」に変更する。ITSM、SIRテーブル用に2レシピあり、No1の設定にあわせて使い分けする |
| 3 | Randori → SNOW Create ServiceNow Incidents Create new SNOW Incident Tickets for any completed Successful Validate Activity | 脆弱性検証アクティビティが成功したときに、ServiceNowにインシデントを起票する |
今回試したNo1とNo2のレシピの動作イメージです。3つ目のレシピは動作環境が整えられなかったため割愛しています。

2.ServiceNow設定確認
最初にServiceNowで設定確認を行います。
2.1.インシデント内にあるStateフィールドのNumber確認
RandoriがServiceNowのインシデントがクローズされたか判定するために利用するStateフィールドの値(数値)を確認します。
任意のインシデントでStateフィールドの文字付近を右クリックし、「Configure Dictionary」をクリックします。

「table is incident」の条件を設定して「RUN」をクリックします。

Closed(クローズ)ステータスは、数値が「7」であることを確認します。

3.IBM Security Randori設定
3.1.ServiceNow情報の構成/接続確認
Randoriの画面で、Integration- Marketplaceに移動し、ServiceNowのタイル状に表示されている「Configure」をクリックします、

ServiceNowのテナント情報、および、管理者ID/パスワードを入力して「Connect」をクリックします。
| 設定項目 | 設定値 | 備考 |
|---|---|---|
| Authentication Type | Username/Password | Username/Password、OAuth2.0から選択 |
| Instance Name | インスタンス名 | ServiceNowのインスタンス名:.service-now.com |
| Username | 管理者ID | - |
| Password | 管理者IDのパスワード | - |
接続が成功すると、「Connection Success」と表示されます。
3.2.レシピの構成
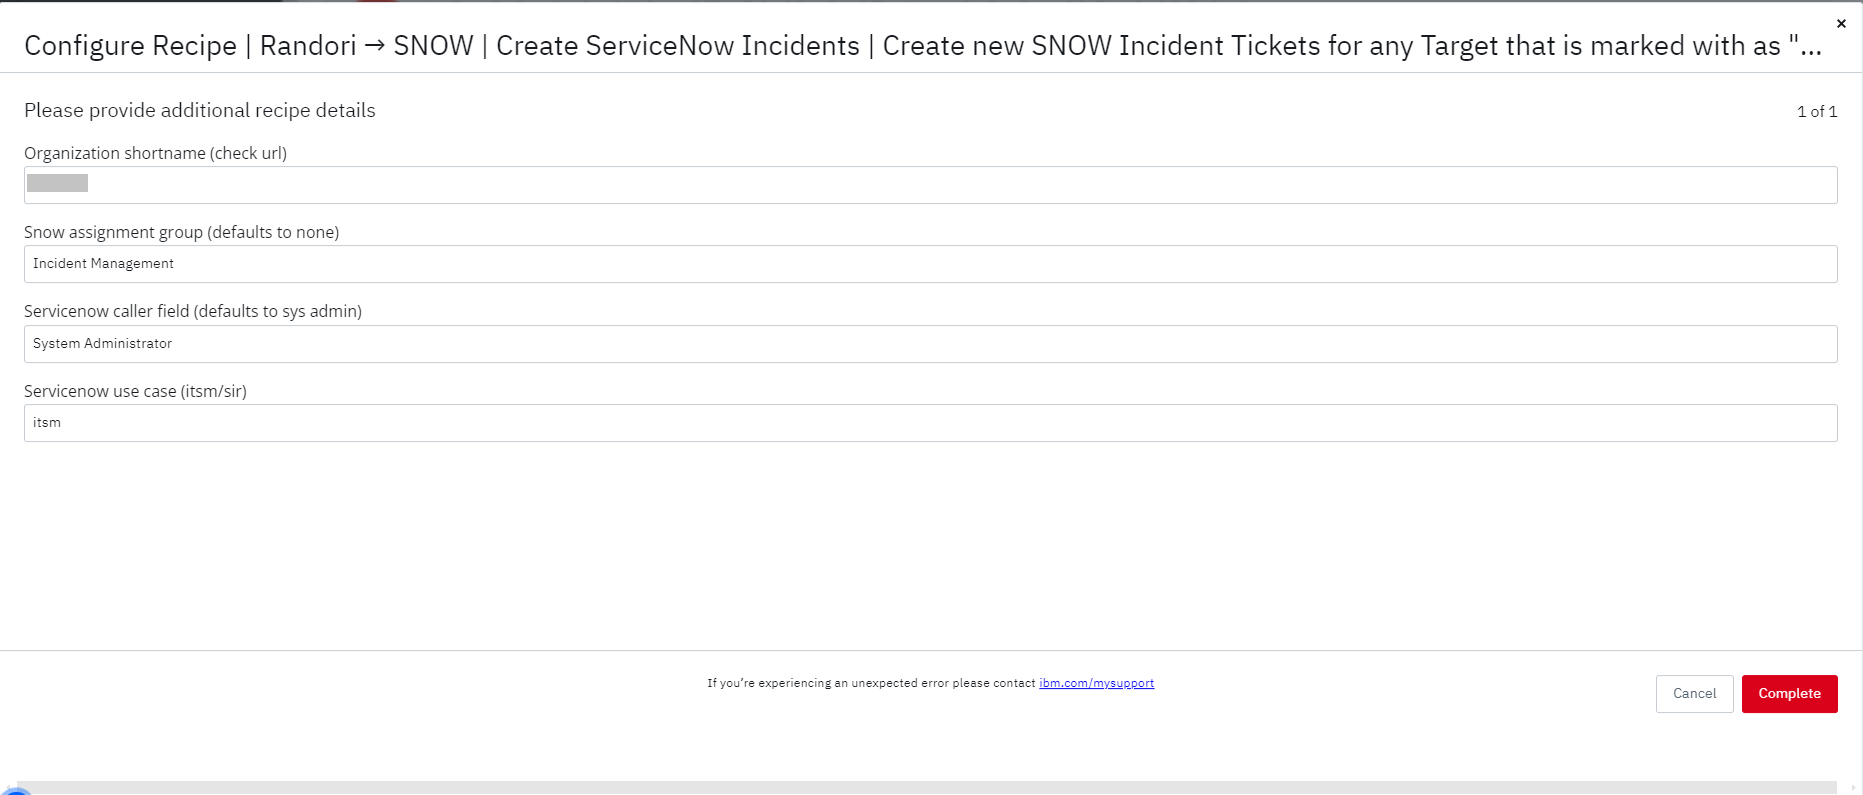
Create new SNOW Incident Tickets for any Target that is marked with as "Needs Investigation" in Randoriレシピを構成します。
以下の内容を入力して、「Complete」をクリックします。
| 設定項目 | 設定値 | 備考 |
|---|---|---|
| Organization shortname (check url) | Randoriの[SHORTNAME]を指定 | RandoriへアクセスするURL: app.randori.io/[SHORTNAME]/dashboard |
| Snow assignment group (defaults to none) | 任意の値を設定 | ServiceNowに存在しているグループ名を指定 |
| Servicenow caller field (defaults to sys admin) | 任意の値を設定 | ServiceNowに存在するユーザー名を指定。デフォルト値のsys adminのままだと、ServiceNow側に存在せず、起票されたインシデントのCallerが空白になる |
| Servicenow use case (itsm/sir) | itsm | itsm/sirいずれかを指定 |
次に、Updates the corresponding Randori Target to the completed SNOW ticketレシピを構成します。

トリガーとなるstateの数値(7)を入力して、「Complete」をクリックします。

4.動作確認
構成したレシピの動作確認をします。
4.1.レシピ動作確認① ServiceNowへの新規チケット起票
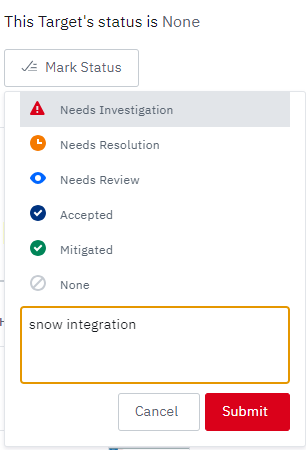
Randoriの任意のターゲットで、ステータス画面で「Mark Status」をクリックします。

ステータスを「Needs Investigation」に変更して、「Submit」をクリックします。
レシピが動作すると、ServiceNowにインシデントが起票されます。

指定したCaller/グループが割り当てられていることを確認します。

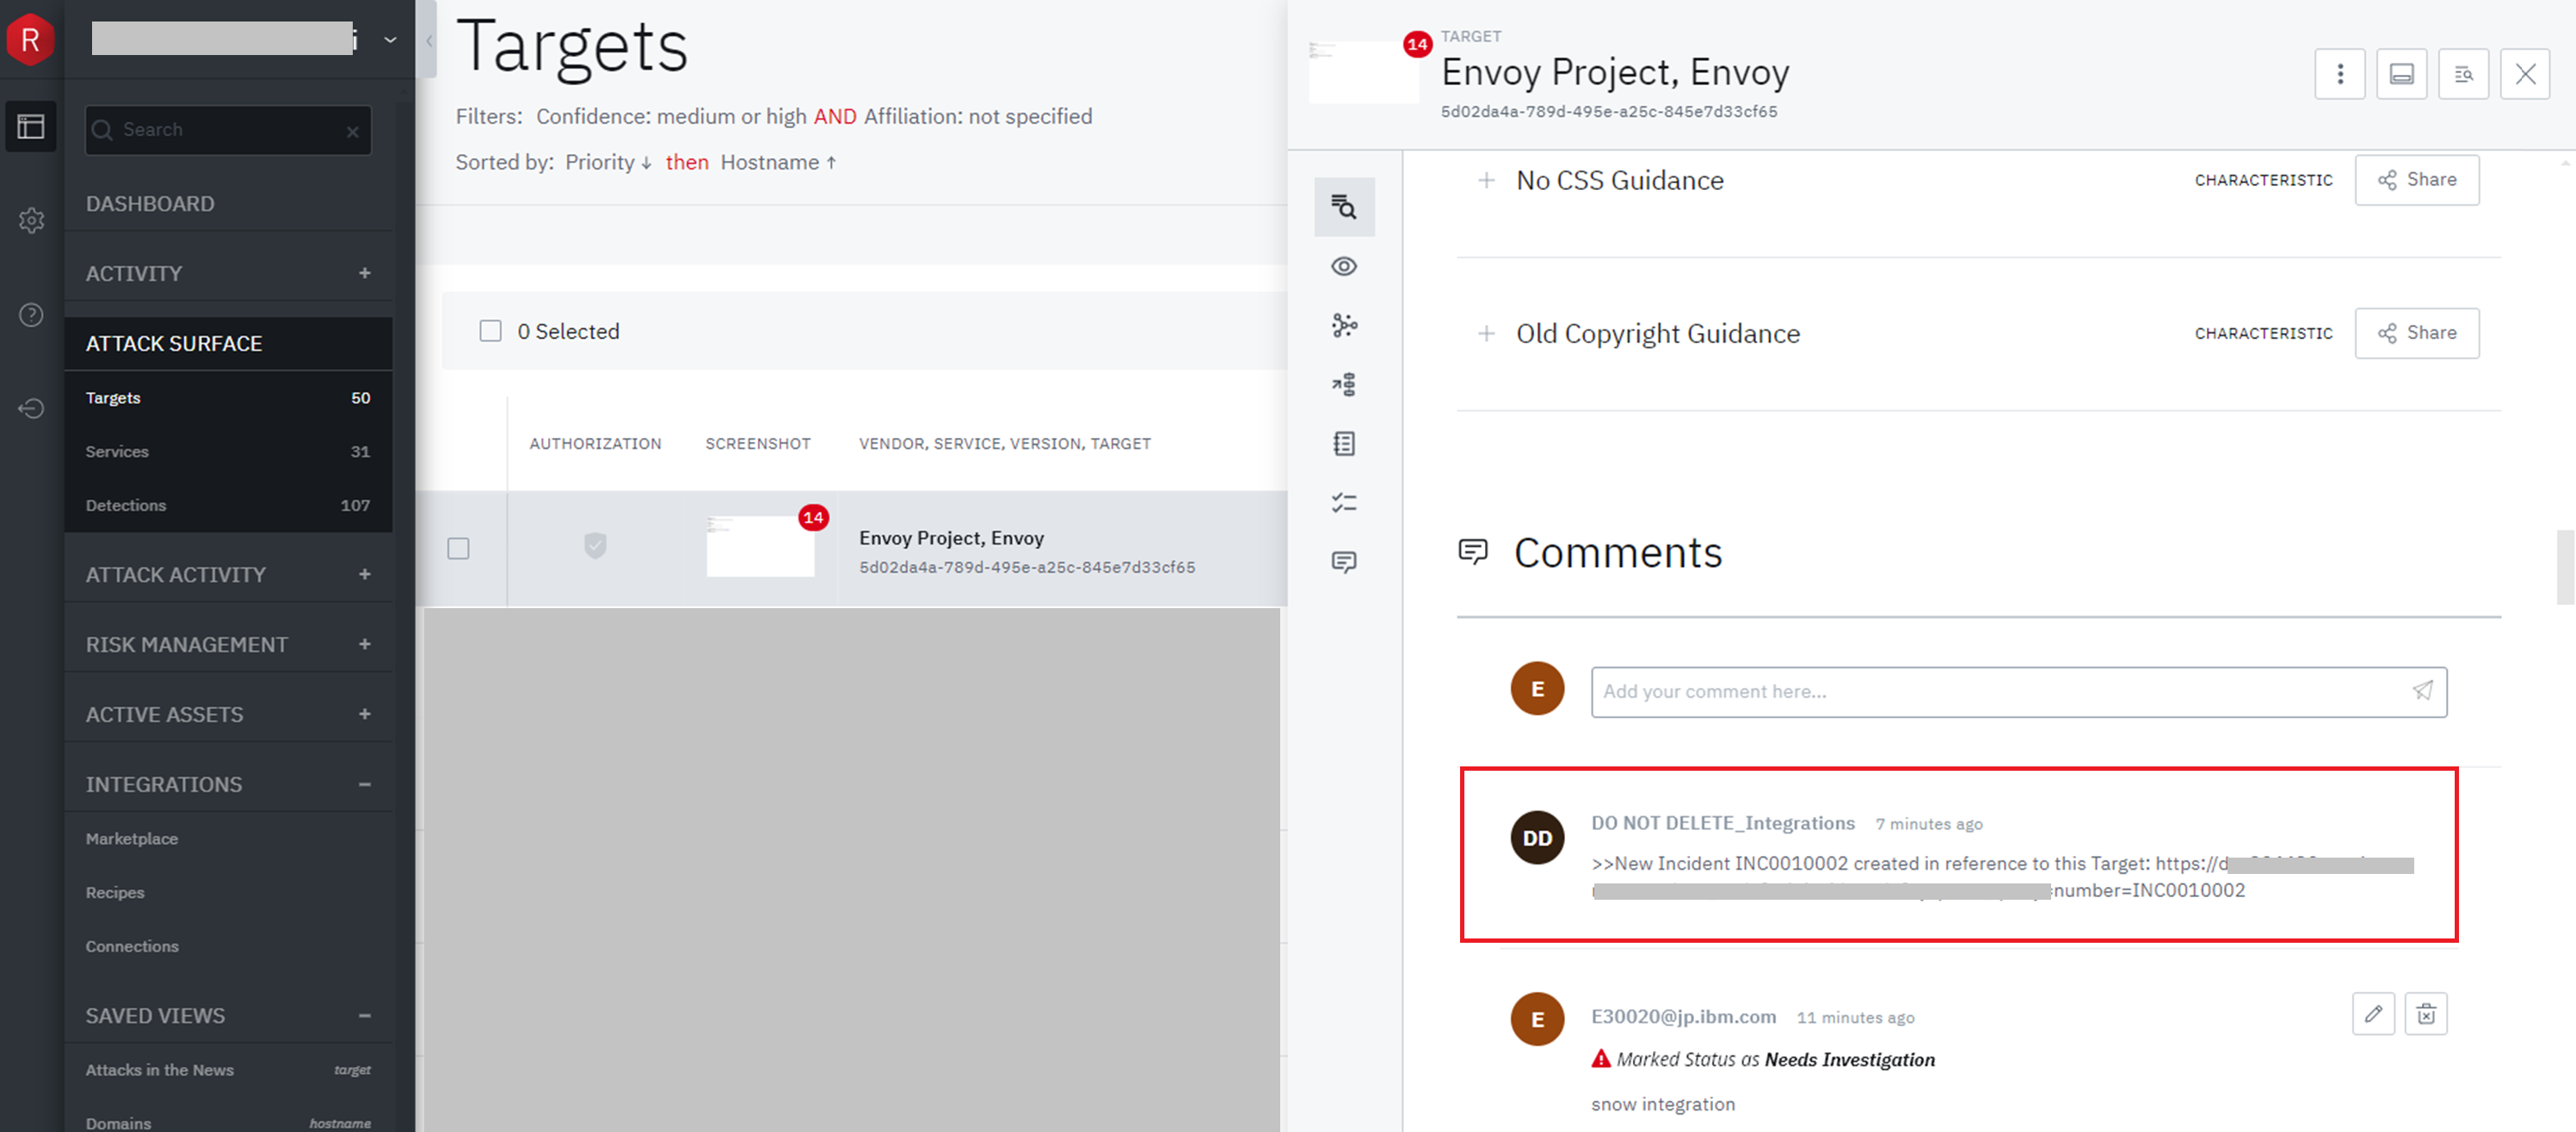
Randori側の変更を確認します。
ターゲットでステータスが「Needs Resolution」に変更されます。

また、起票したインシデントの情報がコメント欄に追記されます。
4.2.レシピ② チケットクローズ後のステータス反映
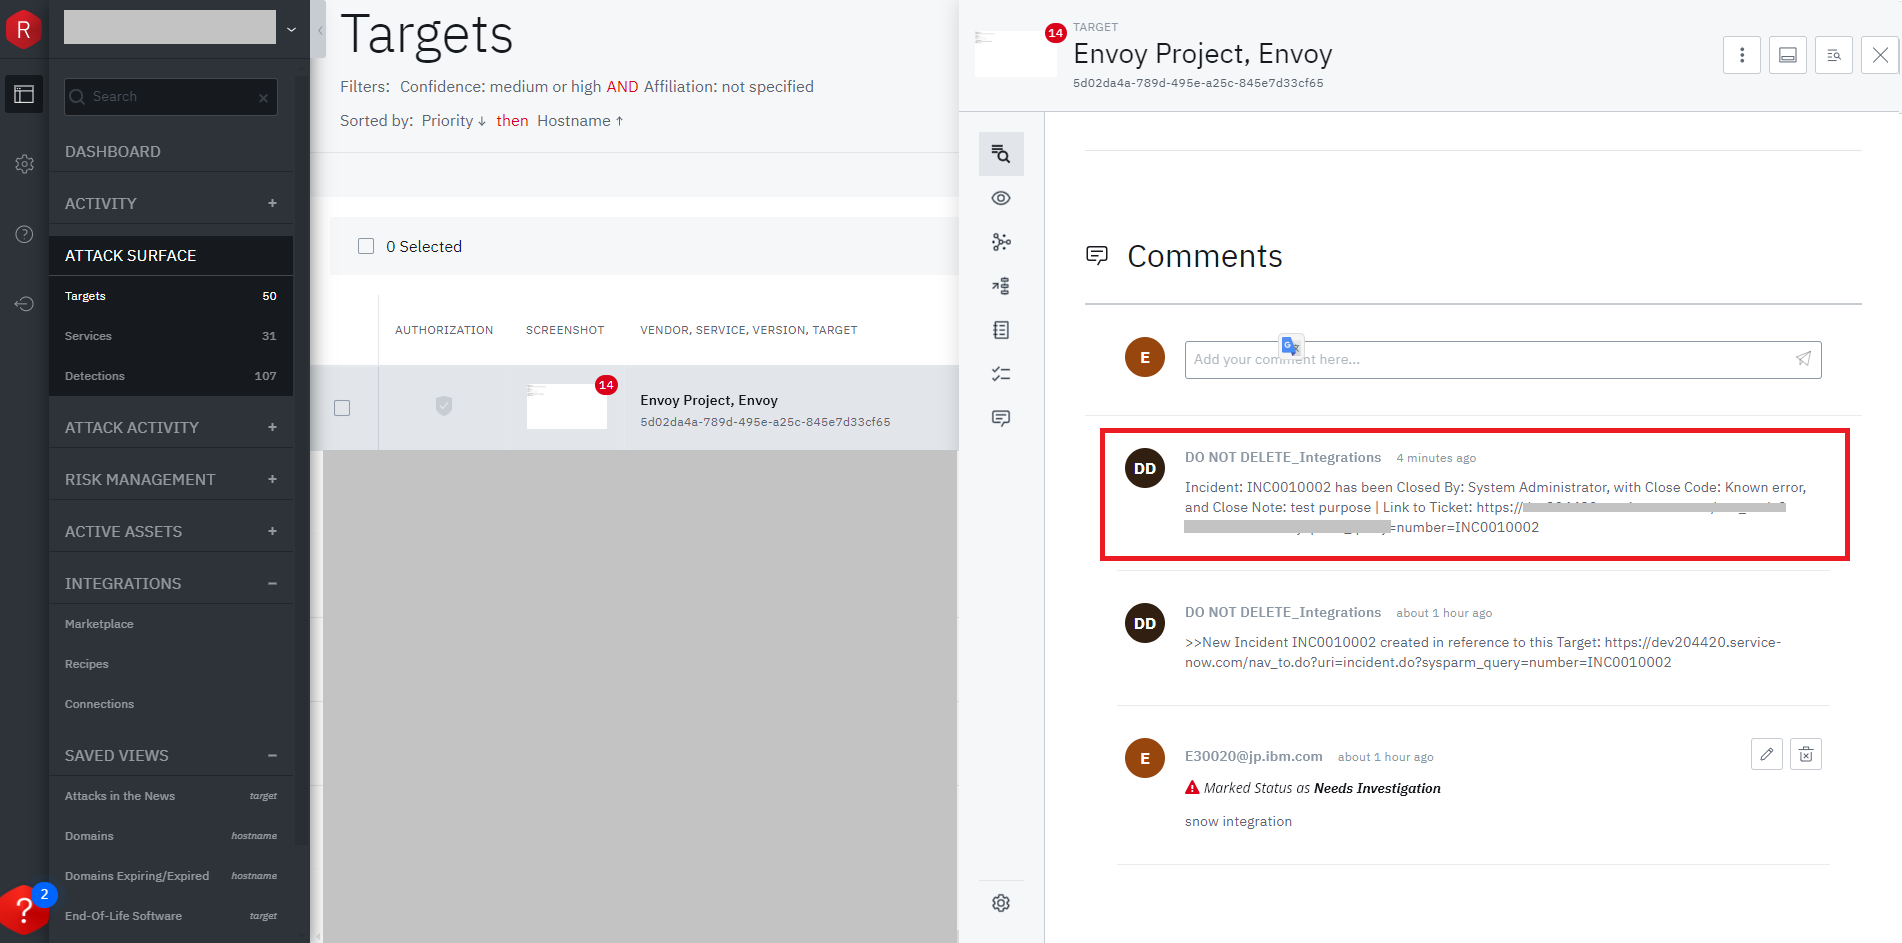
レシピが動作すると、Randoriターゲットのステータスが「Needs Review」に変更されます。

また、インシデントクローズ時の理由などがコメント欄に追記されます。
レシピの動作確認が以上になります。
5. 参考(OAuth2.0によるServiceNow連携)
ServiceNowの管理者ID/パスワードではなく、OAuth2.0を使って連携する方法もあります。
5.1.SeriveNowのOAuth有効化
OAuth 2.0 クライアントを設定するため、ServiceNowのマニュアルに従い、OAuth 2.0を有効化します。
https://docs.servicenow.com/ja-JP/bundle/washingtondc-platform-security/page/administer/security/task/t_ActivateOAuth.html
ServiceNowの管理画面で、すべて > システム定義 > プラグイン に移動して、「OAuth」のキーワードで検索します。
今回のテナントではOAuth 2.0は有効化されていました。
5.2.SeriveNowのアプリケーションレジストリ作成
ServiceNowのマニュアルに従い、アプリケーションレジストリを設定します
https://docs.servicenow.com/ja-JP/bundle/washingtondc-platform-security/page/administer/security/task/t_CreateEndpointforExternalClients.html
ServiceNowの管理画面で、すべて > システム OAuth > アプリケーションレジストリー に移動して、「新規」をクリックします。
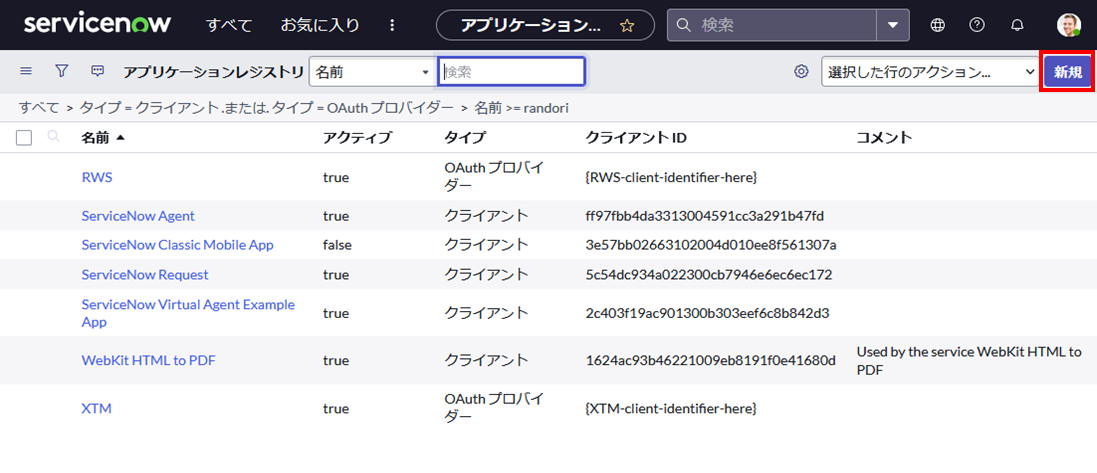
「外部クライアント用の OAuth API エンドポイントを作成します 」をクリックします。

以下のように設定します。
| 設定項目 | 設定値 | 備考 |
|---|---|---|
| 名前 | 任意の名前を設定 | - |
| クライアントID | 自動生成 | - |
| クライアントシークレット | 空白のまま(送信時に自動生成) | - |
| リダイレクトURL | https://www.workato.com/oauth/callback | ※ |
| ロゴURL | https://www.workato.com/blog/wp-content/uploads/2015/10/workato-logo-small.png | ※ |
※リダイレクトURLとロゴURLは、RandoriのマニュアルからたどったWorkatoのマニュアルを参考にしています。
https://docs.workato.com/ja/connectors/servicenow.html

送信をクリックすると、クライアントシークレットが自動生成されます。
クライアントIDとクライアントシークレットの値をコピーしておきます。
5.3.Randoriのマーケットプレイス設定
テナント名、先ほど発行したクライアントID、クライアントシークレットを登録して「Connect」をクリックします。
ServiceNowのログイン画面が表示されるため、管理者IDでログインします。

接続が成功すると、「Connection Success」と表示されます。
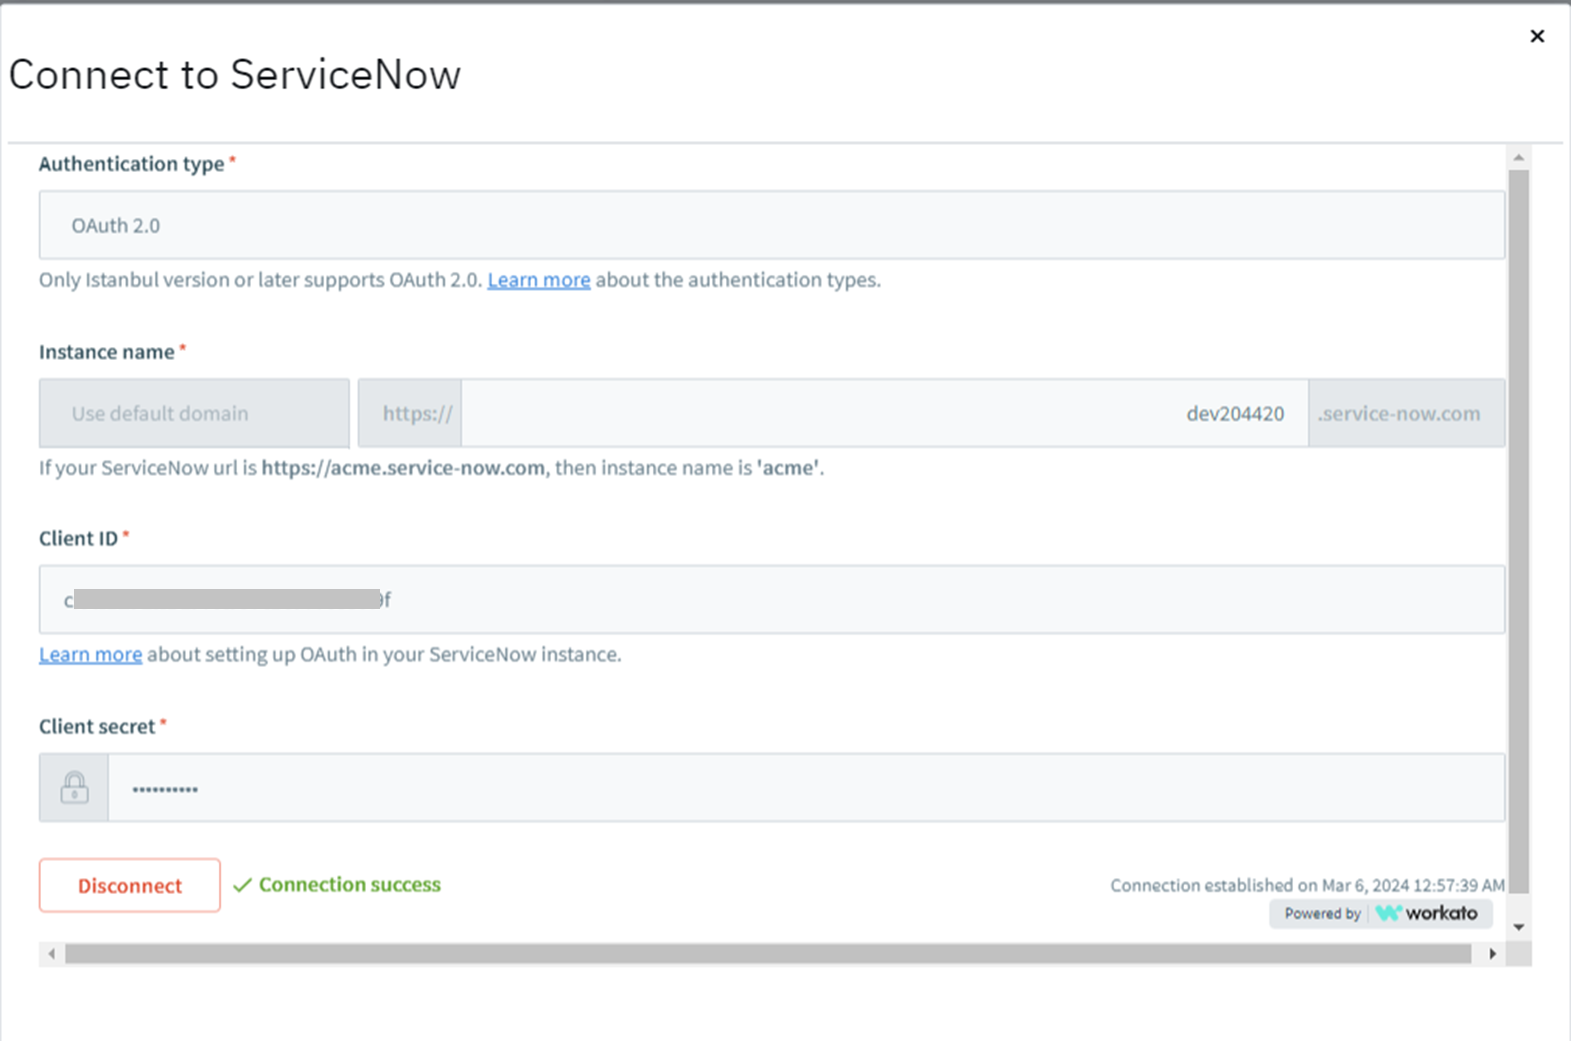
マーケットプレイスの設定は以上となります
ただし、OAuth2.0で構成した場合、100日ごとに手動で接続を更新する必要があると記載されています。
OAuth2.0の接続方式を採用する際には、注意が必要です。
最後に
IBM Security RandoriとServiceNowを連携させてみました。
ServiceNow以外の製品とも連携できるので、試してみたいと思います。


