tl;dr
Evernoteヘビーユーザーだけど最近使いにくいし、ほとんどの機能は最近使っていない事に気づきました。
実情記事を集めて管理したいだけなので、それならFlutter + Firebaseでさくっと作れるか試してみました。
作ったアプリのソース。
環境
Windows 10 Home 19041 build
firebase version 8.7.0
flutter doctor
Doctor summary (to see all details, run flutter doctor -v):
[√] Flutter (Channel beta, 1.20.0, on Microsoft Windows [Version 10.0.19041.388], locale ja-JP)

[!] Android toolchain - develop for Android devices (Android SDK version 29.0.3)
    X Android license status unknown.
      Try re-installing or updating your Android SDK Manager.
      See https://developer.android.com/studio/#downloads or visit
      https://flutter.dev/docs/get-started/install/windows#android-setup for detailed instructions.
[√] Chrome - develop for the web
[!] Android Studio (not installed)
[√] VS Code (version 1.47.3)
[√] Connected device (3 available)
NOTE: 今回webベースで開発したためflutter beta channelを利用しました。
[Flutter] まずデモアプリを表示
公式サイトのチュートリアルに沿ってカウントアップのデモアプリをforkしてきます。
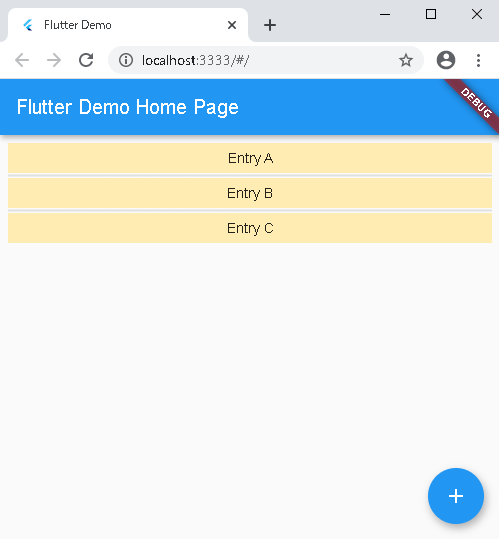
初めは数字とそのカウントアップのためのボタンがセットされているScaffoldクラスを少し改造してダミーのitem list表示するようにします。
class MyHomePage extends StatefulWidget {
  MyHomePage({Key key, this.title}) : super(key: key);

  final String title;
  final List<String> entries = <String>['A', 'B', 'C'];
  final List<String> tags = <String>['tagA', 'tagB', 'tagC'];
  final List<int> colorCodes = <int>[100, 100, 100];

  @override
  _MyHomePageState createState() => _MyHomePageState();
}

class _MyHomePageState extends State<MyHomePage> {
  int _counter = 0;

  void _incrementCounter() {
    setState(() {
      _counter++;
    });
  }

  @override
  Widget build(BuildContext context) {
    return Scaffold(
      appBar: AppBar(
        title: Text(widget.title),
      ),
      body: ListView.separated(
        padding: const EdgeInsets.all(8),
        itemCount: widget.entries.length,
        itemBuilder: (BuildContext context, int index) {
          return Container(
            height: 30,
            color: Colors.amber[widget.colorCodes[index]],
            child: Center(child: Text('Entry ${widget.entries[index]}')),
          );
        },
        separatorBuilder: (BuildContext context, int index) => Divider(
          color: Colors.grey[300],
          height: 5,
          thickness: 2,
        ),
      ),
      floatingActionButton: FloatingActionButton(
        onPressed: _incrementCounter,
        tooltip: 'Increment',
        child: Icon(Icons.add),
      ), // This trailing comma makes auto-formatting nicer for build methods.
    );
  }
}
[Firebase] Firestoreで記事リスト作成
Firestoreから実際の記事がとってこれるように、一度ダミーの記事リストを作成します。
まずはFirebase consoleでプロジェクトを作成しておきます。
プロジェクト内のFirestoreにて新しくデータベースを作成しいくつかダミー記事を突っ込んでおきます。
この時、記事タイトルの"title"や記事内容をひとまず詰める予定の"text", "html"等、タグ管理のための"tags"、最後にtimestampなどを決め打ちでキーとして追加しておきます。
[Flutter+Firebase] Firestoreの記事リストを表示
このページに沿ってindex.htmlへFirebaseのプロジェクト情報を追加しておきます。
Firestoreから得た記事リストを表示するクラスを追加します。
こちらはStreamBuilderを利用してFirestoreからの返り値を処理します。
class ItemList extends StatelessWidget {
  ItemList();

  @override
  Widget build(BuildContext context) {
    return StreamBuilder<QuerySnapshot>(
      stream: Firestore.instance
          .collection('test_list')
          .orderBy('timestamp', descending: true)
          .where('tags', arrayContainsAny: this.queryTags)
          .snapshots(),
      builder: (BuildContext context, AsyncSnapshot<QuerySnapshot> snapshot) {
        if (snapshot.hasError) {
          print(snapshot.error);
          return new Text('Error: ${snapshot.error}');
        }
        switch (snapshot.connectionState) {
          case ConnectionState.waiting:
            return new Text('Loading...');
          default:
            return new ListView(
              shrinkWrap: true,
              children: snapshot.data.documents
                  .map((DocumentSnapshot document) {
                return new GestureDetector(
                  onTap: () => print('tapped'),
                  child: new Card(
                    child: ListTile(
                      title: new Text(document['title']),
                      subtitle: new Text(document['tags']
                              .join(',')),
                    ),
                  ),
                );
              }).toList(),
            );
        }
      },
    );
  }
}
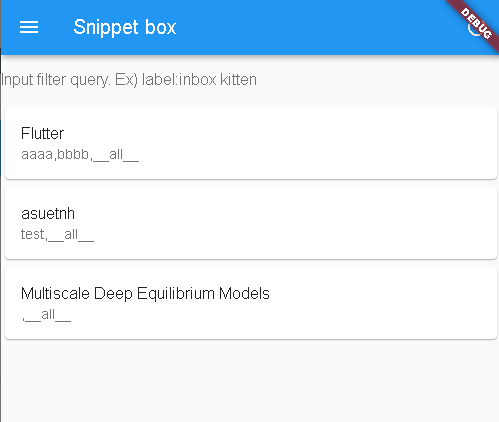
_MyHomePageState内Scaffold関数のbodyを修正して表示します。
(ついでに後で使うテキストボックスも追加)
class _MyHomePageState extends State<MyHomePage> {

  @override
  Widget build(BuildContext context) {
    return Scaffold(
      ...
      body: Column(children: <Widget>[
        TextField(
          decoration: InputDecoration(
              border: InputBorder.none,
              hintText: 'Input filter query. Ex) label:inbox kitten'),
          onSubmitted: (String value) => print('hit'),
        ),
        ItemList(),
      ]),
      ...
    );
  }
}
[Flutter+Firebase] 記事のフィルタリング機能の追加
タグ情報やタイトルを用いた簡単なフィルタリング機能を追加します。
先ほどさりげなく追加しておいたテキストボックスを拡張してフィルタを可能にします。
具体的にはスペースで区切ったクエリをパースして取得します。
そしてlabel:nameの形式で$nameのタグのみを表示できるようにします。
それ以外はタイトルへの文字列検索を行ってフィルタをします。
まず_MyHomePageStateでテキスト入力をパースしてクエリを取得します。
この時、デフォルトの全表示を可能にするため便宜的に__all__タグをデフォルトで追加しました。
class _MyHomePageState extends State<MyHomePage> {
  List<String> _queryTerms = [];
  List<String> _queryTags = ['__all__'];

  void _setQuery(String query) {
    setState(() {
      this._queryTags.clear();
      this._queryTerms.clear();

      query.split(' ').forEach((element) {
        if (element.startsWith(widget.tagPrefix)) {
          this._queryTags.add(element.replaceFirst(widget.tagPrefix, ''));
        } else {
          this._queryTerms.add(element);
        }
      });

      if (this._queryTags.isEmpty) {
        this._queryTags.add('__all__');
      }
    });
    print('tags: ${this._queryTags}');
    print('terms: ${this._queryTerms}');
  }
  ...
  @override
  Widget build(BuildContext context) {
    return Scaffold(
      ...
      body: Column(children: <Widget>[
        TextField(
          decoration: InputDecoration(
              border: InputBorder.none,
              hintText: 'Input filter query. Ex) label:inbox kitten'),
          onSubmitted: (String value) => this._setQuery(value),
        ),
        ItemList(this._queryTags, this._queryTerms),
      ]),
      ...
    );
  }
}
ItemListクラスもクエリを受け付けてフィルタをかける機能を追加します。
class ItemList extends StatelessWidget {
  ItemList(this.queryTags, this.queryTerms);

  final List<String> queryTags;
  final List<String> queryTerms;
  ...
  @override
  Widget build(BuildContext context) {
    return StreamBuilder<QuerySnapshot>(
      stream: Firestore.instance
          .collection('test_list')
          .orderBy('timestamp', descending: true)
          .where('tags', arrayContainsAny: this.queryTags)
          .snapshots(),
      builder: (BuildContext context, AsyncSnapshot<QuerySnapshot> snapshot) {
        ...
        switch (snapshot.connectionState) {
          case ConnectionState.waiting:
            return new Text('Loading...');
          default:
            return new ListView(
              shrinkWrap: true,
              children: snapshot.data.documents
                  .where((document) =>
                      document['tags'].toSet().containsAll(this.queryTags))
                  .where((document) => this
                      .queryTerms
                      .every((term) => document['title'].contains(term)))
                  .map((DocumentSnapshot document) {
                return new GestureDetector(
                  onTap: () => _navigate(context, document),
                  child: new Card(
                    child: ListTile(
                      title: new Text(document['title']),
                      subtitle: new Text(document['tags']
                              .where((tag) => tag != '__all__')
                              .join(',') +
                          ',__all__'),
                    ),
                  ),
                );
              }).toList(),
            );
        }
      },
    );
  }
}
主な変更として、StreamBuilderに渡すstreamはFirestoreへのクエリを利用してタグのフィルタリングを
適用するようにして受け取る記事リストを事前に制限するようにしました。
またListViewを表示する際にwhereを使って再度タグフィルタの確認とタイトル文字列とクエリ文字列の比較を
行ってフィルタリングを行っています。
FirestoreにはさらにorderByでのtimestampによる整列を行っているため複合クエリを行っていることになります。
そのため、Firestore側で事前に複合クエリのためのインデックスを作成する必要がありました。
ただし、エラーメッセージに言われるがままにインデックスを作成するだけですので特に大変な事はありません。
[Flutter] Navigatorで記事内容を表示
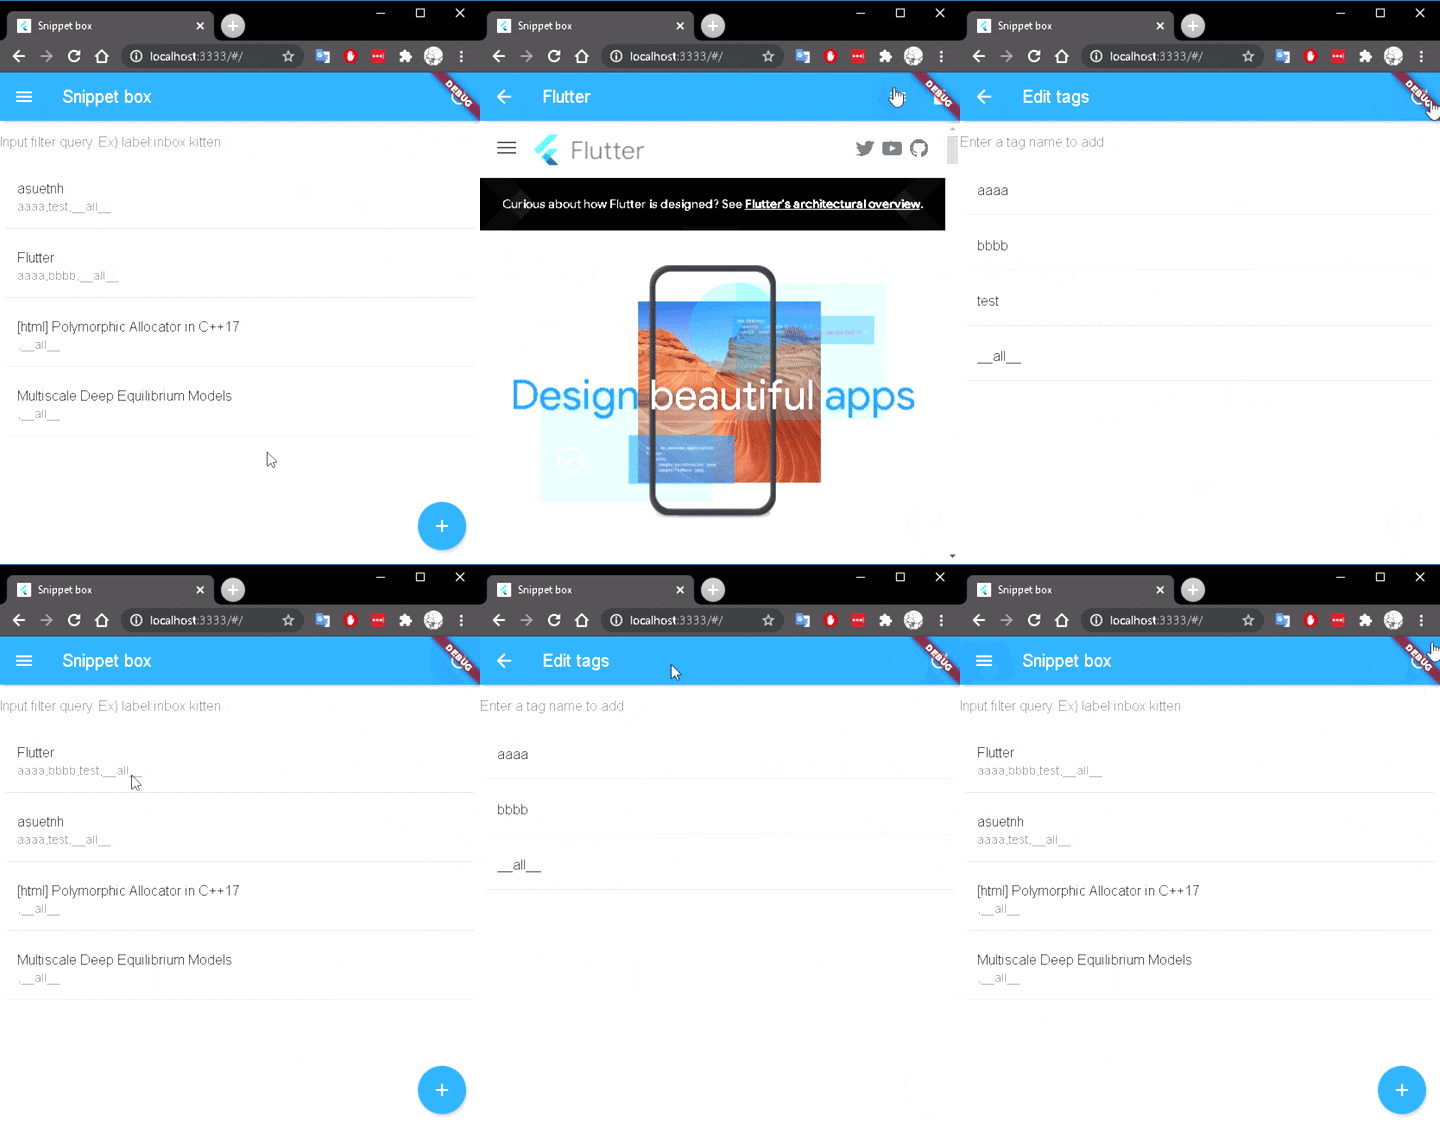
記事リストをタップするとその記事に登録された宛先やコンテンツを表示する機能をNavigatorを用いて実装します。
class ItemList extends StatelessWidget {
  ...
  _navigate(context, document) async {
    final content = await _getContent(document);
    await Navigator.push(
      context,
      MaterialPageRoute(
        builder: (context) => ContentViewer(
          document,
          content,
        ),
      ),
    );
  }

  _getContent(document) async {
    if (await canLaunch(document['uri'])) {
      return EasyWebView(
        src: document['uri'],
        onLoaded: () => (print('loaded uri')),
      );
    } else if (!document['html'].isEmpty) {
      return EasyWebView(
        src: document['html'],
        isHtml: true,
        onLoaded: () => (print('loaded html')),
      );
    } else if (!document['text'].isEmpty) {
      return SingleChildScrollView(
        scrollDirection: Axis.vertical,
        child: Text(document['text']),
      );
    } else {
      throw 'Cannot read document $document';
    }
  }  ...
}
ここではEasyWebView, SingleChildScrollViewを用いてweb content、html(メール等)、その他textを
ひとまず表示できるようにしました。
実際にコンテンツを描画するContentViewerは以下のように実装します。
class ContentViewer extends StatelessWidget {
  const ContentViewer(this.document, this.content);

  final DocumentSnapshot document;
  final Widget content;

  @override
  Widget build(BuildContext context) {
    return Scaffold(
      appBar: AppBar(
        title: Text(this.document['title']),
      body: this.content,
    );
  }
}
[Flutter+Firebase] 記事タグを編集、更新
各記事に登録されているタグ情報を編集、更新できるようにします。
新たにStatefulWidgetとしてTagEditorクラスを追加します。
TagEditorクラス内では、FutureBuilderを通してタグ情報をFirestoreから取得し、
その内容を表示します。
最上段のテキストボックスで入力を受け付けて、新しいタグ情報加えます。
既存のタグは、そのカードをタップすると消せるようにします。(TODO:もっと分かりやすい消し方)
右上にupdate iconを追加し、そのボタンをタップすると初めてFirestoreへ更新リクエストを送ります。
デフォルトのBackボタンを押した場合は更新せずに戻ります。
__all__タグはフィルタリング時に利用するため全ての記事に登録されている必要があります。
なので、これは消せないようにします。
class TagEditor extends StatefulWidget {
  TagEditor(this.documentID);

  final String documentID;

  @override
  _TagEditorState createState() => _TagEditorState();
}

class _TagEditorState extends State<TagEditor> {
  Future<List<dynamic>> _tags;

  @override
  void initState() {
    super.initState();

    this._tags = Firestore.instance
        .collection('test_list')
        .document(widget.documentID)
        .get()
        .then((doc) {
      var tags = doc.data['tags'];
      tags.sort();
      tags.removeAt(tags.indexOf('__all__'));
      tags.add('__all__');
      return tags;
    });
  }

  void _removeTag(int index) {
    // Needs at least '__all__' tag to avoid filter error.
    // Do not allow to delete.
    setState(() {
      this._tags = this._tags.then((tags) {
        if (tags[index] != '__all__') {
          tags.removeAt(index);
        }
        return tags;
      });
    });
  }

  void _addTag(String tagName) {
    setState(() {
      this._tags = this._tags.then((tags) {
        tags.add(tagName);
        tags.sort();
        tags.removeAt(tags.indexOf('__all__'));
        tags.add('__all__');
        return tags;
      });
    });
  }

  @override
  Widget build(BuildContext context) {
    return FutureBuilder(
      future: this._tags,
      builder: (context, snapshot) {
        if (snapshot.connectionState != ConnectionState.done) {
          return CircularProgressIndicator();
        }

        if (snapshot.hasError) {
          return Text(snapshot.error.toString());
        }

        if (!snapshot.hasData) {
          return Text('Missing data');
        }

        return Scaffold(
          appBar: AppBar(
            title: Text('Edit tags'),
            actions: <Widget>[
              IconButton(
                icon: Icon(
                  Icons.update,
                  size: 24.0,
                ),
                onPressed: () {
                  print(
                      'Assign tags ${snapshot.data} to document ${widget.documentID}');
                  Firestore.instance
                      .collection('test_list')
                      .document(widget.documentID)
                      .updateData({
                    'tags': snapshot.data,
                    'timestamp': FieldValue.serverTimestamp(),
                  });
                  Navigator.of(context).pop();
                },
              ),
            ],
          ),
          body: Column(
            children: <Widget>[
              TextField(
                textInputAction: TextInputAction.done,
                onSubmitted: (String tagName) {
                  if (tagName.isNotEmpty && !snapshot.data.contains(tagName)) {
                    this._addTag(tagName);
                  }
                },
                decoration: InputDecoration(
                    border: InputBorder.none,
                    hintText: 'Enter a tag name to add'),
              ),
              ListView.builder(
                shrinkWrap: true,
                itemCount: snapshot.data.length,
                itemBuilder: (BuildContext context, int index) {
                  return new GestureDetector(
                    onTap: () => this._removeTag(index),
                    child: new Card(
                      child: ListTile(
                        title: new Text(snapshot.data[index]),
                      ),
                    ),
                  );
                },
              ),
            ],
          ),
        );
      },
    );
  }
}
あとはContentViewerにList iconを追加してそこから呼べるようにして編集機能を追加しました。
[Flutter+Firebase] Navigation Barを用意してタグリストを表示
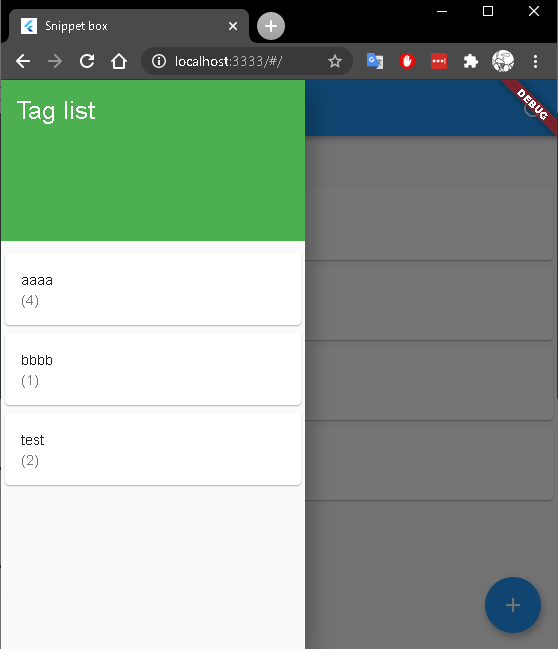
トップページからタグ一覧をNavigation Barより見れるようにします。
Firestoreにてタグ一覧のデータベースtag_listを記事リストtest_listから
自動生成するようなCloudFunctionを加えます。
ここで加える関数tagListOnUpdateはtest_list内の各記事に更新がかかる度に実行され、
tag情報の差分を抽出し、その差分に基づきtag_listデータベースへ更新を加えます。
exports.tagListOnUpdate = functions.firestore
  .document('test_list/{docId}')
  .onUpdate((change, context) => {
    const newValue = change.after.data();
    const previousValue = change.before.data();

    const newTags = new Set(newValue['tags']);
    const previousTags = new Set(previousValue['tags']);

    const removedTags = new Set([...previousTags].filter(x => !newTags.has(x)));
    const addedTags = new Set([...newTags].filter(x => !previousTags.has(x)));

    console.log('removedTags: ', removedTags);
    console.log('addedTags: ', addedTags);

    const tagListRef = fireStore.collection('tag_list');

    removedTags.forEach((tag) => {
      tagListRef.doc(tag).get()
        .then((tagDoc) => {
          if (tagDoc.exists) {
            console.log('doc exists when removing: ', tagDoc.data()['documents']);

            const tagDocuments = tagDoc.data()['documents'].filter(
              v => v !== context.params.docId);

            console.log('setting docs ', tagDocuments, 'from tag ', tag, 'after removal of ', context.params.docId);

            if (tagDocuments.length) {
              console.log('After removal, doc should still exist.');
              tagListRef.doc(tag).set({
                documents: tagDocuments,
                timestamp: admin.firestore.FieldValue.serverTimestamp(),
              });
            } else {
              console.log('No documents belong to this tag. remove tag document itself');
              tagListRef.doc(tag).delete();
            }
          }
          return;
        })
        .catch((error) => console.log('error tag update:', error));
      });

    addedTags.forEach((tag) => {
      tagListRef.doc(tag).get()
        .then((tagDoc) => {
          let tagDocuments = [];
          if (tagDoc.exists) {
            console.log('doc exists when adding: ', tagDoc.data()['documents']);
            tagDocuments = tagDocuments.concat(tagDoc.data()['documents']);
          }

          if (!tagDocuments.includes(context.params.docId)) {
            tagDocuments.push(context.params.docId);
          }

          console.log('setting docs ', tagDocuments, 'to tag ', tag, 'after addition of ', context.params.docId);

          return tagListRef.doc(tag).set({
            documents: tagDocuments,
            timestamp: admin.firestore.FieldValue.serverTimestamp(),
          });
        })
        .catch((error) => console.log('error tag update:', error));
      });
  })
Navigator Bar上でタグ一覧をFirestoreのtag_listデータベースに基づき表示するクラスも
以下のようにStreamBuilderを用いて実装します。
class NavDrawer extends StatelessWidget {
  @override
  Widget build(BuildContext context) {
    return Drawer(
        child: ListView(padding: EdgeInsets.zero, children: <Widget>[
      DrawerHeader(
        child: Text(
          'Tag list',
          style: TextStyle(color: Colors.white, fontSize: 25),
        ),
        decoration: BoxDecoration(
          color: Colors.green,
        ),
      ),
      StreamBuilder<QuerySnapshot>(
          stream: Firestore.instance.collection('tag_list').snapshots(),
          builder:
              (BuildContext context, AsyncSnapshot<QuerySnapshot> snapshot) {
            if (snapshot.hasError) return new Text('Error: ${snapshot.error}');
            switch (snapshot.connectionState) {
              case ConnectionState.waiting:
                return new Text('Loading...');
              default:
                return new ListView(
                  shrinkWrap: true,
                  children:
                      snapshot.data.documents.map((DocumentSnapshot document) {
                    return new GestureDetector(
                        child: new Card(
                            child: ListTile(
                                title: new Text(document.documentID),
                                subtitle: new Text(
                                    '(${document['documents'].length})'))));
                  }).toList(),
                );
            }
          })
    ]));
  }
}
Firestore上は以下のようになっています。documentsキーが示す配列は対応するタグが登録されている記事一覧です。
[Flutter+Firebase] 手動で記事を追加
トップページのプラスボタンから、手動で記事を追加できるようにします。
Flutter Html Editorが残念ながらWeb版に対応していなかったため、
今回はURLとraw textのみ追加できるようにしました。
(TODO: PDF追加)
text editorとして、TextField経由で入力を受け付けて、update iconからFirestoreへ更新を投げる
LaunchTextEditorクラスに実装します。
class LaunchTextEditor extends StatelessWidget {
  LaunchTextEditor({this.initialTitle, this.initialContent});

  final String initialTitle;
  final String initialContent;

  @override
  Widget build(BuildContext context) {
    final titleController = TextEditingController(text: this.initialTitle);
    final contentController = TextEditingController(text: this.initialContent);

    return Scaffold(
      appBar: AppBar(
        title: TextField(controller: titleController),
        actions: <Widget>[
          IconButton(
            icon: Icon(
              Icons.update,
              size: 24.0,
            ),
            onPressed: () async {
              print('title: ${titleController.text}');
              print('content: ${contentController.text}');
              await Firestore.instance.collection('test_list').add({
                'title': titleController.text,
                'uri': '',
                'html': '',
                'text': contentController.text,
                'tags': ['__all__'],
                'timestamp': FieldValue.serverTimestamp(),
              });
              Navigator.of(context).pop();
            },
          ),
        ],
      ),
      body: TextField(
        controller: contentController,
        decoration: InputDecoration(
          border: InputBorder.none,
          hintText: 'Enter text',
        ),
        keyboardType: TextInputType.multiline,
        maxLines: null,
      ),
    );
  }
}
続いて、トップページのプラスボタンよりダイアログベースで誘導しつつ
URLとtextを追加できるようにします。
enum ArticleTypes {
  URL,
  PDF,
  TEXT,
}

class _MyHomePageState extends State<MyHomePage> {
  ...
  _createDialogOption(
      BuildContext context, ArticleTypes articleType, String str) {
    return new SimpleDialogOption(
      child: new Text(str),
      onPressed: () {
        Navigator.pop(context, articleType);
      },
    );
  }

  _addUrlDialog(BuildContext context) {
    final titleController = TextEditingController();
    final contentController = TextEditingController();

    return showDialog(
        context: context,
        builder: (context) {
          return AlertDialog(
            title: Text('Provide URL'),
            content: Column(
              mainAxisSize: MainAxisSize.min,
              children: <Widget>[
                TextField(
                  controller: titleController,
                  decoration: InputDecoration(hintText: "Title"),
                ),
                TextField(
                  controller: contentController,
                  decoration: InputDecoration(hintText: "URL path"),
                ),
              ],
            ),
            actions: <Widget>[
              new FlatButton(
                child: new Text('Add'),
                onPressed: () async {
                  print(
                      'Add new title ${titleController.text} with article ${contentController.text}');
                  await Firestore.instance.collection('test_list').add({
                    'title': titleController.text,
                    'uri': contentController.text,
                    'tags': ['__all__'],
                    'timestamp': FieldValue.serverTimestamp(),
                  });
                  Navigator.of(context).pop();
                },
              ),
              new FlatButton(
                child: new Text('CANCEL'),
                onPressed: () {
                  Navigator.of(context).pop();
                },
              ),
            ],
          );
        });
  }

  _addArticleDialog(BuildContext context) {
    showDialog<ArticleTypes>(
      context: context,
      builder: (BuildContext context) => new SimpleDialog(
        title: new Text('Select the content type'),
        children: <Widget>[
          _createDialogOption(context, ArticleTypes.URL, 'Url'),
          _createDialogOption(context, ArticleTypes.TEXT, 'Text')
        ],
      ),
    ).then((value) {
      switch (value) {
        case ArticleTypes.URL:
          print('url');
          _addUrlDialog(context);
          break;
        case ArticleTypes.PDF:
          print('pdf');
          // TODO: PDF storage.
          break;
        case ArticleTypes.TEXT:
          print('text');
          // TODO: switch to HTML editor.
          Navigator.push(
            context,
            MaterialPageRoute(
              builder: (context) => LaunchTextEditor(
                initialTitle: 'New article',
                initialContent: 'New content',
              ),
            ),
          );
          break;
      }
    });
  }
  ...
}
[Flutter+Firebase] Emailを転送して記事リストに追加
Email経由で記事を追加できるようにします。
調べた所、Freenom(ドメイン取得)+ SendGrid(inbound parser) + Cloud function(parse, 記事追加)で行けるとの事でした。
Freenom, SendGridの設定は他記事がすでに詳しいので割愛します。
参考:
- SendGrid 新人成長記 第七回 Inbound Parse Webhookを用いてメールを受信する
- SendGrid,Heroku,Gmailを使って無料で特定のメールだけをSlackチャンネルに転送する
唯一SendGridがCloudFunctionへ送ってくるメール情報のparse方法が分からなかったのですが、以下記事などを参考に
multipart/form-dataとしてbusboyでparseする事で上手くいきました。
結果CloudFunctionでは以下のような関数を実装しました。
exports.addMessage = functions.https.onRequest(async (req, res) => {
  try {
    console.log('Email recieved')

    console.log(req)
    console.log(req.headers)
    console.log(req.body.toString())

    const busboy_parser = new busboy({ headers: req.headers })
    let docRef = fireStore.collection('test_list').doc();
    docRef.set({
        tags: ['__all__'],
        timestamp: admin.firestore.FieldValue.serverTimestamp(),
      }, {merge: true})
      .then(() => console.log('added tags'))
      .catch((error) => console.log('error tags:', error));

    busboy_parser.on("field", (field, val) => {
      console.log(`Processed field ${field}: ${val}.`);
      if (field === 'subject') {
        console.log('find subject')
        docRef.set({title: val}, {merge: true})
          .then(() => console.log('added subject'))
          .catch((error) => console.log('error subject:', error));
      } else if (field === 'html') {
        console.log('find html')
        docRef.set({html: val}, {merge: true})
          .then(() => console.log('added html'))
          .catch((error) => console.log('error html:', error));
      } else if (field === 'text') {
        console.log('find text')
        docRef.set({text: val}, {merge: true})
          .then(() => console.log('added text'))
          .catch((error) => console.log('error text:', error));
      }
    })

    busboy_parser.end(req.rawBody)
  } finally {
    res.send(200);
  }
});
ただしこのやり方だと認証なしのHTTPリクエストを受け付けないと動かないのが問題でした。
GCPのservice account経由でトークンを発行してもSendGridからそれを利用できず。
以下の記事などですとURLに埋め込める範囲であればIDを差し込めそうなので何とでもできそうですが、ひとまず今回はこのメール転送機能は保留しました。
https://stackoverflow.com/questions/20865673/sendgrid-incoming-mail-webhook-how-do-i-secure-my-endpoint
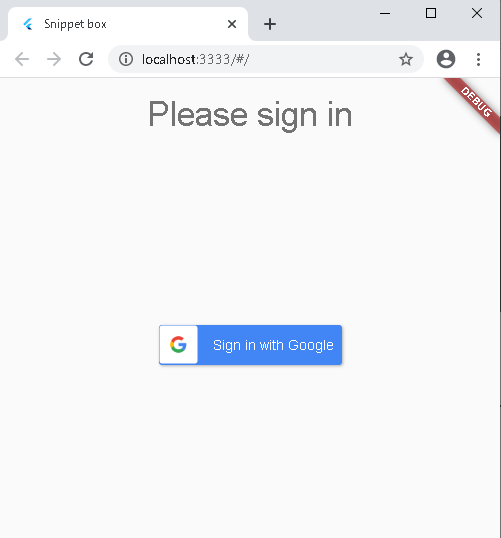
[Flutter+Firebase] Google認証を用いたログインを追加
以下のチュートリアルを参考にしてgoogle sign inを可能にしました。
Providerを用いて認証状態管理し、ログインが必要な場合にのみlogin画面を先に表示できるようにします。
void main() => runApp(
      MultiProvider(
        providers: [
          Provider(
            create: (_) => FirebaseAuthService(),
          ),
          StreamProvider(
            create: (context) =>
                context.read<FirebaseAuthService>().onAuthStateChanged,
          ),
        ],
        child: MyApp(),
      ),
    );
FirebaseAuthServiceなどの詳細は上記チュートリアルから丸パクさせてもらいました。
また以下の記事により、起動時のポートを固定する方が良いようです。(今回は3333に固定しています)
[Firebase] UIDベースでアクセス制限を設定
前セクションでユーザー情報が追加できたので、そのユーザーIDに基づいてデータベースのアクセス制限を
Firestore上で設定します。
これは公式のドキュメントなどを読んでさくっと設定できました。
Writing conditions for Cloud Firestore Security Rules
感想
- FirebaseとFlutterはサクサク作れてとても良い。
- 作りこもうとするととても大変(ところどころに妥協が。。)
- Evernoteは偉大ry
