はじめに
初投稿です。もし何か気づきやご意見がありましたら、ぜひフィードバックをお願いします。
Lineだけでの家族内コミュニケーションに限界を感じています。
Slackの無料版は90日しか履歴が残らないので、Discordが第一候補に挙がりました。
Discordを理解する手段の1つとしてBot作成にトライしました。
個人の備忘録も兼ねて手順を投稿します。
1.Photo LibraryAPIの有効化
以下の解説記事の[Photo Library APIの有効化]セクションを参照してください。
参考:PythonからGooglePhotoに画像や動画をアップロード
2. 認証情報の作成
以下の解説記事の[認証情報の作成]セクションを参照してください。
取得した認証情報のjsonファイルは後ほど使用します。
参考:PythonからGoogleDriveにファイルをアップロード
3. DiscordBotのアカウント作成
- 以下のURLにアクセスします。
Developer portal - [NewApplication]ボタンをクリックします。
- アプリケーション名を入力しチェックボックスにチェックを入れたら[Create]ボタンをクリックします。
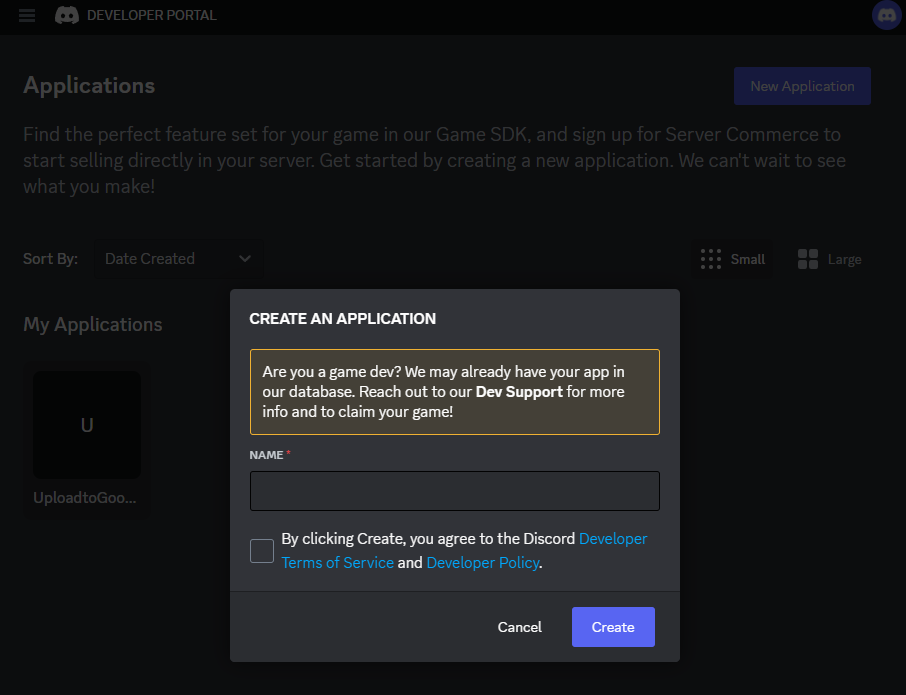
- 作成したBotの設定画面に遷移します。必要に応じてICON、NAMEなどを任意に設定してください。
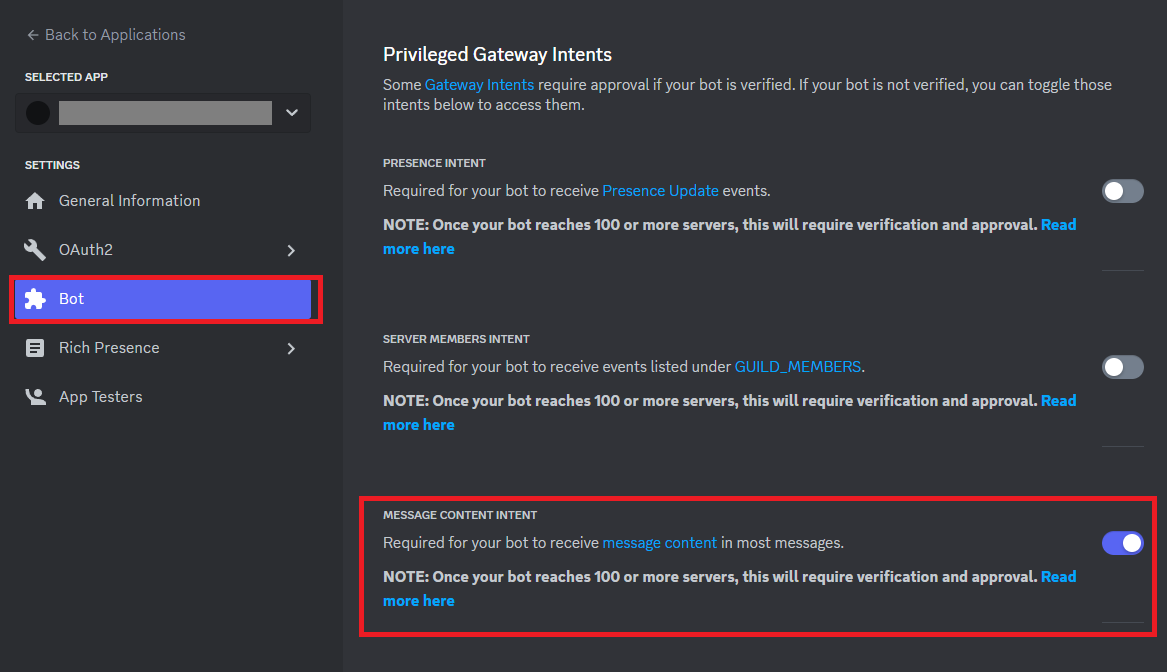
- 左のメニューから[Bot]を選び、[MESSAGE CONTENT INTENT]にチェックを入れます。
これによってBotがDiscordで投稿された画像にアクセスできるようになります。
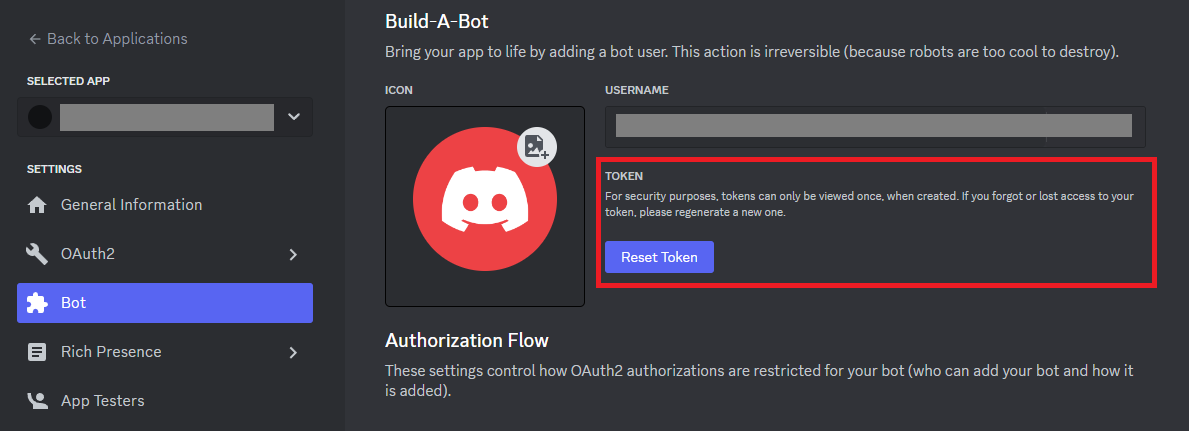
- [Bot]画面上の[ResetToken]をクリックしてTokenを取得します。このTokenは後で使うのでメモしておいてください。
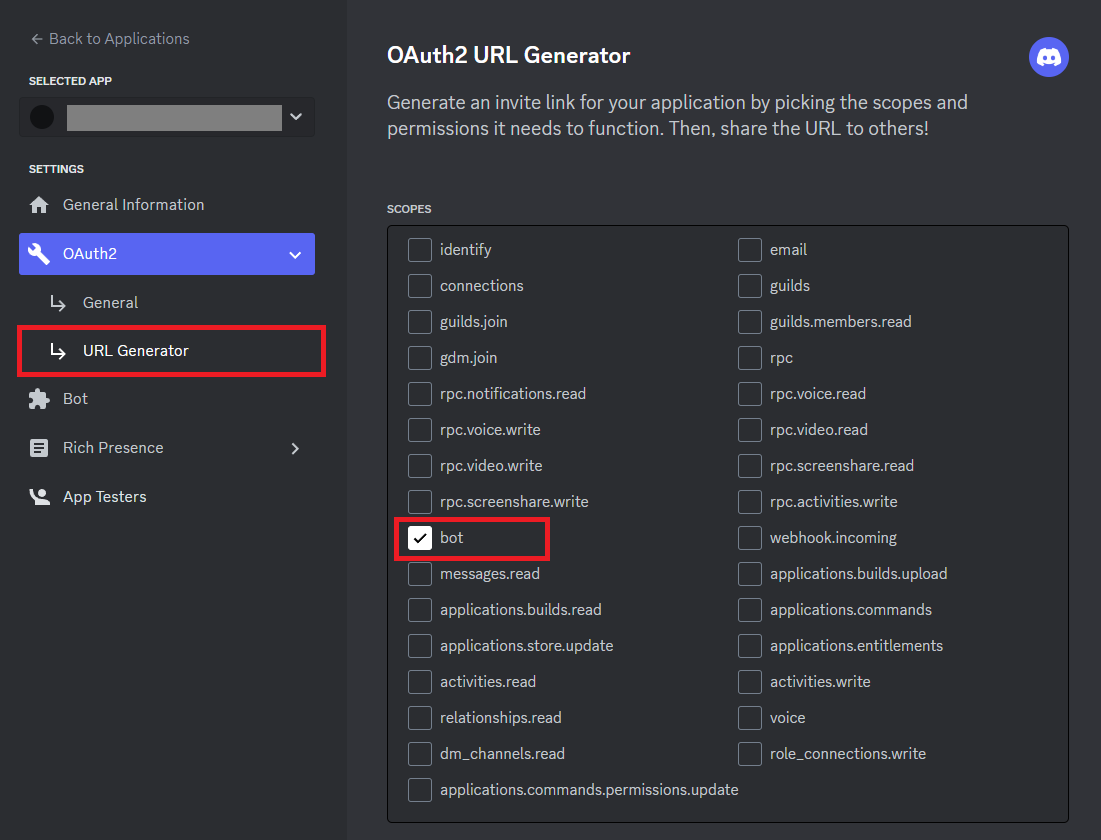
- 左のメニューから[URL Generator]を選び、[Bot]にチェックを入れます。
するとBotに与える権限を選択するチェックボックスが表示されますので、適切な権限を選択します。(今回は[Administrator]を選択しました。)
- さきほどのチェックボックス下部にある[GENERATED URL]欄のURLにアクセスします。Botを追加するサーバを選択したら[はい]をクリックします。他に指示が続くようであれば、画面の指示に従ってください。
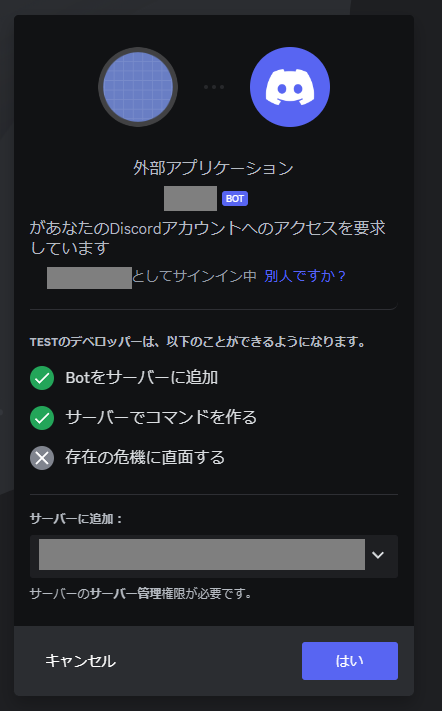
以上でDiscordサーバにBotを作成できます。
4. 必要ライブラリのインストール
以下のライブラリをインストールしてください。
- discord.py
- google-api-python-client
- google-auth-oauthlib
5. 実装その1
GooglePhotoに画像を保存するクラスGooglePhotoFacade.pyを作成します。なお、このコードも先ほどと同じ記事からの引用です。
参考:PythonからGooglePhotoに画像や動画をアップロード
import pickle
from pathlib import Path
import requests
from google.auth.transport.requests import Request
from google_auth_oauthlib.flow import InstalledAppFlow
from googleapiclient.discovery import build

# 各URLやスコープ
API_SERVICE_NAME = "photoslibrary"
API_VERSION = "v1"
SCOPES = ["https://www.googleapis.com/auth/photoslibrary.appendonly"]


class GooglePhotoFacade:
    # ログインしてセッションオブジェクトを返す
    def __init__(
        self,
        credential_path: str,
        token_path: str = "",
    ):
        with build(
            API_SERVICE_NAME,
            API_VERSION,
            credentials=self._login(credential_path, token_path),
            static_discovery=False,
        ) as service:
            self.service = service
            print("Google OAuth is Complete.")

        self.credential_path = credential_path
        self.token_path = token_path

    def _login(self, credential_path: str, token_path: str) -> any:
        """Googleの認証を行う

        Args:
            credential_path (str): GCPから取得したclient_secret.jsonのパス
            token_path (str): Oauth2認証によって得られたトークンを保存するパス。

        Returns:
            googleapiclient.discovery.Resource: _description_
        """

        if Path(token_path).exists():
            # TOKENファイルを読み込み
            with open(token_path, "rb") as token:
                credential = pickle.load(token)
            if credential.valid:
                print("トークンが有効です.")
                return credential
            if credential and credential.expired and credential.refresh_token:
                print("トークンの期限切れのため、リフレッシュします.")
                # TOKENをリフレッシュ
                credential.refresh(Request())
        else:
            print("トークンが存在しないため、作成します.")
            credential = InstalledAppFlow.from_client_secrets_file(
                credential_path, SCOPES
            ).run_local_server()

        # CredentialをTOKENファイルとして保存
        with open(token_path, "wb") as token:
            pickle.dump(credential, token)

        return credential

    def upload(
        self,
        local_file_path: str,
    ):
        self._login(self.credential_path, self.token_path)  # トークンの期限を確認

        save_file_name: str = Path(local_file_path).name
        with open(str(local_file_path), "rb") as image_data:
            url = "https://photoslibrary.googleapis.com/v1/uploads"
            headers = {
                "Authorization": "Bearer " + self.service._http.credentials.token,
                "Content-Type": "application/octet-stream",
                "X-Goog-Upload-File-Name": save_file_name.encode(),
                "X-Goog-Upload-Protocol": "raw",
            }
            response = requests.post(url, data=image_data.raw, headers=headers)

        upload_token = response.content.decode("utf-8")
        print("Google Photoへのアップロードが完了しました。")
        body = {"newMediaItems": [{"simpleMediaItem": {"uploadToken": upload_token}}]}

        upload_response = self.service.mediaItems().batchCreate(body=body).execute()
        print("Google Photoへのアップロードした動画の登録に成功しました。")

        # uploadしたURLを返す
        return upload_response["newMediaItemResults"][0]["mediaItem"]
6.実装その2
Discord側の処理をmain.pyとして実装します。
-
client_secrets.jsonは手順2で取得したjsonファイルです。同じファイル名でmain.pyと同じライブラリに置けばこのままでも動作します。 -
YOUR_TOKENの部分は手順3で取得したTOKENに置き換えてください。 -
YOUR_CHANNEL_IDの部分はBotを追加したいチャンネルのIDで置き換えてください。チャンネルのIDはURLから確認できます。
https://discord.com/channels/サーバーのID/チャンネルのID
import discord
import tempfile
from GooglePhotoFacade import GooglePhotoFacade

# ボットのトークン
TOKEN = "YOUR_TOKEN"

# Discord Intentsの設定
intents = discord.Intents.default()
intents.message_content = True

# Google Photoへのアップロードに使用するクラス
google_photo = GooglePhotoFacade(
    credential_path="client_secrets.json", token_path="token.pkl"
)

# Discordクライアントを作成
client = discord.Client(intents=intents)


@client.event
async def on_ready():
    print(f"Logged in as {client.user.name}")


@client.event
async def on_message(message):
    # メッセージがボット自身のものであれば無視
    if message.author == client.user:
        return
    # 特定のチャンネルID
    target_channel_id = YOUR_CHANNEL_ID

    # 投稿されたメッセージが特定のチャンネルからのものかチェック
    if message.channel.id == target_channel_id:
        # 画像が添付されているかチェック
        if len(message.attachments) > 0:
            total_images = len(message.attachments)
            for index, attachment in enumerate(message.attachments, start=1):
                if attachment.content_type.startswith("image"):
                    # 画像のダウンロード
                    image_data = await attachment.read()
                    # 一時ファイルとして保存
                    with tempfile.NamedTemporaryFile(delete=False) as temp_file:
                        temp_file.write(image_data)
                    save_file_path = temp_file.name
                    # 画像をGoogle Photoにアップロード
                    uploaded_media = google_photo.upload(local_file_path=save_file_path)

                    # アップロードの進捗と画像のURLを表示
                    upload_message = f"{total_images}枚中の{index}枚目の画像をアップロードが完了しました。\n{uploaded_media['productUrl']}"
                    await message.reply(upload_message)


if __name__ == "__main__":
    # ボットを起動
    client.run(TOKEN)
7.動作確認
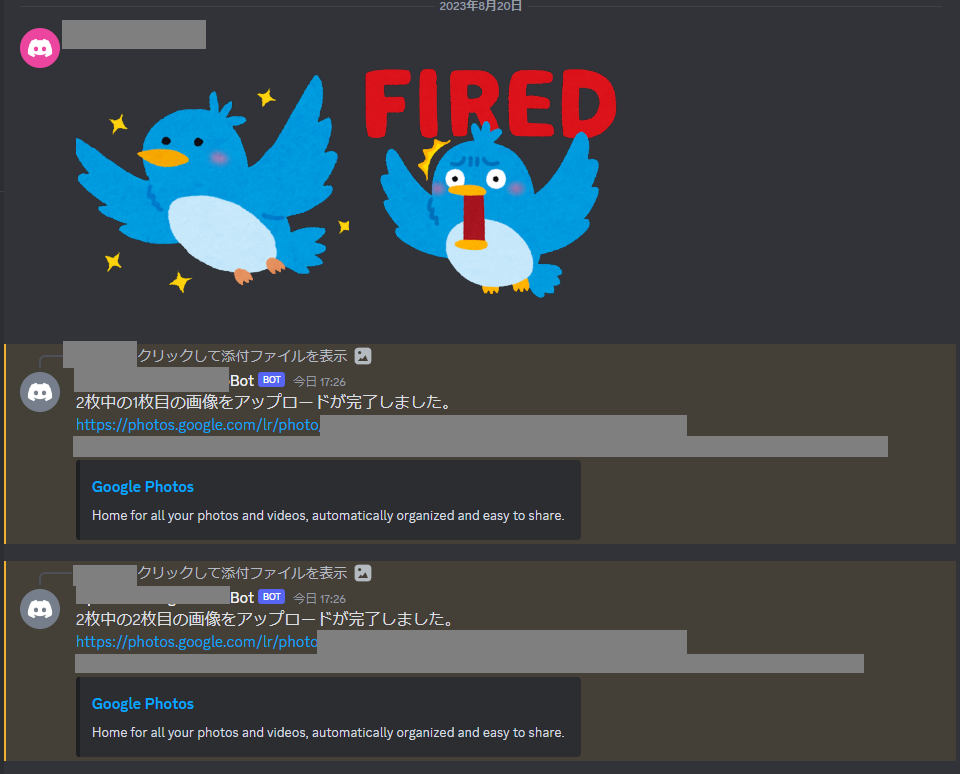
main.pyを起動させた状態でDiscordに画像を投稿するとBotが動作します。無事アップロードが完了するとBotから画像のような返信がきます。同時に複数枚投稿しても問題ありません。
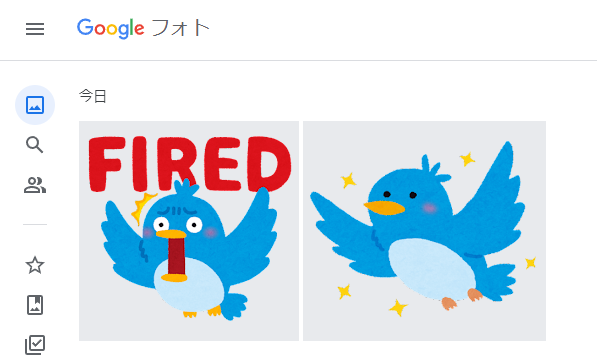
GooglePhotoを開くと無事に画像が保存されています。
参考サイト
文中に載せた参考サイトを改めて列記します。ありがとうございます。