00. はじめに
気が付くとGWも終わりかけています。
このままだとGWにやったことがサマポケの卓球のみになりそうなので、今更ながらFragmentについて調べてみました。
01. Fragmentの実装
流れとしては以下となるかと...
- Fragmentのレイアウト作成
- Fragmentクラスを継承したクラスの作成
- ActivityのレイアウトにFragmentを表示するViewGroupの追加
- ActivityからのFragment呼び出し
1. Fragmentのレイアウト作成
今回はテストなので、単純にテキストを表示するだけのレイアウトです。
fragment_layout.xml
<?xml version="1.0" encoding="utf-8"?>
<android.support.constraint.ConstraintLayout xmlns:android="http://schemas.android.com/apk/res/android"
    android:layout_width="match_parent"
    android:layout_height="match_parent"
    xmlns:app="http://schemas.android.com/apk/res-auto">

    <TextView
        android:id="@+id/fragment_text"
        android:layout_width="wrap_content"
        android:layout_height="wrap_content"
        app:layout_constraintLeft_toLeftOf="parent"
        app:layout_constraintRight_toRightOf="parent"
        android:textSize="@dimen/text_size"/>

</android.support.constraint.ConstraintLayout>
2. Fragmentクラスを継承したクラスの作成
基本的にはonCreateView(LayoutInflater, ViewGroup, Bundle)のみをOverrideすればいいようです。
今回はこのFragmentを使いまわしたいので、外部から情報を渡せるようにしています。
FragmentTest.java
public class FragmentTest extends Fragment {
    private static final String TAG = "FragmentTest";

    private static final String KEY_NAME = "name";
    private static final String KEY_COLOR = "color";

    private String mName;
    private @ColorInt
    int mColor;

    @CheckResult
    public static FragmentTest createInstance(String name, @ColorInt int color) {
        FragmentTest fragment = new FragmentTest();

        Bundle args = new Bundle();
        args.putString(KEY_NAME, name);
        args.putInt(KEY_COLOR, color);

        fragment.setArguments(args);
        return fragment;
    }

    @Override
    public void onCreate(Bundle savedInstanceState) {
        super.onCreate(savedInstanceState);

        Bundle args = getArguments();
        if (args != null) {
            mName = args.getString(KEY_NAME, "");
            mColor = args.getInt(KEY_COLOR, Color.TRANSPARENT);
        }
    }

    @Override
    public View onCreateView(LayoutInflater inflater, ViewGroup container, Bundle savedInstanceState) {
        super.onCreateView(inflater, container, savedInstanceState);
        View view = inflater.inflate(R.layout.fragment_layout, container, false);

        view.setBackgroundColor(mColor);
        ((TextView) view.findViewById(R.id.fragment_text)).setText(mName);

        Log.d(TAG, Integer.toHexString(mColor));

        return view;
    }
}
3. ActivityのレイアウトにFragmentを表示するViewGroupの追加
以下のようにレイアウトに追加するだけです。
<RelativeLayout
    android:id="@+id/Fragment_test01_container"
    android:layout_width="match_parent"
    android:layout_height="wrap_content"
    app:layout_constraintTop_toBottomOf="@id/fragment_test01_switchs">
</RelativeLayout>
4. ActivityからのFragment呼び出し
FragmentTransactionを開始 → Fragmentの追加 → FragmentTransactionをコミット
という流れ
FragmentTransaction transaction = getFragmentManager().beginTransaction();
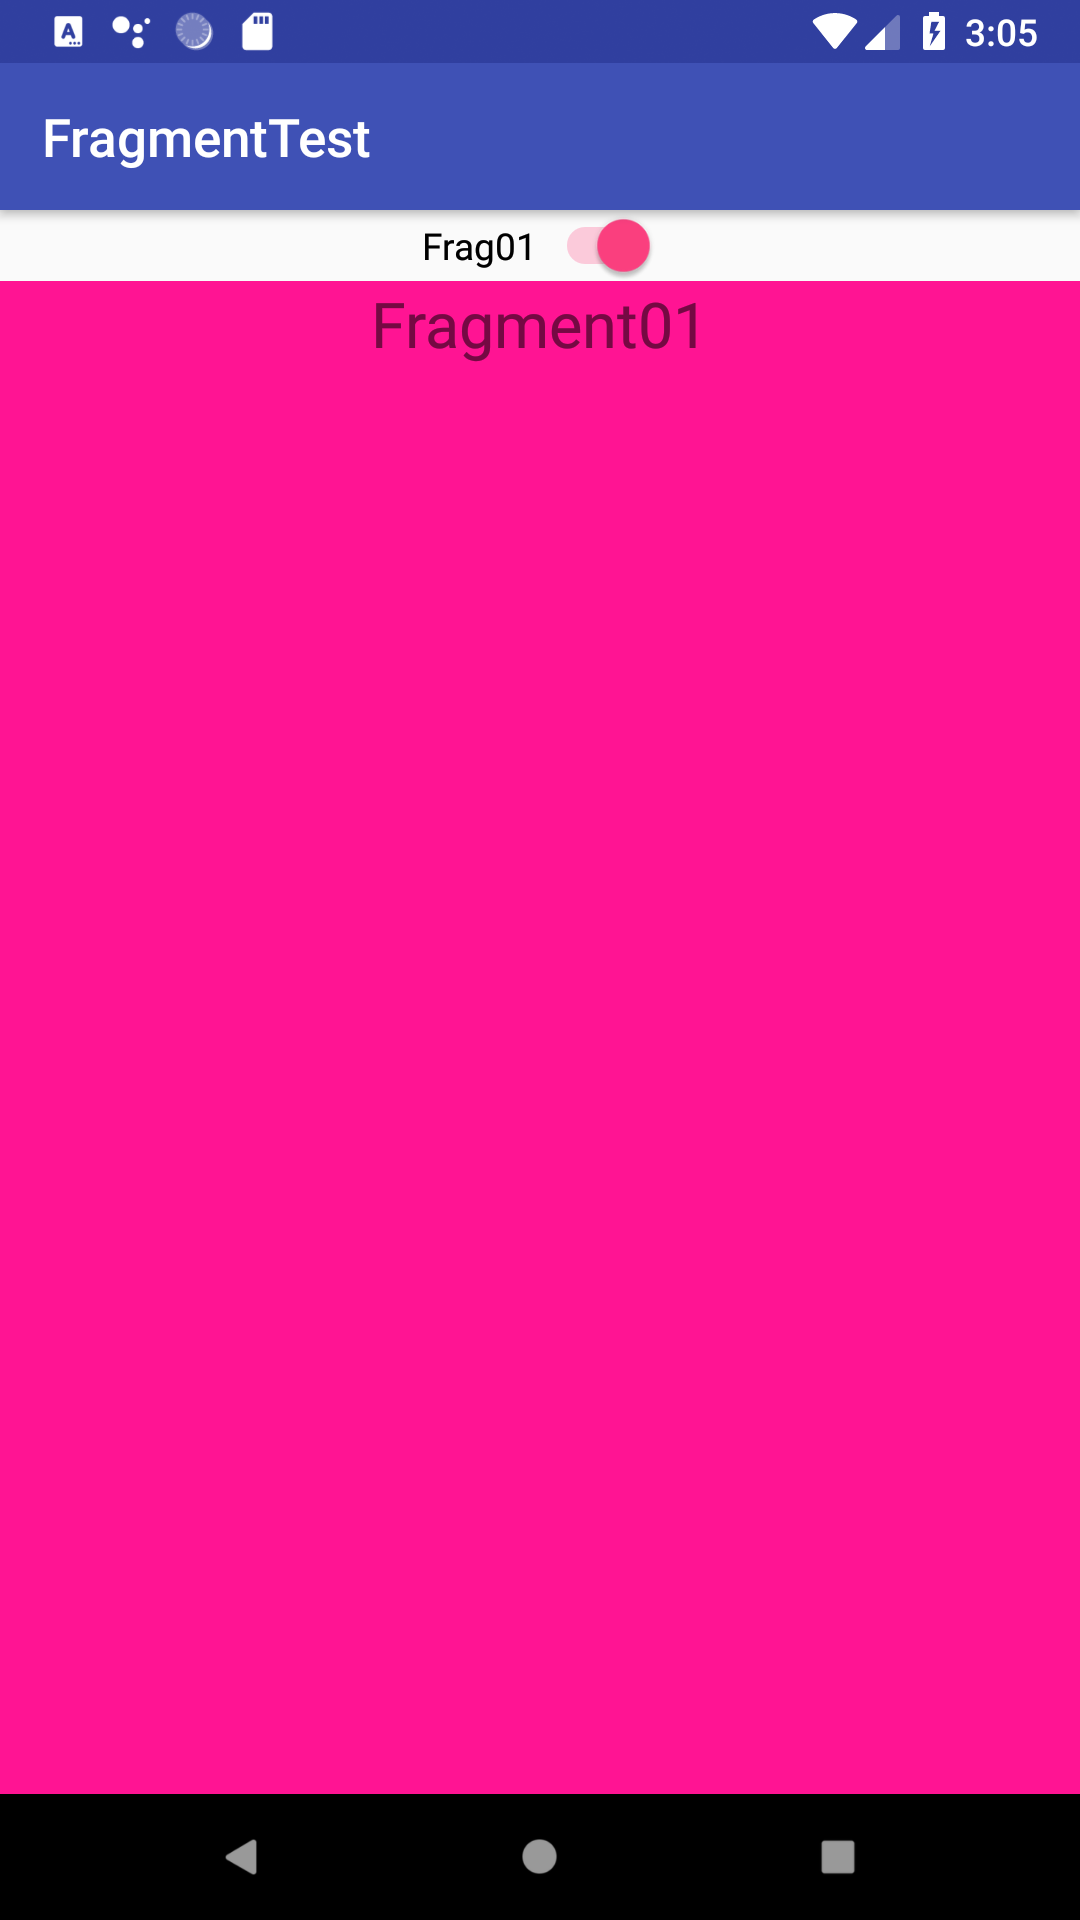
FragmentTest fragment01 = FragmentTest.createInstance("Fragment01", 0xffff1493);
transaction.add(R.id.Fragment_test01_container, fragment01);
transaction.commit();
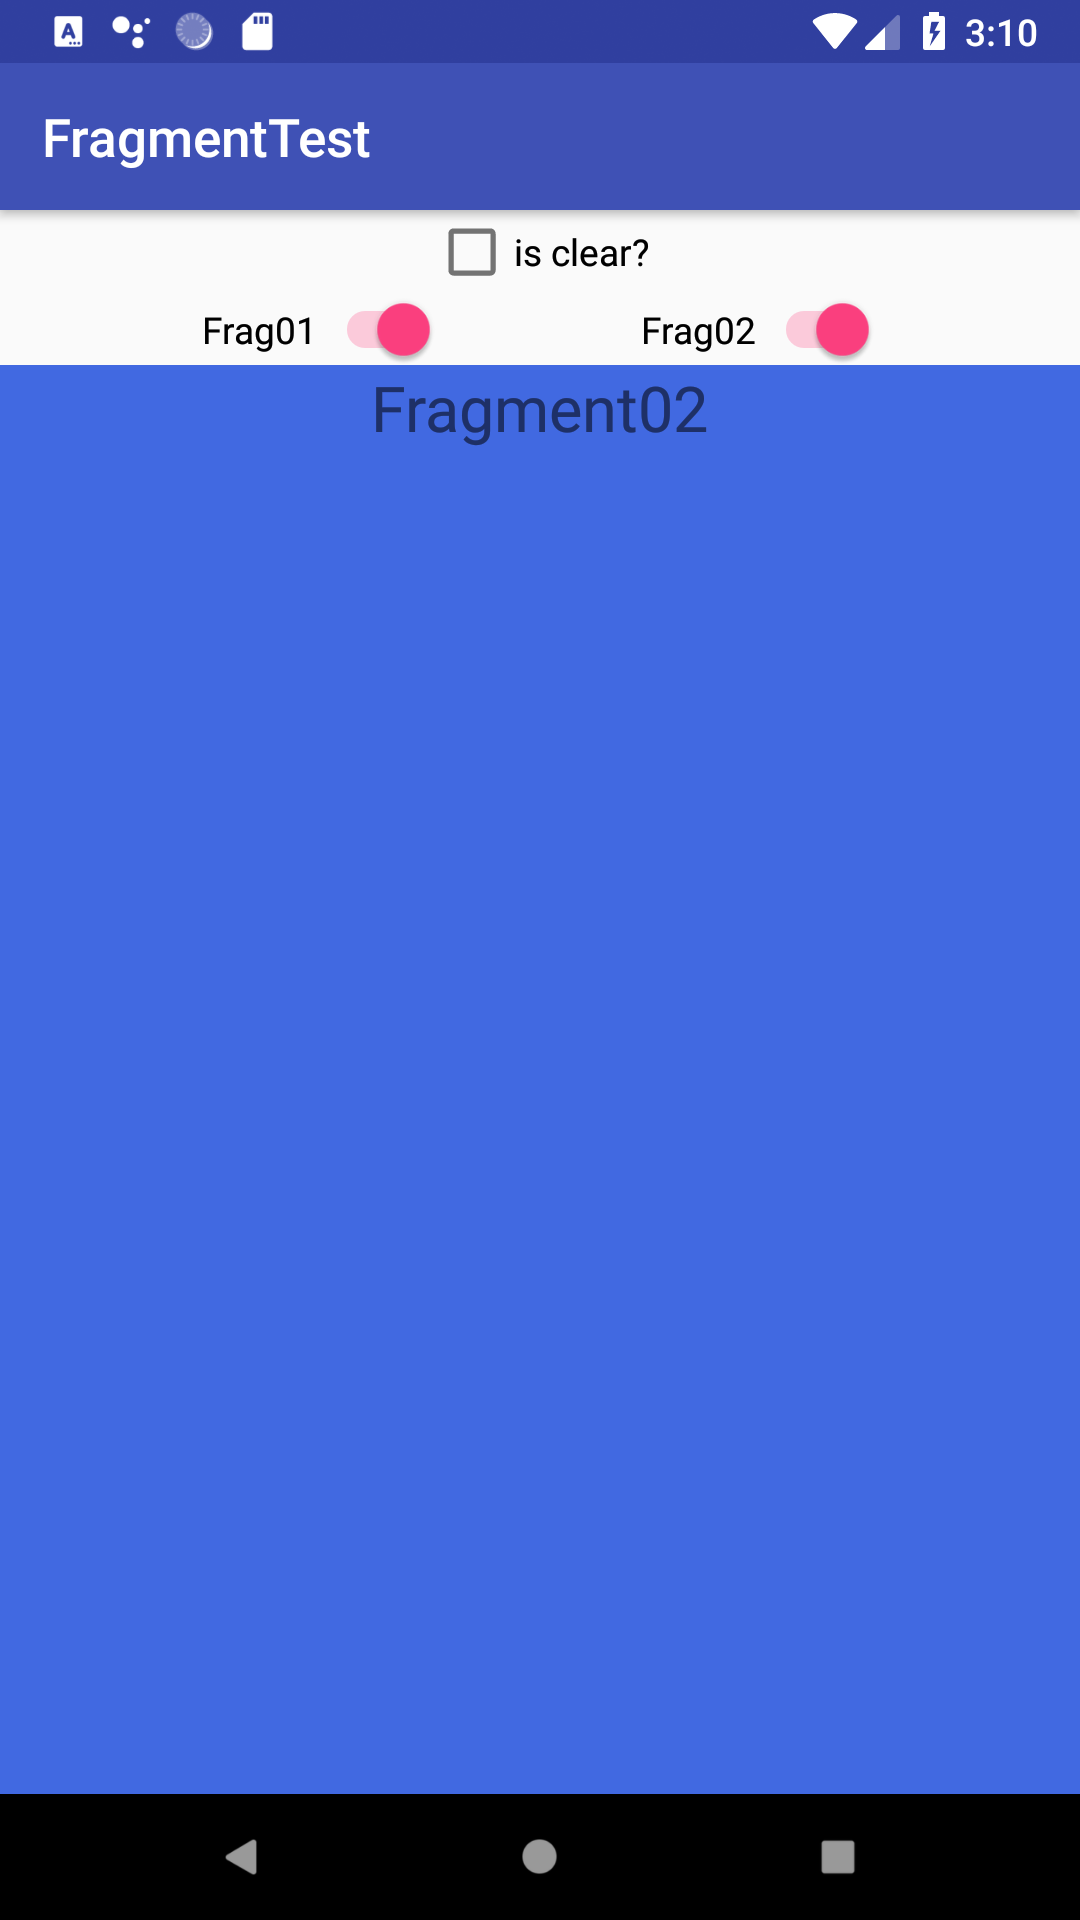
実行結果
02. 重なり合い方とか
01. 複数のViewGroupが重ならず分かれている
レイアウト
<LinearLayout
    android:layout_width="match_parent"
    android:layout_height="wrap_content"
    android:orientation="horizontal">

    <RelativeLayout
        android:id="@+id/Fragment_test02_container01"
        android:layout_width="match_parent"
        android:layout_height="wrap_content"
        android:layout_weight="1">
    </RelativeLayout>

    <RelativeLayout
        android:id="@+id/Fragment_test02_container02"
        android:layout_width="match_parent"
        android:layout_height="wrap_content"
        android:layout_weight="1">
    </RelativeLayout>
</LinearLayout>
実行結果
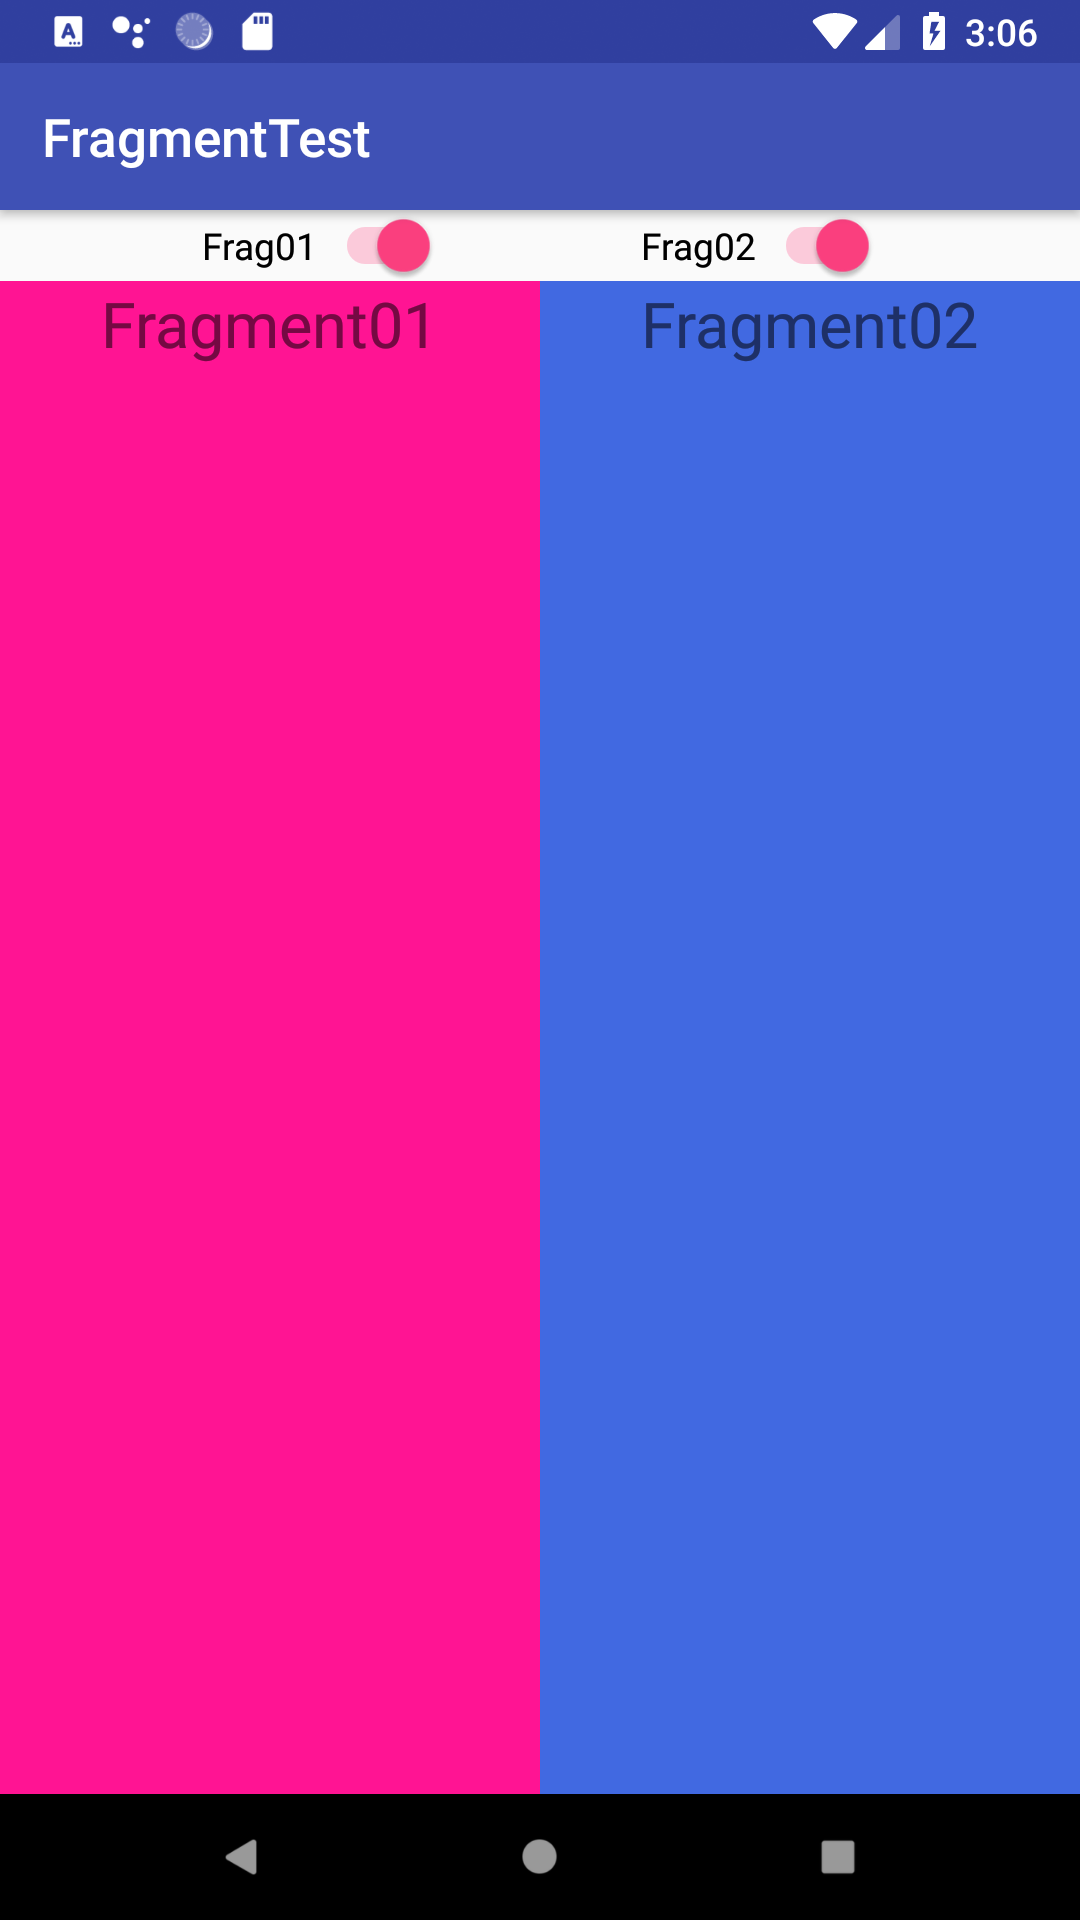 当然、別れて表示される。
02. 一つのViewGroupに複数のFragment
実行結果
| Fragment01 -> Fragment02 | Fragment02 -> Fragment01 |
|---|---|
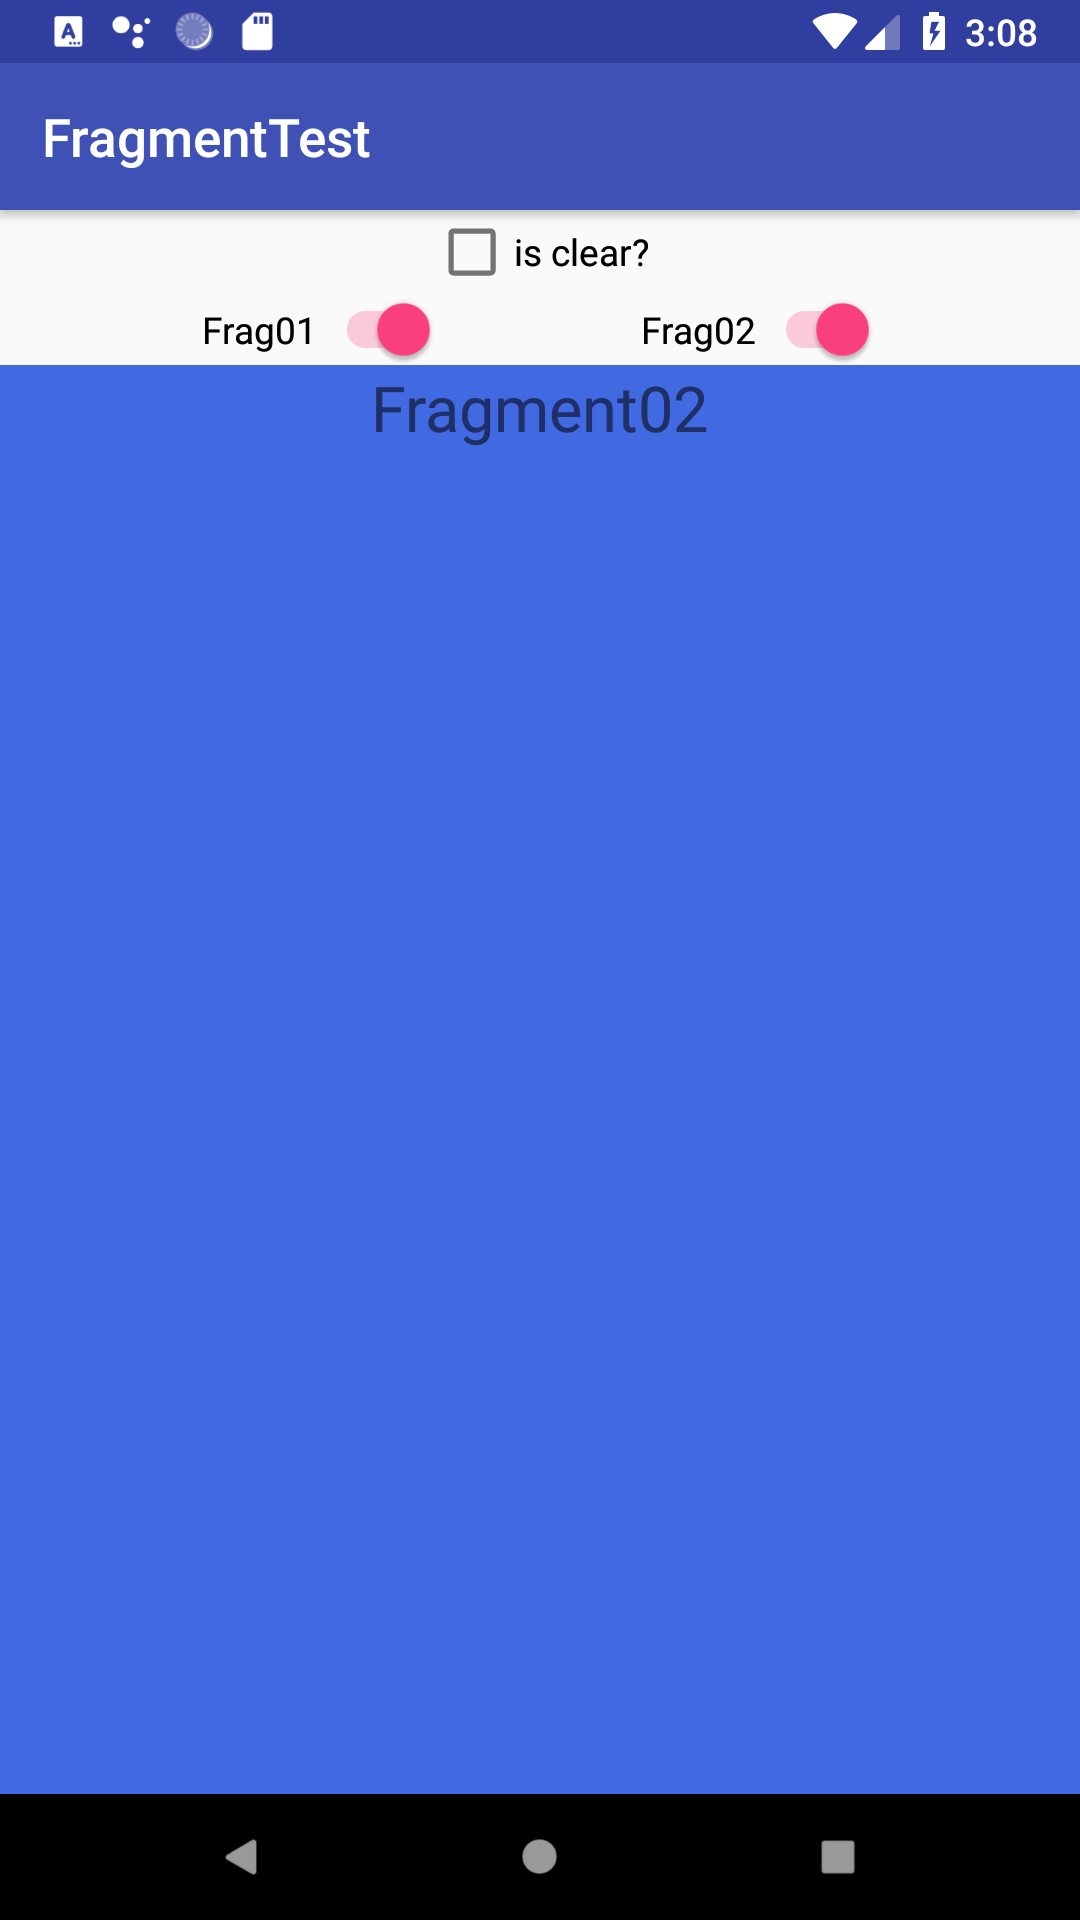 |
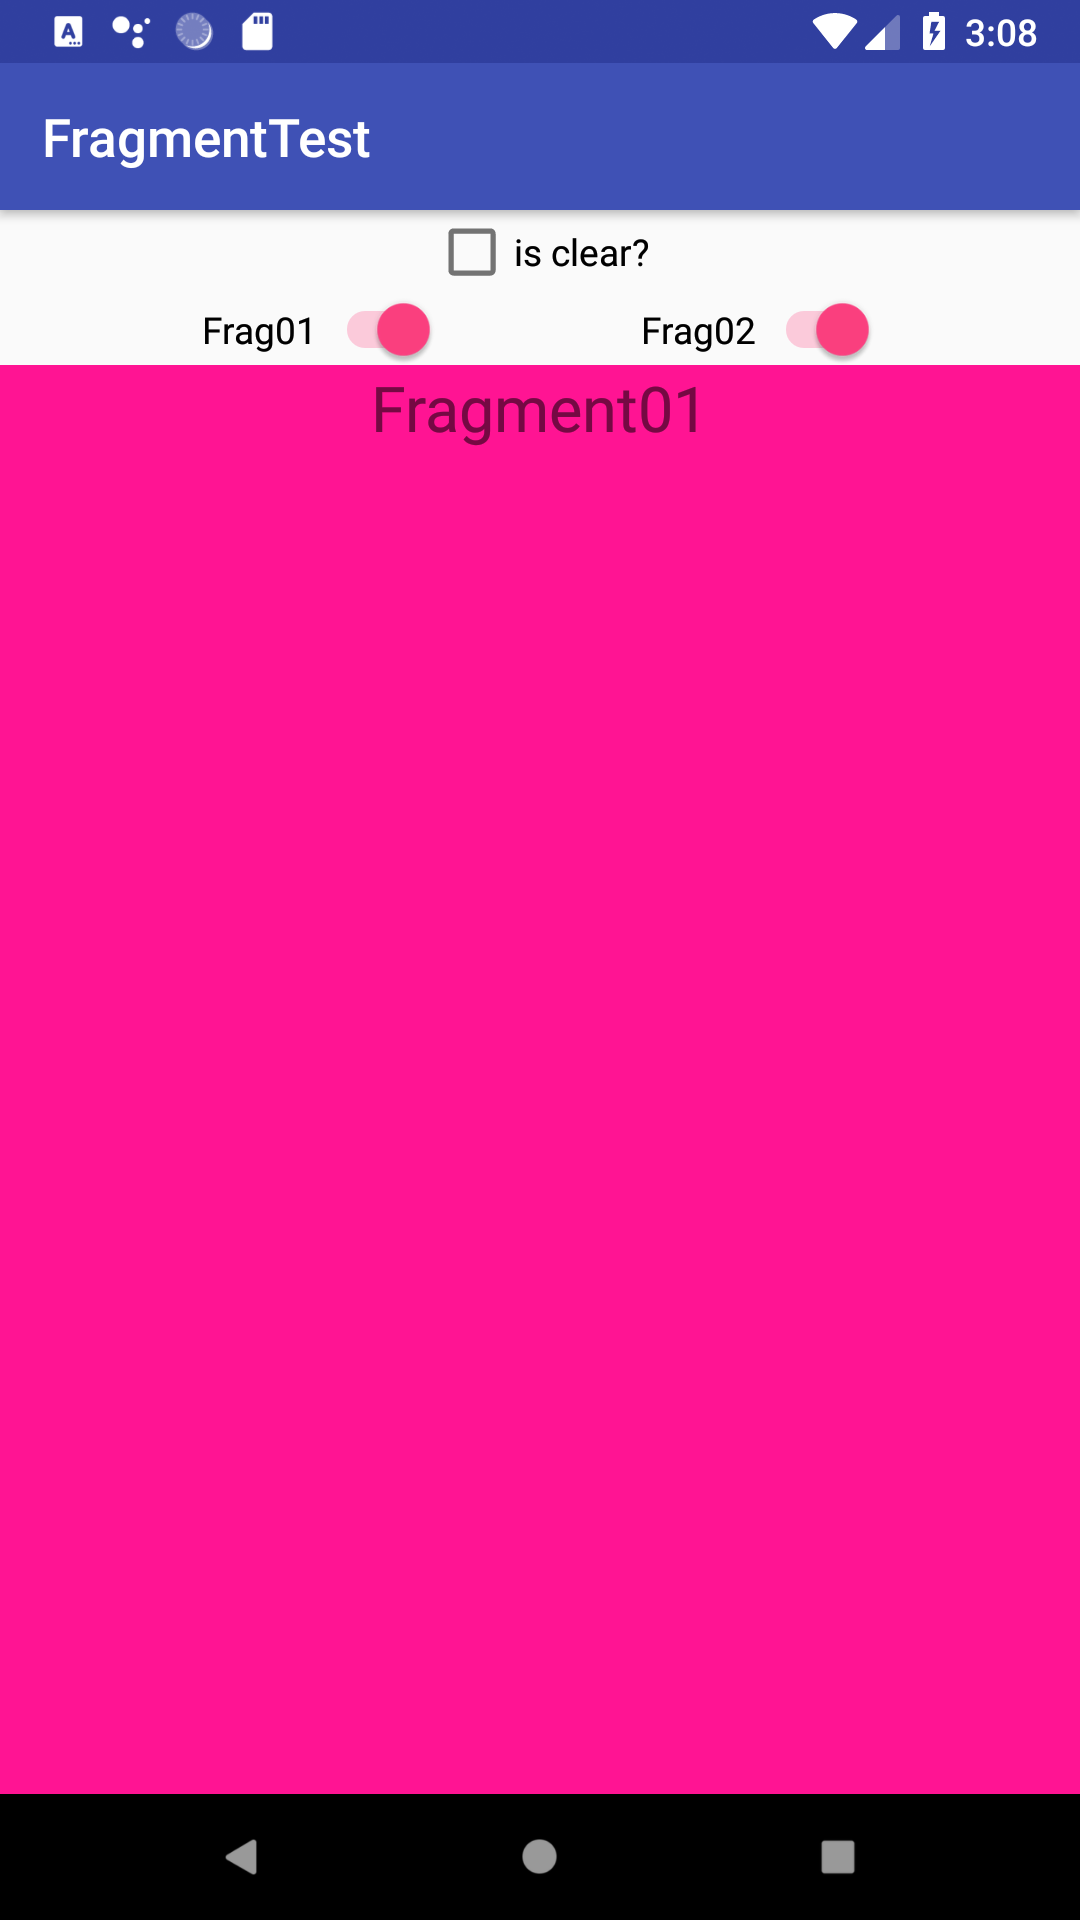 |
| 後から追加したFragmentが手前に表示される。 |
03. 複数のViewGroupが重なっている場合
レイアウト
<RelativeLayout
    android:id="@+id/Fragment_test04_container01"
    android:layout_width="match_parent"
    android:layout_height="wrap_content">
</RelativeLayout>

<RelativeLayout
    android:id="@+id/Fragment_test04_container02"
    android:layout_width="match_parent"
    android:layout_height="wrap_content">
</RelativeLayout>
実行結果
| Fragment01 -> Fragment02 | Fragment02 -> Fragment01 |
|---|---|
 |
 |
| 表示順に関わらず、container02のFragmentが手前に表示される。 |
04. 親子関係にあるViewGroup
レイアウト
<RelativeLayout
    android:id="@+id/Fragment_test05_container01"
    android:layout_width="match_parent"
    android:layout_height="wrap_content"
    android:padding="@dimen/layout_padding">

    <RelativeLayout
        android:id="@+id/Fragment_test05_container02"
        android:layout_width="match_parent"
        android:layout_height="wrap_content"
        android:padding="@dimen/layout_padding">

        <RelativeLayout
            android:id="@+id/Fragment_test05_container03"
            android:layout_width="match_parent"
            android:layout_height="wrap_content"
            android:padding="@dimen/layout_padding">

            <RelativeLayout
                android:id="@+id/Fragment_test05_container04"
                android:layout_width="match_parent"
                android:layout_height="wrap_content"
                android:padding="@dimen/layout_padding">
            </RelativeLayout>
        </RelativeLayout>
    </RelativeLayout>
</RelativeLayout>
実行結果
| Fragment01 -> Fragment04 | Fragment04 -> Fragment01 |
|---|---|
 |
 |
| 表示順に関わらず、親のViewGroupに追加したFragmentが手前に表示される。 |
03. アニメーション
FragmentにTransitionSetを追加すればいいみたい。
FragmentTest fragment01 = FragmentTest.createInstance("Fragment01", 0xffff1493);

TransitionSet ts = new TransitionSet();
ts.addTransition(new Slide(Gravity.RIGHT));

fragment01.setEnterTransition(ts);
04. コード全体
今回試したコードは以下に突っ込んであります。
https://github.com/entan05/FragmentTest
98. 参考
Android はじめてのFragment | https://qiita.com/Reyurnible/items/dffd70144da213e1208b
Activity/Fragment Transitionsのつかいかた | https://qiita.com/verno3632/items/a97942a461204af4f421
99. 更新履歴
| 日付 | 内容 |
|---|---|
| 2018/05/05 | 投稿 |