Mongoose OS の git 管理プロジェクト作成について書きます。
主に公式の手順の翻訳です。Mongoose OS Documentation
mos CLI インストール
$ curl -fsSL https://mongoose-os.com/downloads/mos/install.sh | /bin/bash
$ ~/.mos/bin/mos --help
The Mongoose OS command line tool, v. 20171219-154127/1.22.1@83172b22+.
Update channel: "release". Checking updates... Up to date.
...
プロジェクト作成
公式 boilerplate を Clone します
$ git clone https://github.com/mongoose-os-apps/empty my-app
$ cd my-app
LICENSE   README.md fs        mos.yml   src
初期設定
mjs 用ライブラリ追加
mos.yml
libs:
  - origin: https://github.com/mongoose-os-libs/rpc-service-config
  - origin: https://github.com/mongoose-os-libs/rpc-service-fs
  - origin: https://github.com/mongoose-os-libs/rpc-uart
  - origin: https://github.com/mongoose-os-libs/wifi
+  - origin: https://github.com/mongoose-os-libs/dht
+  - origin: https://github.com/mongoose-os-libs/mjs
設定は同じく mos.yml に config_schema を追加します。
mos.yml
+ config_schema:
+  - ["app", "o", {title: "My app custom settings"}]
+  - ["app.pin", "i", 5, {title: "GPIO pin a sensor is attached to"}]
更に他のライブラリを追加する例
例として公式の i2c や mqtt モジュールと設定を追加する場合以下のような設定になります。
mos.yml
config_schema:
  - ["i2c.enable", true]
  - ["mqtt.server", "iot.eclipse.org:1883"]

libs:
  - origin: https://github.com/mongoose-os-libs/rpc-service-config
  - origin: https://github.com/mongoose-os-libs/rpc-service-fs
  - origin: https://github.com/mongoose-os-libs/rpc-uart
  - origin: https://github.com/mongoose-os-libs/wifi
  - origin: https://github.com/mongoose-os-libs/dht
  - origin: https://github.com/mongoose-os-libs/mjs
  - origin: https://github.com/mongoose-os-libs/rpc-mqtt
  - origin: https://github.com/mongoose-os-libs/rpc-uart
公式ライブラリはここにあります。
https://github.com/mongoose-os-libs
init.js の作成
fs/init.js
load("api_config.js");
load("api_mqtt.js");
load("api_net.js");
load("api_sys.js");
load("api_timer.js");
load("api_i2c.js");

print("Hello mongoose.");
ビルド
$ mos build --arch esp8266 --port /dev/tty.usbserial-####
$ mos flash
...
Booting firmware...
All done!
All done! と出れば完了
--arch オプションは mos.yml にかけば省略できる.
mos.yml
arch: esp8266
--port オプションは環境変数で省略できる。(direnv など)
.envrc
export MOS_PORT=/dev/tty.usbserial-####
ブラウザアプリで確認してみる
mos でアプリを立ち上げる。
$ mos
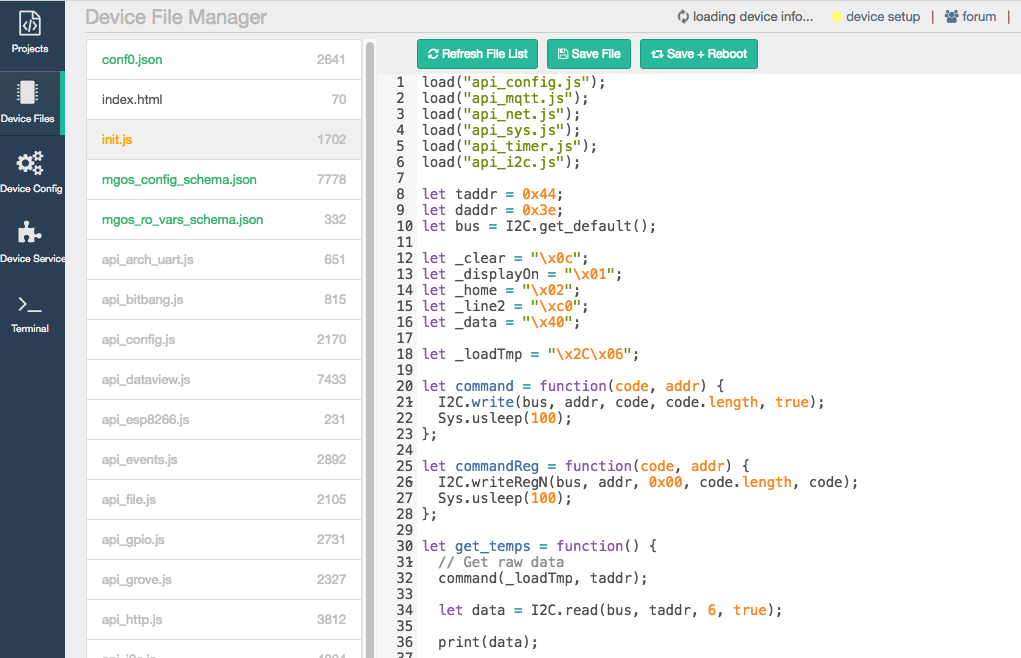
Device Files に init.js 含めてライブラリファイルも入ってればOK
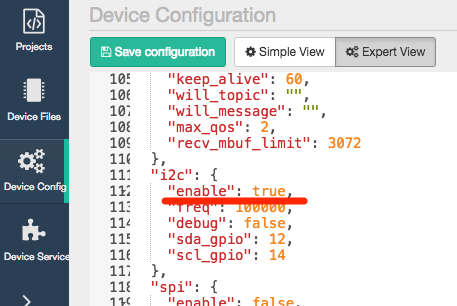
Device Config > Expert view には設定項目が反映されてるはずです。
リンク
- https://mongoose-os.com/ 公式。ビデオチュートリアルやサンプルも充実してます
- https://github.com/cesanta/mjs mjsというエセJSの仕様・構文など
- Mongoose OSでJavaScript IoT入門 #IoTLT - Qiita
- https://github.com/mongoose-os-apps サンプルアプリ
- https://github.com/mongoose-os-libs ライブラリ