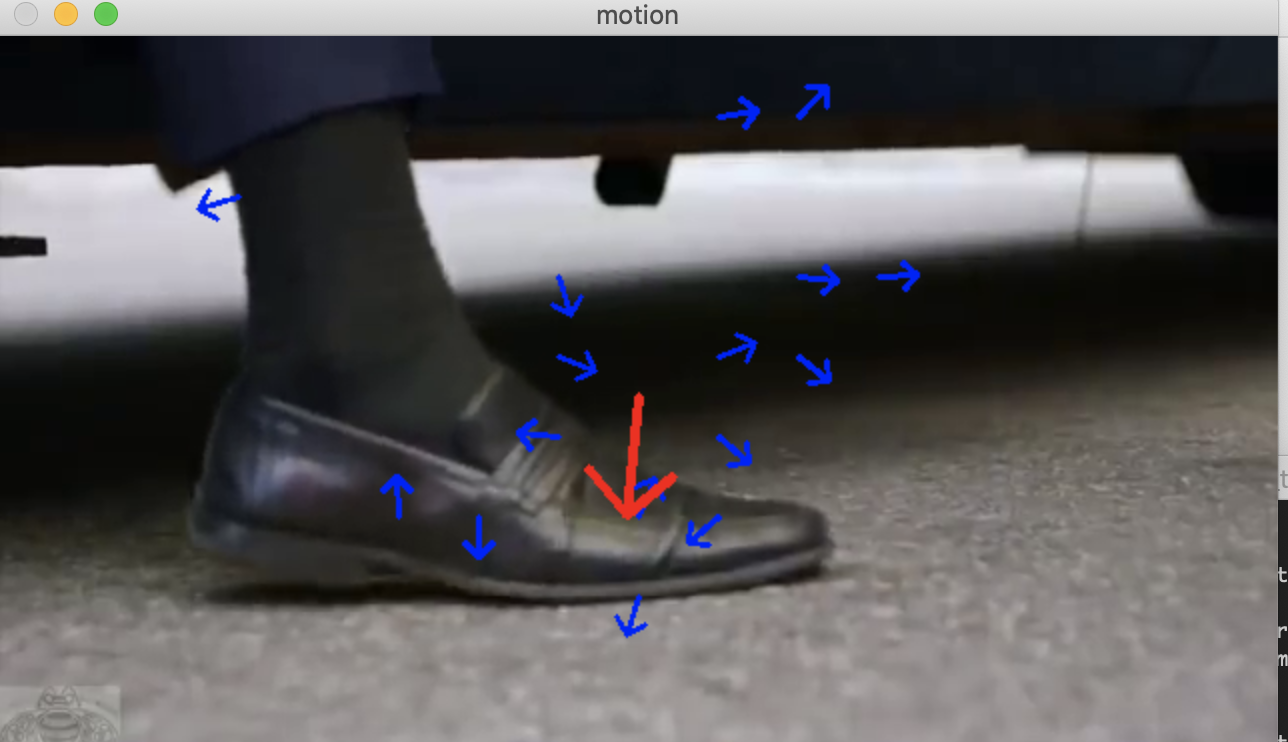
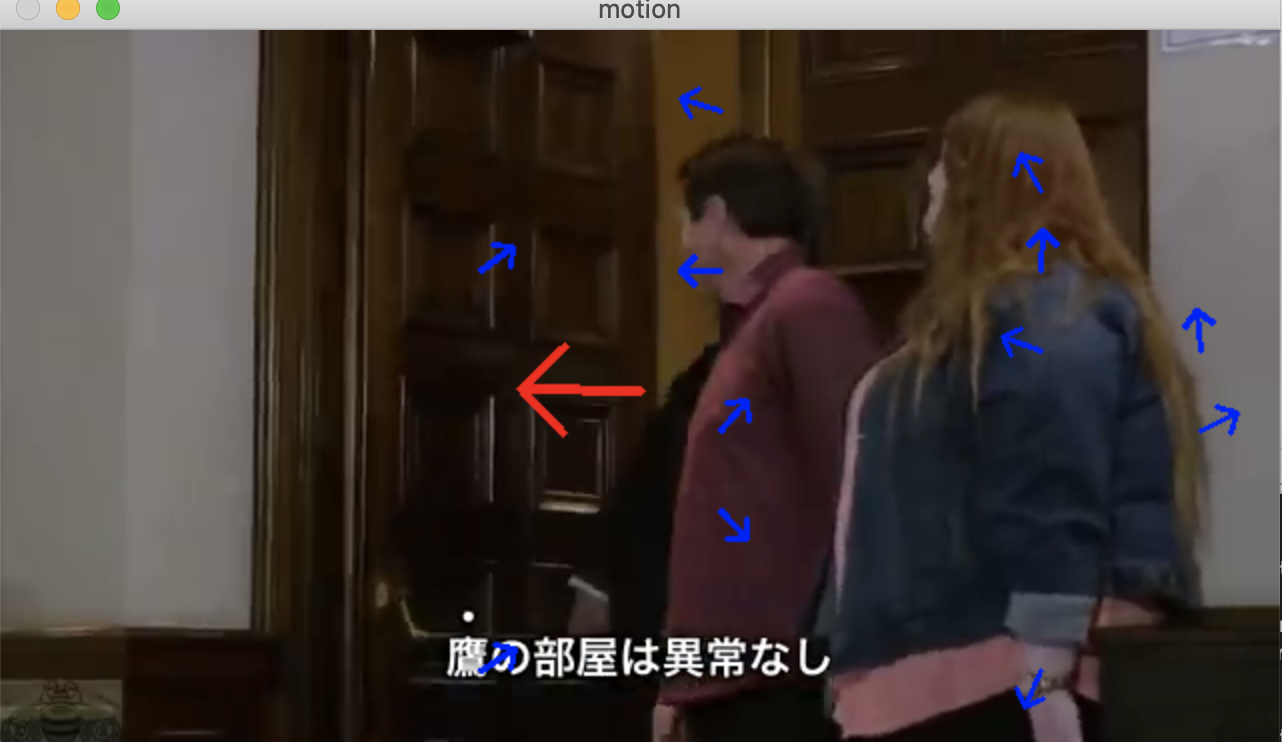
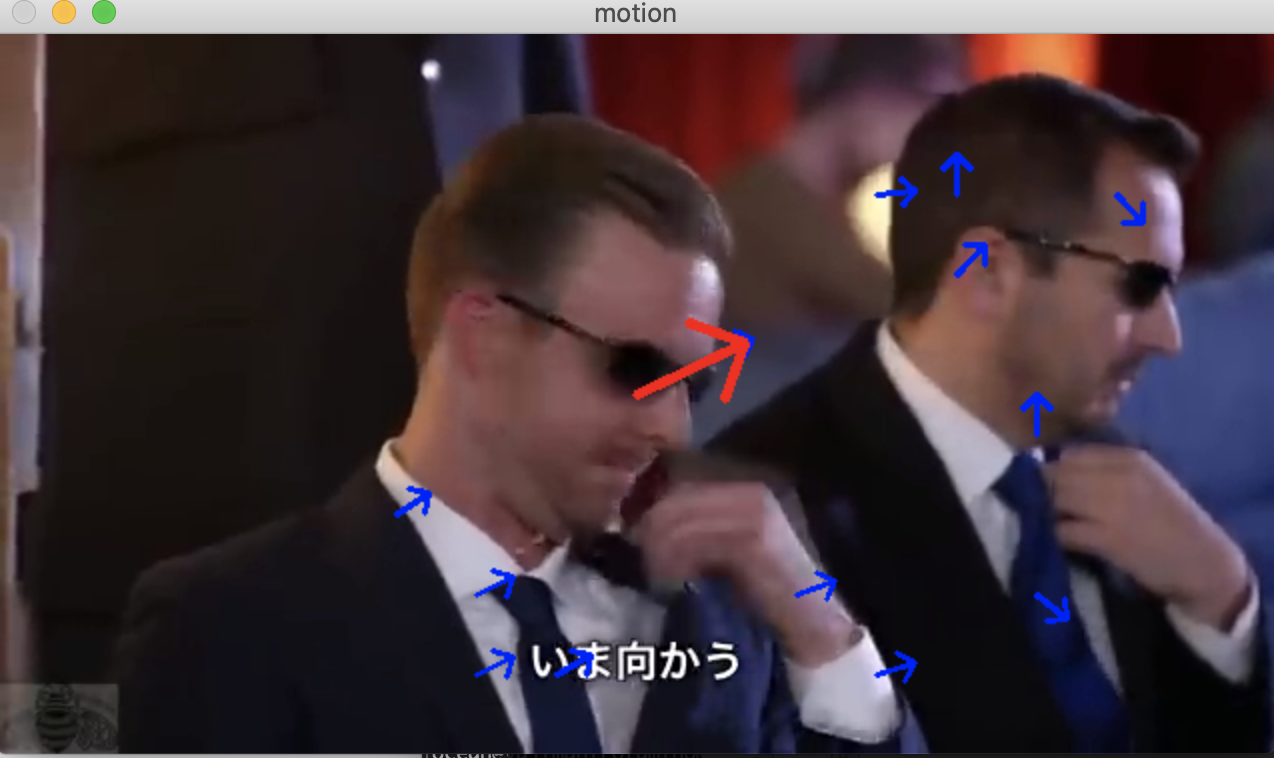
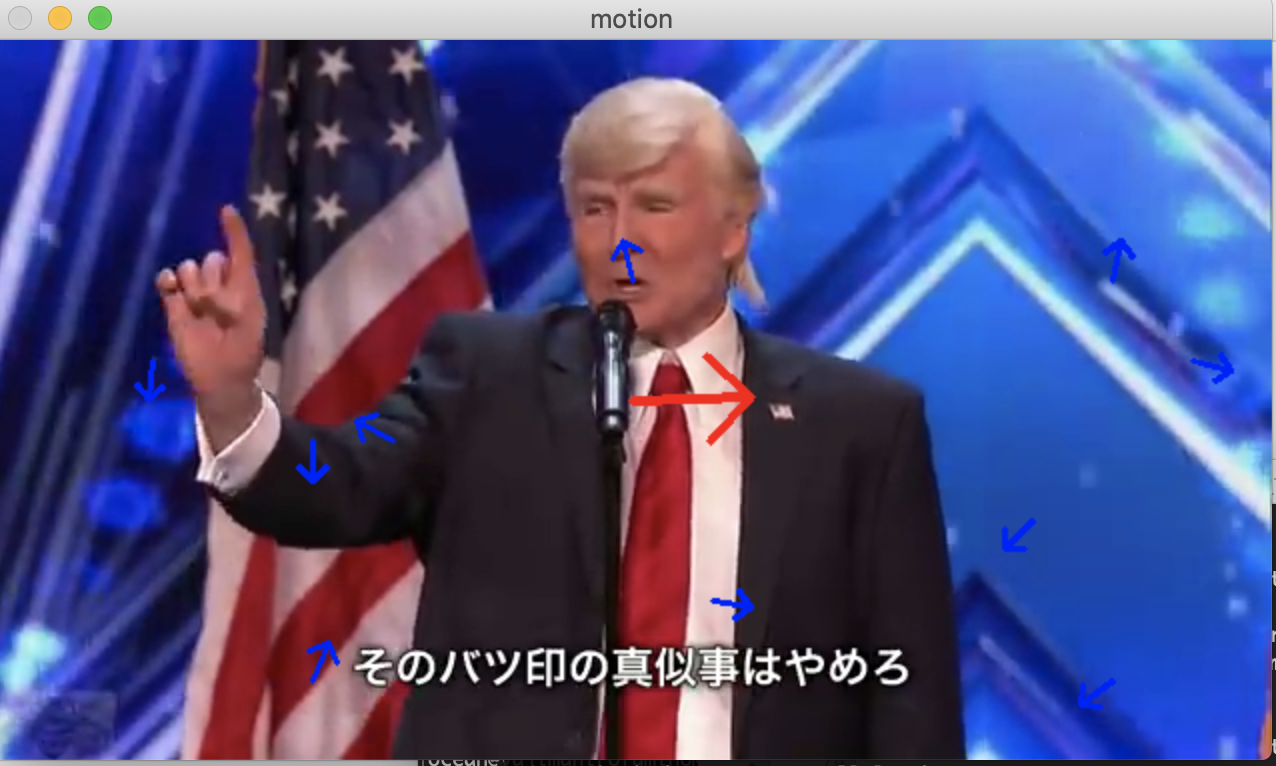
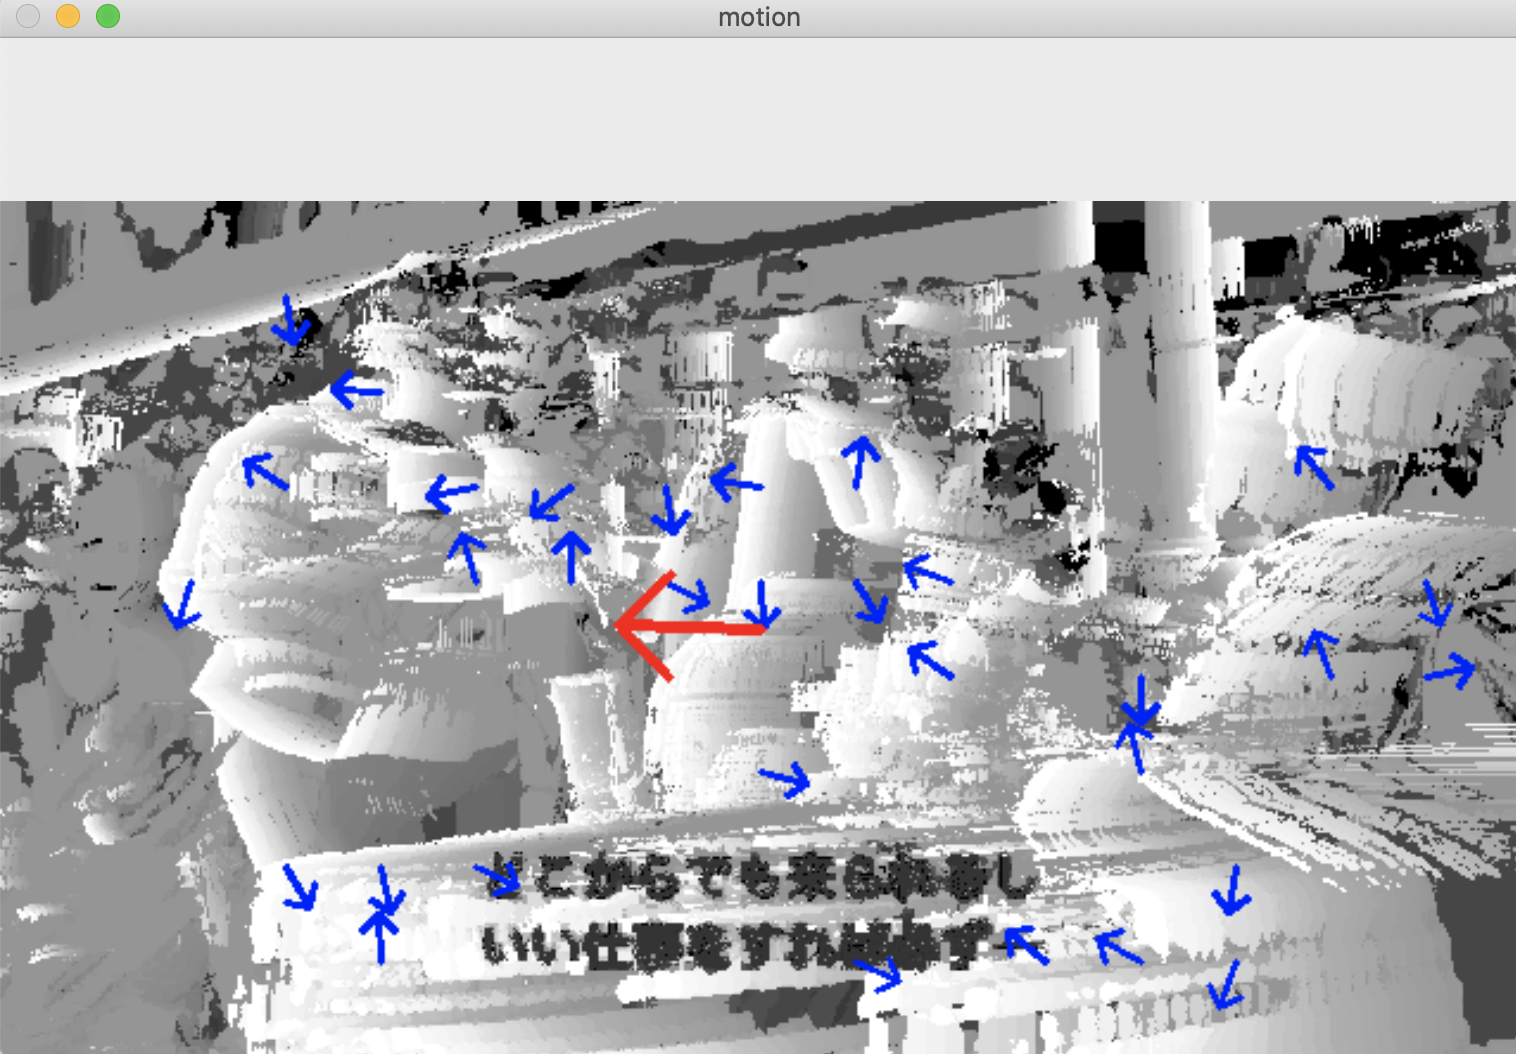
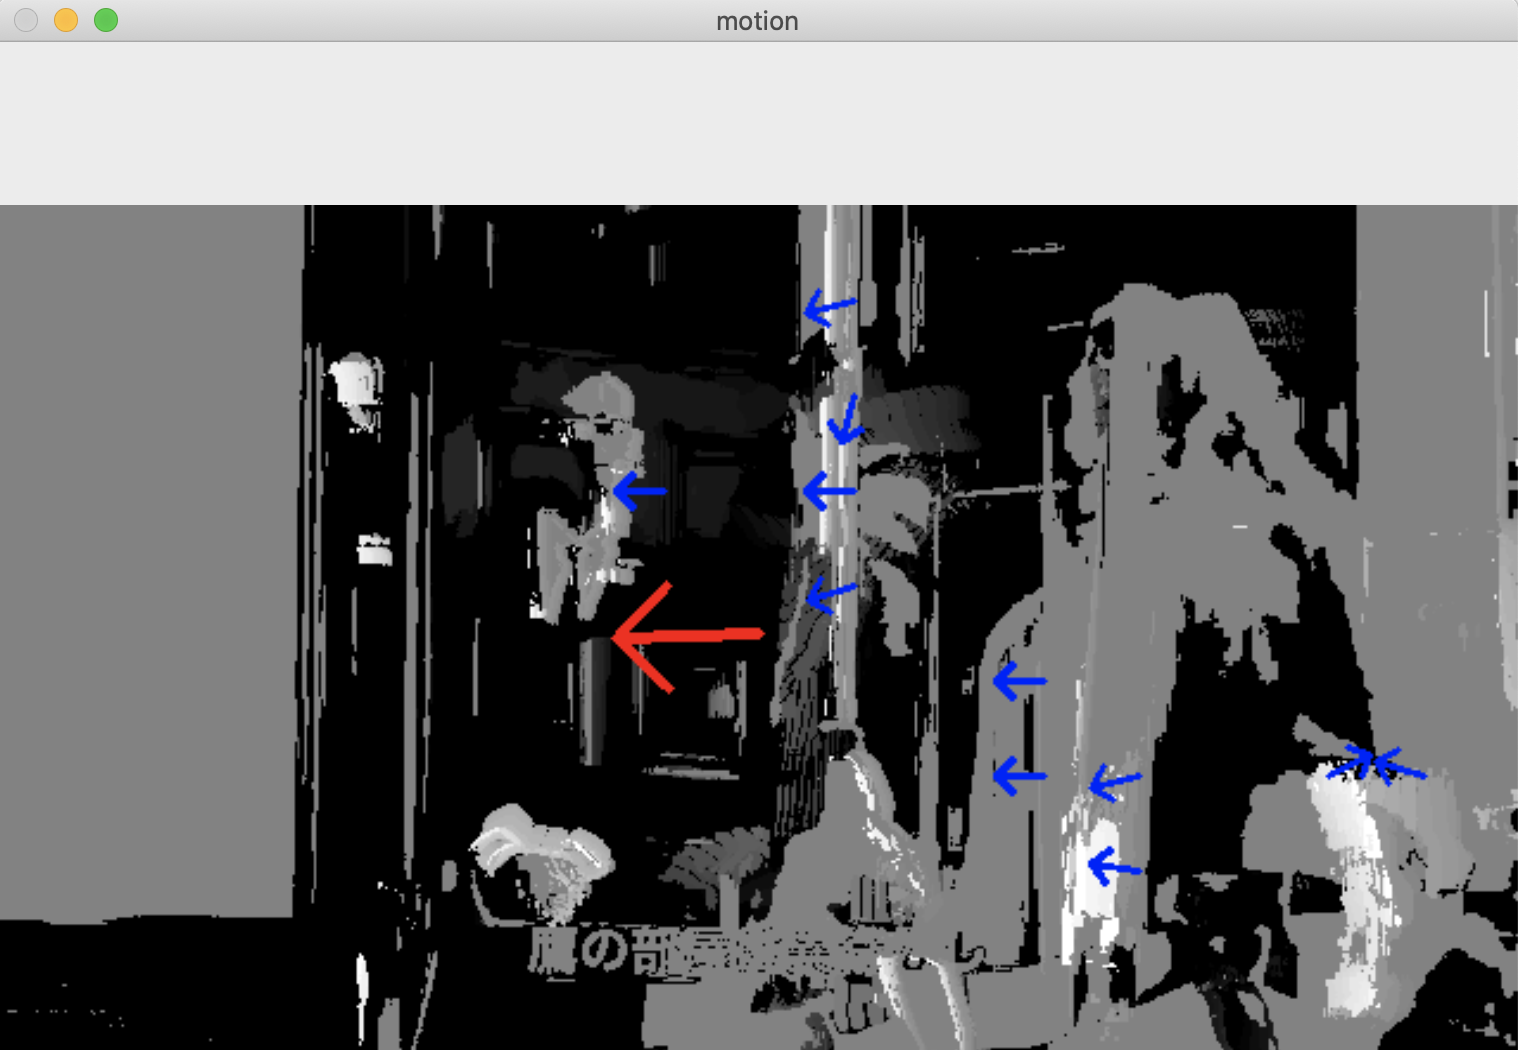
@hitomatagiさんのコードを少し変えて、動画再生中にリアルタイムに、フレーム画像に表示される物体の運動ベクトル方向を線(line)ではなく、矢印(arrow)で表示されるように変更しました。その他、いくつかの変更を行いました。
今回、変更を加えた元のスクリプト・ファイル
( 変更点 )
- 座標点を描画しない
- 線を矢印に変える(矢印:cv2.arrowedLine。矢印の先の「>」の太さはtipLength引数で変える)
- 線の色を変える(各座標点の方向ベクトル矢印:青、画面全体の方向ベクトル矢印:赤)
- 描画する画像を白黒からカラー(読み込んだ元の動画のフレーム画像)に変える
「矢印」表示はOpenCV2の組込メソッドを採用
「矢印」表示は、OpenCV2の組込メソッドである__v2.arrowedLine__を採用しました。
矢印の先端の「>」の部分が小さいと、ぱっと見で視認しづらいため、__第8引数のtipLength__の__数値を大きく__して、__矢の先を大きく__しました。
tipLength=0.5
cv2.arrowedLineの第8引数:tipLength

cv2.arrowedLineの第8引数 tipLength は矢の先の部分の長さです。
float型で指定します。

tipLength は「全体の矢印線の長さに対する比率」で指定します。

サンプルコードでは tipLength=0.1 としているので
「全体の長さ」の10%が「矢の先の長さ」になっています。
変更後のコードの実行方法
- スクリプト・ファイルと同じ階層のディレクトリに保存してある__"trump.mp4"__を読み込むように、コードにベタ打ちしている。
- コマンドライン引数で読込ファイルを渡せるように直したい
Terminal
% ls
motion.py				motion_arrow_color_image.py		trump.mp4
motion_arrow.py				motion_arrow_display_histcolor.py
%
% python3 motion_arrow_color_image.py
出力結果
- MP4ファイルを入力しています。
- MP4ファイルを再生しながら、フレーム画像を順次、リアルタイムに逐次処理を行い、結果をウィンドウに描画しています。
- 事前に解析処理済みの動画ファイルを再生しているのではありません。
事前準備
contrib (extra) モジュールも必要な場合:
$ pip install opencv-contrib-python
Terminal
% pip3 install opencv-contrib-python
環境
- PC: Macbook (macOSCatalina)
- Python version: 3.9.6
変更後のコード
motion_arrow_color_image.py
import time
import math
import cv2
import numpy as np

# ビデオデータ
VIDEO_DATA = "trump.mp4"
# Esc キー
ESC_KEY = 0x1b
# モーションの残存期間(sec)
DURATION = 1.0
# 全体の方向を表示するラインの長さ
LINE_LENGTH_ALL = 60
# 座標毎の方向を表示するラインの長さ
LINE_LENGTH_GRID = 20
# 座標毎の方向を計算する間隔
GRID_WIDTH = 40
# 方向を表示するラインの丸の半径
CIRCLE_RADIUS = 2

# 表示ウィンドウの初期化
cv2.namedWindow("motion")
# ビデオデータの読み込み
video = cv2.VideoCapture(VIDEO_DATA)

# 最初のフレームの読み込み
end_flag, frame_next = video.read()
height, width, channels = frame_next.shape
motion_history = np.zeros((height, width), np.float32)
frame_pre = frame_next.copy()

while(end_flag):
    # フレーム間の差分計算
    color_diff = cv2.absdiff(frame_next, frame_pre)

    # グレースケール変換
    gray_diff = cv2.cvtColor(color_diff, cv2.COLOR_BGR2GRAY)

    # 2値化
    retval, black_diff = cv2.threshold(gray_diff, 30, 1, cv2.THRESH_BINARY)

    # プロセッサ処理時間(sec)を取得
    # Python 3.9系ではtime.clock()はない。
    # proc_time = time.clock()
    # https://stackoverflow.com/questions/58569361/attributeerror-module-time-has-no-attribute-clock-in-python-3-8
    proc_time = time.process_time()

    # モーション履歴画像の更新
    #https://qiita.com/hitomatagi/items/d5d475a446ec9c73261e
    #https://qiita.com/fiftystorm36/items/1a285b5fbf99f8ac82eb
    #pip install opencv-contrib-python
    cv2.motempl.updateMotionHistory(black_diff, motion_history, proc_time, DURATION)
    # 古いモーションの表示を経過時間に応じて薄くする
    hist_color = np.array(np.clip((motion_history - (proc_time - DURATION)) / DURATION, 0, 1) * 255, np.uint8)

    # グレースケール変換
    hist_gray = cv2.cvtColor(hist_color, cv2.COLOR_GRAY2BGR)

    # モーション履歴画像の変化方向の計算
    #   ※ orientationには各座標に対して変化方向の値(deg)が格納されます
    mask, orientation = cv2.motempl.calcMotionGradient(motion_history, 0.25, 0.05, apertureSize = 5)

    # 各座標の動きを緑色の線で描画
    width_i = GRID_WIDTH
    while width_i < width:
        height_i = GRID_WIDTH
        while height_i < height:
            # 座標点の描画を削除
            #cv2.circle(hist_gray, \
            #           (width_i, height_i), \
            #           CIRCLE_RADIUS, \
            #           (0, 255, 0), \
            #           2, \
            #           16, \
            #           0)
            angle_deg = orientation[height_i - 1][width_i - 1]
            if angle_deg > 0:
                angle_rad = math.radians(angle_deg)
                #https://shikaku-mafia.com/opencv-arrowedline/
                #tipLength は「全体の矢印線の長さに対する比率」で指定します。
                #サンプルコードでは tipLength=0.1 としているので
                #「全体の長さ」の10%が「矢の先の長さ」になっています。
                #cv2.line(hist_gray, \
                #         (width_i, height_i), \
                #         (int(width_i + math.cos(angle_rad) * LINE_LENGTH_GRID), int(height_i + math.sin(angle_rad) * LINE_LENGTH_GRID)), \
                #         (0, 255, 0), \
                #         2, \
                #         16, \
                #         0)
                # frame_preに変更
                cv2.arrowedLine(frame_pre, \
                pt1=(width_i, height_i), \
                pt2=(int(width_i + math.cos(angle_rad) * LINE_LENGTH_GRID), int(height_i + math.sin(angle_rad) * LINE_LENGTH_GRID)), \
                color=(255, 0, 0),
                thickness=2,
                line_type=cv2.LINE_4,
                shift=0,
                tipLength=0.5)

            height_i += GRID_WIDTH

        width_i += GRID_WIDTH


    # 全体的なモーション方向を計算
    angle_deg = cv2.motempl.calcGlobalOrientation(orientation, mask, motion_history, proc_time, DURATION)

    # 全体の動きを黄色い線で描画
    # 座標点を削除する
    #cv2.circle(hist_gray, \
    #           (int(width / 2), int(height / 2)), \
    #           CIRCLE_RADIUS, \
    #           (0, 215, 255), \
    #           2, \
    #           16, \
    #           0)
    angle_rad = math.radians(angle_deg)
    #https://shikaku-mafia.com/opencv-arrowedline/
    #cv2.line(hist_gray, \
    #         (int(width / 2), int(height / 2)), \
    #         (int(width / 2 + math.cos(angle_rad) * LINE_LENGTH_ALL), int(height / 2 + math.sin(angle_rad) * LINE_LENGTH_ALL)), \
    #         (0, 215, 255), \
    #         2, \
    #         16, \
    #         0)
    # frame_preに変更
    cv2.arrowedLine(frame_pre, \
                pt1=(int(width / 2), int(height / 2)), \
                pt2=(int(width / 2 + math.cos(angle_rad) * LINE_LENGTH_ALL), int(height / 2 + math.sin(angle_rad) * LINE_LENGTH_ALL)), \
                color=(0, 0, 255),
                thickness=3,
                line_type=cv2.LINE_4,
                shift=0,
                tipLength=0.5)

    # モーション画像を表示
    # frame_preに変更
    cv2.imshow("motion", frame_pre)

    # Escキー押下で終了
    if cv2.waitKey(20) == ESC_KEY:
        break

    # 次のフレームの読み込み
    frame_pre = frame_next.copy()
    end_flag, frame_next = video.read()

# 終了処理
cv2.destroyAllWindows()
video.release()
他の変更コード
以下は白黒画像を表示します。
@hitomatagiさんの元のコードとの差分は以下の通りです。
- 座標点を描画しない
- 線を矢印に変える(矢印:cv2.arrowedLine。矢印の先の「>」の太さはtipLength引数で変える)
- 線の色を変える(各座標点の方向ベクトル矢印:青、画面全体の方向ベクトル矢印:赤)
motion_arrow.py
import time
import math
import cv2
import numpy as np

# ビデオデータ
VIDEO_DATA = "trump.mp4"
# Esc キー
ESC_KEY = 0x1b
# モーションの残存期間(sec)
DURATION = 1.0
# 全体の方向を表示するラインの長さ
LINE_LENGTH_ALL = 60
# 座標毎の方向を表示するラインの長さ
LINE_LENGTH_GRID = 20
# 座標毎の方向を計算する間隔
GRID_WIDTH = 40
# 方向を表示するラインの丸の半径
CIRCLE_RADIUS = 2

# 表示ウィンドウの初期化
cv2.namedWindow("motion")
# ビデオデータの読み込み
video = cv2.VideoCapture(VIDEO_DATA)

# 最初のフレームの読み込み
end_flag, frame_next = video.read()
height, width, channels = frame_next.shape
motion_history = np.zeros((height, width), np.float32)
frame_pre = frame_next.copy()

while(end_flag):
    # フレーム間の差分計算
    color_diff = cv2.absdiff(frame_next, frame_pre)

    # グレースケール変換
    gray_diff = cv2.cvtColor(color_diff, cv2.COLOR_BGR2GRAY)

    # 2値化
    retval, black_diff = cv2.threshold(gray_diff, 30, 1, cv2.THRESH_BINARY)

    # プロセッサ処理時間(sec)を取得
    # Python 3.9系ではtime.clock()はない。
    # proc_time = time.clock()
    # https://stackoverflow.com/questions/58569361/attributeerror-module-time-has-no-attribute-clock-in-python-3-8
    proc_time = time.process_time()

    # モーション履歴画像の更新
    #https://qiita.com/hitomatagi/items/d5d475a446ec9c73261e
    #https://qiita.com/fiftystorm36/items/1a285b5fbf99f8ac82eb
    #pip install opencv-contrib-python
    cv2.motempl.updateMotionHistory(black_diff, motion_history, proc_time, DURATION)
    # 古いモーションの表示を経過時間に応じて薄くする
    hist_color = np.array(np.clip((motion_history - (proc_time - DURATION)) / DURATION, 0, 1) * 255, np.uint8)

    # グレースケール変換
    hist_gray = cv2.cvtColor(hist_color, cv2.COLOR_GRAY2BGR)

    # モーション履歴画像の変化方向の計算
    #   ※ orientationには各座標に対して変化方向の値(deg)が格納されます
    mask, orientation = cv2.motempl.calcMotionGradient(motion_history, 0.25, 0.05, apertureSize = 5)

    # 各座標の動きを緑色の線で描画
    width_i = GRID_WIDTH
    while width_i < width:
        height_i = GRID_WIDTH
        while height_i < height:
            # 座標点の描画を削除
            #cv2.circle(hist_gray, \
            #           (width_i, height_i), \
            #           CIRCLE_RADIUS, \
            #           (0, 255, 0), \
            #           2, \
            #           16, \
            #           0)
            angle_deg = orientation[height_i - 1][width_i - 1]
            if angle_deg > 0:
                angle_rad = math.radians(angle_deg)
                #https://shikaku-mafia.com/opencv-arrowedline/
                #tipLength は「全体の矢印線の長さに対する比率」で指定します。
                #サンプルコードでは tipLength=0.1 としているので
                #「全体の長さ」の10%が「矢の先の長さ」になっています。
                #cv2.line(hist_gray, \
                #         (width_i, height_i), \
                #         (int(width_i + math.cos(angle_rad) * LINE_LENGTH_GRID), int(height_i + math.sin(angle_rad) * LINE_LENGTH_GRID)), \
                #         (0, 255, 0), \
                #         2, \
                #         16, \
                #         0)
                cv2.arrowedLine(hist_gray, \
                pt1=(width_i, height_i), \
                pt2=(int(width_i + math.cos(angle_rad) * LINE_LENGTH_GRID), int(height_i + math.sin(angle_rad) * LINE_LENGTH_GRID)), \
                color=(255, 0, 0),
                thickness=2,
                line_type=cv2.LINE_4,
                shift=0,
                tipLength=0.5)

            height_i += GRID_WIDTH

        width_i += GRID_WIDTH


    # 全体的なモーション方向を計算
    angle_deg = cv2.motempl.calcGlobalOrientation(orientation, mask, motion_history, proc_time, DURATION)

    # 全体の動きを黄色い線で描画
    # 座標点を削除する
    #cv2.circle(hist_gray, \
    #           (int(width / 2), int(height / 2)), \
    #           CIRCLE_RADIUS, \
    #           (0, 215, 255), \
    #           2, \
    #           16, \
    #           0)
    angle_rad = math.radians(angle_deg)
    #https://shikaku-mafia.com/opencv-arrowedline/
    #cv2.line(hist_gray, \
    #         (int(width / 2), int(height / 2)), \
    #         (int(width / 2 + math.cos(angle_rad) * LINE_LENGTH_ALL), int(height / 2 + math.sin(angle_rad) * LINE_LENGTH_ALL)), \
    #         (0, 215, 255), \
    #         2, \
    #         16, \
    #         0)
    cv2.arrowedLine(hist_gray, \
                pt1=(int(width / 2), int(height / 2)), \
                pt2=(int(width / 2 + math.cos(angle_rad) * LINE_LENGTH_ALL), int(height / 2 + math.sin(angle_rad) * LINE_LENGTH_ALL)), \
                color=(0, 0, 255),
                thickness=3,
                line_type=cv2.LINE_4,
                shift=0,
                tipLength=0.5)

    # モーション画像を表示
    cv2.imshow("motion", hist_gray)

    # Escキー押下で終了
    if cv2.waitKey(20) == ESC_KEY:
        break

    # 次のフレームの読み込み
    frame_pre = frame_next.copy()
    end_flag, frame_next = video.read()

# 終了処理
cv2.destroyAllWindows()
video.release()
以下はカラー画像に矢印を重ねた動画が出力されることを期待しましたが、表示されたのは白黒動画に矢印を重ねたものでした。
motion_arrow_display_histcolor.py
import time
import math
import cv2
import numpy as np

# ビデオデータ
VIDEO_DATA = "trump.mp4"
# Esc キー
ESC_KEY = 0x1b
# モーションの残存期間(sec)
DURATION = 1.0
# 全体の方向を表示するラインの長さ
LINE_LENGTH_ALL = 60
# 座標毎の方向を表示するラインの長さ
LINE_LENGTH_GRID = 20
# 座標毎の方向を計算する間隔
GRID_WIDTH = 40
# 方向を表示するラインの丸の半径
CIRCLE_RADIUS = 2

# 表示ウィンドウの初期化
cv2.namedWindow("motion")
# ビデオデータの読み込み
video = cv2.VideoCapture(VIDEO_DATA)

# 最初のフレームの読み込み
end_flag, frame_next = video.read()
height, width, channels = frame_next.shape
motion_history = np.zeros((height, width), np.float32)
frame_pre = frame_next.copy()

while(end_flag):
    # フレーム間の差分計算
    color_diff = cv2.absdiff(frame_next, frame_pre)

    # グレースケール変換
    gray_diff = cv2.cvtColor(color_diff, cv2.COLOR_BGR2GRAY)

    # 2値化
    retval, black_diff = cv2.threshold(gray_diff, 30, 1, cv2.THRESH_BINARY)

    # プロセッサ処理時間(sec)を取得
    # Python 3.9系ではtime.clock()はない。
    # proc_time = time.clock()
    # https://stackoverflow.com/questions/58569361/attributeerror-module-time-has-no-attribute-clock-in-python-3-8
    proc_time = time.process_time()

    # モーション履歴画像の更新
    #https://qiita.com/hitomatagi/items/d5d475a446ec9c73261e
    #https://qiita.com/fiftystorm36/items/1a285b5fbf99f8ac82eb
    #pip install opencv-contrib-python
    cv2.motempl.updateMotionHistory(black_diff, motion_history, proc_time, DURATION)
    # 古いモーションの表示を経過時間に応じて薄くする
    hist_color = np.array(np.clip((motion_history - (proc_time - DURATION)) / DURATION, 0, 1) * 255, np.uint8)

    # グレースケール変換
    hist_gray = cv2.cvtColor(hist_color, cv2.COLOR_GRAY2BGR)

    # モーション履歴画像の変化方向の計算
    #   ※ orientationには各座標に対して変化方向の値(deg)が格納されます
    mask, orientation = cv2.motempl.calcMotionGradient(motion_history, 0.25, 0.05, apertureSize = 5)

    # 各座標の動きを緑色の線で描画
    width_i = GRID_WIDTH
    while width_i < width:
        height_i = GRID_WIDTH
        while height_i < height:
            # 座標点の描画を削除
            #cv2.circle(hist_gray, \
            #           (width_i, height_i), \
            #           CIRCLE_RADIUS, \
            #           (0, 255, 0), \
            #           2, \
            #           16, \
            #           0)
            angle_deg = orientation[height_i - 1][width_i - 1]
            if angle_deg > 0:
                angle_rad = math.radians(angle_deg)
                #https://shikaku-mafia.com/opencv-arrowedline/
                #tipLength は「全体の矢印線の長さに対する比率」で指定します。
                #サンプルコードでは tipLength=0.1 としているので
                #「全体の長さ」の10%が「矢の先の長さ」になっています。
                #cv2.line(hist_gray, \
                #         (width_i, height_i), \
                #         (int(width_i + math.cos(angle_rad) * LINE_LENGTH_GRID), int(height_i + math.sin(angle_rad) * LINE_LENGTH_GRID)), \
                #         (0, 255, 0), \
                #         2, \
                #         16, \
                #         0)
                cv2.arrowedLine(hist_color, \
                pt1=(width_i, height_i), \
                pt2=(int(width_i + math.cos(angle_rad) * LINE_LENGTH_GRID), int(height_i + math.sin(angle_rad) * LINE_LENGTH_GRID)), \
                color=(255, 0, 0),
                thickness=2,
                line_type=cv2.LINE_4,
                shift=0,
                tipLength=0.5)

            height_i += GRID_WIDTH

        width_i += GRID_WIDTH


    # 全体的なモーション方向を計算
    angle_deg = cv2.motempl.calcGlobalOrientation(orientation, mask, motion_history, proc_time, DURATION)

    # 全体の動きを黄色い線で描画
    # 座標点を削除する
    #cv2.circle(hist_gray, \
    #           (int(width / 2), int(height / 2)), \
    #           CIRCLE_RADIUS, \
    #           (0, 215, 255), \
    #           2, \
    #           16, \
    #           0)
    angle_rad = math.radians(angle_deg)
    #https://shikaku-mafia.com/opencv-arrowedline/
    #cv2.line(hist_gray, \
    #         (int(width / 2), int(height / 2)), \
    #         (int(width / 2 + math.cos(angle_rad) * LINE_LENGTH_ALL), int(height / 2 + math.sin(angle_rad) * LINE_LENGTH_ALL)), \
    #         (0, 215, 255), \
    #         2, \
    #         16, \
    #         0)
    cv2.arrowedLine(hist_color, \
                pt1=(int(width / 2), int(height / 2)), \
                pt2=(int(width / 2 + math.cos(angle_rad) * LINE_LENGTH_ALL), int(height / 2 + math.sin(angle_rad) * LINE_LENGTH_ALL)), \
                color=(0, 0, 255),
                thickness=3,
                line_type=cv2.LINE_4,
                shift=0,
                tipLength=0.5)

    # モーション画像を表示
    cv2.imshow("motion", hist_color)

    # Escキー押下で終了
    if cv2.waitKey(20) == ESC_KEY:
        break

    # 次のフレームの読み込み
    frame_pre = frame_next.copy()
    end_flag, frame_next = video.read()

# 終了処理
cv2.destroyAllWindows()
video.release()
