__前回の記事__の続きです。
( 前回の記事 )
__前回__は、SitarHarmonicsさんがウェブサイトで公開しているコードの全体を復元して、動画の各コマに登場する__物体の移動の方向と速さを、線の向きと大きさで可視化して表示__するコードを動かしてみました。
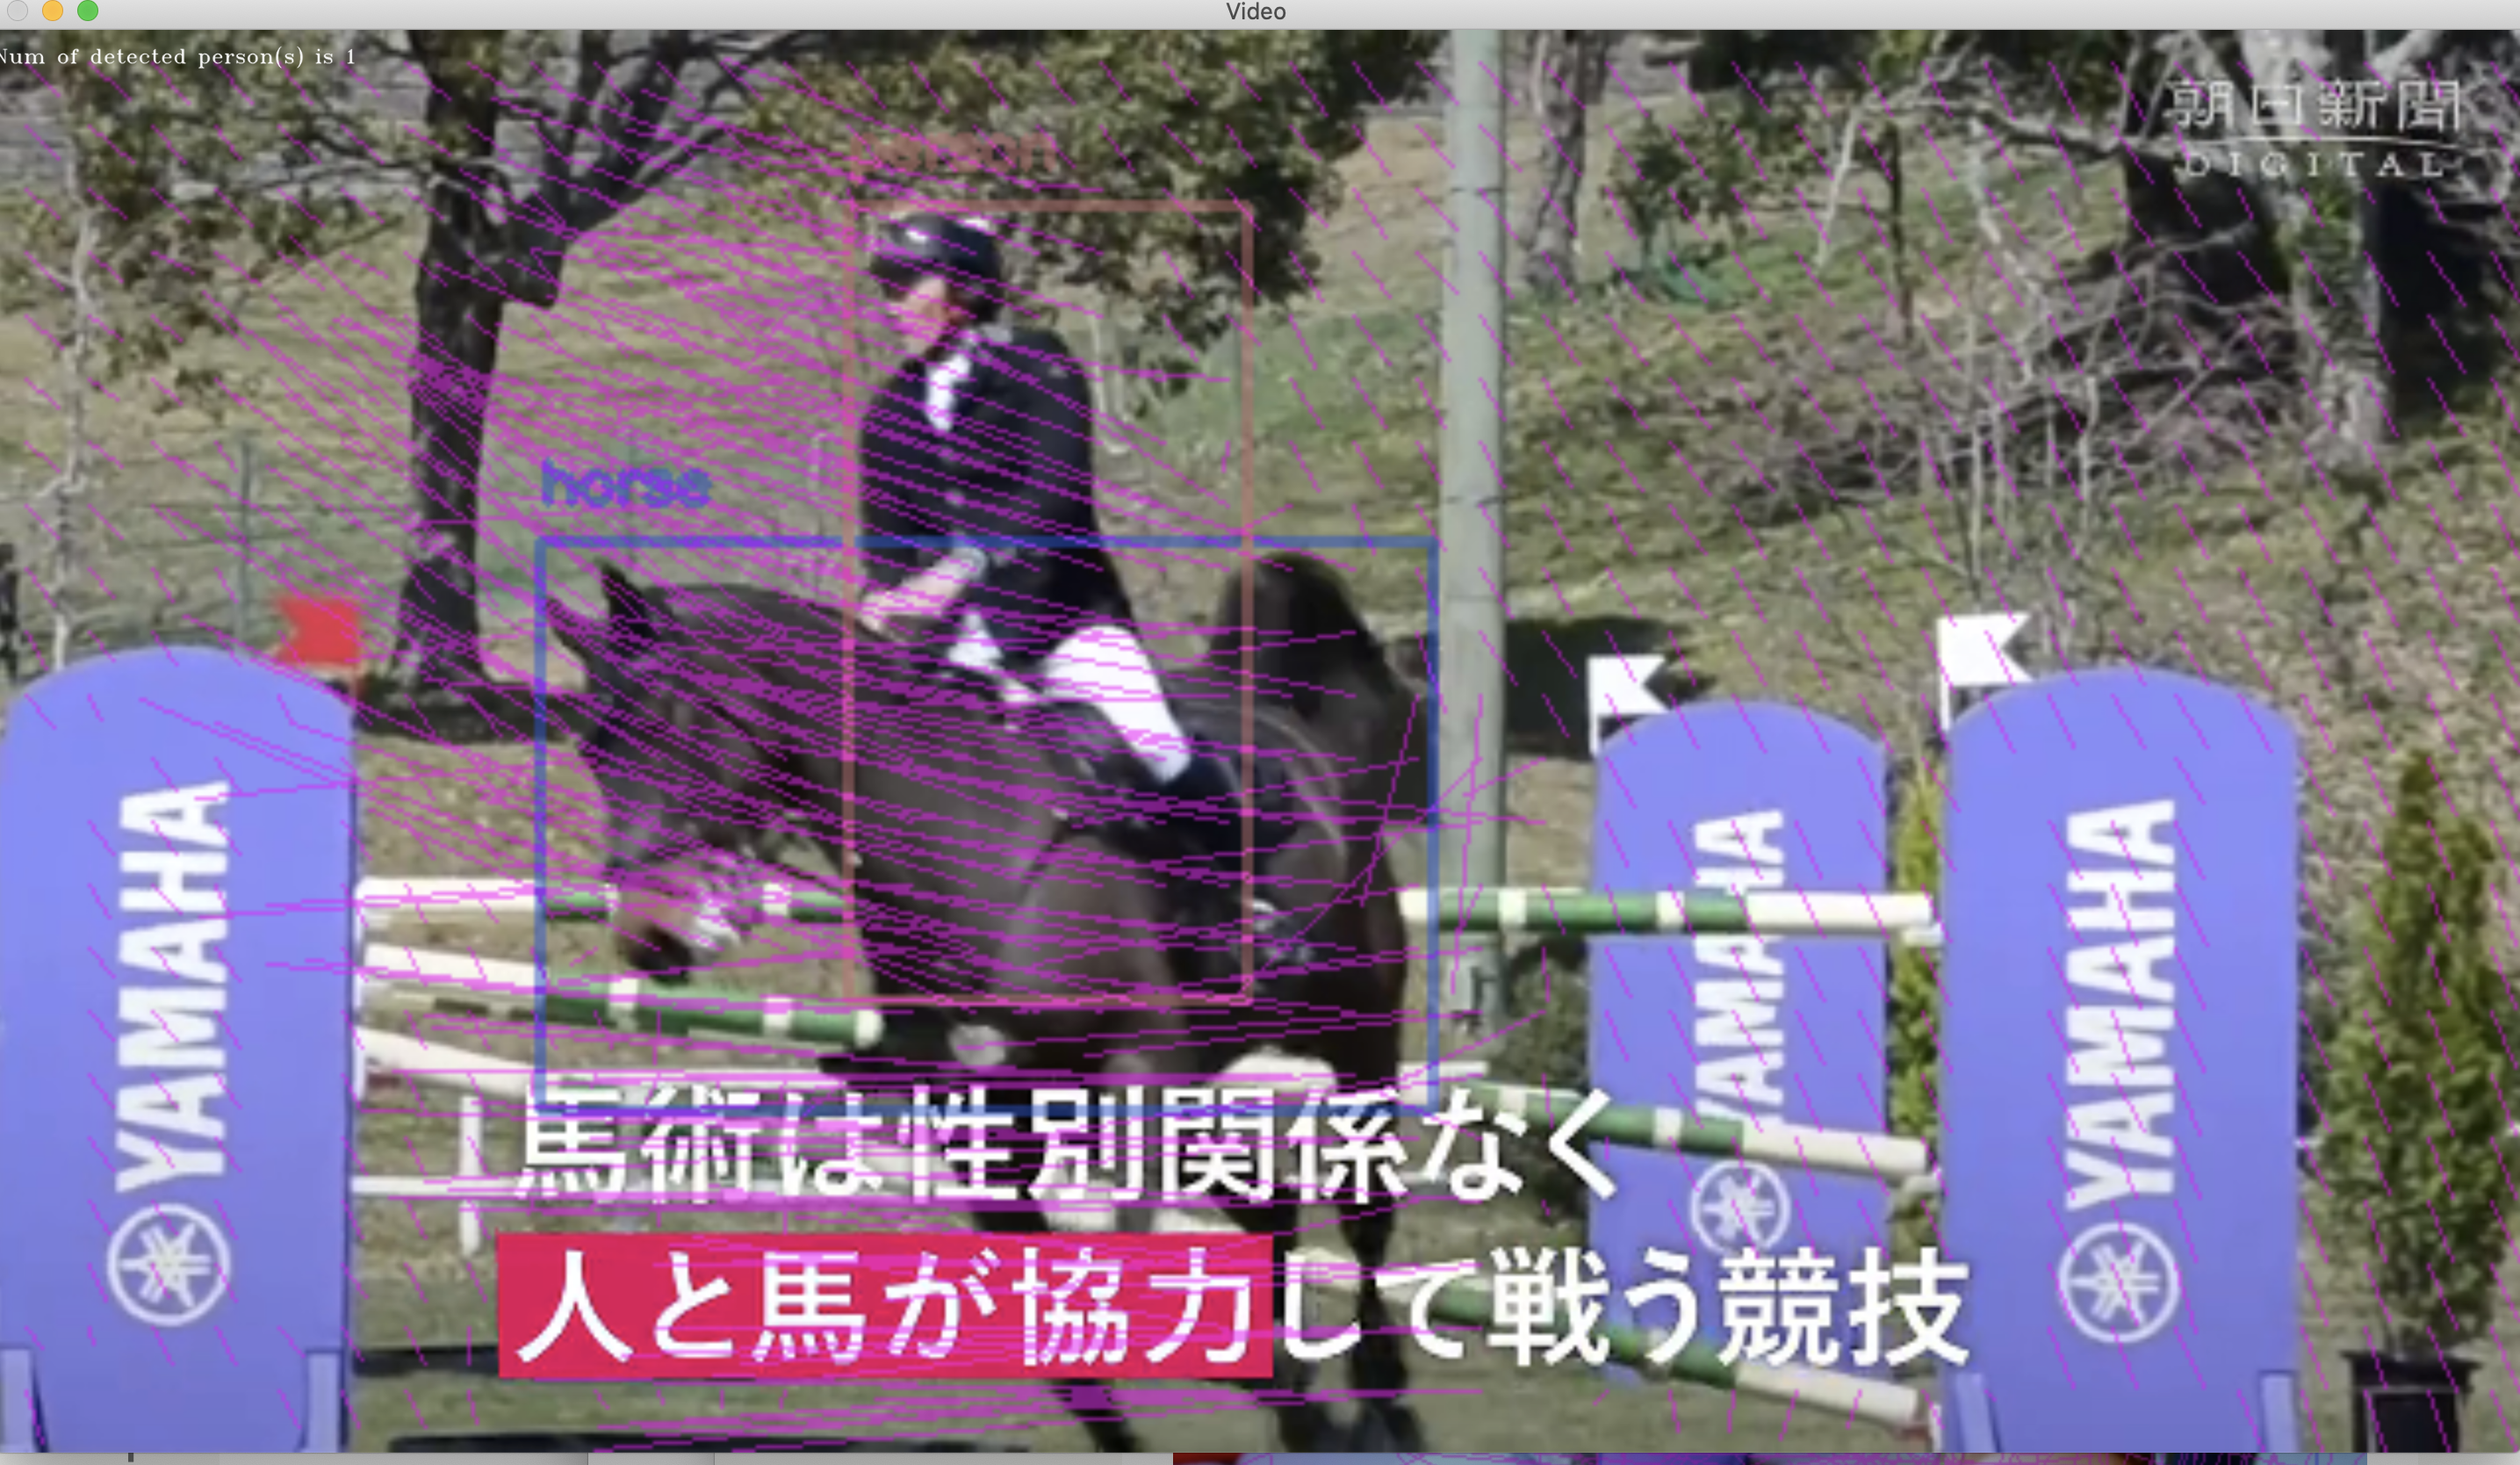
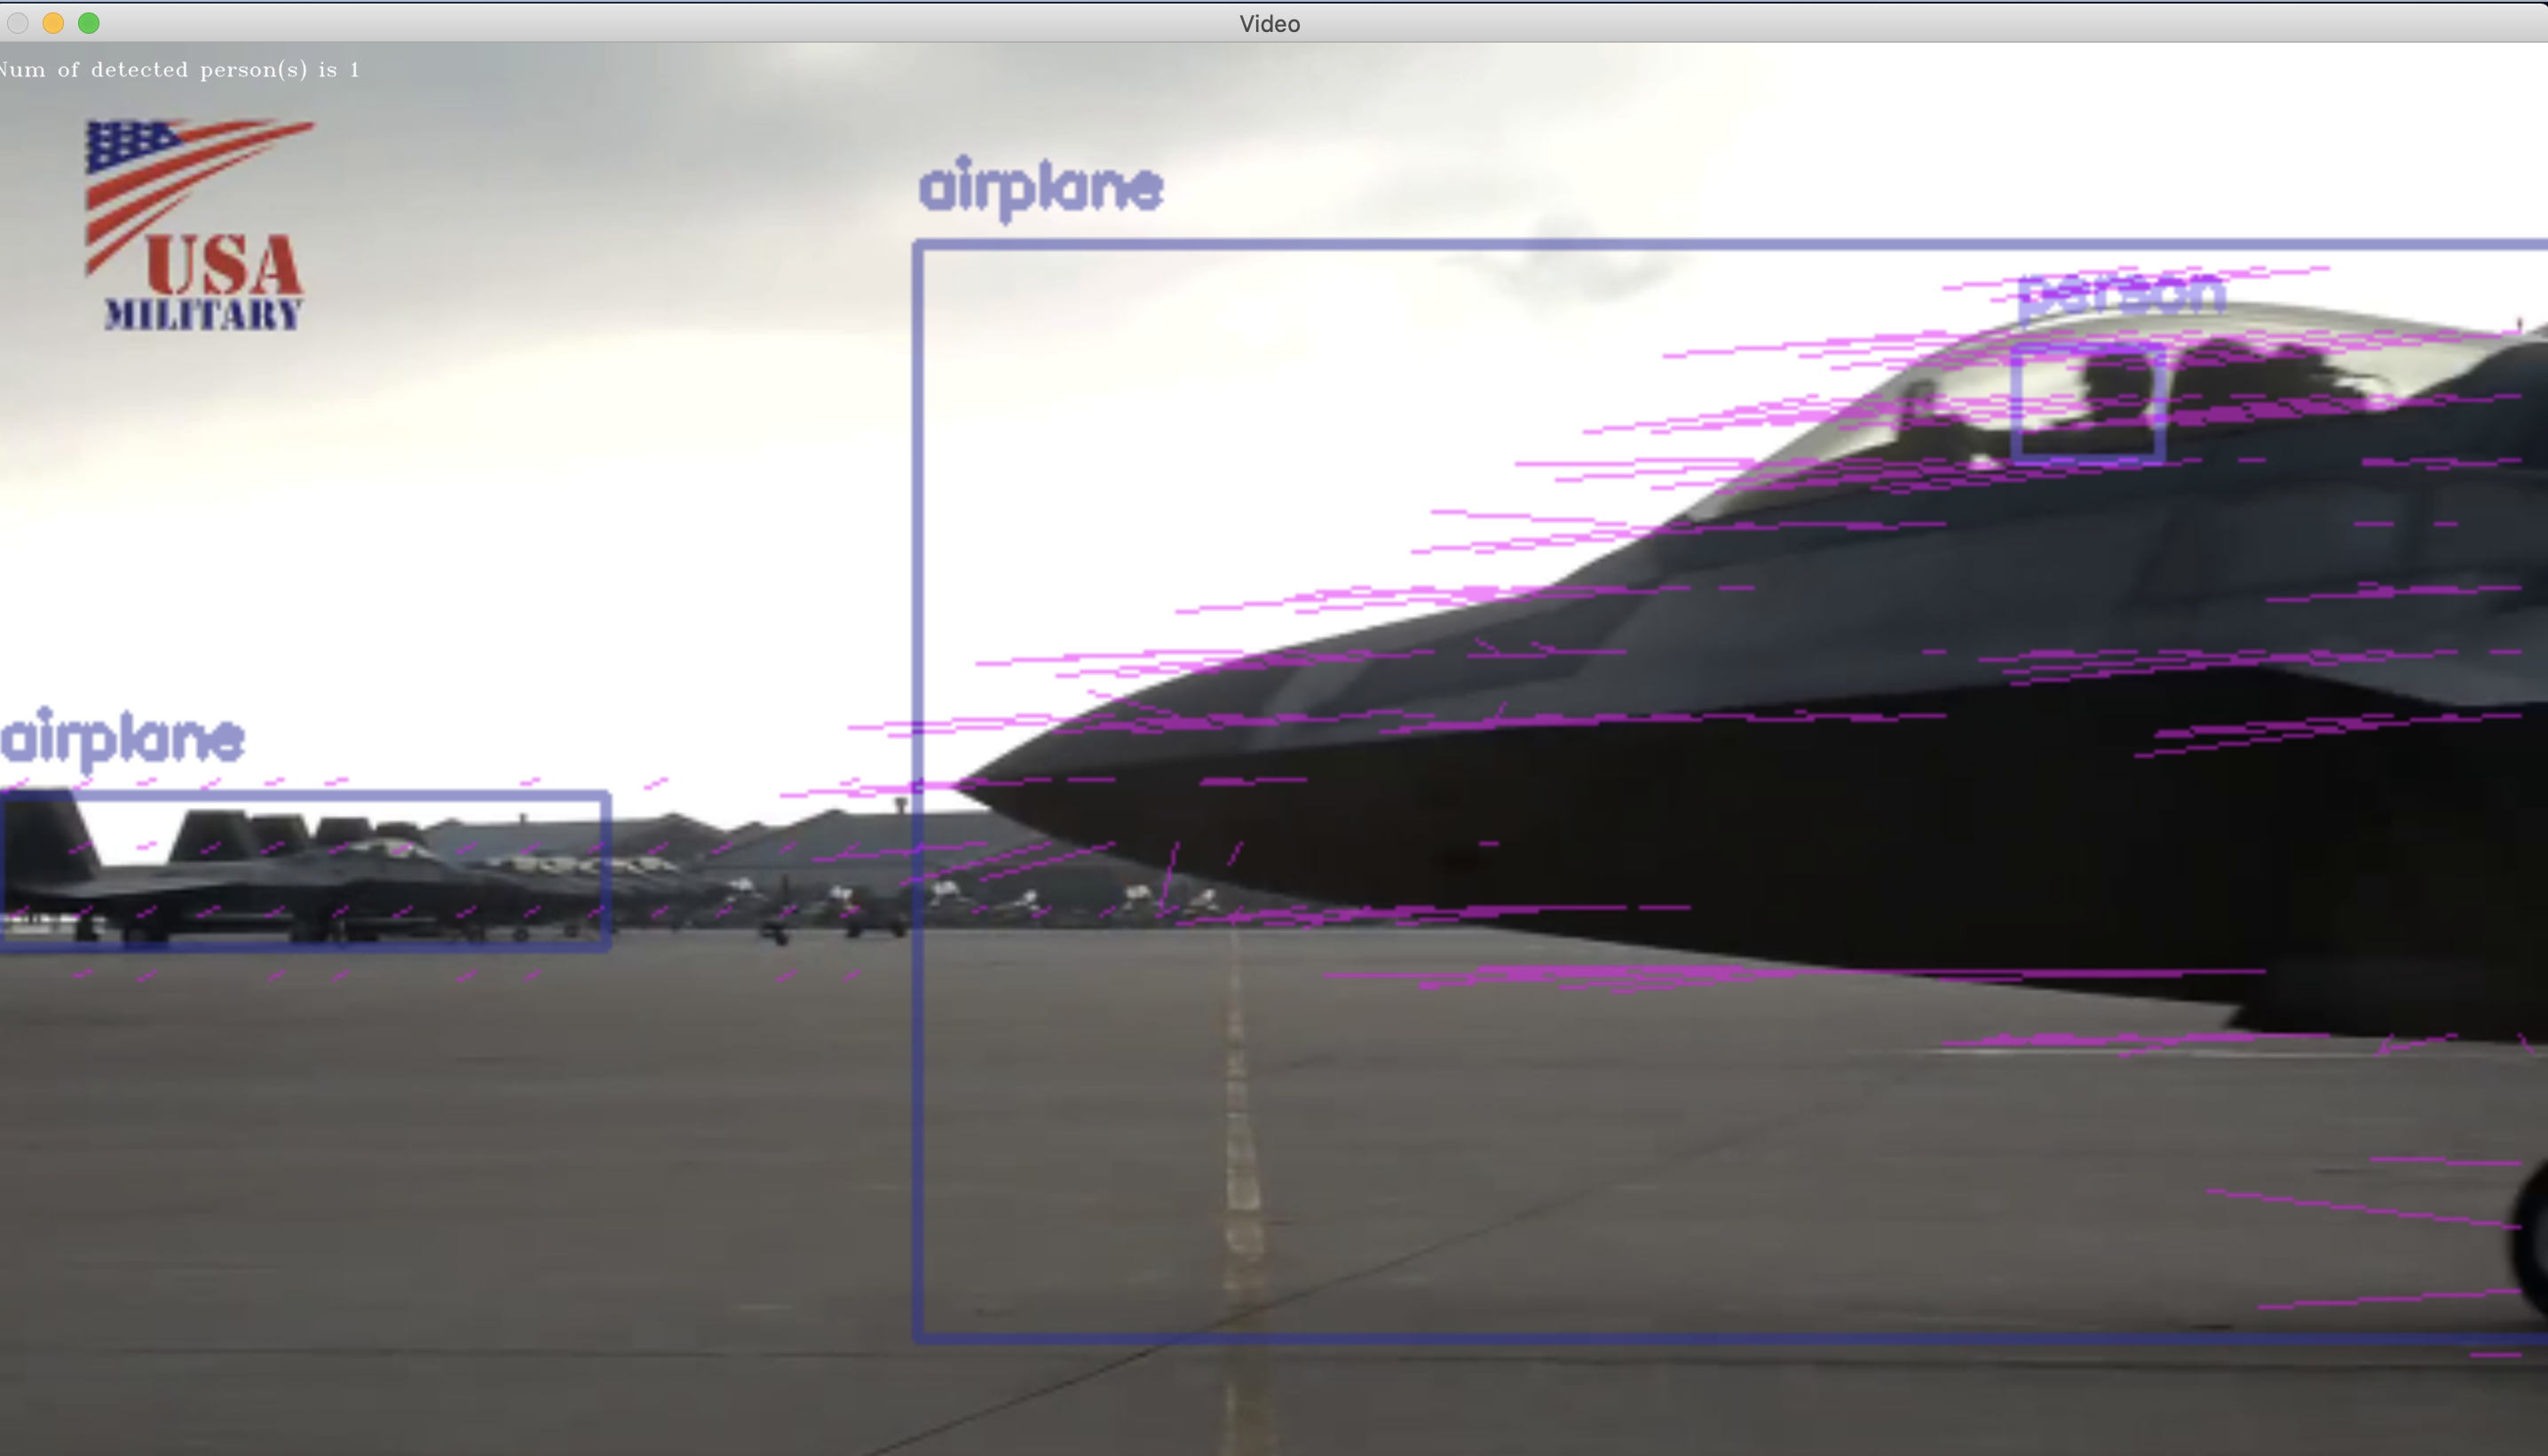
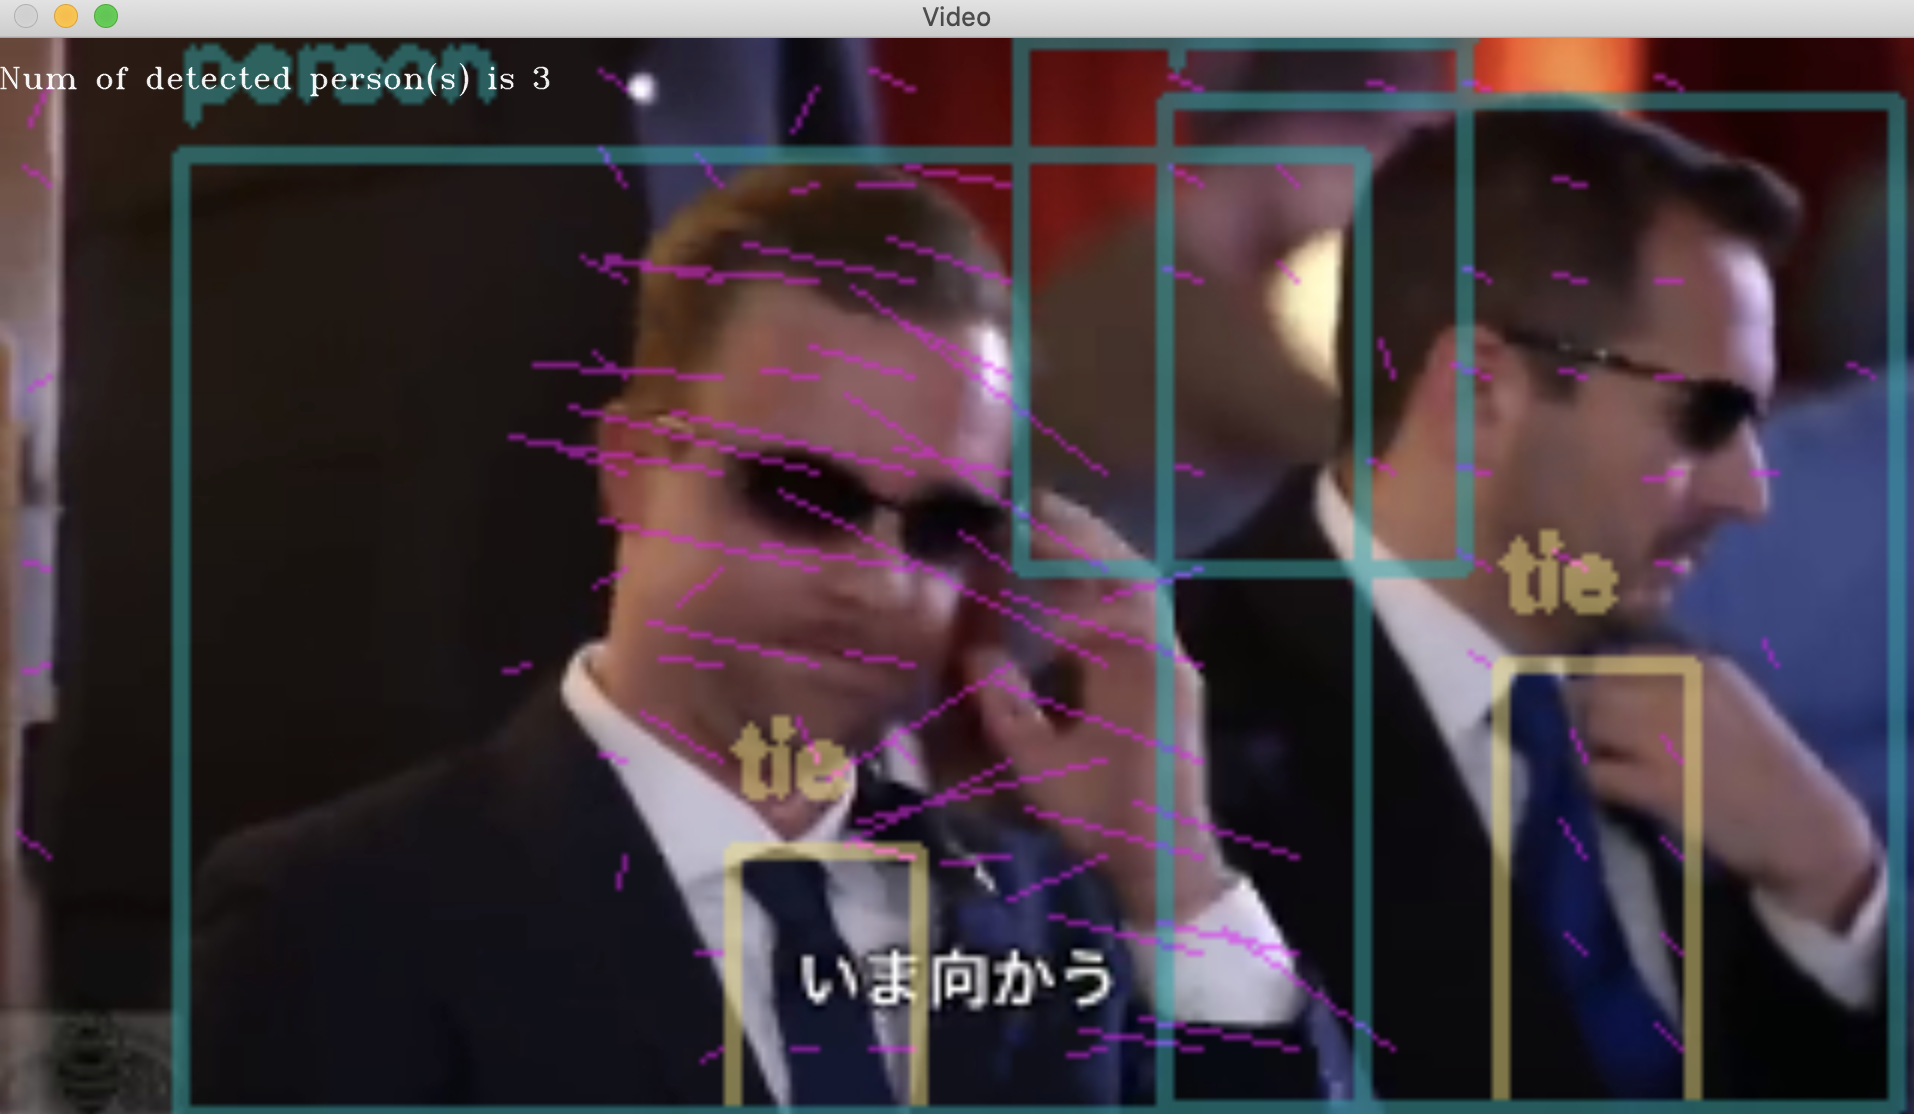
__今回__は、そうした処理と__同時に一般物体認識器を並行処理で走らせる__ことで、動画を再生しながらリアルタイムに__次の3つの情報__を、もとのフレーム画像に書き込んで表示させることに成功しました。
- 各物体の運動ベクトルの可視化
- 各物体の(フレーム画像内での現在)位置を四角枠(矩形)で囲んで表示
- 各物体のラベル名を表示
###実行結果
Terminal
% python3 mp4_movie_file_motion_vector_with_object_detection.py --file_path olympics_equestrian.mp4

Terminal
% python3 mp4_movie_file_motion_vector_with_object_detection.py --file_path f_22_fighter.mp4

Terminal
% python3 mp4_movie_file_motion_vector_with_object_detection.py --file_path trump.mp4

###今回、実装したコード
mp4_movie_file_motion_vector_with_object_detection.py
import numpy as np
import cv2, types, argparse
import cvlib as cvl
from cvlib.object_detection import draw_bbox

# https://emotionexplorer.blog.fc2.com/blog-entry-104.html
# https://emotionexplorer.blog.fc2.com/blog-entry-103.html

#以下、初期化定義されないまま使われている
start_sec = 1
end_sec = 100000

# 動画ファイルをコマンドライン引数で受け取るようにする
parser = argparse.ArgumentParser(description='Motion Vector Visualization')
parser.add_argument('--file_path', type=str, help='path to movie file', required=True)
parser.add_argument('--start_frame', type=str, help='frame_step_num to be analizedanalysis', default=1)
args = parser.parse_args()
file_path = args.file_path
start_frame = int(args.start_frame)

# 縮小画像取得
def grab(cap, sc):
    _, frame = cap.read()

    # 画像縮小
    resize_img = cv2.resize(frame, None, fx=sc, fy=sc, interpolation=cv2.INTER_CUBIC)
    return  resize_img

# オプティカルフロー解析描画
def drawOptFlow(img, gray, flow, step=16, dispsc=10):
    cimg    = img.copy()
    h, w    = img.shape[:2]
    y, x    = np.mgrid[step/2:h:step, step/2:w:step].reshape(2,-1).astype(int)
    dx, dy  = flow[y,x].T * dispsc
    dist = np.sqrt(dx**2+dy**2)

    idx     = np.where(3 < dist)
    x, y    = x[idx], y[idx]
    dx, dy  = dx[idx], dy[idx]
    lines = np.vstack([x, y, x+dx, y+dy]).T.reshape(-1, 2, 2)
    lines = lines.astype(np.int32)
    fx, fy = flow[y,x].T
    cv2.polylines(cimg, lines, False, (255, 0, 255), 1, 8)

    return cimg


# def optflow(cap, start_sec, end_sec):

def main():
    cap = cv2.VideoCapture(file_path)
    frame = cap.read()
    if not cap.isOpened():
        exit()

    # 動画開始フレーム指定(1フレーム30とする)
    fpos = start_frame*30+2
    cap.set(cv2.CAP_PROP_POS_FRAMES, fpos)

    # ShiTomasi cornerパラメータ定義
    feature_params = dict( maxCorners = 100,
                           qualityLevel = 0.2,
                           minDistance = 7,
                           blockSize = 7 )

    # lucas kanade オプティカルフローパラメータ
    lk_params = dict( winSize  = (30,30),
                    maxLevel = 2,
                    criteria=(cv2.TERM_CRITERIA_EPS|cv2.TERM_CRITERIA_COUNT, 10, 0.03))

    # 色
    color = np.random.randint(0,255,(100,3))

    # 縮小画像取得
    frame1 = grab(cap, 0.5)
    prvs = cv2.cvtColor(frame1,cv2.COLOR_BGR2GRAY)

    # 動画開始フレーム指定
    fpos = 30 * start_sec
    cap.set(cv2.CAP_PROP_POS_FRAMES, fpos)

    hsv = np.zeros_like(frame1)
    hsv[...,1] = 255

    # While Trueに変更
    while True:
        # 縮小画像取得
        frame2 = grab(cap, 0.5)
        frame2_copy = frame2.copy()
        next = cv2.cvtColor(frame2,cv2.COLOR_BGR2GRAY)

        # オプティカルフロー解析
        flow = cv2.calcOpticalFlowFarneback(prvs,next, None, 0.5, 3, 15, 3, 5, 1.2, 0)

        # オプティカルフロー解析描画
        rgb2 = drawOptFlow(frame2, next, flow, 16)

        # 物体検出矩形表示と人物検出人数の文字列埋込み表示の画像を取得
        # 物体の運動ベクトルを線で書き込んだ画像(motion_vector_img)ではなく、
        # 何も書き込まれていないカメラ画像(image)をもとに解析を行う。
        # motion_vector_imgとimageは同じタイミングでTelloから取得済み。

        label_name  = "person"
        bbox, label, conf = cvl.detect_common_objects(frame2_copy)
        obejct_detected_img = draw_bbox(frame2_copy, bbox, label, conf)

        input_text = "Num of detected {0}(s) is {1}".format(label_name, str(label.count(label_name)))

        # ウィンドウのサイズが小さいので、大きくする
        height = rgb2.shape[0]
        width = rgb2.shape[1]
        resized_rgb2_img = cv2.resize(rgb2, (int(3.0*width), int(3.0*height)))

        # 2つの画像、motion_vector_imgとobejct_detected_imgを重ね合わせる
        # 最初に、2つの画像の縦横サイズを揃える
        height_0 = resized_rgb2_img.shape[0]
        width_0 = resized_rgb2_img.shape[1]
        resized_obejct_detected_img = cv2.resize(obejct_detected_img, (width_0, height_0))
        # 同じサイズになった2つの画像を重ね合わせる
        # https://atatat.hatenablog.com/entry/opencv3_overlay
        # https://code-graffiti.com/blending-images-with-opencv-in-python/
        blended_img = cv2.addWeighted(src1=resized_rgb2_img, alpha=0.5, src2=resized_obejct_detected_img, beta=0.5, gamma=0)

        # 重ね合わせた画像を1.7倍に縦横同じ比率で拡大する
        height_1 = blended_img.shape[0]
        width_1 = blended_img.shape[1]
        resized_blended_img = cv2.resize(blended_img, (int(2*width_1), int(2*height_1)))

        # 画像に、検出した物体の輪郭を囲む矩形枠と人物検出人数の文字列を記入
        cv2.putText(resized_blended_img, str(input_text), (0, 50), cv2.FONT_HERSHEY_TRIPLEX, 1, (255, 255, 255), 1, cv2.LINE_AA)

        cv2.namedWindow("Video", cv2.WINDOW_NORMAL)
        cv2.imshow("Video", resized_blended_img)

        # ESCキー押下で終了
        k = cv2.waitKey(30) & 0xff
        if k == 27:
            break
        prvs = next

    cap.release()
    cv2.destroyAllWindows()


if __name__ == '__main__':
    main()