次のページを参考にしました。
データの受け渡し
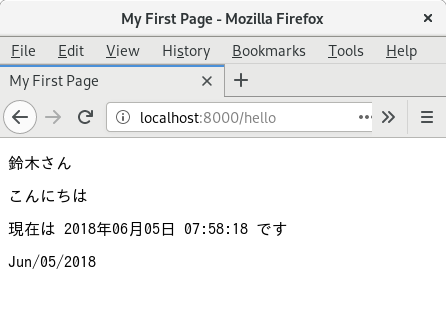
完成すると次のような表示がされます。
- プロジェクトの用意
- app/Http/Controllers/HelloController.php の編集
- resources/views/hello.blade.php の作成
- routes/web.php の編集
- サーバーを動かします。
laravel new sample_project
cd sample_project
php artisan make:controller HelloController
新規に作成しないで、こちらで作成したプログラムを改造することもできます。
Laravel で HelloWorld
app/Http/Controllers/HelloController.php
<?php

namespace App\Http\Controllers;

use Illuminate\Http\Request;

class HelloController extends Controller
{
    //
  public function index()
  {
    // 配列の初期化
    $data = array();

    // データ格納
    $data['name'] = '鈴木';
    $data['message'] = 'こんにちは';

    // 現在日時
	date_default_timezone_set('Asia/Tokyo');
	$data['today'] = date('Y年m月d日 H:i:s');

    return view('hello', $data);
  }
}
resources/views/hello.blade.php
<!DOCTYPE html>
<html lang="ja">
<head>
  <meta charset="UTF-8">
  <title>My First Page</title>
</head>
<body>
  <p>{{$name}}さん</p>
  <p>{{$message}}</p>
  <p>現在は {{$today}} です</p>
<p>Jun/05/2018</p>
</body>
</html>
最後に一行を加えます。
routes/web.php
<?php

/*
|--------------------------------------------------------------------------
| Web Routes
|--------------------------------------------------------------------------
|
| Here is where you can register web routes for your application. These
| routes are loaded by the RouteServiceProvider within a group which
| contains the "web" middleware group. Now create something great!
|
*/

Route::get('/', function () {
    return view('welcome');
});

Route::get('hello', 'App\Http\Controllers\HelloController@index');
php artisan serve --host 0.0.0.0
ブラウザーで、 http://localhost:8000/hello にアクセスします。
冒頭の画面が表示されます。
次の環境で確認しました。
$ uname -a
Linux iwata 5.13.0-27-generic #29-Ubuntu SMP Wed Jan 12 17:36:47 UTC 2022 x86_64 x86_64 x86_64 GNU/Linux

$ php --version
PHP 8.0.8 (cli) (built: Oct 26 2021 11:42:42) ( NTS )
Copyright (c) The PHP Group
Zend Engine v4.0.8, Copyright (c) Zend Technologies
    with Zend OPcache v8.0.8, Copyright (c), by Zend Technologies

$ php artisan --version
Laravel Framework 8.82.0