こちらと同じことを行いました。
【Kotlin】Fragmentのサンプル
プロジェクトの作成
プロジェクト名: fragment01
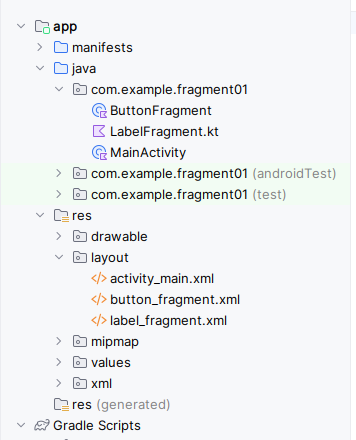
ツリー構造
画面
activity_main.xml
<?xml version="1.0" encoding="utf-8"?>
<androidx.constraintlayout.widget.ConstraintLayout xmlns:android="http://schemas.android.com/apk/res/android"
    xmlns:app="http://schemas.android.com/apk/res-auto"
    xmlns:tools="http://schemas.android.com/tools"
    android:layout_width="match_parent"
    android:layout_height="match_parent"
    tools:context=".MainActivity">

    <androidx.constraintlayout.widget.Guideline
        android:id="@+id/guideline"
        android:layout_width="wrap_content"
        android:layout_height="wrap_content"
        android:orientation="horizontal"
        app:layout_constraintGuide_percent="0.5" />

    <fragment
        android:id="@+id/fragment"
        android:name="com.example.fragment01.ButtonFragment"
        android:layout_width="wrap_content"
        android:layout_height="wrap_content"
        android:layout_marginStart="8dp"
        android:layout_marginTop="8dp"
        android:layout_marginEnd="8dp"
        android:layout_marginBottom="8dp"
        app:layout_constraintBottom_toTopOf="@+id/guideline"
        app:layout_constraintEnd_toEndOf="parent"
        app:layout_constraintStart_toStartOf="parent"
        app:layout_constraintTop_toTopOf="parent"
        tools:layout="@layout/button_fragment" />

    <FrameLayout
        android:id="@+id/container"
        android:layout_width="0dp"
        android:layout_height="0dp"
        android:layout_marginStart="8dp"
        android:layout_marginTop="8dp"
        android:layout_marginEnd="8dp"
        android:layout_marginBottom="8dp"
        app:layout_constraintBottom_toBottomOf="parent"
        app:layout_constraintEnd_toEndOf="parent"
        app:layout_constraintStart_toStartOf="parent"
        app:layout_constraintTop_toTopOf="@+id/guideline">

    </FrameLayout>
</androidx.constraintlayout.widget.ConstraintLayout>
button_fragment.xml
<?xml version="1.0" encoding="utf-8"?>
<androidx.constraintlayout.widget.ConstraintLayout xmlns:android="http://schemas.android.com/apk/res/android"
    xmlns:app="http://schemas.android.com/apk/res-auto"
    xmlns:tools="http://schemas.android.com/tools"
    android:layout_width="match_parent"
    android:layout_height="match_parent"
    tools:context=".MainActivity">

    <Button
        android:id="@+id/button"
        android:layout_width="wrap_content"
        android:layout_height="wrap_content"
        android:layout_marginStart="8dp"
        android:layout_marginTop="8dp"
        android:layout_marginEnd="8dp"
        android:layout_marginBottom="8dp"
        android:text="Button"
        android:textSize="50sp"
        app:layout_constraintBottom_toBottomOf="parent"
        app:layout_constraintEnd_toEndOf="parent"
        app:layout_constraintStart_toStartOf="parent"
        app:layout_constraintTop_toTopOf="parent" />
</androidx.constraintlayout.widget.ConstraintLayout>
label_fragment.xml
<?xml version="1.0" encoding="utf-8"?>
<androidx.constraintlayout.widget.ConstraintLayout xmlns:android="http://schemas.android.com/apk/res/android"
    xmlns:app="http://schemas.android.com/apk/res-auto"
    xmlns:tools="http://schemas.android.com/tools"
    android:layout_width="match_parent"
    android:layout_height="match_parent"
    tools:context=".MainActivity">

    <TextView
        android:id="@+id/textView"
        android:layout_width="wrap_content"
        android:layout_height="wrap_content"
        android:layout_marginStart="8dp"
        android:layout_marginTop="8dp"
        android:layout_marginEnd="8dp"
        android:layout_marginBottom="8dp"
        android:text="TextView"
        android:textSize="50sp"
        android:textAppearance="@style/TextAppearance.AppCompat.Large"
        app:layout_constraintBottom_toBottomOf="parent"
        app:layout_constraintEnd_toEndOf="parent"
        app:layout_constraintStart_toStartOf="parent"
        app:layout_constraintTop_toTopOf="parent" />
</androidx.constraintlayout.widget.ConstraintLayout>
プログラム
MainActivity.kt
package com.example.fragment01

import androidx.appcompat.app.AppCompatActivity
import android.os.Bundle

class MainActivity : AppCompatActivity(),ButtonFragment.OnButtonClickListener {

    //ボタンがクリックされたらラベルフラグメントを呼び出す
    override fun onButtonClicked() {
        val fragment = supportFragmentManager.findFragmentByTag("labelFragment") as LabelFragment
        fragment.update()
    }
    override fun onCreate(savedInstanceState: Bundle?) {
        super.onCreate(savedInstanceState)
        setContentView(R.layout.activity_main)

        //フラグメントの有無を確認し動的にフラグメントを追加する
        if (supportFragmentManager.findFragmentByTag("labelFragment") == null){
            supportFragmentManager.beginTransaction()
                .add(R.id.container, newLabelFragment(0),"labelFragment")
                .commit()
        }
    }
}
ButtonFragment.kt
package com.example.fragment01

import android.content.Context
import android.os.Bundle
import android.view.LayoutInflater
import android.view.View
import android.view.ViewGroup
import android.widget.Button
import androidx.fragment.app.Fragment
import java.lang.RuntimeException

//①Fragmentを継承したclassを作る これがなきゃ始まらない
class ButtonFragment:Fragment() {

    //③onAttach:フラグメントがアクティビティに配置されたときに呼ばれる
    //ここではコールバックインターフェース(②)がちゃんと実装されていることを確認している
    override fun onAttach(context: Context){
        super.onAttach(context)
        if(context !is OnButtonClickListener)
            throw RuntimeException("リスナーを実装してください")
    }
    //③

    //④フラグメントのレイアウトを決定している(onCreateView)
    override fun onCreateView(inflater:LayoutInflater,
                              container: ViewGroup?, savedInstanceState:Bundle?): View {
        //⑤ボタンが押された時のリスナーをセット
        val view = inflater.inflate(R.layout.button_fragment, container, false)
        view.findViewById<Button>(R.id.button)
            .setOnClickListener {
            //⑥コールバックインターフェースを実装しているアクティビティにイベントを知らせる
            val listener = context as? OnButtonClickListener
            listener?.onButtonClicked()
            //⑥
        }
        return view
    }
    //④

    //②コールバックインターフェースを定義する
    interface OnButtonClickListener{
        fun onButtonClicked()
    }
    //②
}
//①
LabelFragment.kt
package com.example.fragment01

import android.os.Bundle
import android.view.LayoutInflater
import android.view.View
import android.view.ViewGroup
import android.widget.TextView
import androidx.fragment.app.Fragment

//①Fragmentを継承したclassを作る さっきと一緒だね
class LabelFragment: Fragment(){

    //③argumentに入れておいた値を取り出す
    private var counter = 0
    private lateinit var counterLabel : TextView

    //onCreateはフラグメント生成時に呼ばれる
    override fun onCreate(savedInstanceState:Bundle?){
        super.onCreate(savedInstanceState)
        counter = savedInstanceState?.getInt("counter")
            ?:arguments?.getInt("counter")
                    ?: 0

    }

    //取り出した値をViewに表示する
    override fun onCreateView(
        inflater: LayoutInflater,
        container: ViewGroup?,
        savedInstanceState: Bundle?
    ): View? {
        val view = inflater.inflate(R.layout.label_fragment,container,false)
        counterLabel = view.findViewById(R.id.textView)
        counterLabel.text = counter.toString()
        return view
    }
    //③

    //⑤onSaveInstanceState:フラグメントが停止する際に呼ばれる
    //ここでカウンターを保存する
    override fun onSaveInstanceState(outState:Bundle){
        outState.putInt("counter",counter)
    }
    //⑤

    //④カウンターをインクリメントするメソッド
    fun update(){
        counter++
        counterLabel.text = counter.toString()
    }
    //④
}
//①

//②このフラグメントのインスタンスを生成する関数
//フラグメント生成時にBundleにパラメータを詰めargumentプロパティに設定する
//ここにカウンターの値を保持する
fun newLabelFragment(value : Int):LabelFragment{
    val fragment = LabelFragment()

    val args = Bundle()
    args.putInt("counter",value)

    fragment.arguments = args
    return fragment
}
//②
実行結果
