Activityは画面遷移みたいなイメージだけど、
Fragmentは同じ画面で部品が呼応しあうイメージ。
また例によってこの本から勉強してみた。
https://www.sbcr.jp/products/4797395808.html
サンプルアプリを作成
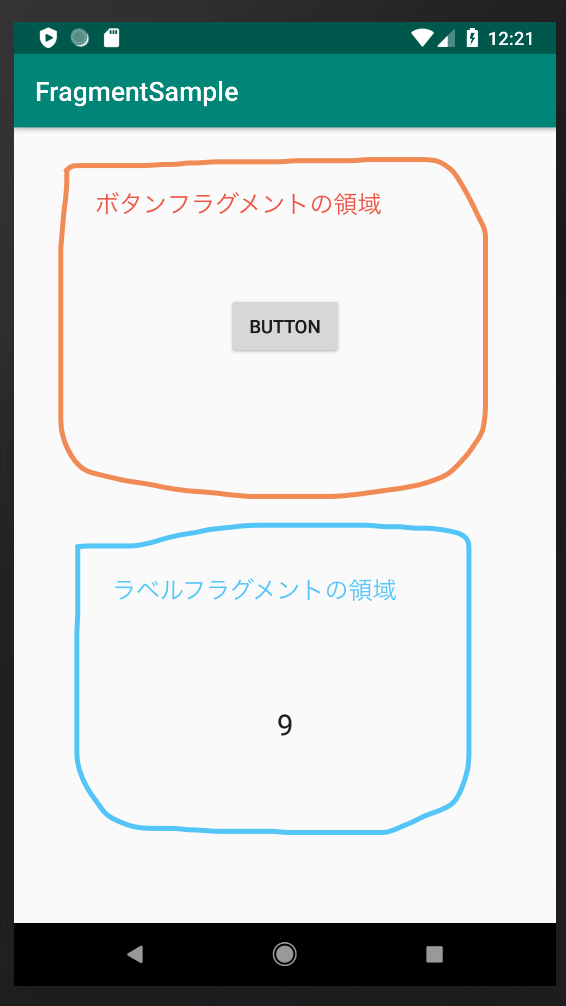
このような感じで、ボタンを押すフラグメントの領域と、ボタンが押されたらカウントアップするラベルのフラグメント領域を作ってみる

ソースコード
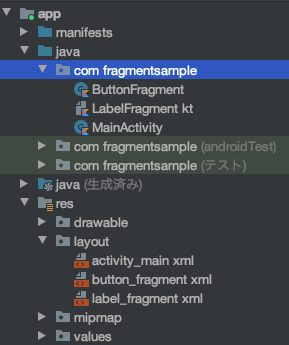
・ktファイル
MainActivity.kt : メインの処理。他の二つのフラグメントを制御する。
ButtonFragment.kt : ボタンフラグメントを制御する。
LabelFragment.kt : ボタンフラグメントと連動してラベルフラグメントを制御する。
・xml(レイアウト)ファイル
activity_main.xml : メインのレイアウトファイル。他の二つのフラグメントを配置する。
button_fragment.xml : ボタンフラグメントのレイアウト。
label_fragment.xml : ラベルフラグメントのレイアウト。

まずはボタンフラグメントから作っていこう
<?xml version="1.0" encoding="utf-8"?>
<androidx.constraintlayout.widget.ConstraintLayout xmlns:android="http://schemas.android.com/apk/res/android"
    xmlns:app="http://schemas.android.com/apk/res-auto"
    xmlns:tools="http://schemas.android.com/tools"
    android:layout_width="match_parent"
    android:layout_height="match_parent"
    tools:context=".MainActivity">

    <Button
        android:id="@+id/button"
        android:layout_width="wrap_content"
        android:layout_height="wrap_content"
        android:layout_marginStart="8dp"
        android:layout_marginTop="8dp"
        android:layout_marginEnd="8dp"
        android:layout_marginBottom="8dp"
        android:text="Button"
        app:layout_constraintBottom_toBottomOf="parent"
        app:layout_constraintEnd_toEndOf="parent"
        app:layout_constraintStart_toStartOf="parent"
        app:layout_constraintTop_toTopOf="parent" />
</androidx.constraintlayout.widget.ConstraintLayout>
レイアウトはButton置いただけ
package com.fragmentsample

import android.content.Context
import android.os.Bundle
import android.view.LayoutInflater
import android.view.View
import android.view.ViewGroup
import android.widget.Button
import androidx.fragment.app.Fragment
import java.lang.RuntimeException

//①Fragmentを継承したclassを作る これがなきゃ始まらない
class ButtonFragment:Fragment() {

    //③onAttach:フラグメントがアクティビティに配置されたときに呼ばれる
    //ここではコールバックインターフェース(②)がちゃんと実装されていることを確認している
    override fun onAttach(context: Context){
        super.onAttach(context)
        if(context !is OnButtonClickListener)
            throw RuntimeException("リスナーを実装してください")
    }
    //③

    //④フラグメントのレイアウトを決定している(onCreateView)
    override fun onCreateView(inflater:LayoutInflater,
                              container: ViewGroup?, savedInstanceState:Bundle?): View {
        //⑤ボタンが押された時のリスナーをセット
        val view = inflater.inflate(R.layout.button_fragment, container, false)
        view.findViewById<Button>(R.id.button)
            .setOnClickListener {
            //⑥コールバックインターフェースを実装しているアクティビティにイベントを知らせる
            val listener = context as? OnButtonClickListener
            listener?.onButtonClicked()
            //⑥
        }
        return view
    }
    //④

    //②コールバックインターフェースを定義する
    interface OnButtonClickListener{
        fun onButtonClicked()
    }
    //②
}
//①
アクティビティにボタンを置くだけに比べてフラグメントはいろいろやんなきゃいけないけど
その恩恵は大きいらしい
次にラベルフラグメント
レイアウトファイル
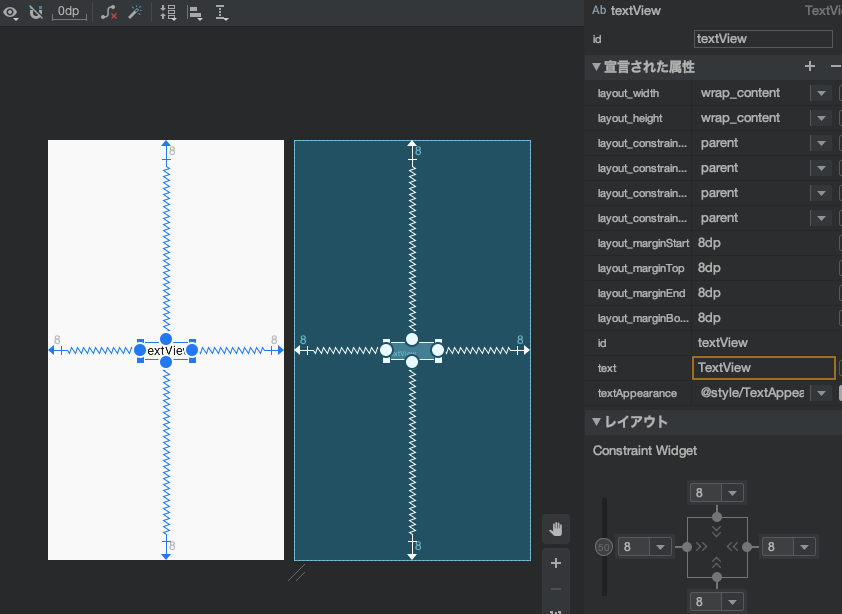
これもTextViewおいただけ
<?xml version="1.0" encoding="utf-8"?>
<androidx.constraintlayout.widget.ConstraintLayout xmlns:android="http://schemas.android.com/apk/res/android"
    xmlns:app="http://schemas.android.com/apk/res-auto"
    xmlns:tools="http://schemas.android.com/tools"
    android:layout_width="match_parent"
    android:layout_height="match_parent"
    tools:context=".MainActivity">

    <TextView
        android:id="@+id/textView"
        android:layout_width="wrap_content"
        android:layout_height="wrap_content"
        android:layout_marginStart="8dp"
        android:layout_marginTop="8dp"
        android:layout_marginEnd="8dp"
        android:layout_marginBottom="8dp"
        android:text="TextView"
        android:textAppearance="@style/TextAppearance.AppCompat.Large"
        app:layout_constraintBottom_toBottomOf="parent"
        app:layout_constraintEnd_toEndOf="parent"
        app:layout_constraintStart_toStartOf="parent"
        app:layout_constraintTop_toTopOf="parent" />
</androidx.constraintlayout.widget.ConstraintLayout>
フラグメントファイル
package com.fragmentsample

import android.os.Bundle
import android.view.LayoutInflater
import android.view.View
import android.view.ViewGroup
import android.widget.TextView
import androidx.fragment.app.Fragment

//①Fragmentを継承したclassを作る さっきと一緒だね
class LabelFragment: Fragment(){

    //③argumentに入れておいた値を取り出す
    private var counter = 0
    private lateinit var counterLabel : TextView

    //onCreateはフラグメント生成時に呼ばれる
    override fun onCreate(savedInstanceState:Bundle?){
        super.onCreate(savedInstanceState)
        counter = savedInstanceState?.getInt("counter")
            ?:arguments?.getInt("counter")
                    ?: 0

    }

    //取り出した値をViewに表示する
    override fun onCreateView(
        inflater: LayoutInflater,
        container: ViewGroup?,
        savedInstanceState: Bundle?
    ): View? {
        val view = inflater.inflate(R.layout.label_fragment,container,false)
        counterLabel = view.findViewById(R.id.textView)
        counterLabel.text = counter.toString()
        return view
    }
    //③

    //⑤onSaveInstanceState:フラグメントが停止する際に呼ばれる
    //ここでカウンターを保存する
    override fun onSaveInstanceState(outState:Bundle){
        outState.putInt("counter",counter)
    }
    //⑤

    //④カウンターをインクリメントするメソッド
    fun update(){
        counter++
        counterLabel.text = counter.toString()
    }
    //④
}
//①

//②このフラグメントのインスタンスを生成する関数
//フラグメント生成時にBundleにパラメータを詰めargumentプロパティに設定する
//ここにカウンターの値を保持する
fun newLabelFragment(value : Int):LabelFragment{
    val fragment = LabelFragment()

    val args = Bundle()
    args.putInt("counter",value)

    fragment.arguments = args
    return fragment
}
//②
Mainの実装
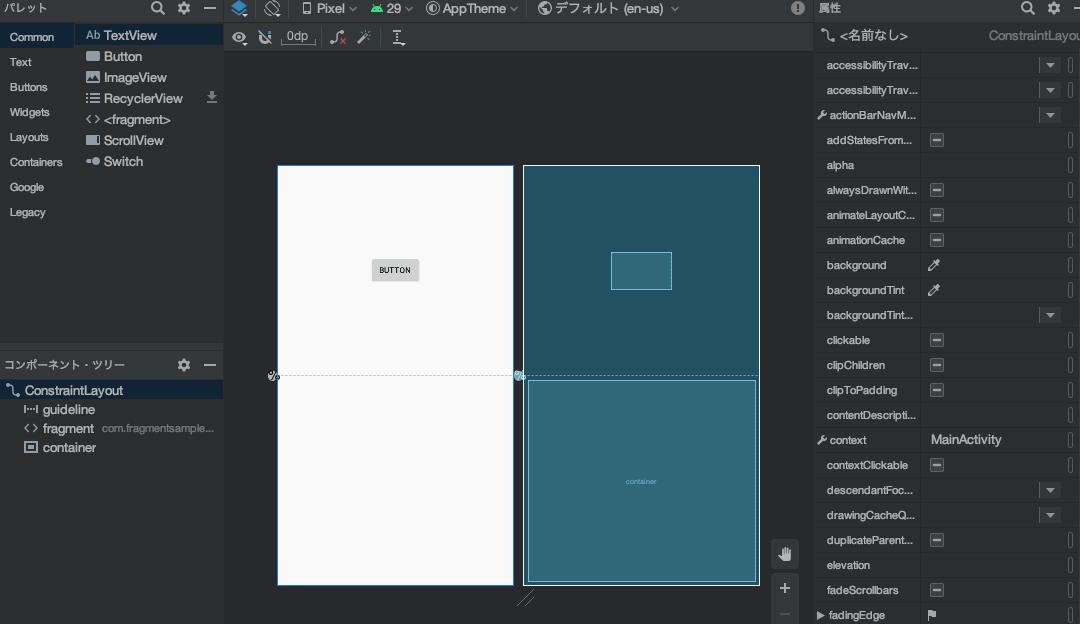
まずはレイアウト
二つのフラグメントを配置する
<?xml version="1.0" encoding="utf-8"?>
<androidx.constraintlayout.widget.ConstraintLayout xmlns:android="http://schemas.android.com/apk/res/android"
    xmlns:app="http://schemas.android.com/apk/res-auto"
    xmlns:tools="http://schemas.android.com/tools"
    android:layout_width="match_parent"
    android:layout_height="match_parent"
    tools:context=".MainActivity">

    <androidx.constraintlayout.widget.Guideline
        android:id="@+id/guideline"
        android:layout_width="wrap_content"
        android:layout_height="wrap_content"
        android:orientation="horizontal"
        app:layout_constraintGuide_percent="0.5" />

    <fragment
        android:id="@+id/fragment"
        android:name="com.fragmentsample.ButtonFragment"
        android:layout_width="wrap_content"
        android:layout_height="wrap_content"
        android:layout_marginStart="8dp"
        android:layout_marginTop="8dp"
        android:layout_marginEnd="8dp"
        android:layout_marginBottom="8dp"
        app:layout_constraintBottom_toTopOf="@+id/guideline"
        app:layout_constraintEnd_toEndOf="parent"
        app:layout_constraintStart_toStartOf="parent"
        app:layout_constraintTop_toTopOf="parent"
        tools:layout="@layout/button_fragment" />

    <FrameLayout
        android:id="@+id/container"
        android:layout_width="0dp"
        android:layout_height="0dp"
        android:layout_marginStart="8dp"
        android:layout_marginTop="8dp"
        android:layout_marginEnd="8dp"
        android:layout_marginBottom="8dp"
        app:layout_constraintBottom_toBottomOf="parent"
        app:layout_constraintEnd_toEndOf="parent"
        app:layout_constraintStart_toStartOf="parent"
        app:layout_constraintTop_toTopOf="@+id/guideline">

    </FrameLayout>
</androidx.constraintlayout.widget.ConstraintLayout>
package com.fragmentsample

import androidx.appcompat.app.AppCompatActivity
import android.os.Bundle

class MainActivity : AppCompatActivity(),ButtonFragment.OnButtonClickListener {

    //ボタンがクリックされたらラベルフラグメントを呼び出す
    override fun onButtonClicked() {
        val fragment = supportFragmentManager.findFragmentByTag("labelFragment") as LabelFragment
        fragment.update()
    }
    override fun onCreate(savedInstanceState: Bundle?) {
        super.onCreate(savedInstanceState)
        setContentView(R.layout.activity_main)

        //フラグメントの有無を確認し動的にフラグメントを追加する
        if (supportFragmentManager.findFragmentByTag("labelFragment") == null){
            supportFragmentManager.beginTransaction()
                .add(R.id.container, newLabelFragment(0),"labelFragment")
                .commit()
        }
    }
}
以上。


