
コンテナに入って叩く
概要
ECS-execについて公式ページには、下記と書いてあります。
ECS Exec を使用して、Amazon EC2 インスタンスまたは AWS Fargate で実行されているコンテナでコマンドを実行したり、シェルを取得したりできます。これにより、診断情報を収集し、エラーを迅速にトラブルシューティングすることが容易になります。
立ち上げられたコンテナに入ってコマンドを実行するようなサービスです。コンテナのヘルスチェックエラーや、環境変数の確認などの場合で活用されています。
目標
立ち上げられたコンテナに入って環境変数を叩いてみる
前提条件
- AWSアカウント
- AWS CLI
- ECSコンテナが立ち上げられている
手順
Session Manager pluginのインストールとセットアップ
https://docs.aws.amazon.com/systems-manager/latest/userguide/install-plugin-linux-verify-signature.html
上記公式ページの手順に従ってインストールしてください。
- Session Manager プラグインのインストール成功の確認
$ session-manager-plugin
The Session Manager plugin was installed successfully. Use the AWS CLI to start a session.
$
タスクロールにポリシー追加
タスクロールの画面を開く
-
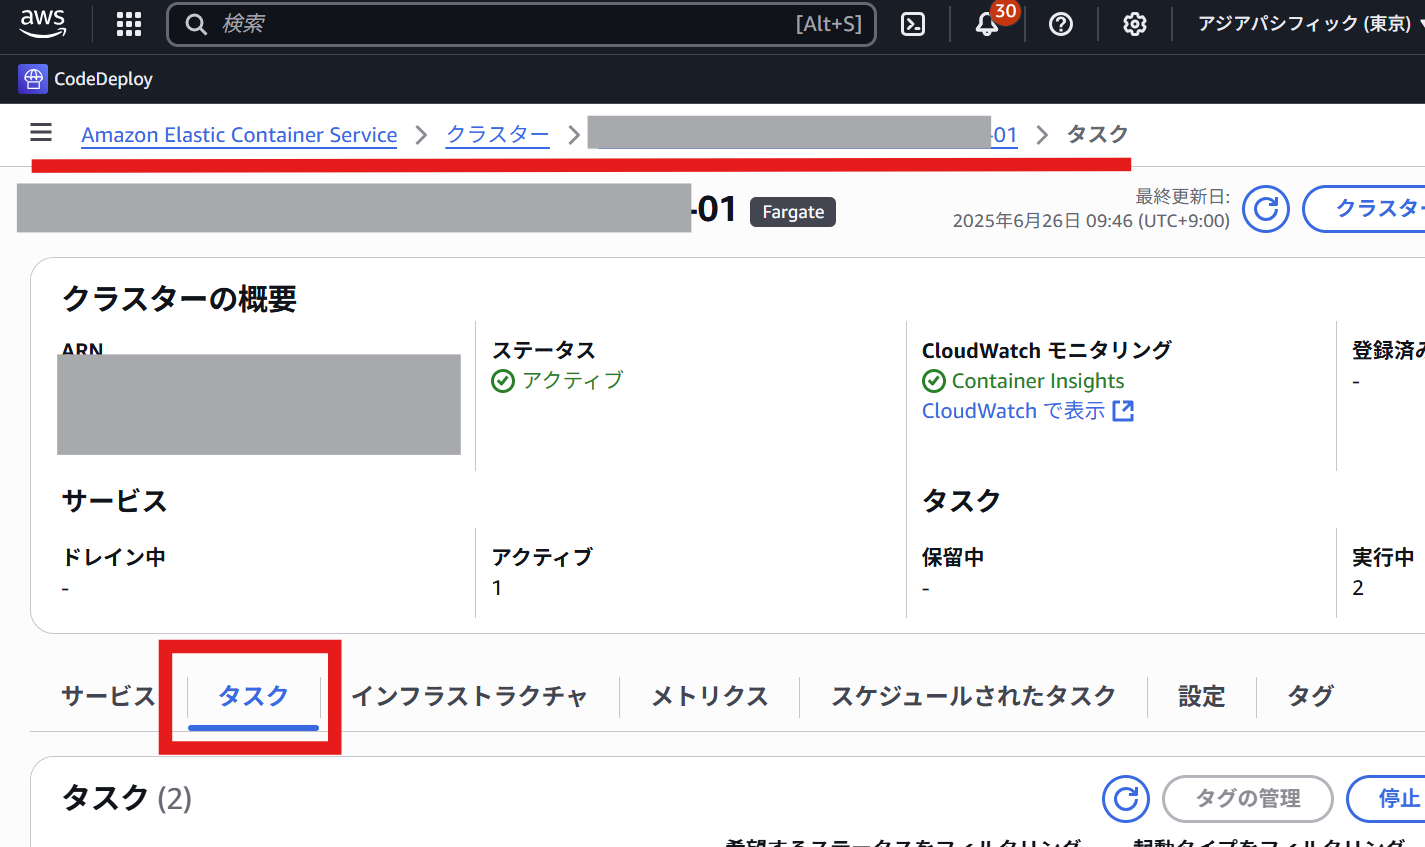
対象ECSの画面を開き、「タスク」をクリック
-
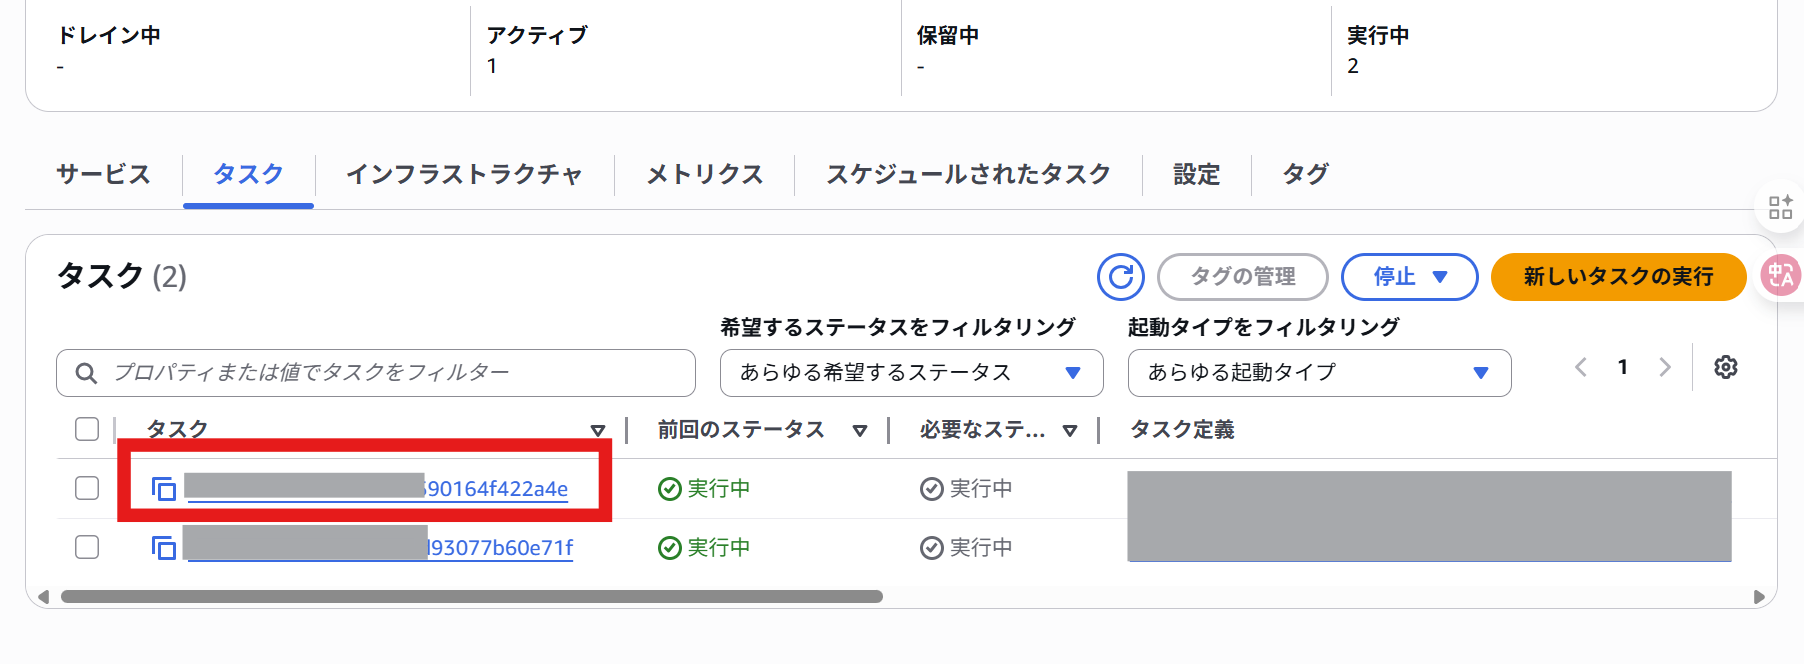
稼働しているタスクをクリック
-
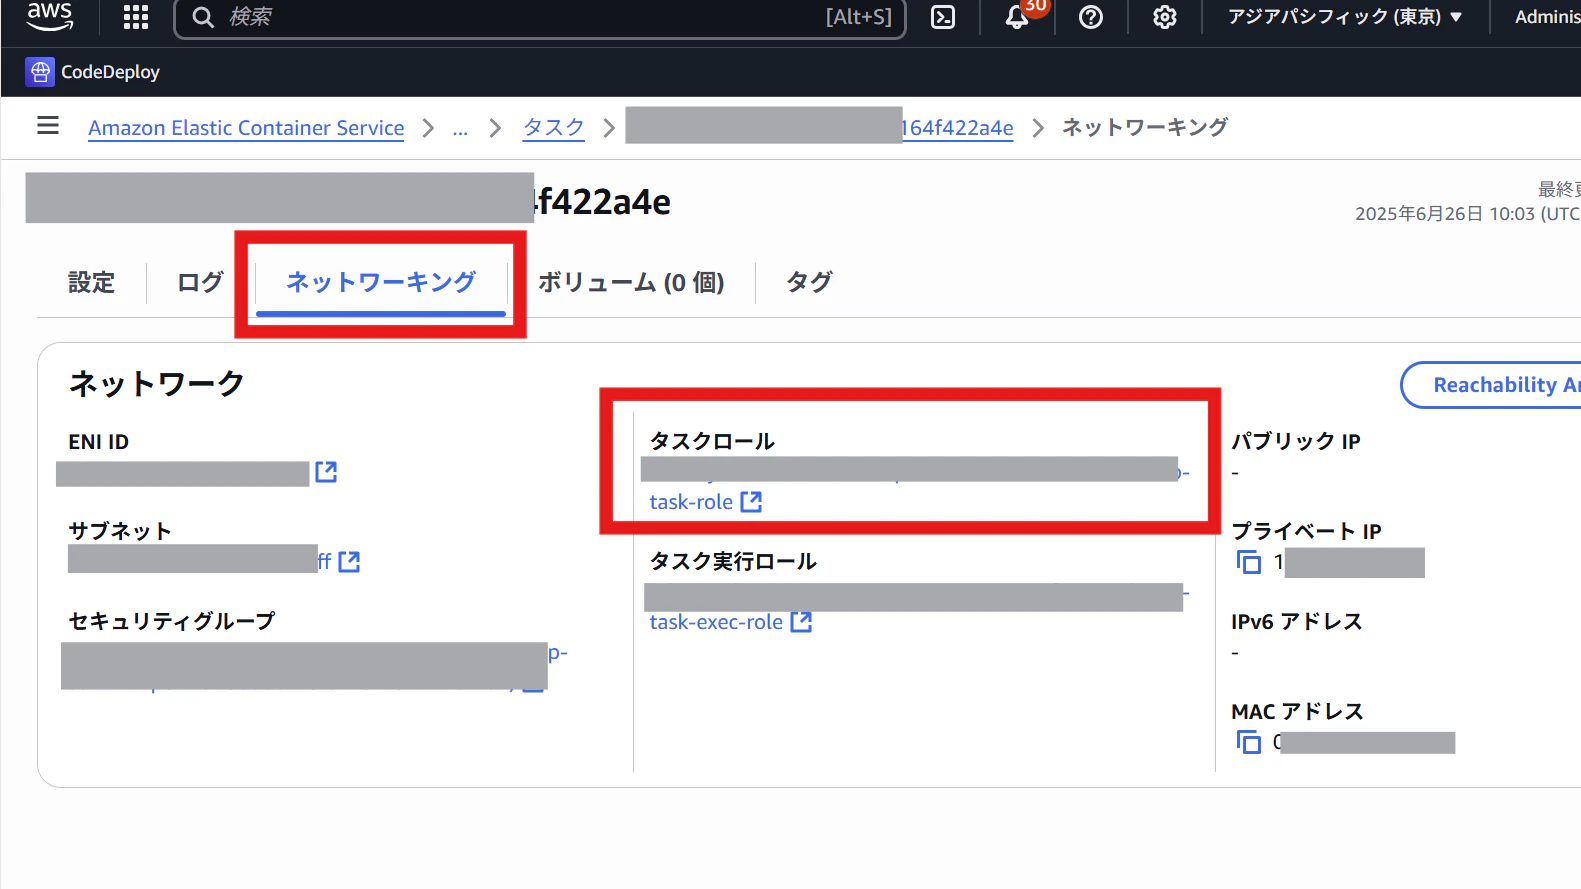
「ネットワーキング」をクリック、「タスクロール」をクリック
-
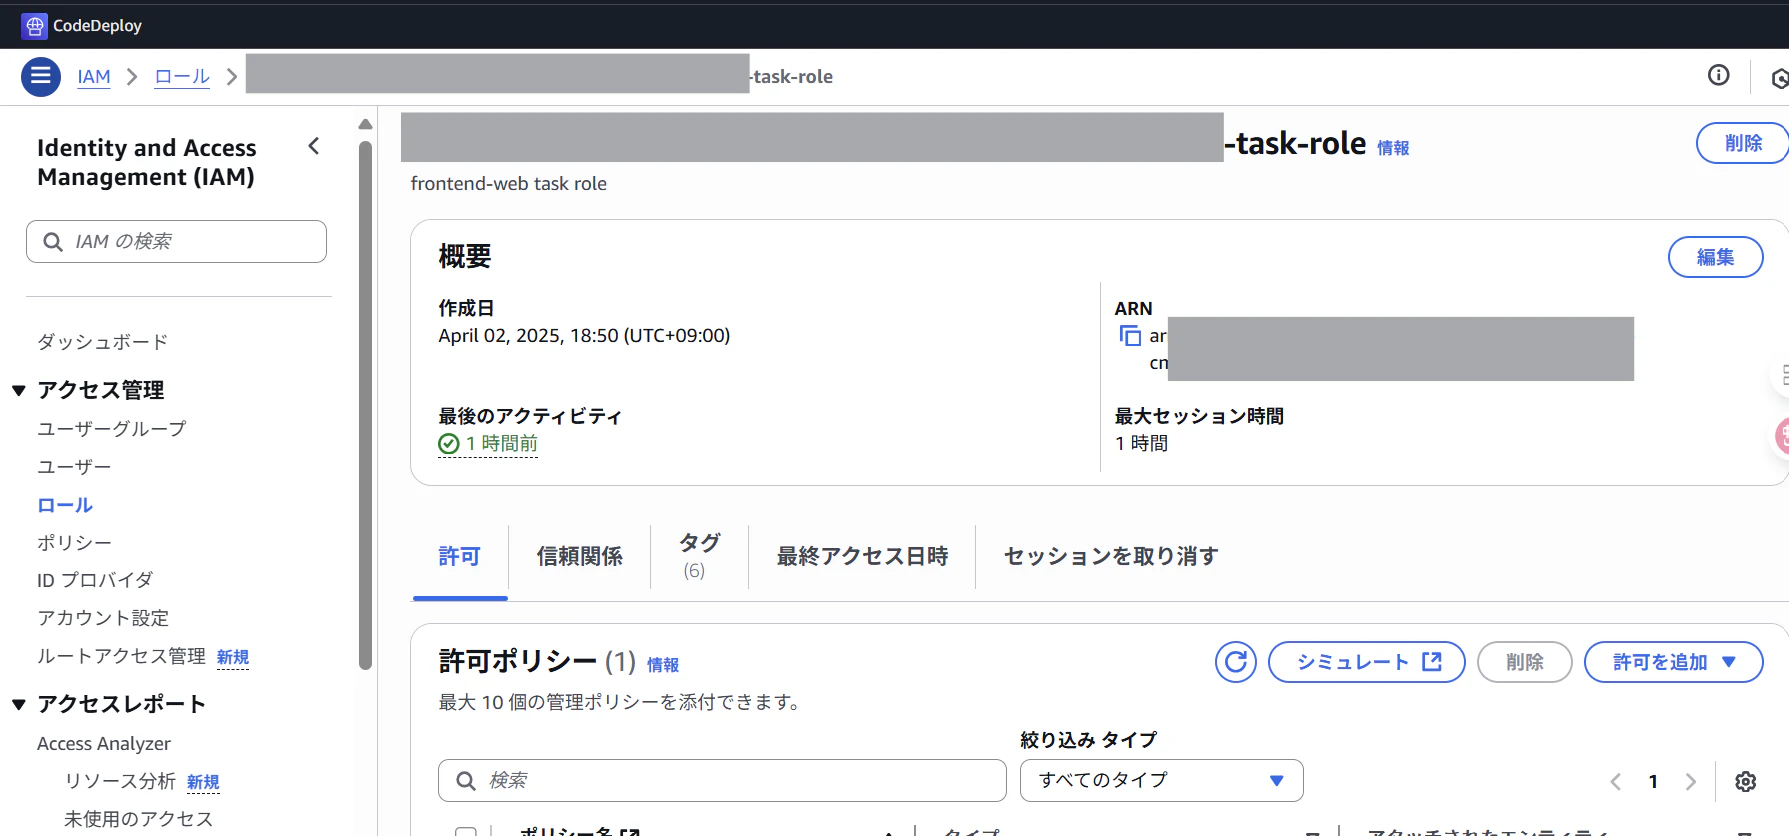
対象ECSが使用しているタスクロールの画面が表示される
SSMのポリシーを追加
- 下記ポリシー追加して、タスクロールにアタッチ
{
    "Version": "2012-10-17",
    "Statement": [
        {
            "Effect": "Allow",
            "Action": [
                "ssmmessages:CreateControlChannel",
                "ssmmessages:CreateDataChannel",
                "ssmmessages:OpenControlChannel",
                "ssmmessages:OpenDataChannel"
            ],
            "Resource": "*"
        }
    ]
}
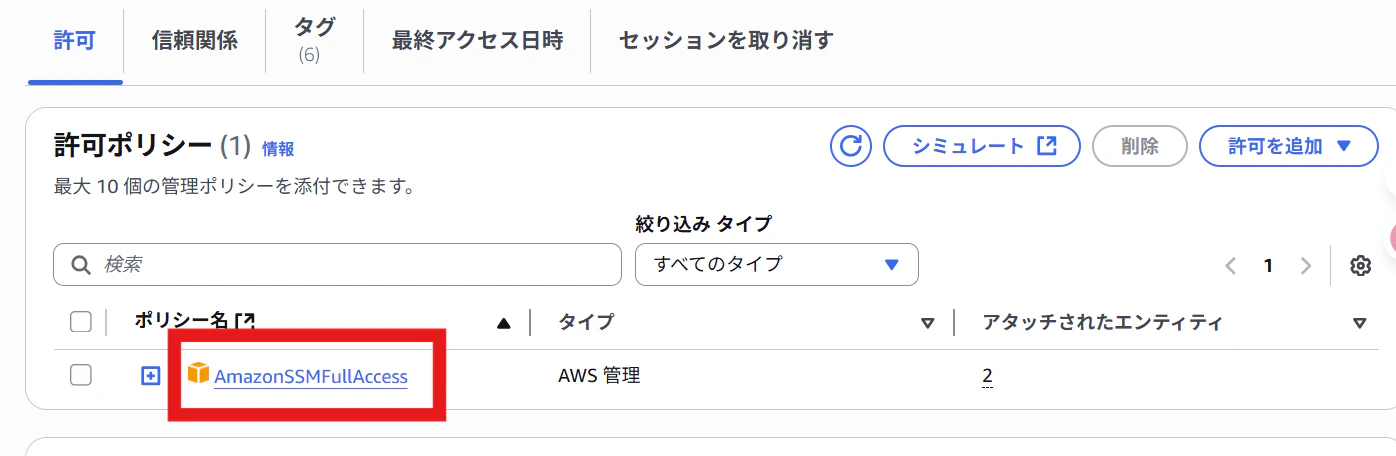
または、(権限付与の決まりによるが)AmazonSSMFullAccessをアタッチしてもよい。
タスク定義設定
-
タスク定義の画面を開く
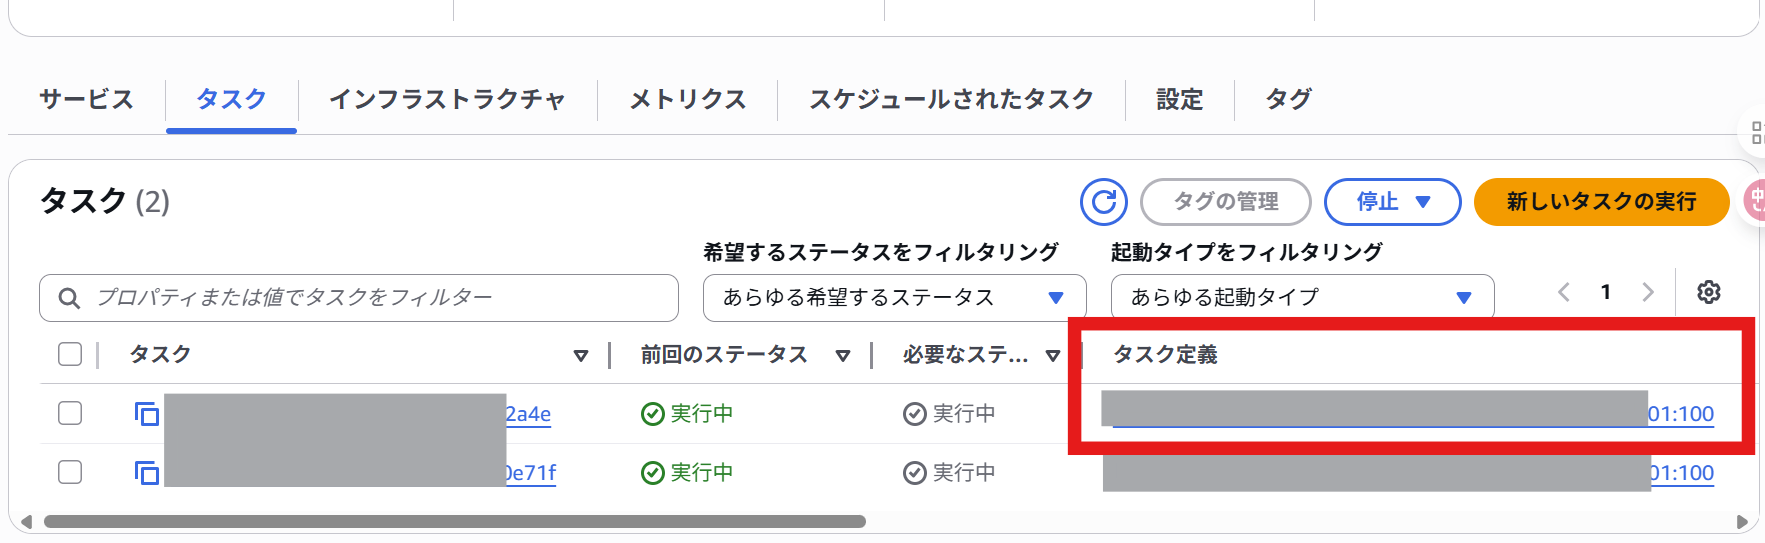
対象ECSの画面を開き、「タスク」をクリックし、タスク定義をクリック
-
[JSONを使用した新しいリビジョンの作成」をクリック

-
「"containerDefinitions": 」セッションに下記タスク定義の設定を追加する
            "linuxParameters": {
                "initProcessEnabled": true
            },

-
※要確認 readonlyRootFilesystem(読み取り専用)無効化が必須
execにアクセスできない原因の一つであるため、readonlyRootFilesystemがtrueになっていたら、falseに変更してください。

-
一番下にスクロールして、「作成」をクリック
新タスク定義をサービスに適用し、execを有効化する
- 【CLI操作】aws cliにログインして、サービス更新のコマンドを実行する
aws cliで下記コマンドを実行する
aws ecs update-service --cluster cluster-name --service service-name --task-definition task-definition:new-revision-number --enable-execute-command --force-new-deployment --profile profile-name
--task-definition:前ステップで作成されたリビジョンを指定
--profile:profileを指定したい場合 ※詳細はCLI編をご覧ください。
コマンドの例として下記をご参照ください。
$ aws ecs update-service --cluster sample-cluster --service sample-service --task-definition sample-task-definition:21 --enable-execute-command --force-new-deployment --profile sample-profile
{
    "service": {
        "serviceArn": "arn:aws:ecs:ap-northeast-1:xxxxxxxxx:service/xxxxxxxx/xxxxxxxxxxx",
        "serviceName": "xxxxxxxxxxx",
<略>
- サービスデプロイの確認
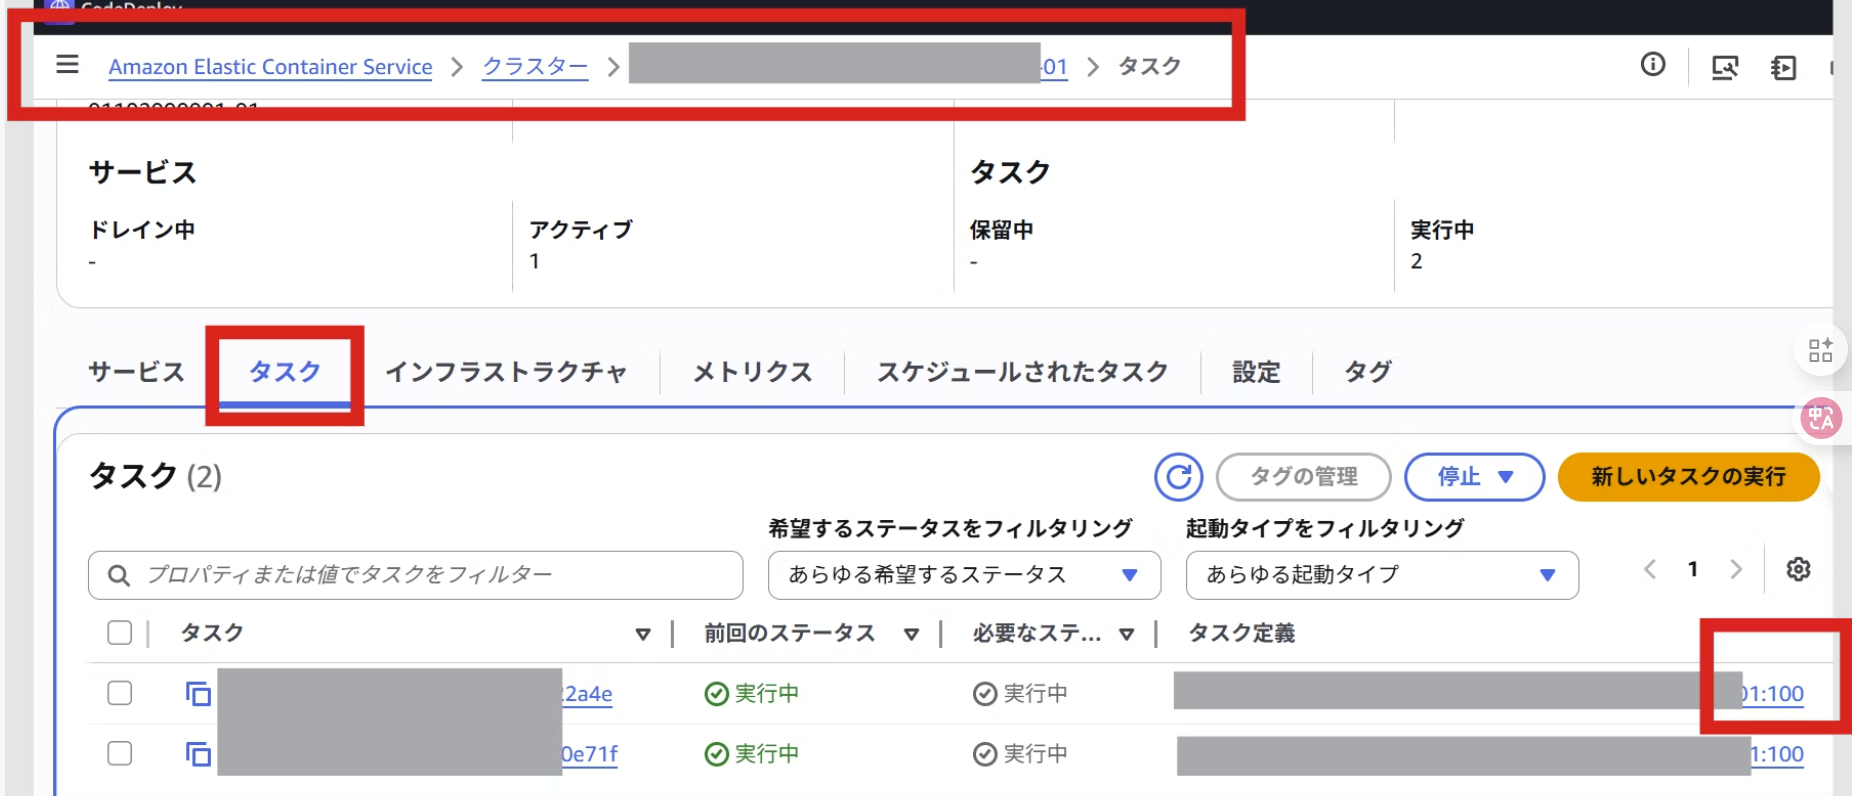
タスクの画面を開き、想定したタスク定義リビジョンでエラーなく稼働していることを確認
問題なければ、
タスクのARNをコピーしておく

※これからの手順で、上記コピーされたタスクのARNをtask_ARNと呼ぶ
タスク名もコピーしておく

こちらのランダムに並べている英数字のことである。
※これからの手順で、上記コピーされたタスク名をtask_NAMEと呼ぶ
- 【CLI操作】enableExecuteCommandの確認
aws cliで下記コマンドを実行する
aws ecs describe-tasks --profile profile-name --cluster cluster-name --tasks task_NAME | grep enableExecuteCommand
コマンドの例として下記をご参照ください。
$ aws ecs describe-tasks --profile sample-profile --cluster sample-cluster --tasks xxxxxxxxxxxxbd73c7e5856a | grep enableExecuteCommand

            "enableExecuteCommand": true,

$
「true」になっていればOK
- 【CLI操作】managedAgentsの確認
aws ecs describe-tasks --profile profile-name --cluster cluster-name --tasks task_NAME | grep -A 6 managedAgents
コマンドの例として下記をご参照ください。
$ aws ecs describe-tasks --profile sample-profile --cluster sample-cluster --tasks xxxxxxxxxxxxbd73c7e5856a | grep -A 6 managedAgents
                    "managedAgents": [
                        {
                            "lastStartedAt": "2025-04-10T14:08:47.501000+09:00",
                            "name": "ExecuteCommandAgent",
                            "lastStatus": "RUNNING"
                        }
                    ],
$
「RUNNING」になっていればOK
【CLI操作】ECS-execを起動する
下記マンドを実行する
aws ecs execute-command --profile profile-name --cluster cluster-name --task task_ARN --container container-name --interactive --command "/bin/sh"
コマンドの例として下記をご参照ください。
$ aws ecs execute-command --profile sample-profile --cluster sample-cluster --task arn:aws:ecs:ap-northeast-1:xxxxx:task/sample-cluster/xxxxxxxxxxxxxxxxx1950c6 --container sample-coneainer --interactive --command "/bin/sh"

The Session Manager plugin was installed successfully. Use the AWS CLI to start a session.
Starting session with SessionId: ecs-execute-command-xxxxxxxxxxxxxxxgsvk4qu

#
これで、ECSコンテナに入り、トラブルシューティングできるようになった。
【CLI操作】環境変数を叩いてみる
# echo $ENV
development
#
#5環境変数編で設定されているENVの環境変数が出力されたら、OK